Tools Required
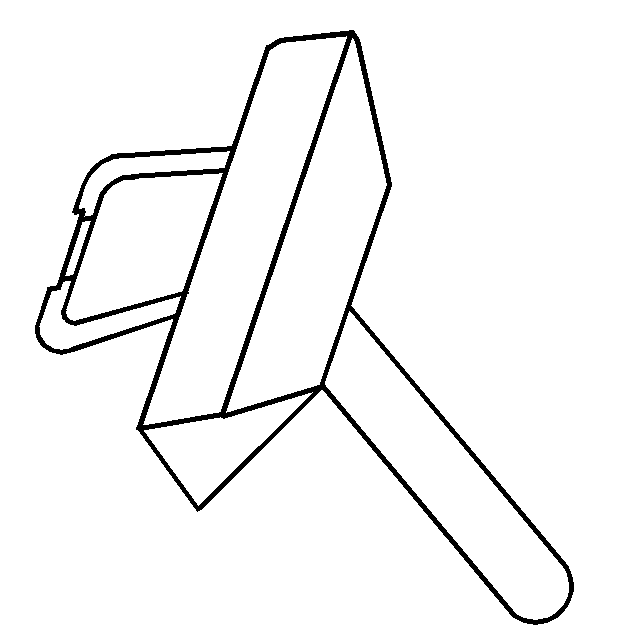
J 37228 Seal Cutter
Removal Procedure
- Drain the cooling system. Refer to Cooling System Draining and Filling in Engine Cooling.
- Remove the starter. Refer to Starter Motor Replacement in Engine Electrical.
- Remove the crankshaft rear oil seal. Refer to Crankshaft Rear Oil Seal Replacement .
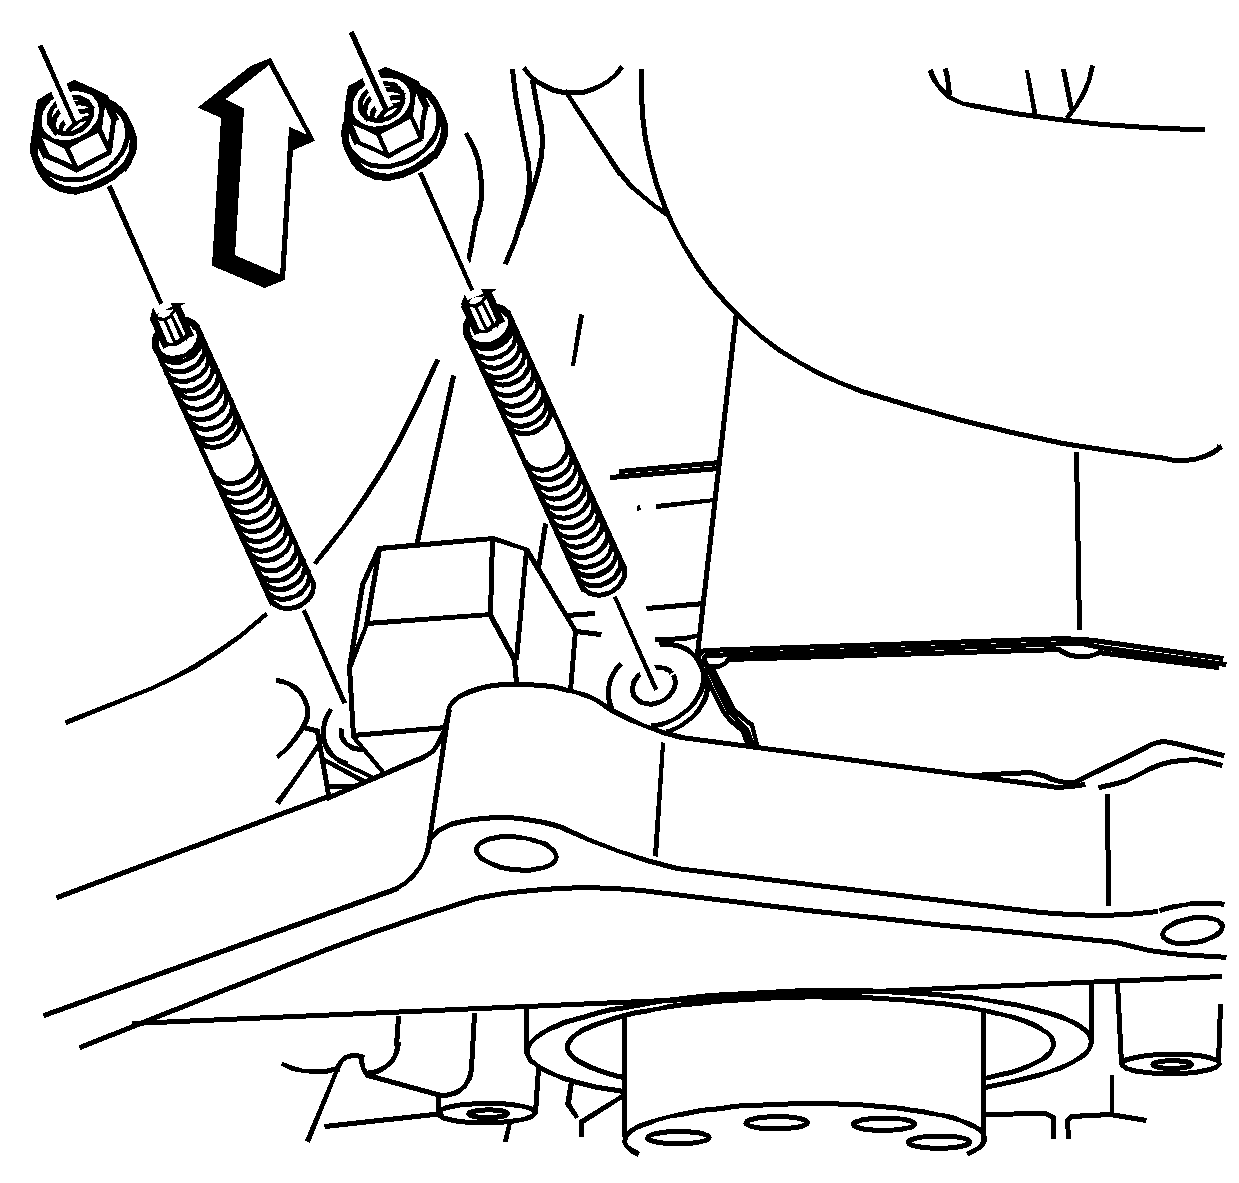
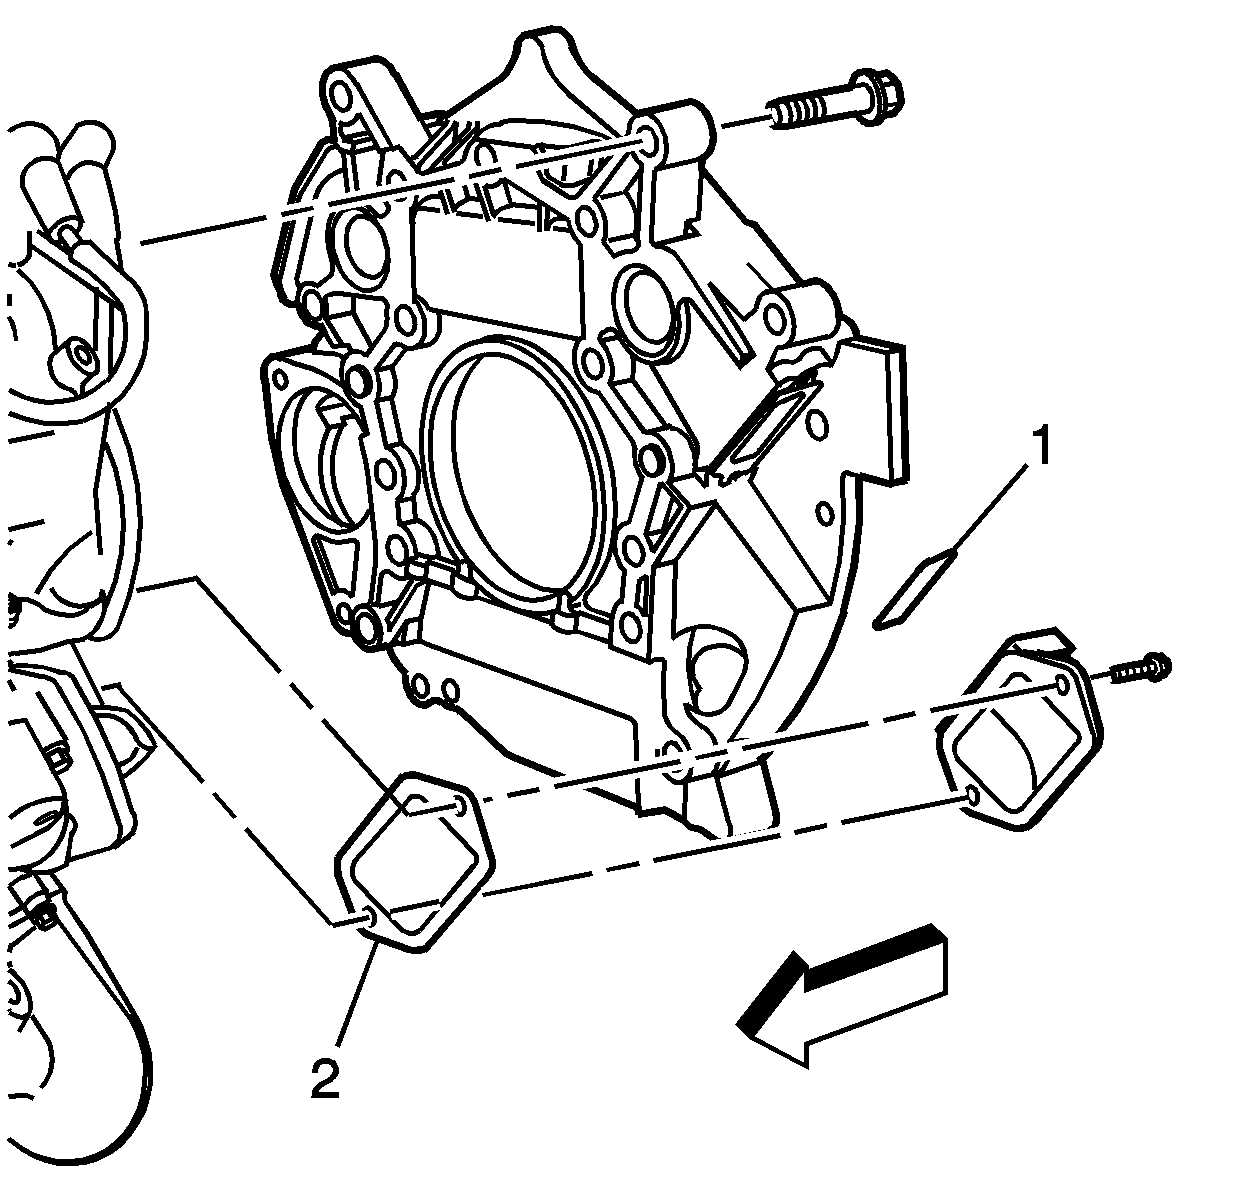
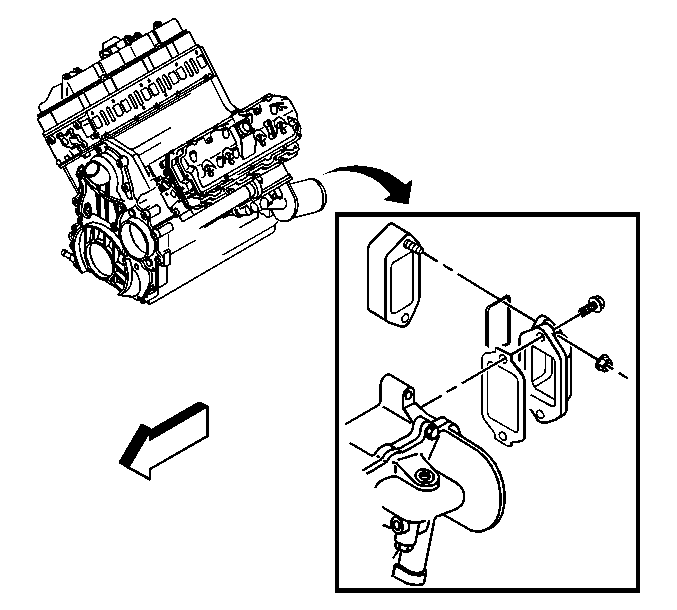
- Remove the turbocharger oil return pipe nuts from the top of the flywheel housing.
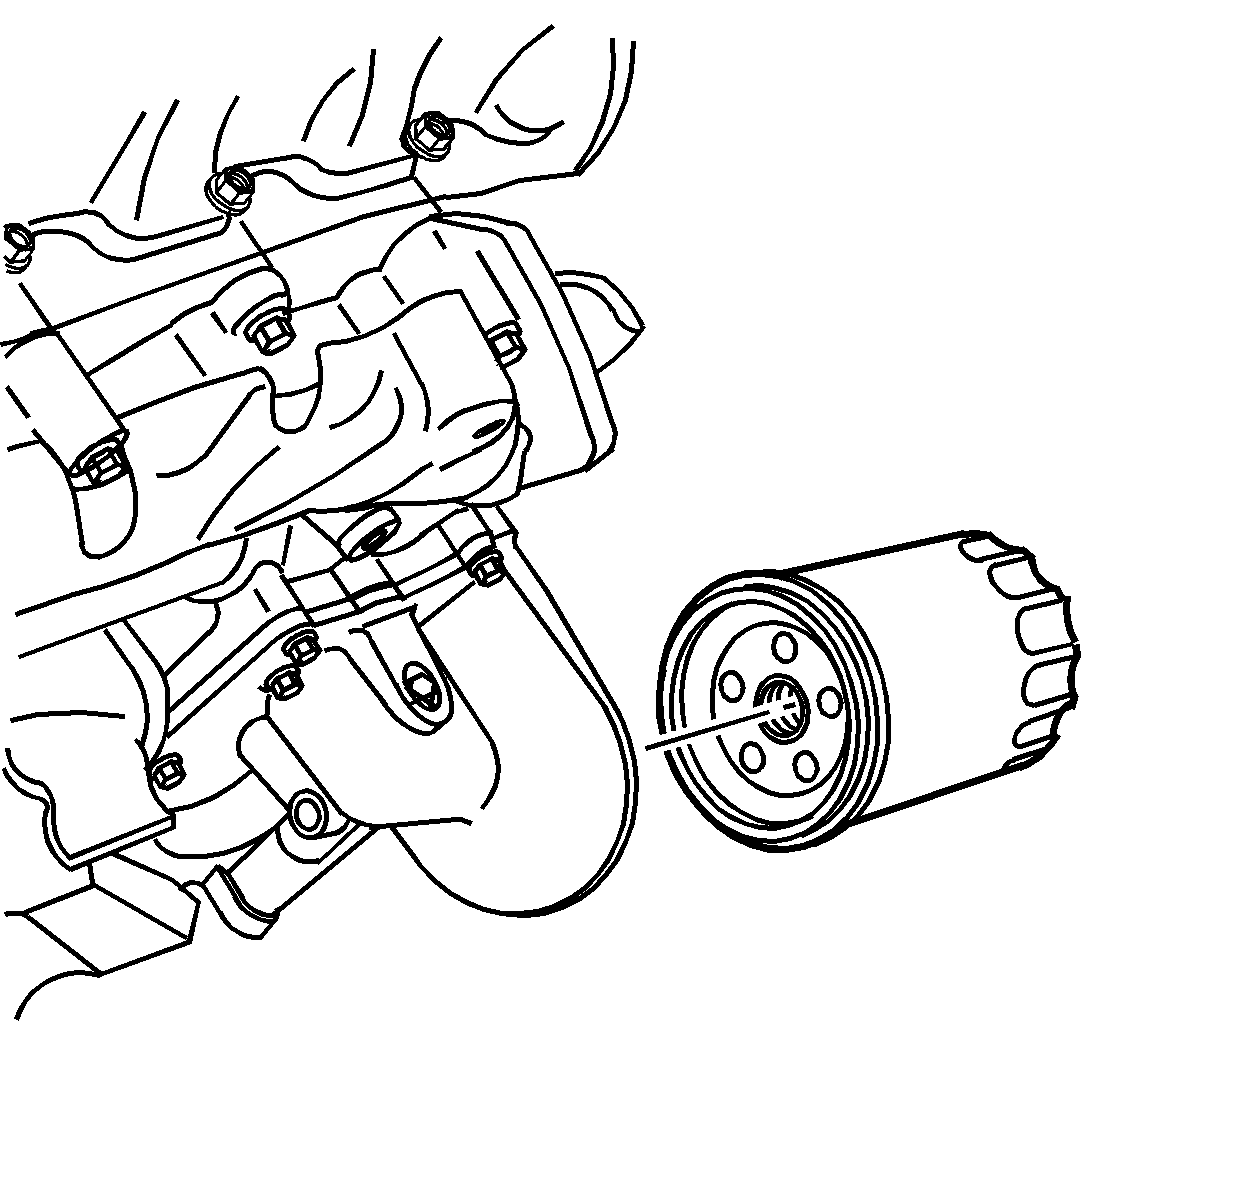
- Remove the oil filter.
- Remove the upper oil pan. Refer to Upper Oil Pan Replacement .
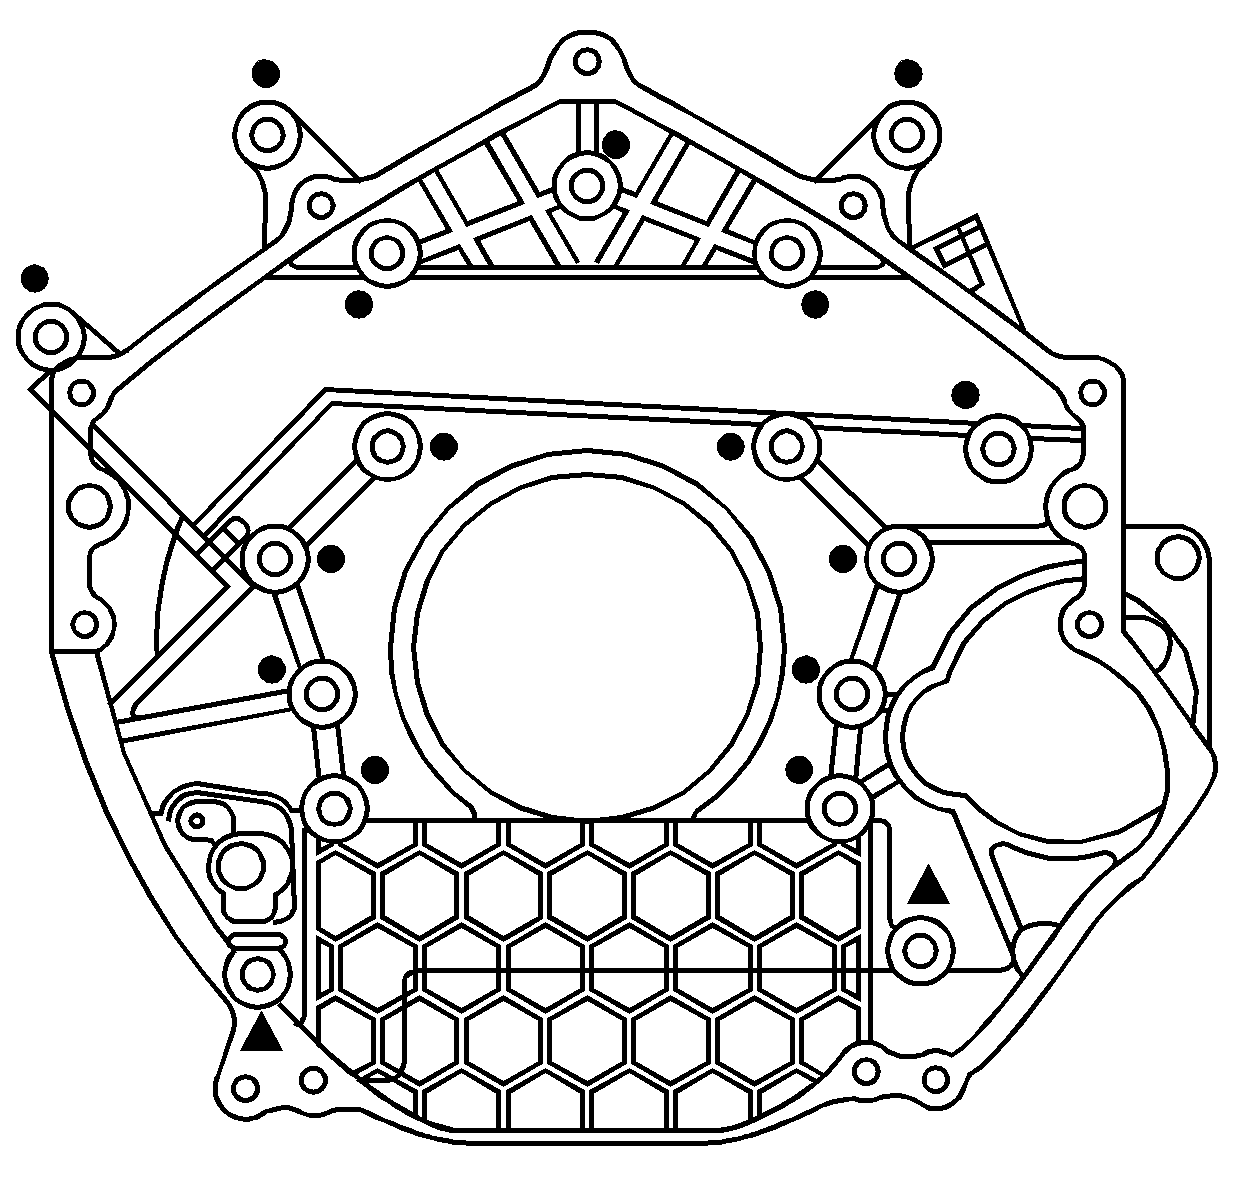
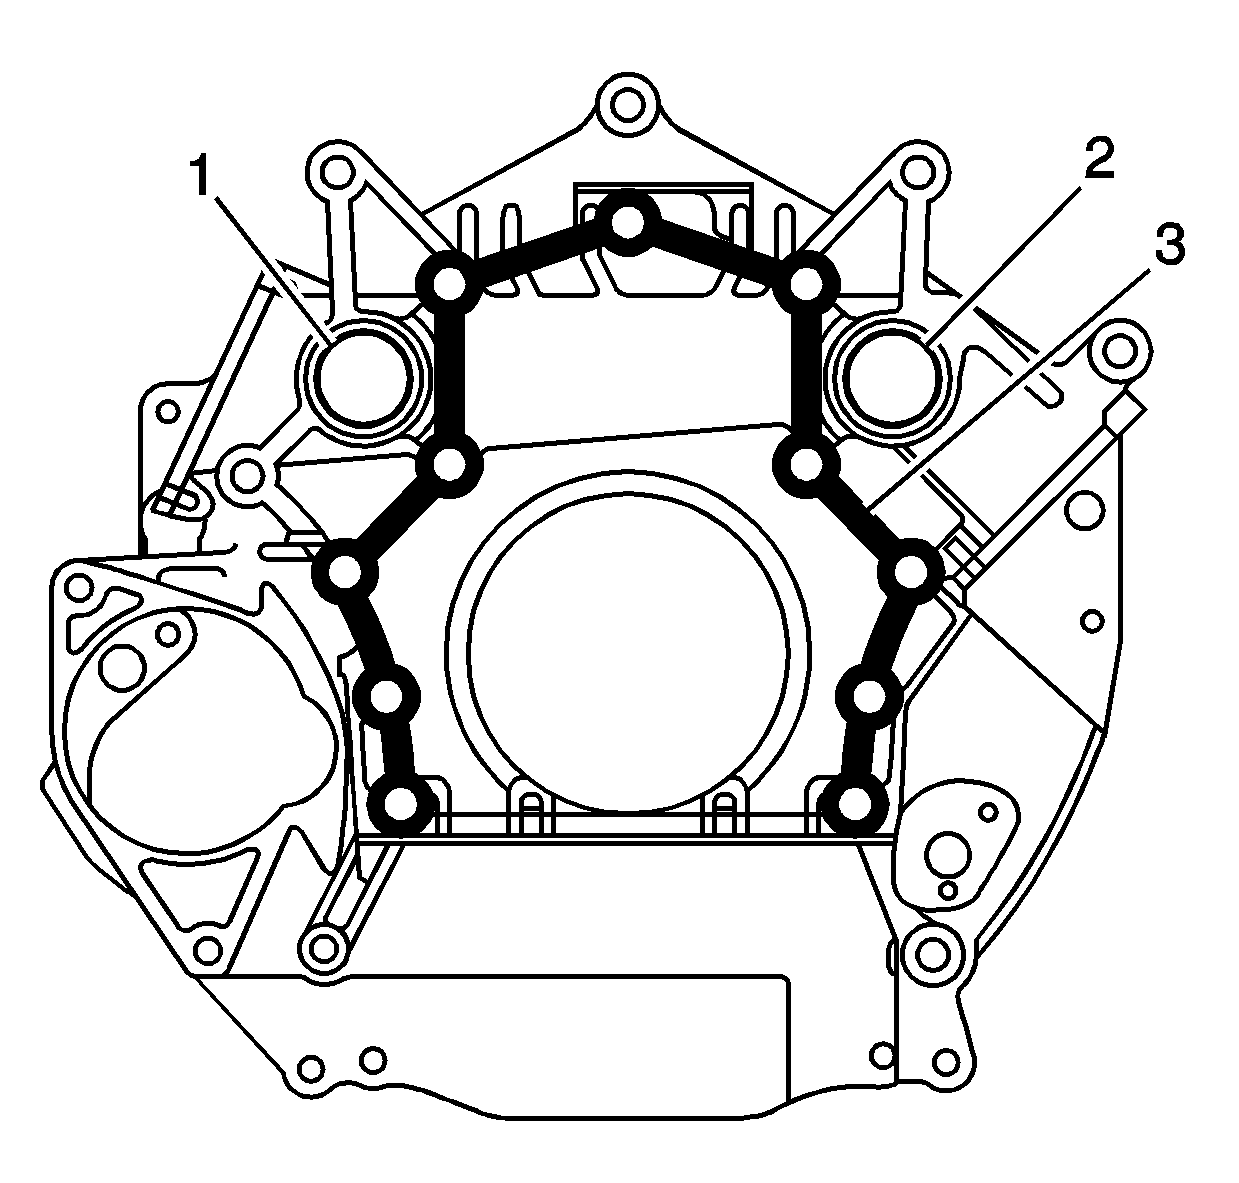
- Remove the engine rear cover bolts, denoted by the black circles.
- Remove the oil cooler adapter to the engine flywheel housing nuts.
- Remove the oil cooler adapter to oil cooler bolts.
- Remove and discard the oil cooler adapter gaskets (1, 2).
- Separate the flywheel housing from the cylinder block using J 37228 .
- Remove the engine rear cover.
- If required, clean and inspect the flywheel housing. Refer to Engine Flywheel Housing Cleaning and Inspection .
Important: The flywheel housing has dowels that protrude into the upper oil pan and engine block. The upper oil pan requires removal for proper installation of the flywheel housing.
Installation Procedure
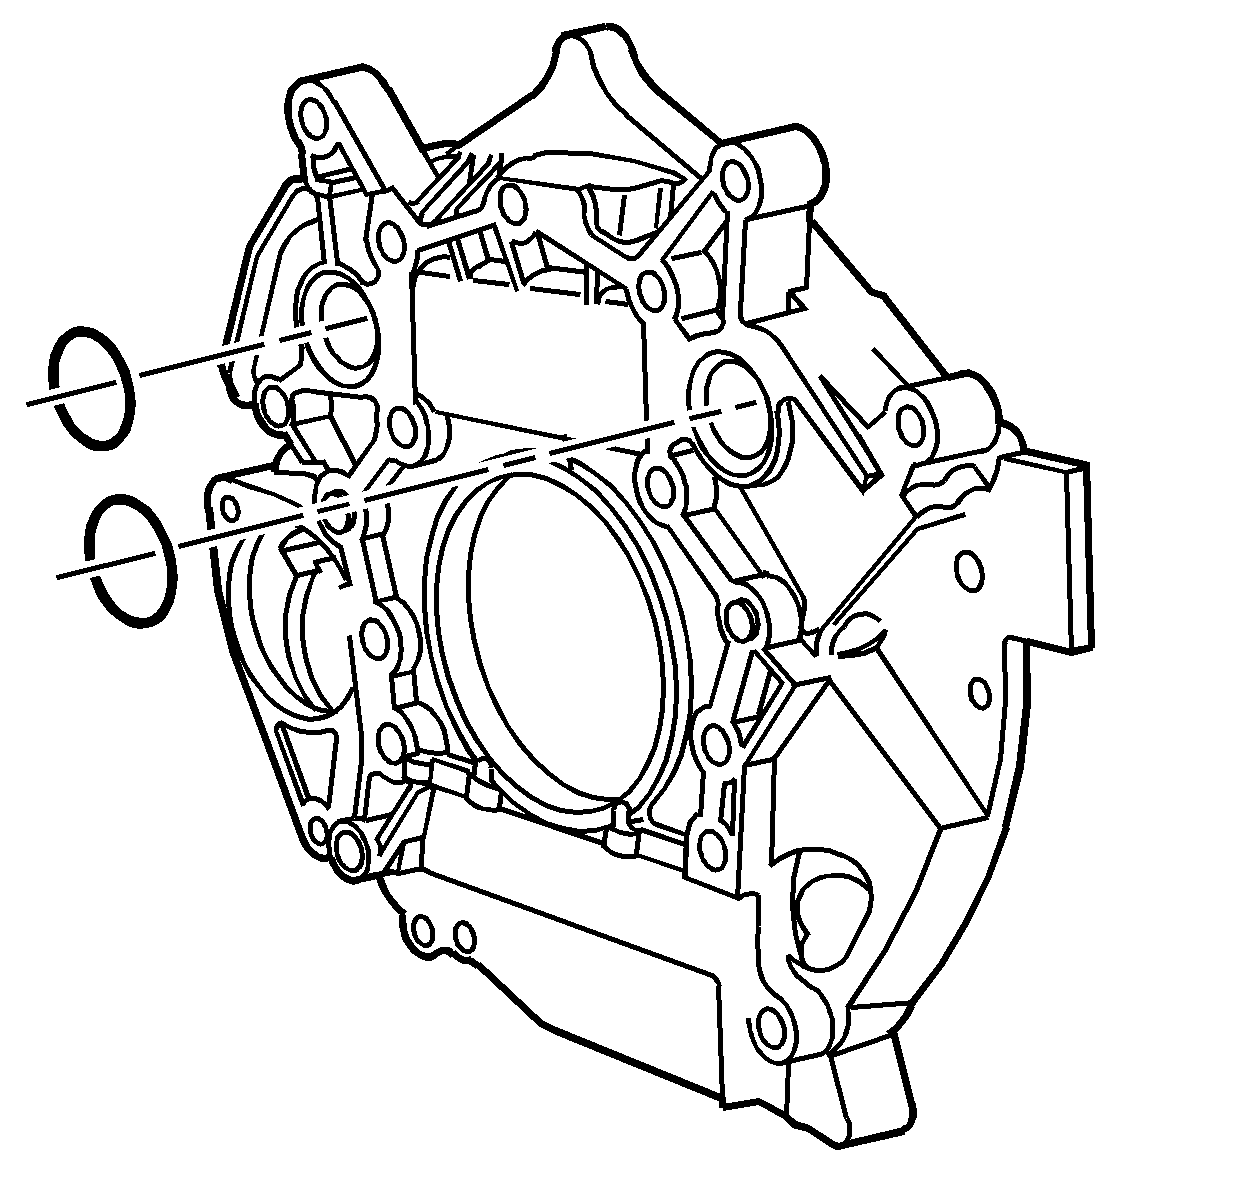
- Install NEW O-ring seals to the flywheel housing, if required.
- Apply a 2 mm (1/8 in) wide bead of sealant (3) GM P/N 97720043 (Canadian P/N 88901148), or equivalent to the engine rear cover sealing surfaces.
- Install a NEW oil cooler adapter gasket (2) .
- Install a NEW oil cooler adapter to flywheel housing gasket (1).
- Install the oil cooler adapter to the flywheel housing.
- Loosely install the oil cooler adapter to the flywheel housing nuts.
- Install the flywheel housing to the block.
- Install the flywheel housing bolts, denoted by the black circles.
- Install the oil cooler adapter to oil cooler bolts.
- Install a new gasket to the turbocharger oil return pipe.
- Install the turbocharger oil return pipe to flywheel housing nuts.
- Install the upper oil pan. Refer to Upper Oil Pan Replacement .
- Install the crankshaft rear oil seal. Refer to Crankshaft Rear Oil Seal Replacement .
- Install the starter. Refer to Starter Motor Replacement in Engine Electrical.
- Install a new oil filter.
- Lower the vehicle.
- Fill the cooling system. Refer to Cooling System Draining and Filling in Engine Cooling.
Notice: Use the correct fastener in the correct location. Replacement fasteners must be the correct part number for that application. Fasteners requiring replacement or fasteners requiring the use of thread locking compound or sealant are identified in the service procedure. Do not use paints, lubricants, or corrosion inhibitors on fasteners or fastener joint surfaces unless specified. These coatings affect fastener torque and joint clamping force and may damage the fastener. Use the correct tightening sequence and specifications when installing fasteners in order to avoid damage to parts and systems.
Tighten
Tighten the bolts to 90 N·m (67 lb ft).
Tighten
Tighten the bolts/nuts to 21 N·m (15 lb ft).
Tighten
Tighten the nuts to 21 N·m (15 lb ft).
Tighten
Tighten the oil filter after contact 1 to 1¼ turns.
