
- Raise the vehicle. Refer
to
Lifting and Jacking the Vehicle
in General Information.
- Remove the oil pan skid plate.
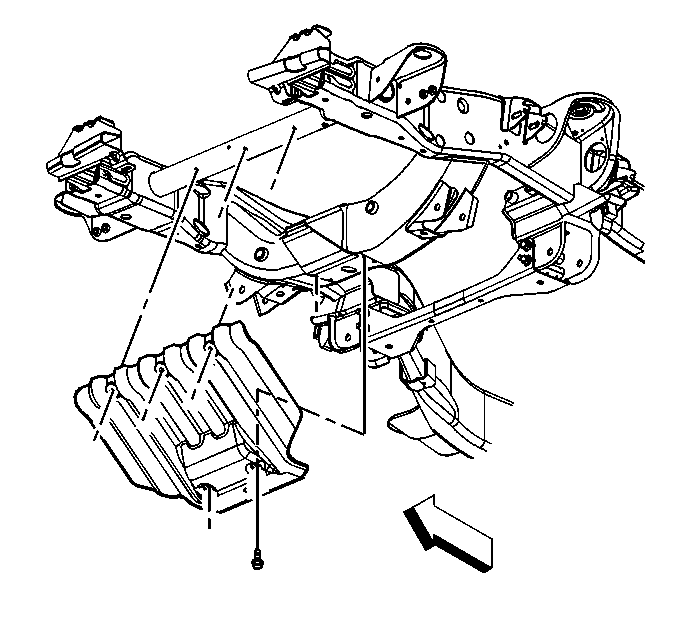
- Remove the engine protection
shield.
Notice: Broken engine mountings can cause misalignment of certain drive-train
components. Misalignment of drive-train components causes eventual destruction
of the drive-train components.
If one engine mount breaks, the rest of the engine mounts will have
increased stress put on them. This could cause the rest of the engine mounts
to break.
- Inspect for
loose or missing bolts at the following locations:
| • | Engine mount bracket to engine |
| • | Engine mount frame bracket to frame |
| • | Engine mount to engine mount bracket |
| • | Engine mount to engine mount frame bracket |
Notice: Use the correct fastener in the correct location. Replacement fasteners
must be the correct part number for that application. Fasteners requiring
replacement or fasteners requiring the use of thread locking compound or sealant
are identified in the service procedure. Do not use paints, lubricants, or
corrosion inhibitors on fasteners or fastener joint surfaces unless specified.
These coatings affect fastener torque and joint clamping force and may damage
the fastener. Use the correct tightening sequence and specifications when
installing fasteners in order to avoid damage to parts and systems.
- Replace missing or loose bolts. Refer
to
Fastener Tightening Specifications
.
Notice: When raising or supporting the engine for any reason, do
not use a jack under the oil pan, any sheet metal, or the crankshaft pulley.
Lifting the engine in an unapproved manner may cause component damage.
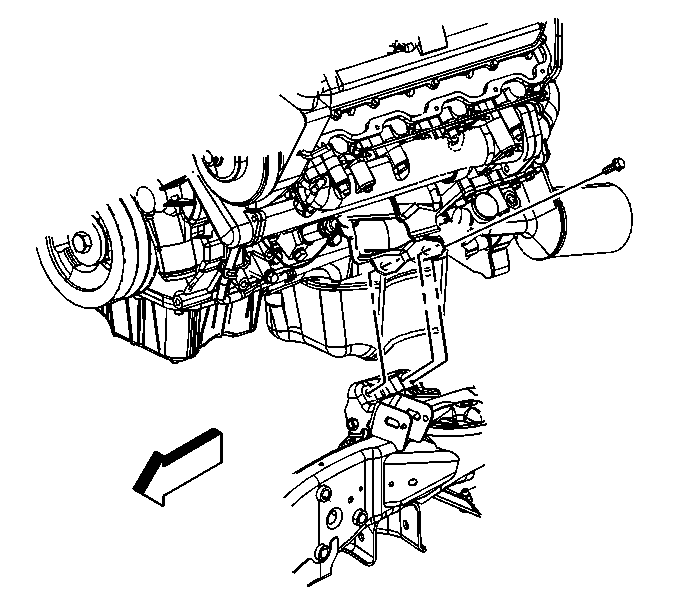
- If the vehicle
is 4WD you will not be able to access the lifting points on the engine. In
order to raise the engine attach a chain to the front of the engine.
Then follow the inspection steps.
- If the vehicle is RWD, in order to raise the engine to inspect
the left engine mount, use a suitable jack on the ground wire bolt bosses
on the left side of the engine
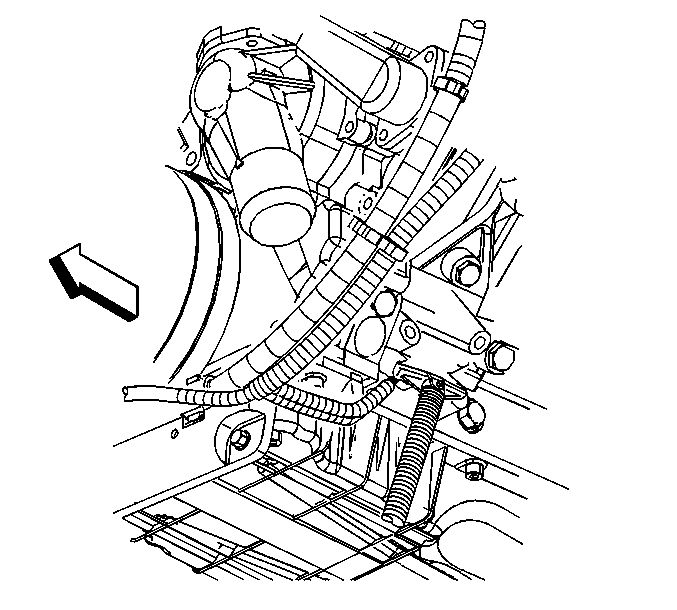
- If equipped with automatic
transmission remove the bolt retaining the transmission oil cooler line bracket.
- Move the transmission oil cooler lines aside.
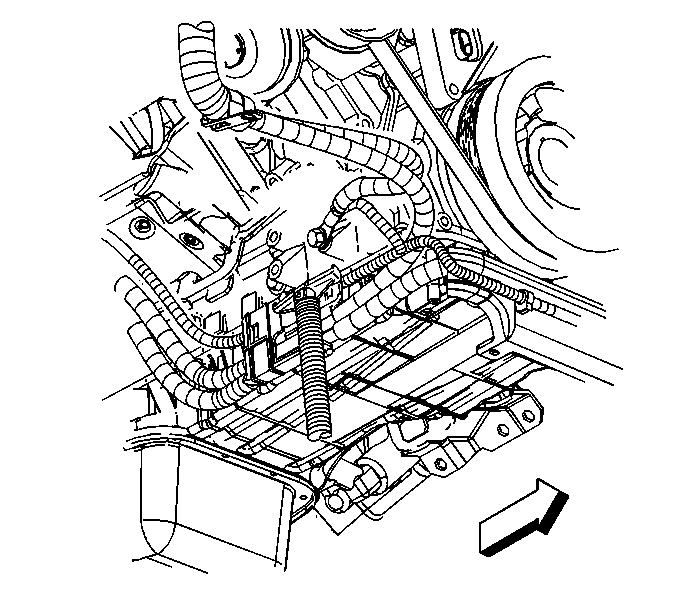
- In order to raise the engine to inspect the right engine mount
use a suitable jack on the ground wire bolt bosses on the right side of the
engine
- Perform the following in order to inspect the engine mounts:
| 11.1. | Raise the engine to remove weight from the engine mount. |
| 11.2. | Place a slight tension on the rubber cushion. |
| 11.3. | Observe the engine mount for the following while raising the engine. |
| • | Heat check cracks covering the hard rubber surface. |
| • | The rubber cushion is separated from the metal plate of the engine
mount. |
| • | There is a split through the rubber cushion. |
- Replace the engine mount if any of the above conditions exist.
- Install the engine protection
shield and bolts.
Tighten
Tighten the engine protection shield bolts to 20 N·m (15 lb ft).
- Install the oil pan skid
plate and bolts.
Tighten
Tighten the oil pan skid plate bolts to 20 N·m (15 lb ft).
- Lower the vehicle.
