
| Subject: | Revised Clutch Pressure Plate Adjustment (Off-Vehicle (6.0L, 6.6L, 8.1L Only)) |
| Models: | 2001-2004 Chevrolet Silverado |
| with 6.0L, 6.6L or 8.1L Engine |
This bulletin is being issued to add the Clutch Pressure Plate Adjustment (Off-Vehicle
(6.0L, 6.6L, 8.1L only)) procedure to the Clutch sub-section of the Service
Manual.
The following information has been updated within SI. If you are using a paper
version of this Service Manual, please make a reference to this bulletin on the affected
page.
Clutch Pressure Plate Adjustment (Off-Vehicle (6.0L, 6.6L, 8.1L Only))
Important:
| • | Use the following procedure when replacing ONLY the clutch disc. The self
adjusting clutch pressure plate/cover assembly must be "reset" back to
the "unworn" position in order to work properly. Failure to "reset"
the cover assembly results in the inability to achieve full clutch release and clutch
slippage under full torque. |
| • | The 6.6L engine uses a "potted" style flywheel and the cover
stamping is much shorter to accommodate the flywheel. As a result, to "reset"
this clutch, the cover MUST be evenly supported at all six bolt holes in order to
keep from bending the cover and to unload the adjuster ring allowing the clutch to
be "reset." |
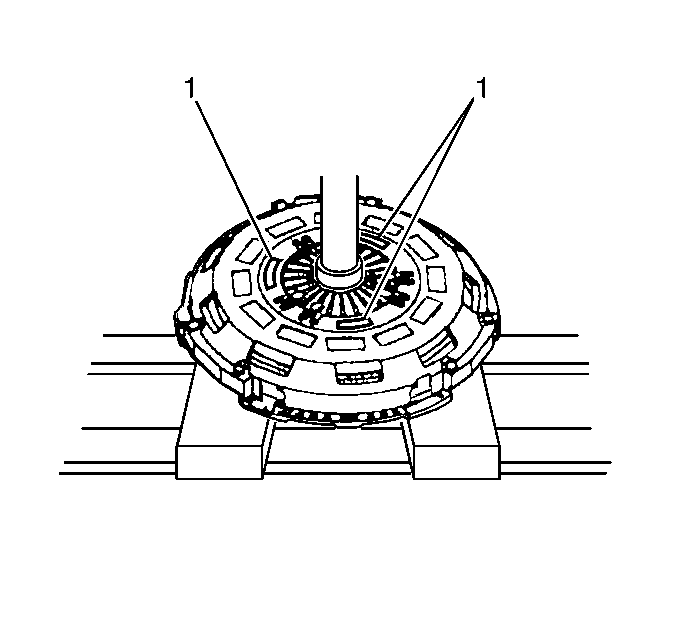
- Place the clutch pressure plate and disc, flange
side down, on a press.
- Compress the pressure plate diaphragm spring fingers until tension is
released from the stepped adjusting ring.
- Using 2 screwdrivers or other suitable tools, place them against
2 of the 3 stepped adjusting ring tension spring stops (1), just ahead
of the adjusting ring tension springs.
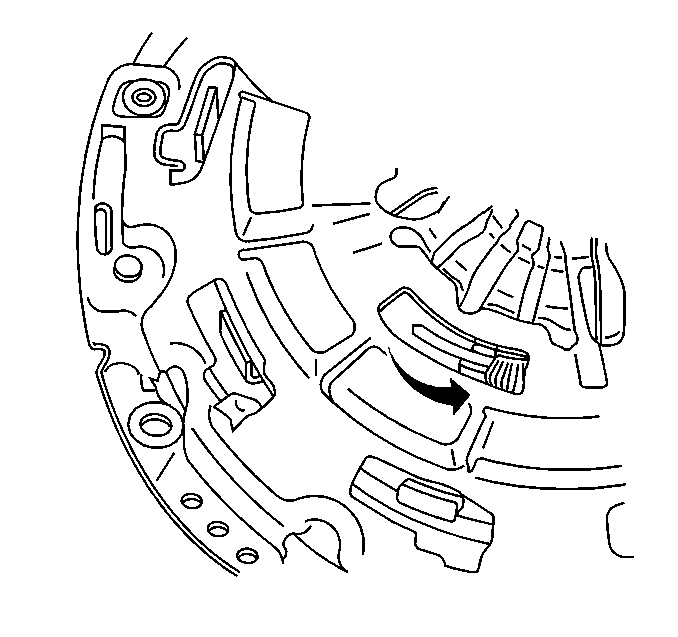
- Using the screwdrivers, rotate the stepped adjusting
ring counterclockwise (compressing the tension springs) until the adjusting ring
steps are fully adjusted out, then continue to hold in position.
- Release the press pressure from the pressure plate diaphragm spring fingers.
- Release the adjusting ring tension spring stops.
- Remove the pressure plate and disc from the press.
