For 1990-2009 cars only
Replacement Procedure
- Raise and suitably support the vehicle. Refer to Lifting and Jacking the Vehicle .
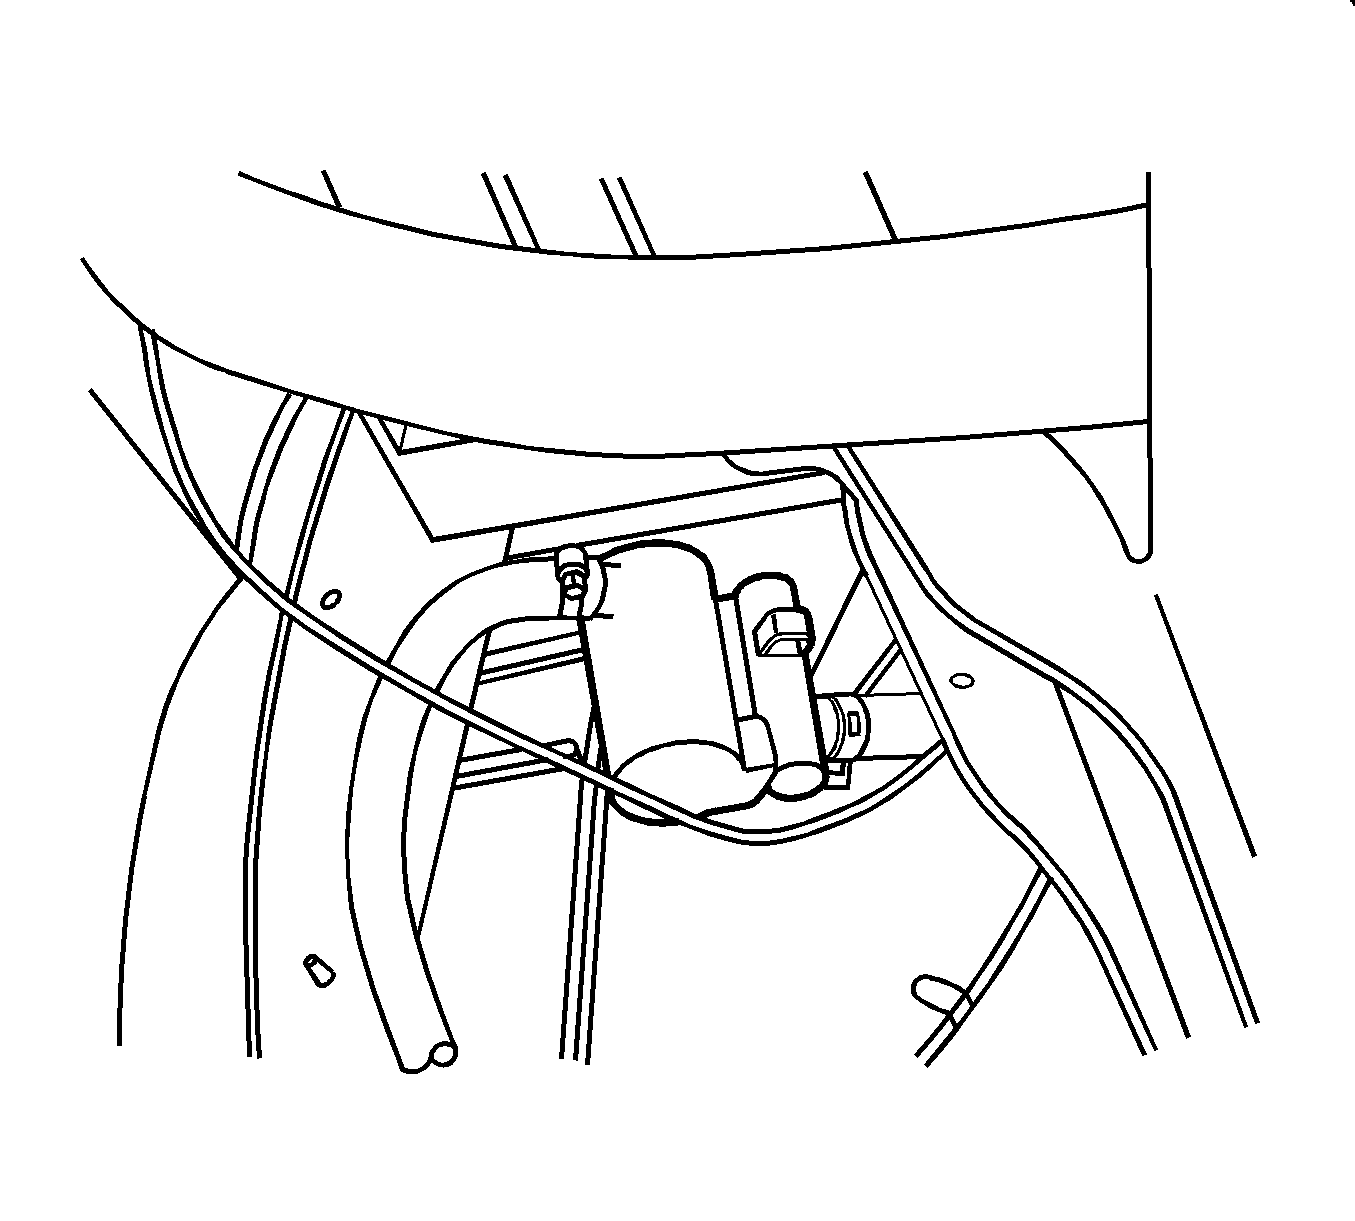
- Disconnect the evaporative emission (EVAP) canister vent electrical connector, if equipped.
- Disengage the 2 vent valve pipe clips securing the pipe to the underbody.
- Disconnect the vent valve pipe at the EVAP canister.
- Remove and retain the EVAP canister vent valve bracket mounting bolt.
- Remove the complete EVAP canister vent valve assembly with bracket attached and discard.
- Position and secure the new valve assembly to the frame bracket on the outside of the frame using the existing hole and mounting bolt.
- Connect the vent valve pipe to the EVAP canister.
- Install the 2 vent valve pipe clips into the existing underbody holes.
- Connect the EVAP canister vent valve electrical connector, if equipped.
- Attach a bulk 5/8 in heater hose to the vent valve port and secure using a clamp.
- Cut the hose to determined length and install the supplied filter box. Secure using a clamp.
- Secure the filter box to the fuel lines above the transmission using a tie strap.
- Tie strap the hose as needed along the frame rail in order to keep the hose away from the pinch-points and heat sources.
- Lower the vehicle.
Remove the clips from the underbody and discard.
Notice: Refer to Fastener Notice in the Preface section.
Important: The new canister vent valve will be installed in a new location, outside of the frame.
Tighten
Tighten the bracket mounting bolt to 12 N·m (106 lb in).
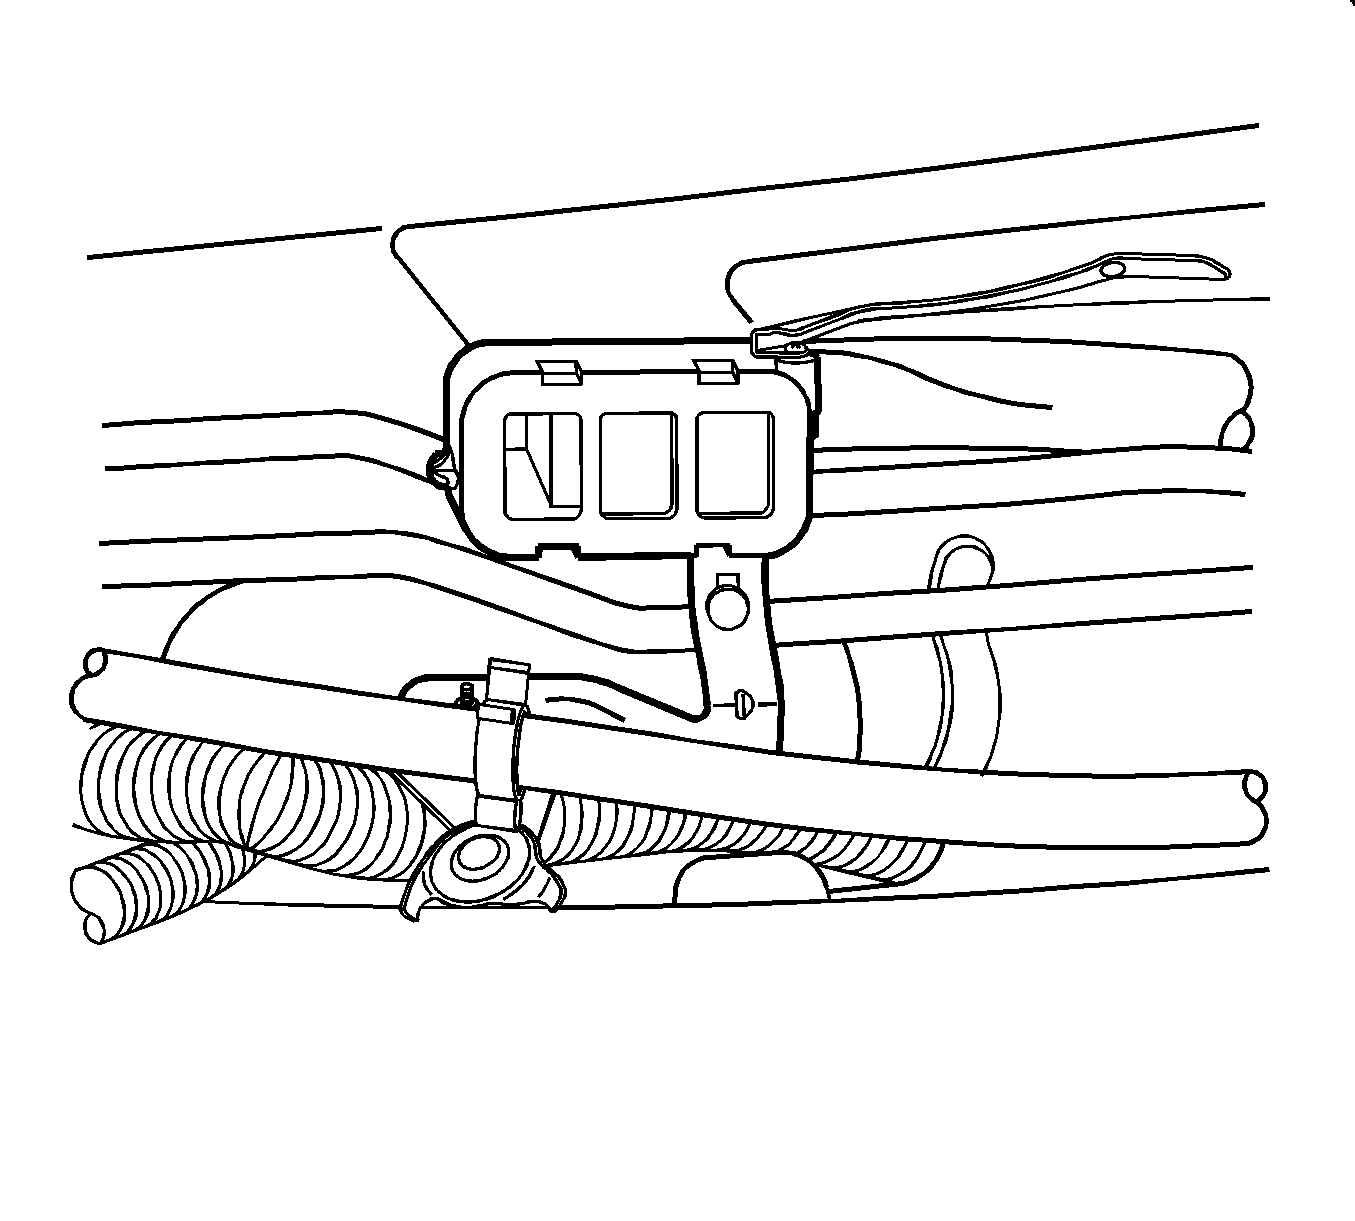
The filter box opening should be pointing downward.
