VALVE ADJUSTMENT INSTALL NEW BOLT AND NUT

SUBJECT: VALVE ADJUSTMENT (INSTALL NEW BOLT AND NUT)
VEHICLES AFFECTED: 1991-92 C/K, R/V, G, P, B, S, C5, C6, C7 TRUCKS WITH 6.0/7.0/7.4L ENGINES (VIN CODES P,M,N)
CONDITION:
---------- Starting in 1991, all 6.0/7.0/7.4L (RPOs L86, LR0, L19) Mark engines were built with a net lash valve system. If an engine has the deck surface of the cylinder and case, cylinder head deck surface, valve seats, or valves ground, the engine may have incorrect valve lash adjustment.
CAUSE:
------ No service parts or procedure available for converting the engine from net lash to an adjustable lash valve system.
CORRECTION:
----------- A new rocker arm stud P/N 10198929 and rocker arm locking nut P/N 10198930 are now available. With these parts and the procedure listed below, the engine can be converted from net lash to an adjustable lash valve system.
VALVE ADJUSTMENT
1. Remove the rocker arm cover, per Service Manual procedure.
2. Crank the engine until the mark on the vibration damper lines up with the "O" mark on the timing tab and the engine is in the number one firing position. This may be determined by placing fingers on the number one valve as the mark on the damper comes near the "O" mark on the timing tab. If the rocker arms are not moving, the engine is in the number one firing position. If the rocker arms move as the mark comes up to the timing tab, the engine is in the number six position and should be turned over one more time to reach the number one position.
3. With the engine in the number one firing position, as determined above, the following valves may be adjusted:
Exhaust: 1, 3, 4, 8 Intake: 1, 2, 5, 7
(Even numbered cylinders are in the right bank; odd numbered cylinders are in the left bank, when viewed from the rear of the engine.)
4. Remove the bolt, rocker arm and pivot ball and install rocker arm stud P/N 10198929 in 3/8 - 16 hole that the rocker arm bolt was removed and torque to 40 Lbs. Ft. (Nominal). Install rocker arm and pivot ball over the stud and install rocker arm nut P/N 10198930 on stud.
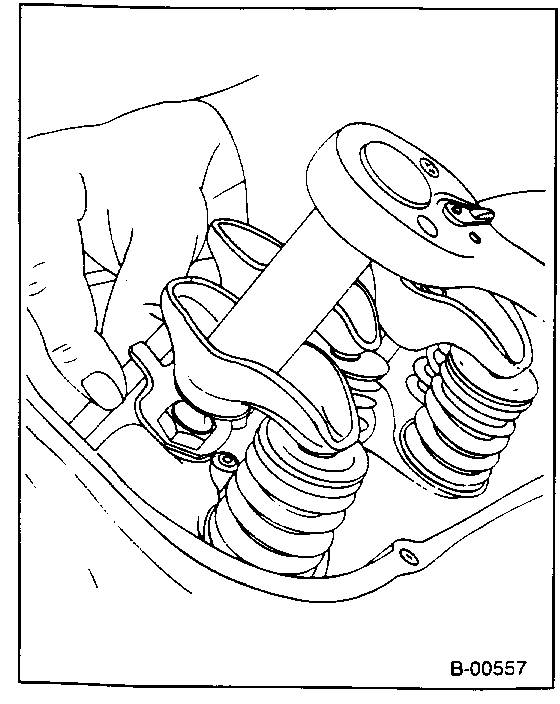
5. Back out the adjusting nut until lash is felt at the pushrod, then turn in the adjusting nut until all lash is removed. This can be determined by rotating the pushrod while turning the adjusting nut (see Illustration). When the play has been removed, turn the adjusting nut in one (1) additional turn (to centre the lifter plunger).
6. Crank the engine one revolution until the timing tab "O" mark and vibration damper mark are again in alignment. This is the number six firing position; the following valves may be adjusted:
Exhaust: 2, 5, 6, 7 Intake: 3, 4, 6, 8
7. Install the rocker arm cover, per Service Manual procedure.
General Motors bulletins are intended for use by professional technicians, not a "do-it-yourselfer". They are written to inform those technicians of conditions that may occur on some vehicles, or to provide information that could assist in the proper service of a vehicle. Properly trained technicians have the equipment, tools, safety instructions and know-how to do a job properly and safely. If a condition is described, do not assume that the bulletin applies to your vehicle, or that your vehicle will have that condition. See a General Motors dealer servicing your brand of General Motors vehicle for information on whether your vehicle may benefit from the information.
