For 1990-2009 cars only
- Remove the fan clutch. Refer to Fan Clutch Replacement .
- Remove the upper valve rocker arm covers. Refer to Valve Rocker Arm Cover Replacement - Upper Left Side and Valve Rocker Arm Cover Replacement - Upper Right Side .
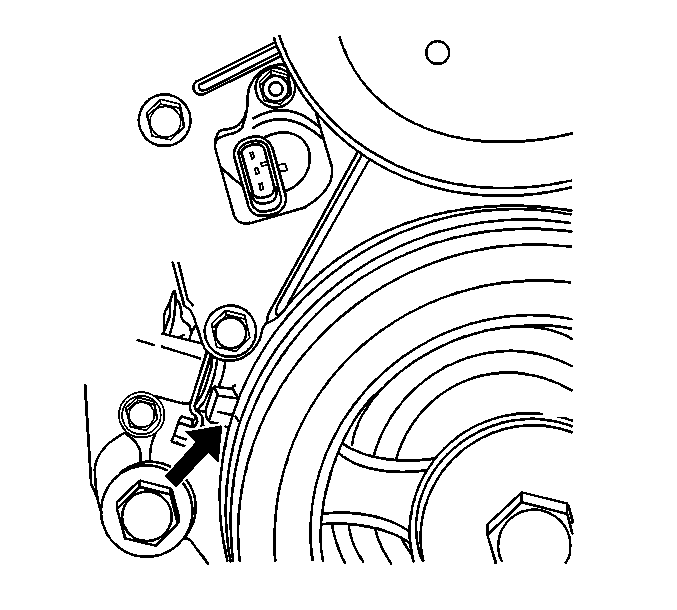
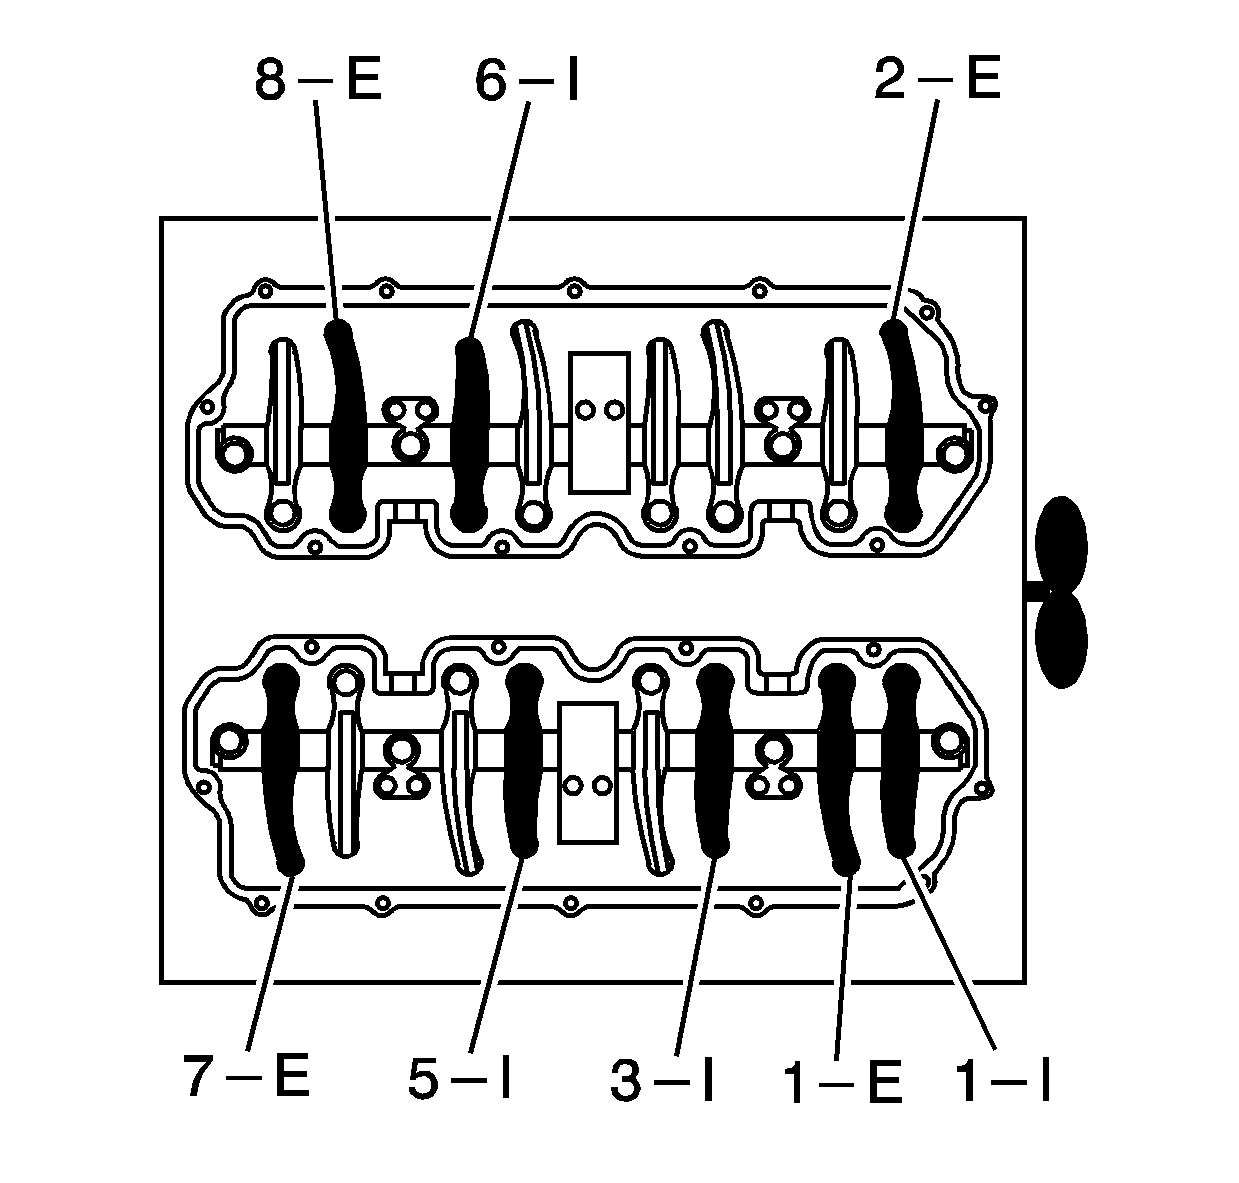
- Rotate the crankshaft in order to bring the number 1 cylinder to top dead center (TDC) of the compression stroke. The number 1 cylinder is the front cylinder on the right bank. The mark on the crankshaft balancer should be aligned with the mark on the engine.
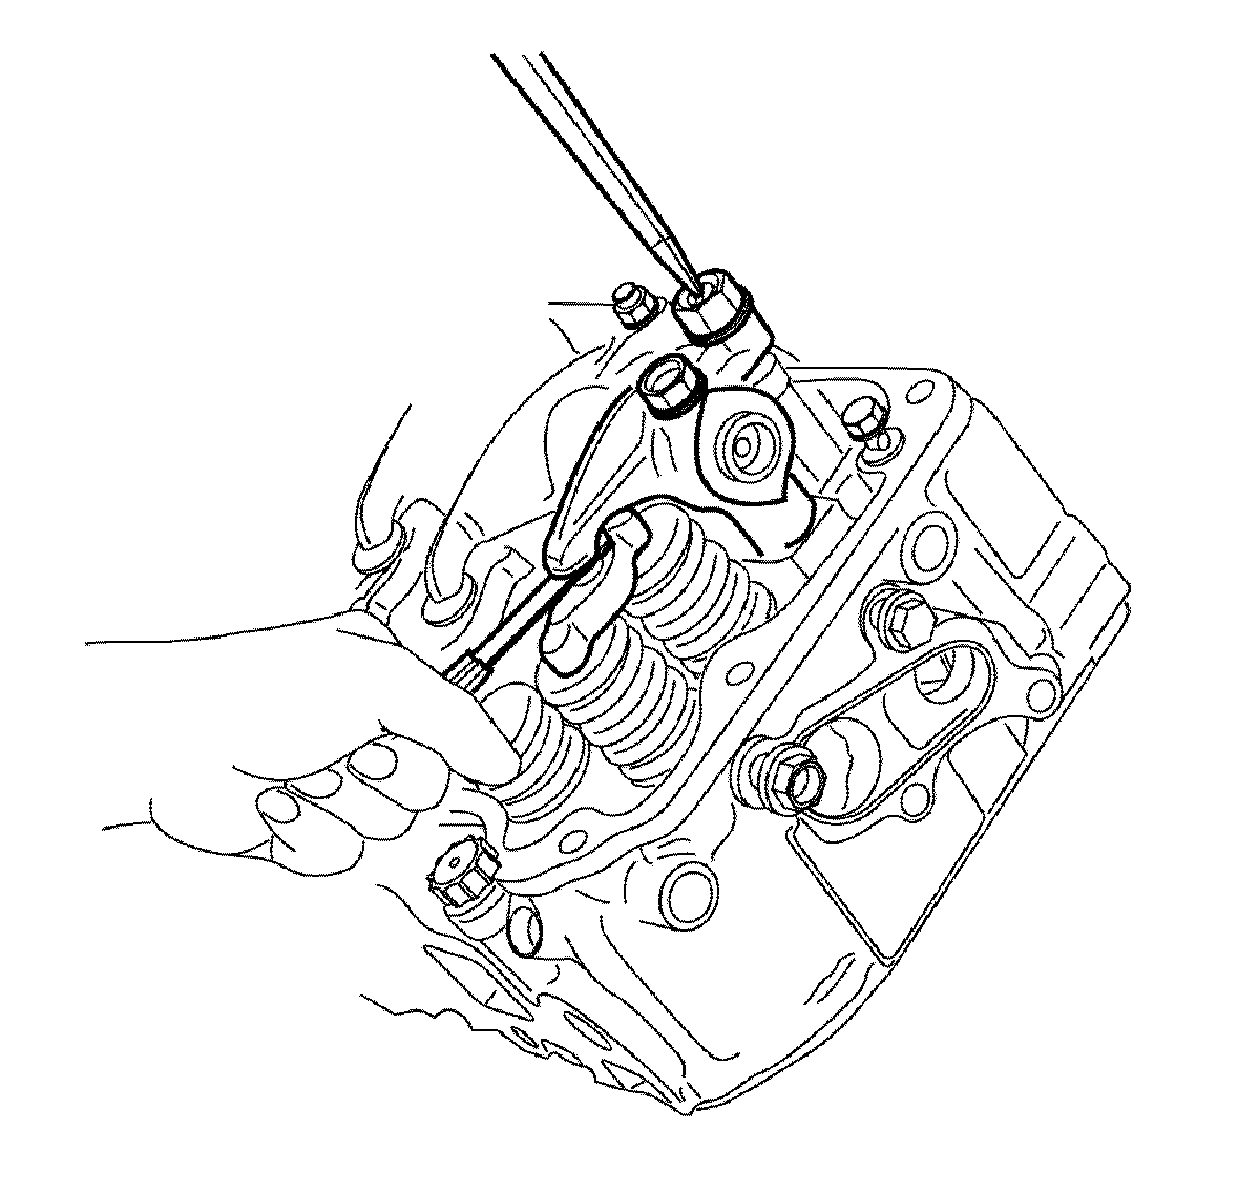
- Loosen the valve adjusting screws.
- Insert a feeler gage between the tip of the rocker arm and the valve bridge.
- Adjust the valve lash to 0.3 mm (0.012 in). Refer to Valve Clearance Adjustment Specifications to determine which valves can be adjusted when the engine is at TDC.
- Tighten the lock nut.
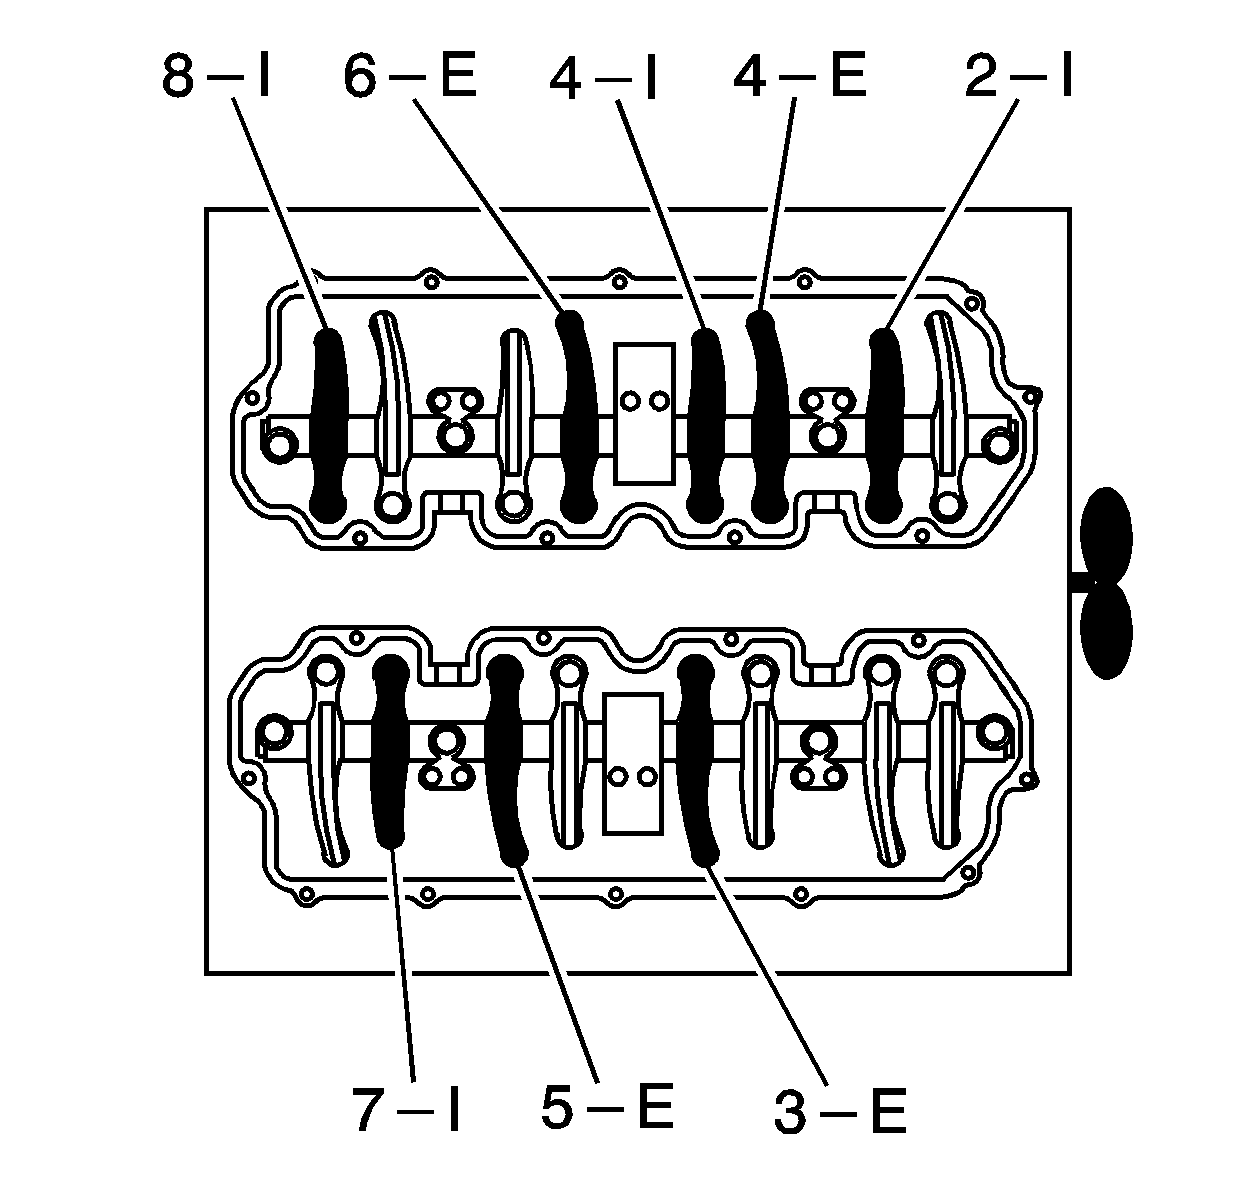
- Rotate the crankshaft one revolution in order to bring the number 1 cylinder to TDC of the exhaust stroke.
- Loosen the valve adjusting screws.
- Insert a feeler gage between the tip of the rocker arm and the valve bridge.
- Adjust the valve clearance to 0.3 mm (0.012 in). Refer to Valve Clearance Adjustment Specifications to determine which valves can be adjusted when the engine is at TDC.
- Tighten the lock nut.
- Install the upper valve rocker arm covers. Refer to Valve Rocker Arm Cover Replacement - Upper Left Side and Valve Rocker Arm Cover Replacement - Upper Right Side .
- Install the fan clutch. Refer to Fan Clutch Replacement .
Notice: Refer to Fastener Notice in the Preface section.
Tighten
Tighten nut to 22 N·m (16 lb ft).
Tighten
Tighten nut to 22 N·m (16 lb ft).
