For 1990-2009 cars only
Tools Required
J 43631 Ball Joint Remover
Removal Procedure
- Raise and support the vehicle. Refer to Lifting and Jacking the Vehicle .
- Remove the tire and wheel. Refer to Tire and Wheel Removal and Installation .
- Remove the rotor, except dual wheel vehicles. Refer to Rear Brake Rotor Replacement .
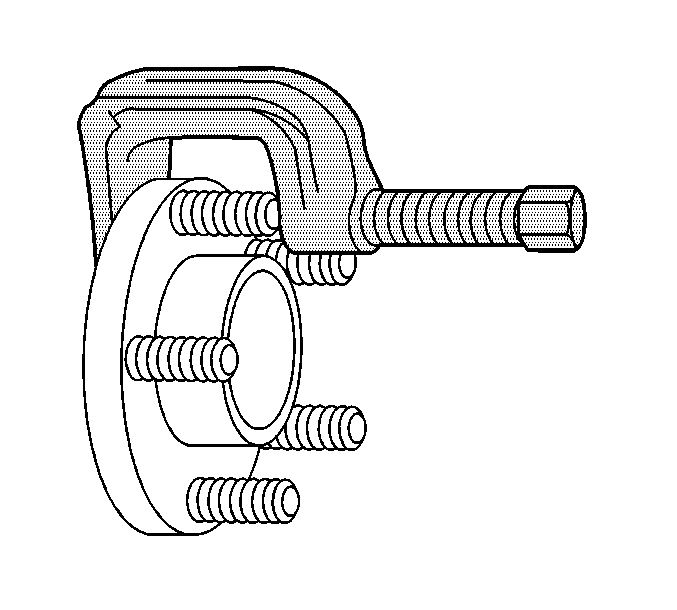
- Remove the wheel stud from the axle flange using the J 43631 .
- Remove the axle shaft for vehicles with 9.5 in ring gear. Refer to Rear Axle Shaft Replacement .
- Remove the rear hub assembly for vehicles with 10.5/11.5 in ring gear, with single wheels. Refer to Rear Axle Shaft Replacement .
- Remove the rear axle hub for vehicles with dual wheels. Refer to Rear Axle Hub, Bearing, Cup, and/or Seal Replacement .
- Remove the wheel stud from the axle flange using the J 43631 .
- Remove the wheel stud from the hub flange using the J 43631 .
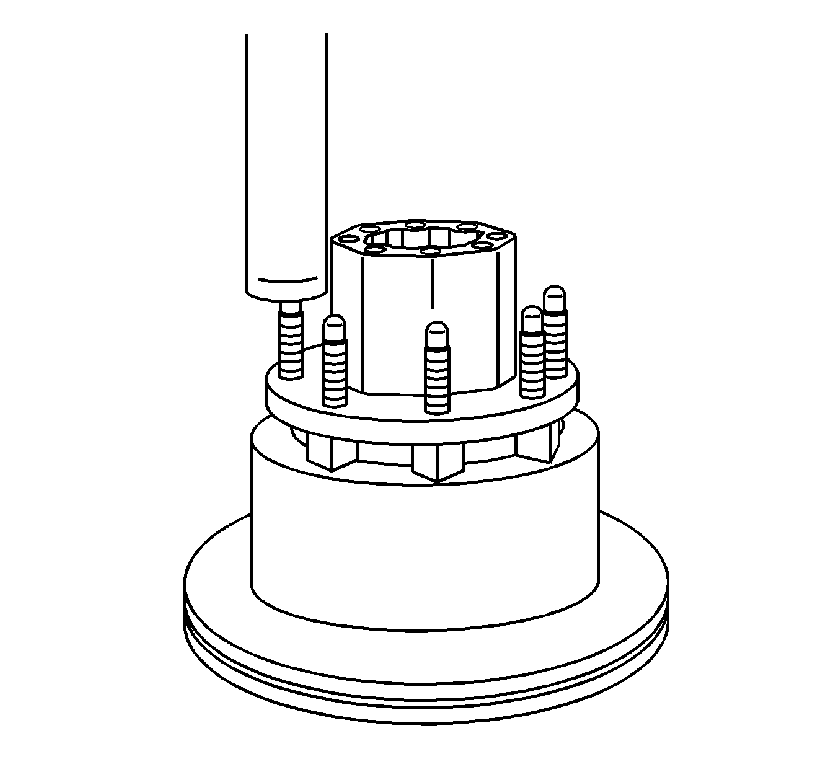
- Place the hub and rotor assembly in a press to remove the wheel stud.
Installation Procedure
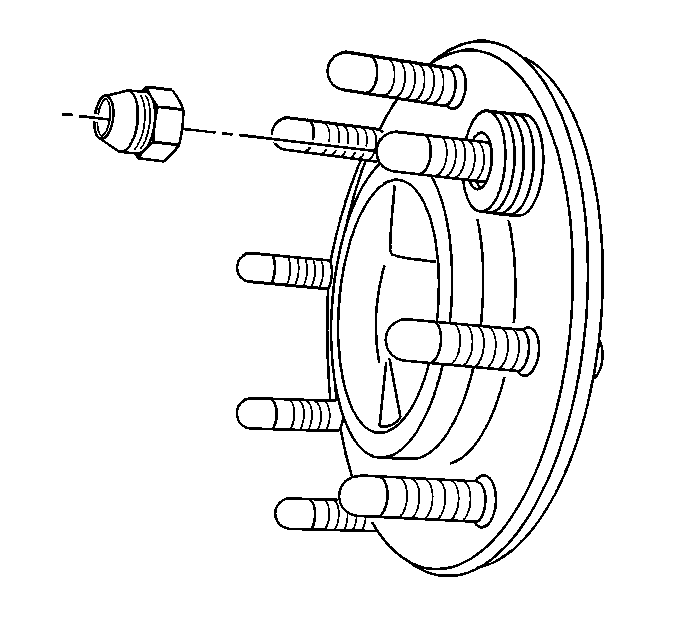
- Install the stud.
- Install the 4 washers and the lug nut to the stud.
- Tighten the lug nut in order to draw the stud into the flange until the stud fully seats.
- Remove the lug nut and the washers.
- Install the axle shaft for the vehicles with 9.5 in ring gear. Refer to Rear Axle Shaft Replacement .
- Install the rear hub assembly for the vehicles with 10.5/11.5 in ring gear, with single wheels. Refer to Rear Axle Shaft Replacement .
- Install the rear axle hub for vehicles with dual wheels. Refer to Rear Axle Hub, Bearing, Cup, and/or Seal Replacement .
- Install the rotor, except dual wheels. Refer to Rear Brake Rotor Replacement .
- Install the tire and wheel. Refer to Tire and Wheel Removal and Installation .
- Remove the safety stands.
- Lower the vehicle.