Shock Absorber Replacement with Coil Spring
Removal Procedure
Notice: The front shock absorbers of the vehicle are multifunctional. In addition to contributing to a smooth ride they also provide the only stop to the front suspension when fully extended. Therefore, when servicing the shock absorber, service replacement shock absorbers must be equivalent to original shock absorbers in both extended length and strength. Use of shocks not complying to original equipment or strength could result in suspension over-travel or shock breakage. Suspension over-travel may result in suspension component breakage.
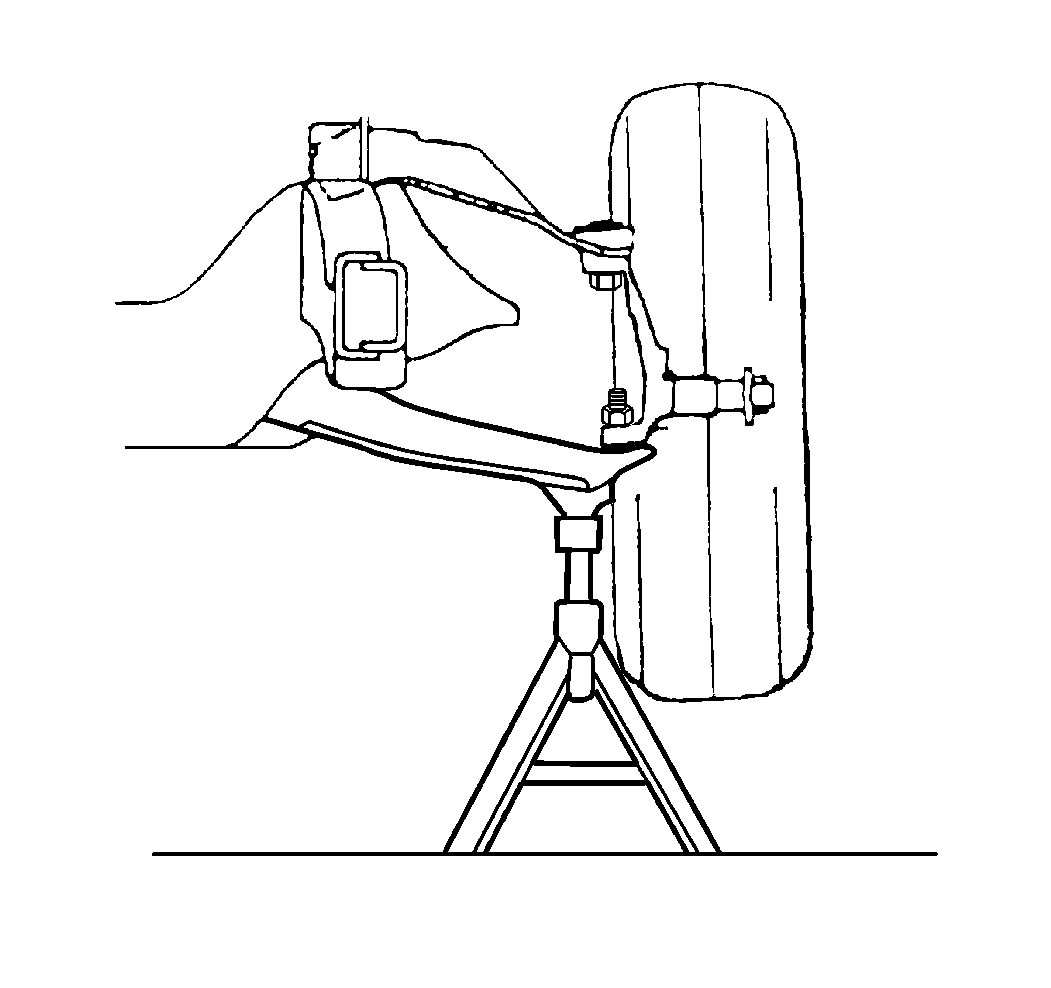
- Raise and support the vehicle. Refer to Lifting and Jacking the Vehicle .
- Support the lower control arm with a jack stand.
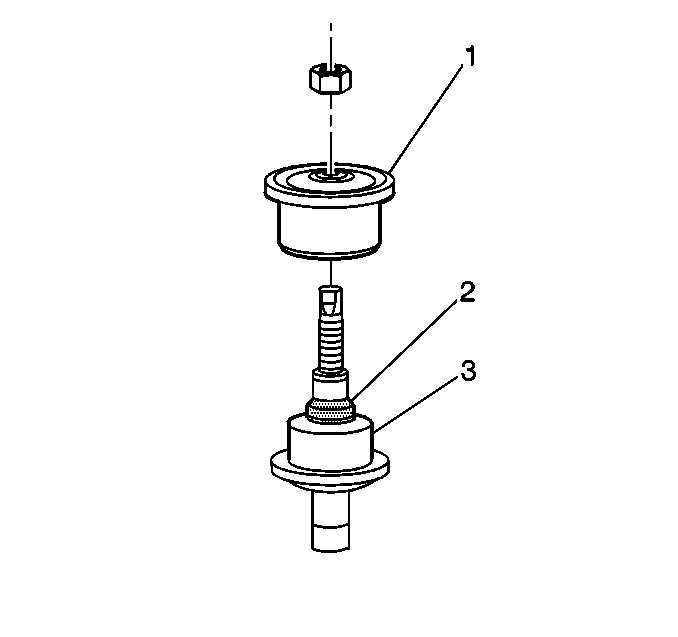
- Remove the upper insulator (1).
- Remove the shock absorber mounting bolts at the lower control arm.
- Remove the shock absorber through the lower control arm from below.
Installation Procedure
- Install the shock absorber through the lower control arm from below. Insert the tennon through the mounting hole in the upper spring pocket.
- Align the shock absorber with the mounting holes in the lower control arm.
- Install the shock absorber mounting bolts to the lower control arm.
- Install the upper insulator to the shock absorber.
- Install the nut to the tennon end. Do not tighten the nut.
- Remove the safety stands.
- Lower the vehicle.
- Hold the tennon end with a wrench while torquing the nut.
- Dispose of the shock absorber. Refer to Shock Absorber Disposal .
Notice: Refer to Fastener Notice in the Preface section.
Tighten
Tighten the bolts to 25 N·m (18 lb ft).
Important: The upper insulators are substantially larger that the lower insulators. The upper insulator (1) must be installed above the shock mounting bracket on the frame.
Tighten
Tighten the nut to 20 N·m (15 lb ft).
Shock Absorber Replacement with Torsion Bar
Removal Procedure
Notice: The front shock absorbers of the vehicle are multifunctional. In addition to contributing to a smooth ride they also provide the only stop to the front suspension when fully extended. Therefore, when servicing the shock absorber, service replacement shock absorbers must be equivalent to original shock absorbers in both extended length and strength. Use of shocks not complying to original equipment or strength could result in suspension over-travel or shock breakage. Suspension over-travel may result in suspension component breakage.
- Raise and support the vehicle. Refer to Lifting and Jacking the Vehicle .
- Support the lower control arm with a jack stand.
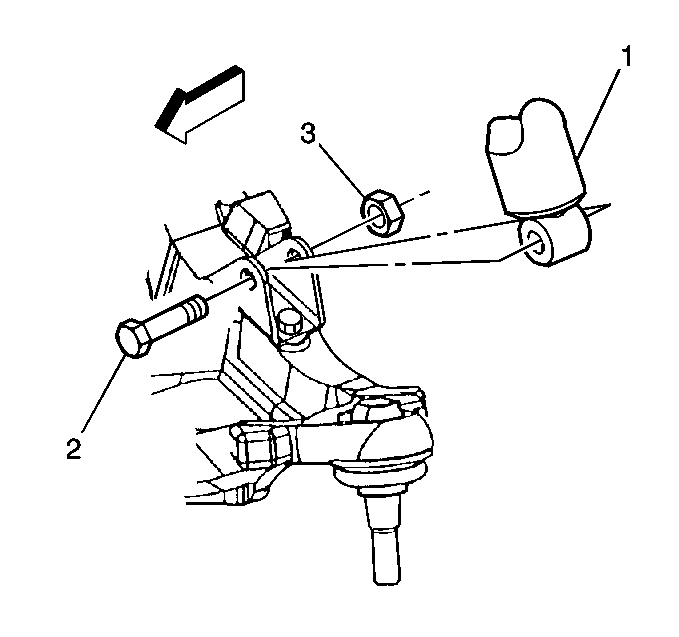
- Remove the upper insulator (1).
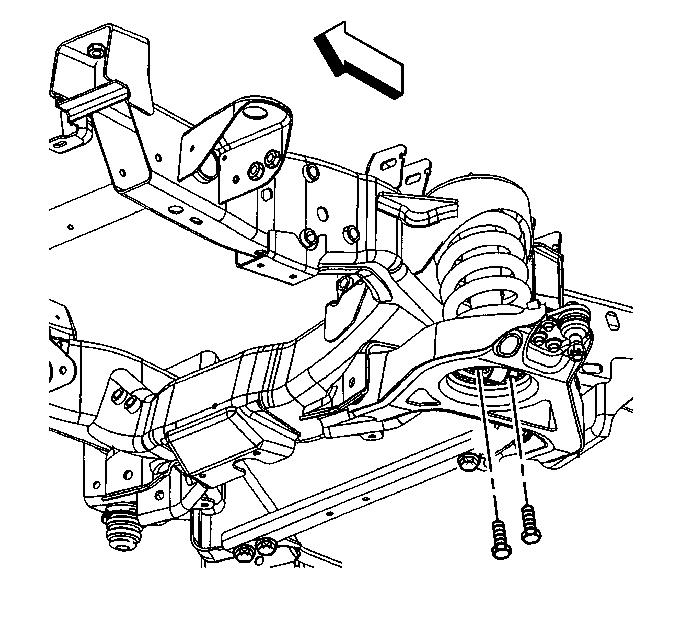
- Remove the shock absorber mounting bolt at the lower control arm, the 15 series.
- The lower shock mounting bushing is serviceable by driving the bushing out with the appropriate tool.
- Remove the shock absorber mounting bolt (2) at the lower control arm, the 25 series.
- Remove the shock absorber.

Installation Procedure
- Install the shock absorber. Insert the stem through the hole in the shock bracket on the frame.
- Align the shock absorber with the mounting holes in the lower control arm, the 15 series.
- Align the shock absorber with the mounting holes in the lower control arm, the 25 series.
- Install the shock absorber through the bolt (2) to the lower control arm.
- Install the shock absorber through the bolt nut (3).
- Install the upper insulator to the shock absorber.
- Install the nut to the tennon end. Do not tighten the nut.
- Remove the safety stands.
- Lower the vehicle.
- Hold the tennon end with a wrench while torquing the nut.
- Dispose of the shock absorber. Refer to Shock Absorber Disposal .
Notice: Refer to Fastener Notice in the Preface section.
Tighten
Tighten the nut to 80 N·m (59 lb ft).
Important: The upper insulators are substantially larger that the lower insulators. The upper insulator (1) must be installed above the shock mounting bracket on the frame.
Tighten
Tighten the nut to 20 N·m (15 lb ft).
