Generator Battery Replacement 5.3L Engine w/RPO HP2
Tools Required
J 43679 Battery Removal Handles
Caution: To help avoid personal injury, disable the 36V system anytime you perform service work on or around the generator battery carrier. The 36V system will still be active after you have disabled the generator battery carrier.
Caution: To help avoid personal injury, always disconnect the 36V generator battery carrier before doing any work to the generator battery carrier system. To disconnect the generator battery carrier, turn the engine off and turn OFF the service disconnect switch, which is located on the passenger side of the generator battery carrier.
Removal Procedure
Important:
• If one battery fails testing, replacement of that specific battery is required. If two of the three batteries fail testing, replacement of all three batteries is required. • If replacement of all three batteries is required, the technician MUST perform the (Reset Battery Total Ahrs.) procedure with the scan tool via BECM Output Controls.
- Perform the battery pack service charge procedure. Refer to Battery Pack Service Charge - HP2 .
- Remove the generator battery carrier intermediate cover. Refer to Battery Cover Replacement .
- If necessary, remove the battery disconnect switch. Refer to Battery Service Disconnect Switch Replacement .
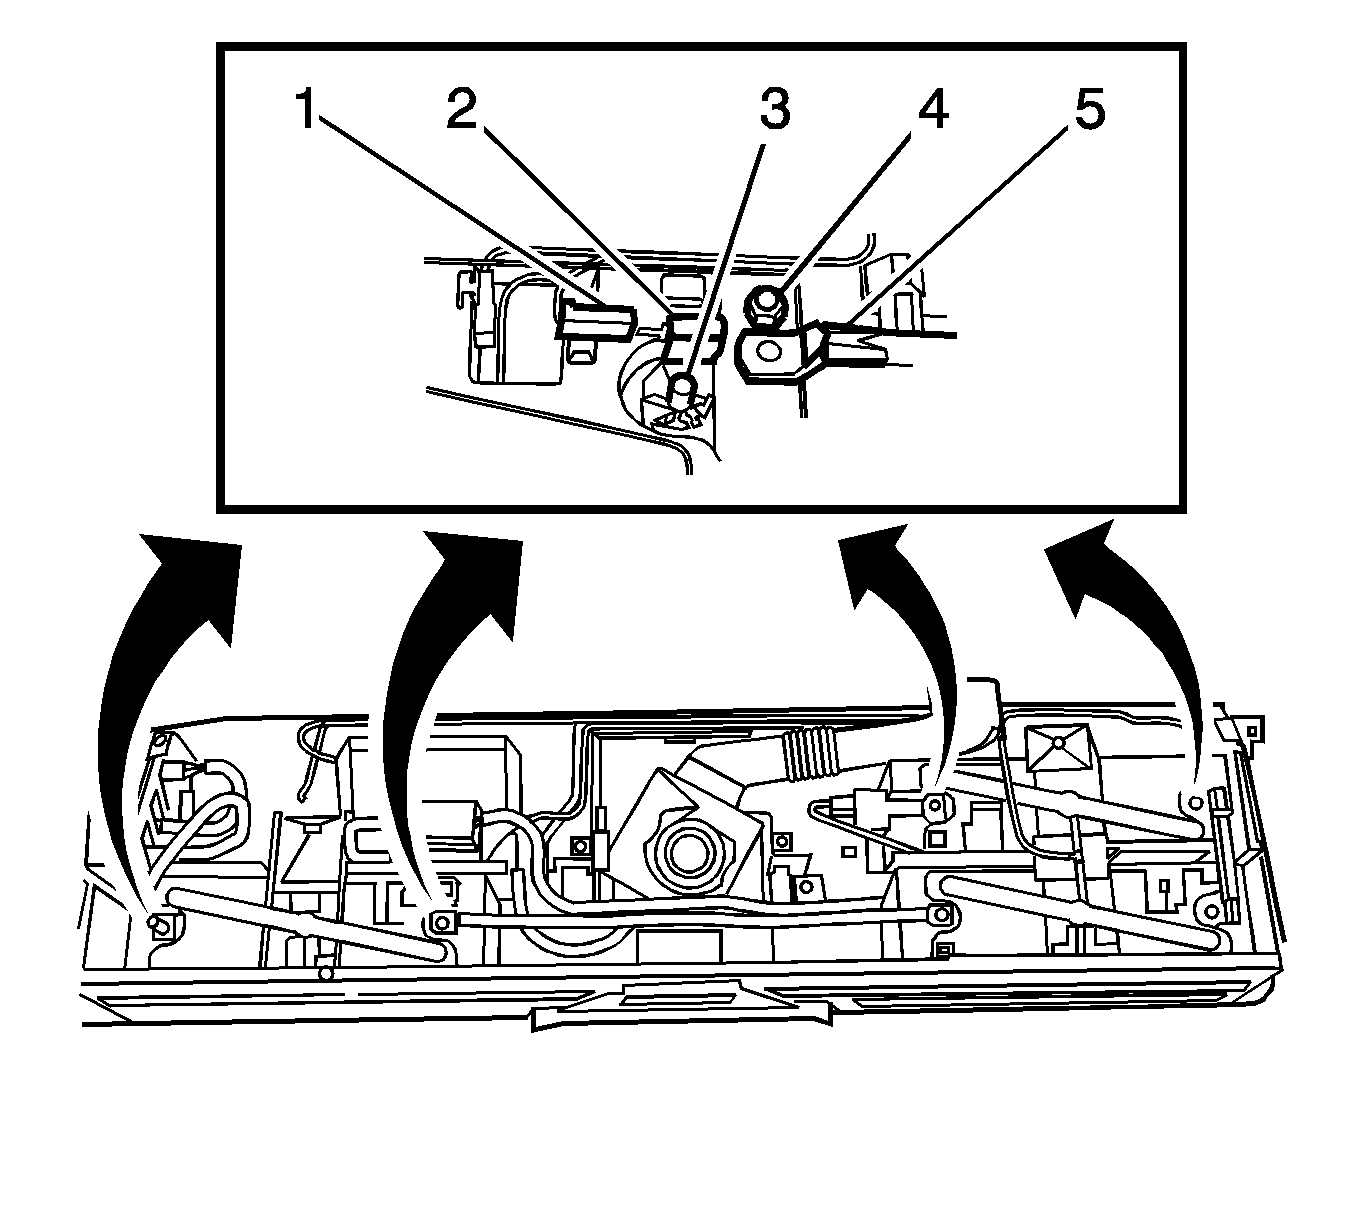
- Disconnect the battery resistor electrical connectors (1) from the appropriate battery.
- Disconnect the battery thermistor electrical connectors from the appropriate battery.
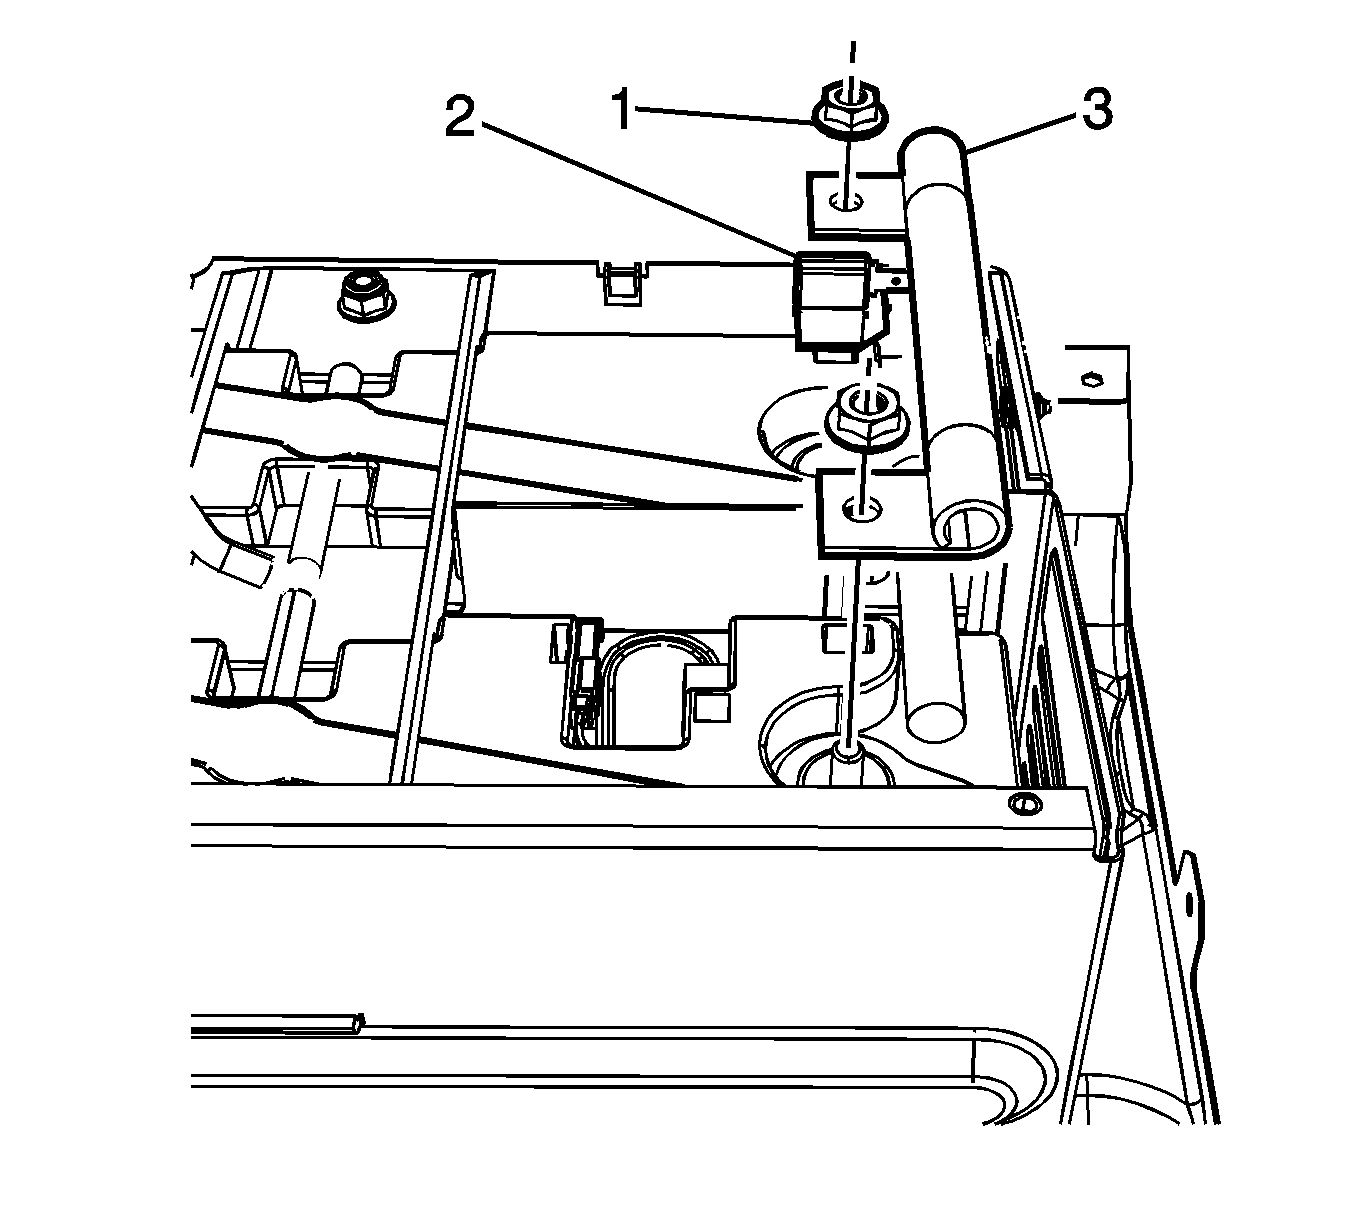
- If necessary, remove the power cable nuts (1) from battery 1 and battery 2.
- Remove the power cable (3) from battery 1 and battery 2.
- Remove the battery resistor from the battery 1 positive terminal.
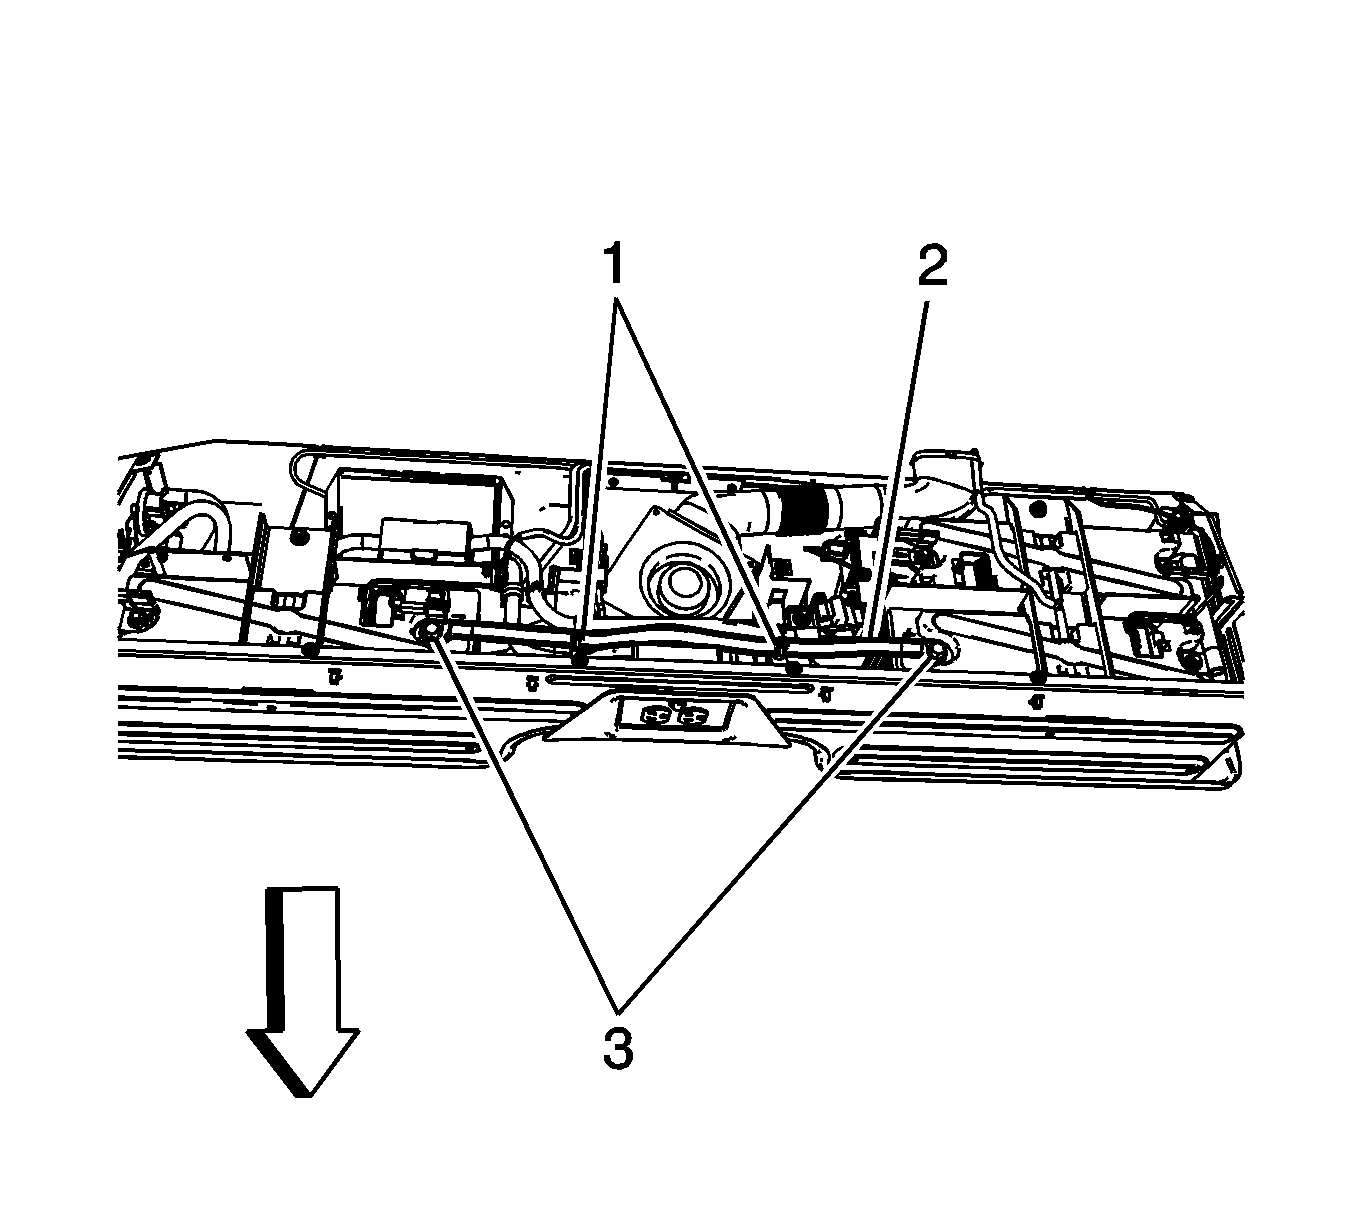
- If necessary, cut the tie straps (1) securing the power cables to the generator battery carrier.
- Remove the power cable nuts (3) from battery 2 and battery 3.
- Remove the power cable (2) from battery 2 and battery 3.
- Remove the battery resistor from the battery 3 negative terminal.
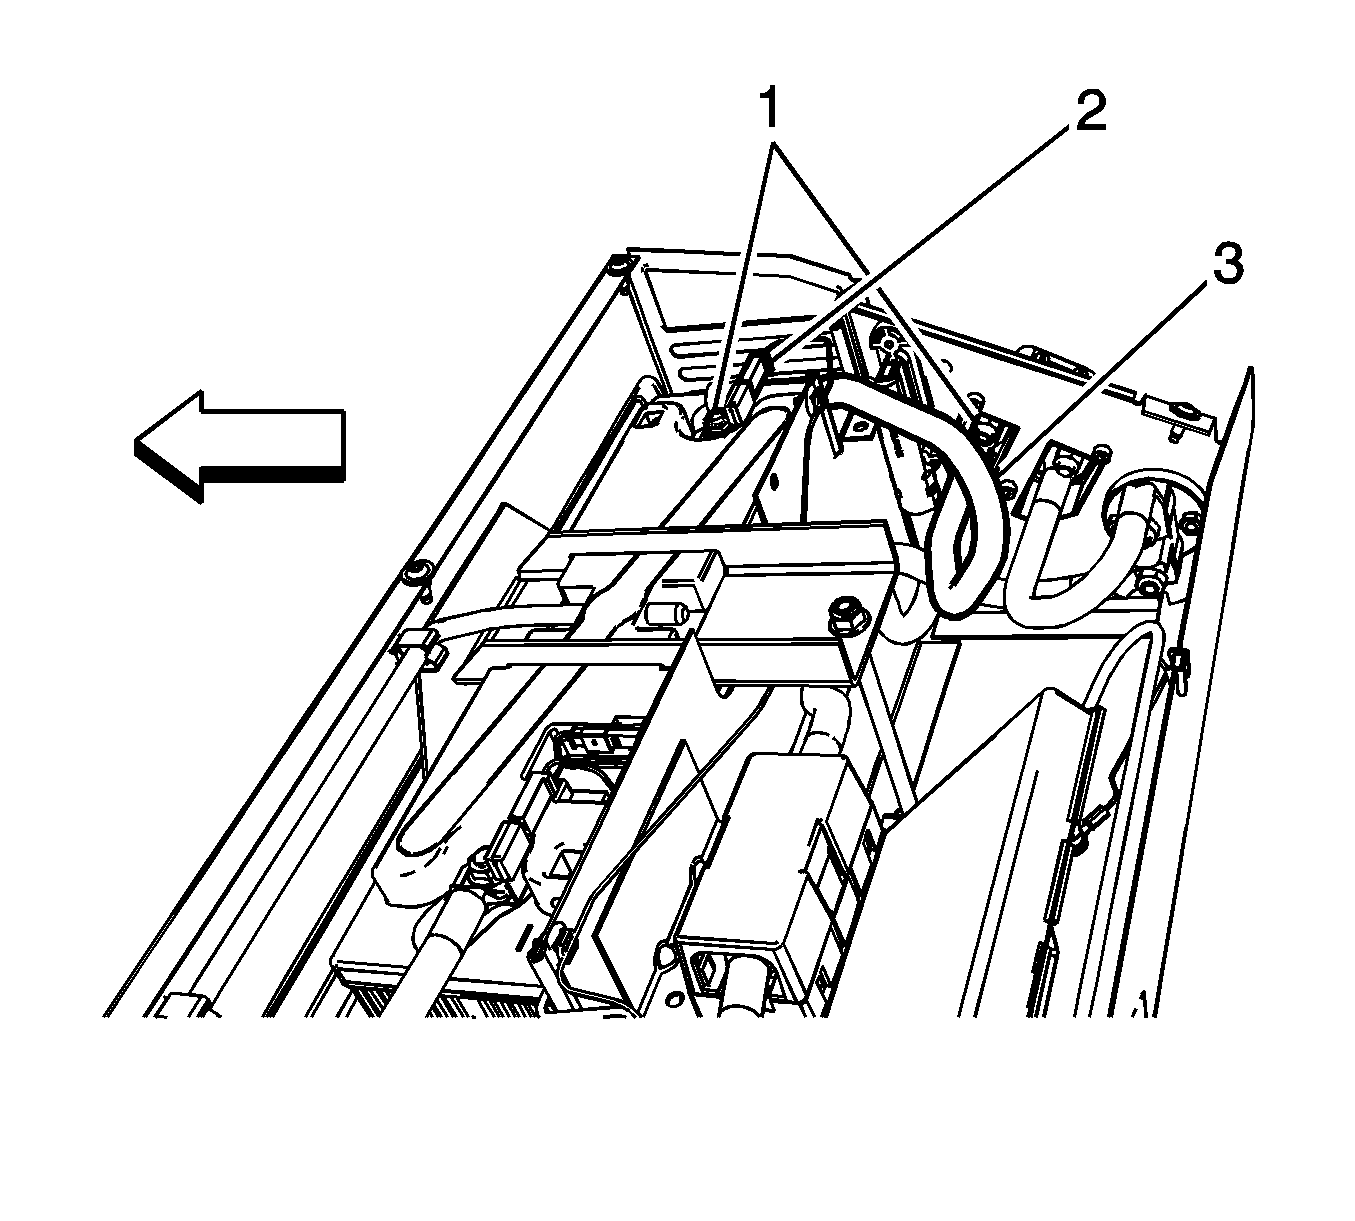
- If necessary, remove the power cable nut (1) from battery 3.
- Remove the power cable (3) from battery 3.
- Remove the battery resistor from the battery 3 positive terminal.
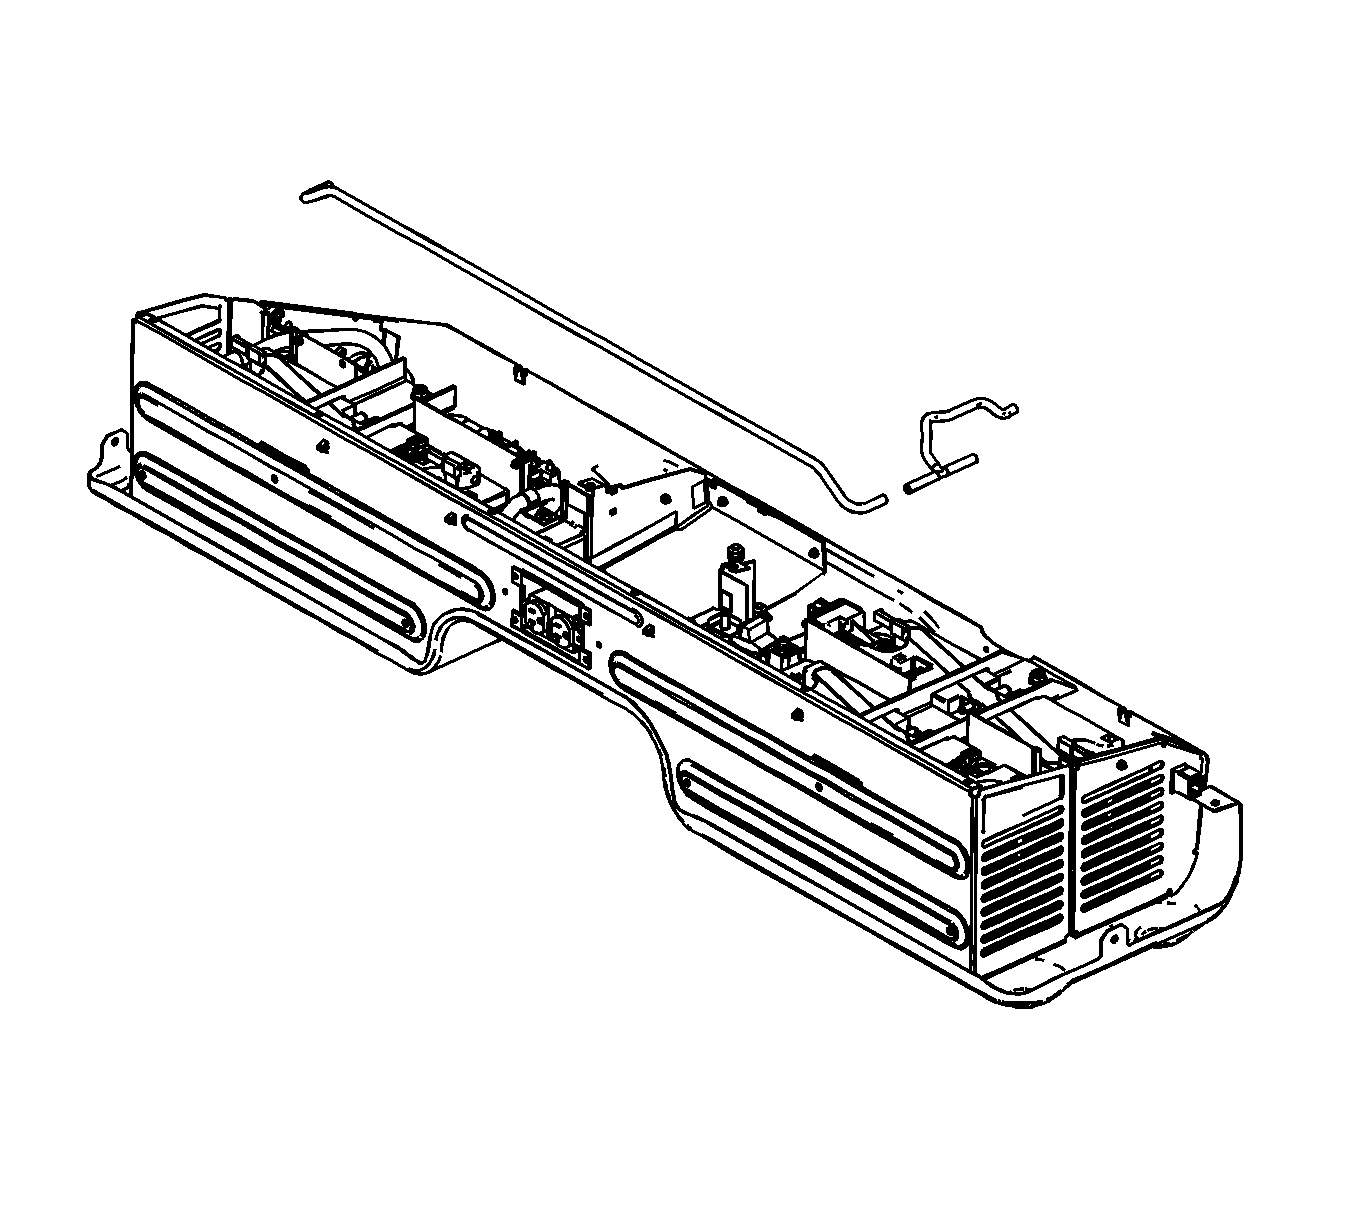
- Disconnect the battery vent hose(s) from the appropriate battery.
- If necessary, disengage the retainers securing the battery vent hose.
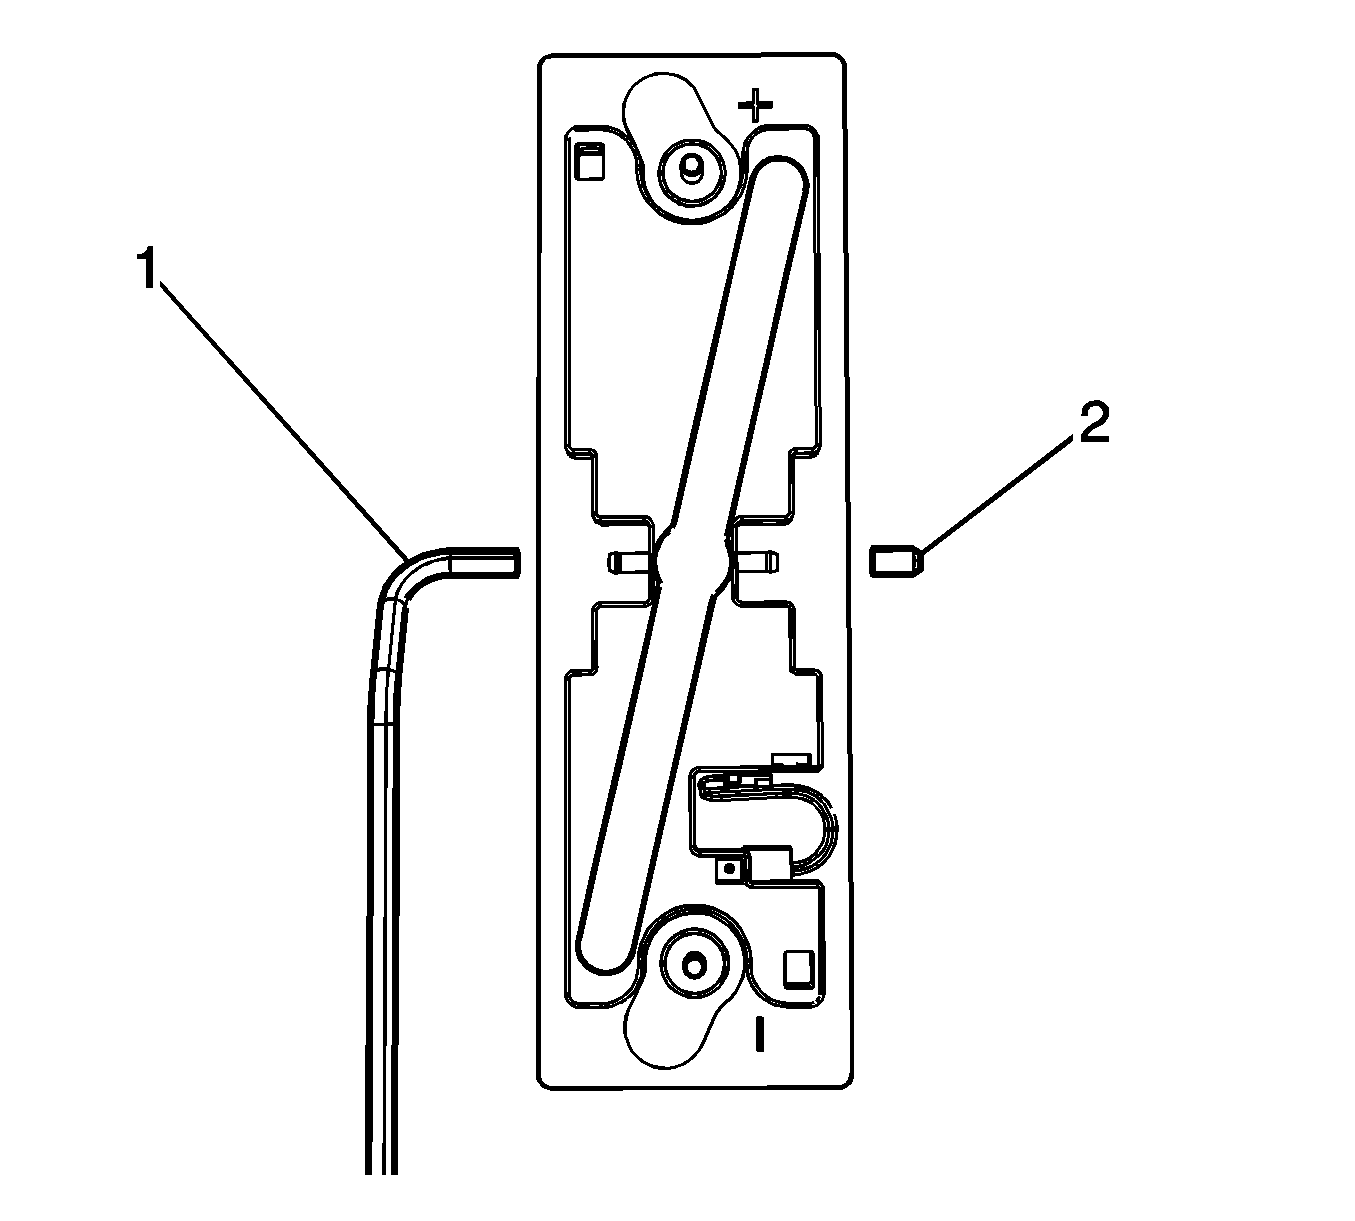
- Remove the battery vent cap (2) from the appropriate battery.
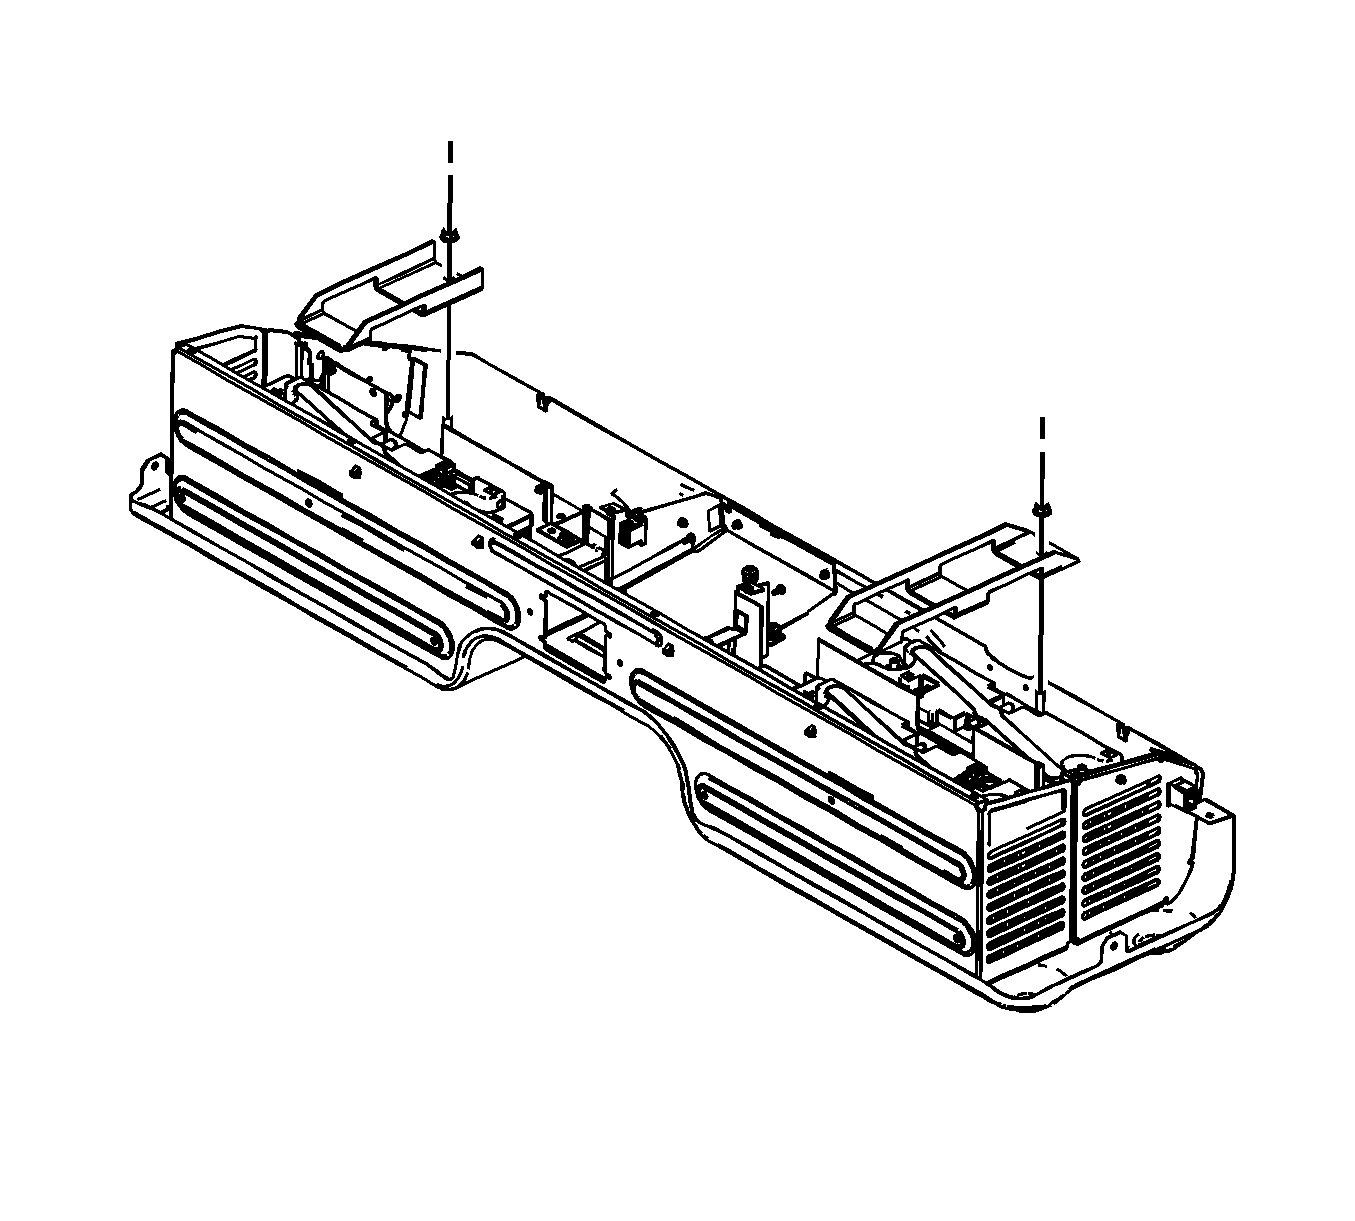
- Remove the appropriate battery hold down bracket nut.
- Remove the appropriate battery hold down bracket.
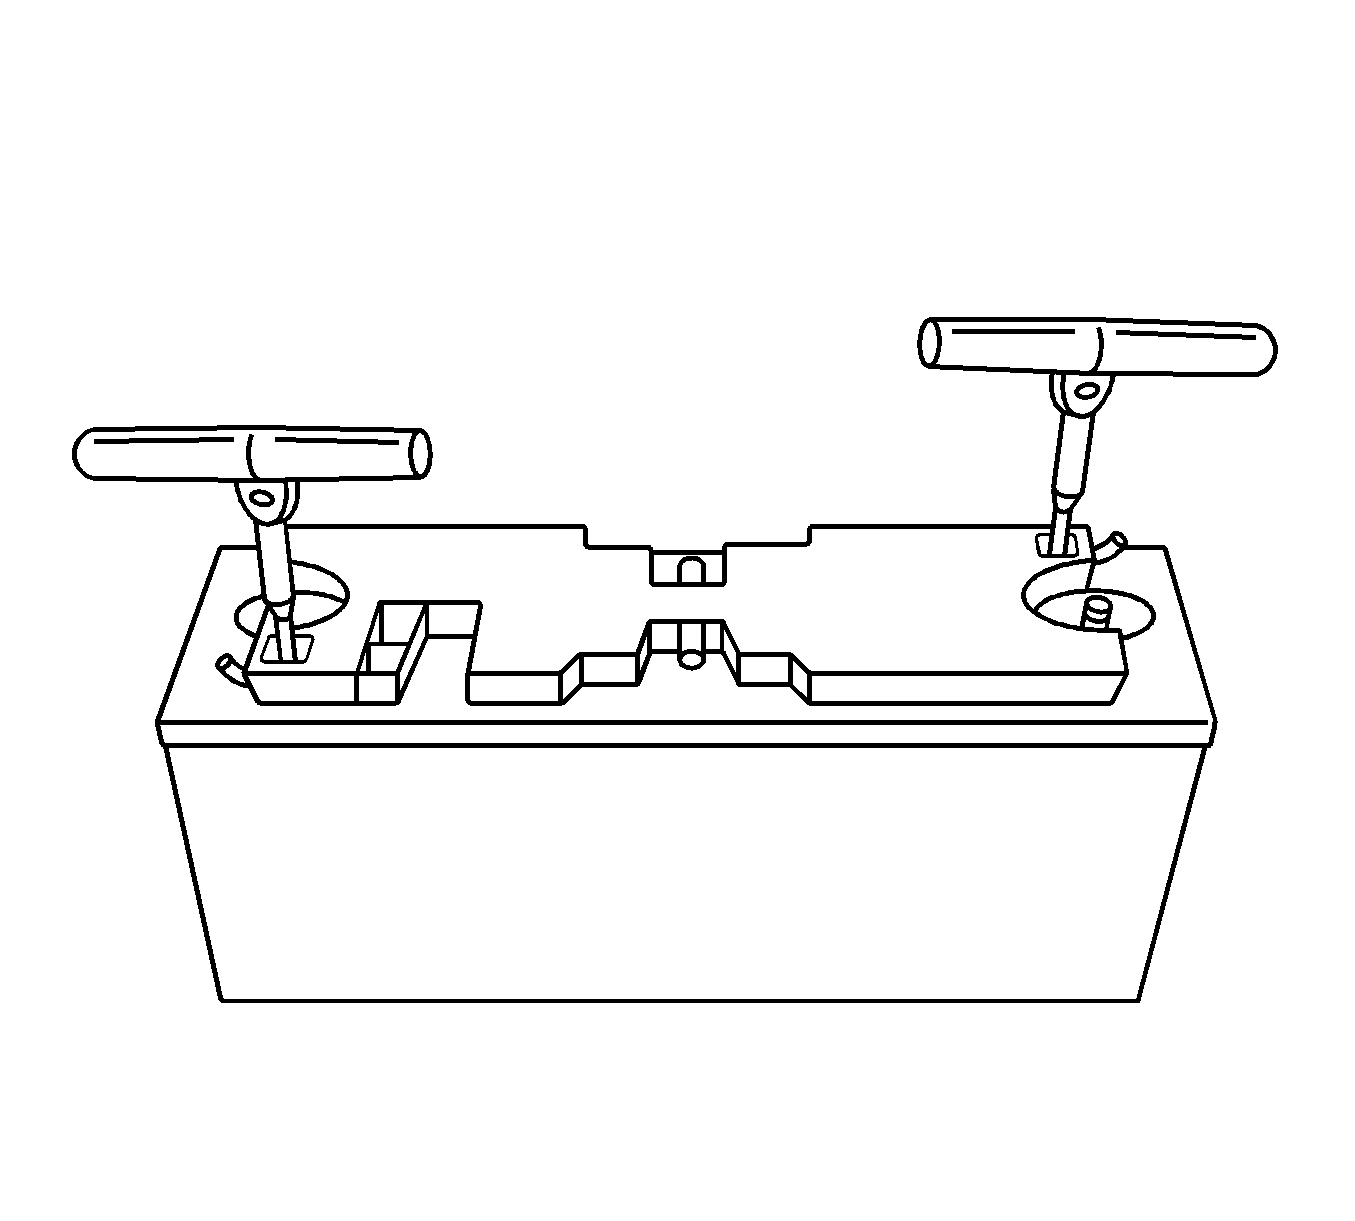
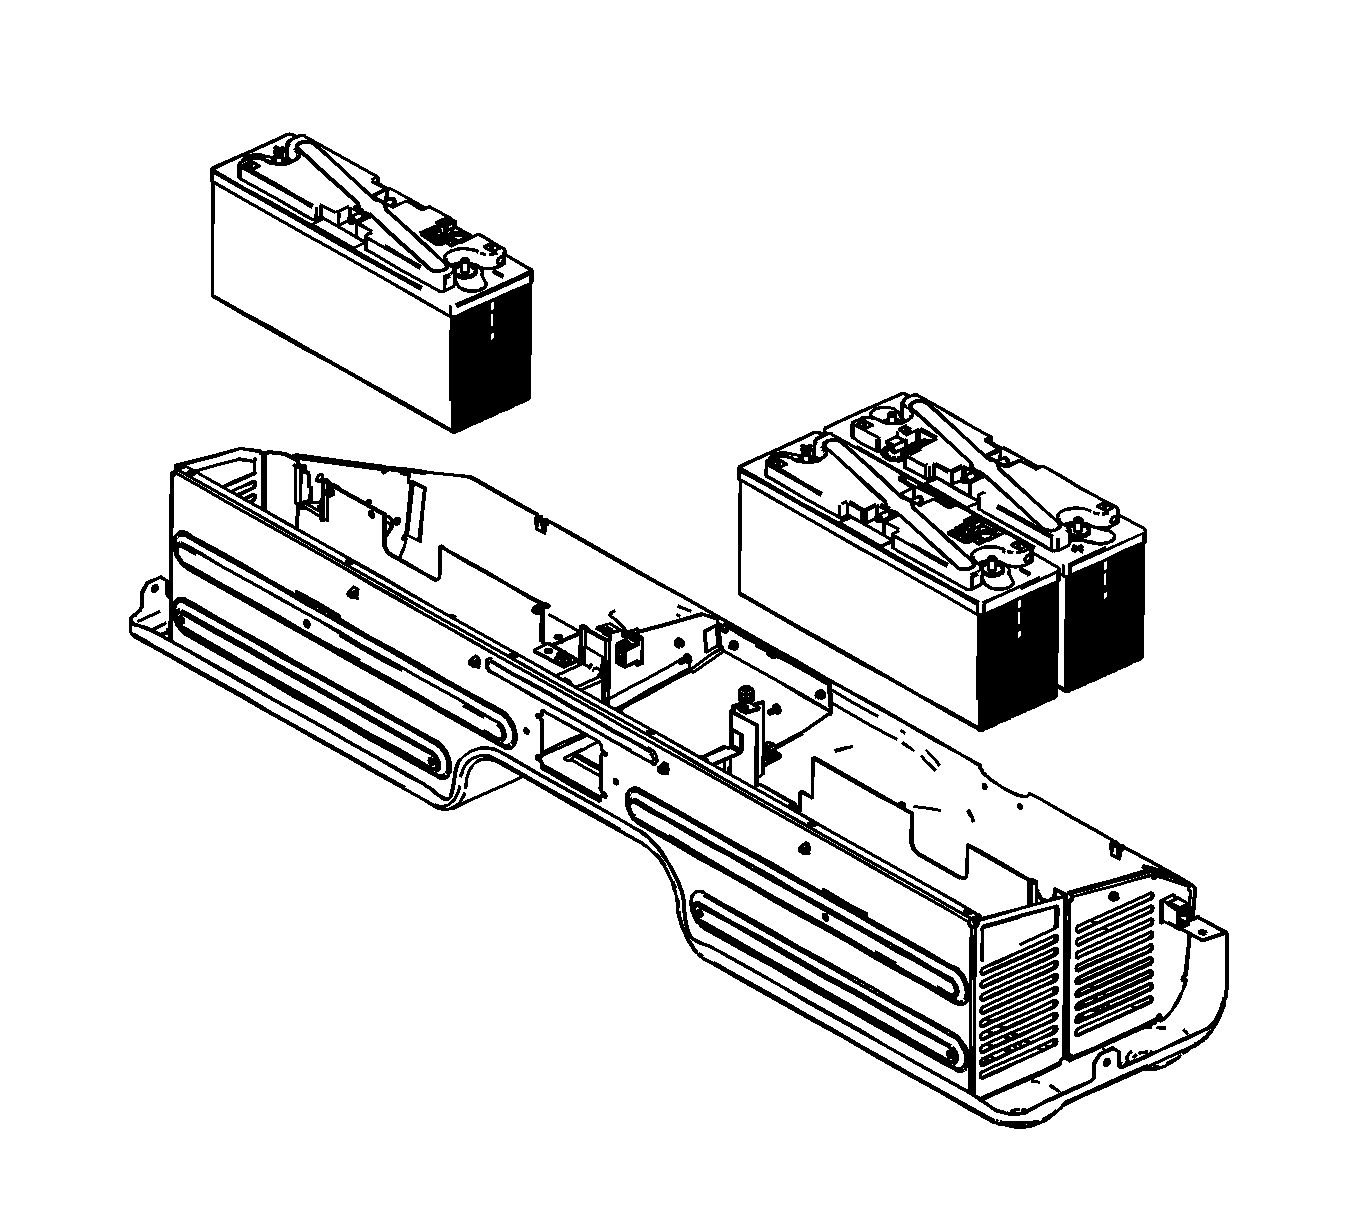
- Install J 43679 , to the lifting points on the appropriate battery.
- Remove the appropriate battery.
Installation Procedure
Important: The NEW replacement battery will be delivered at approximately 80 percent state of charge (SOC) and must be charged alone to 100 percent SOC prior to installation.
- Charge the NEW replacement battery. Refer to Battery Charging .
- Install J 43679 , to the lifting points on the NEW battery.
- Install the appropriate battery.
- Remove J 43679 , from the battery.
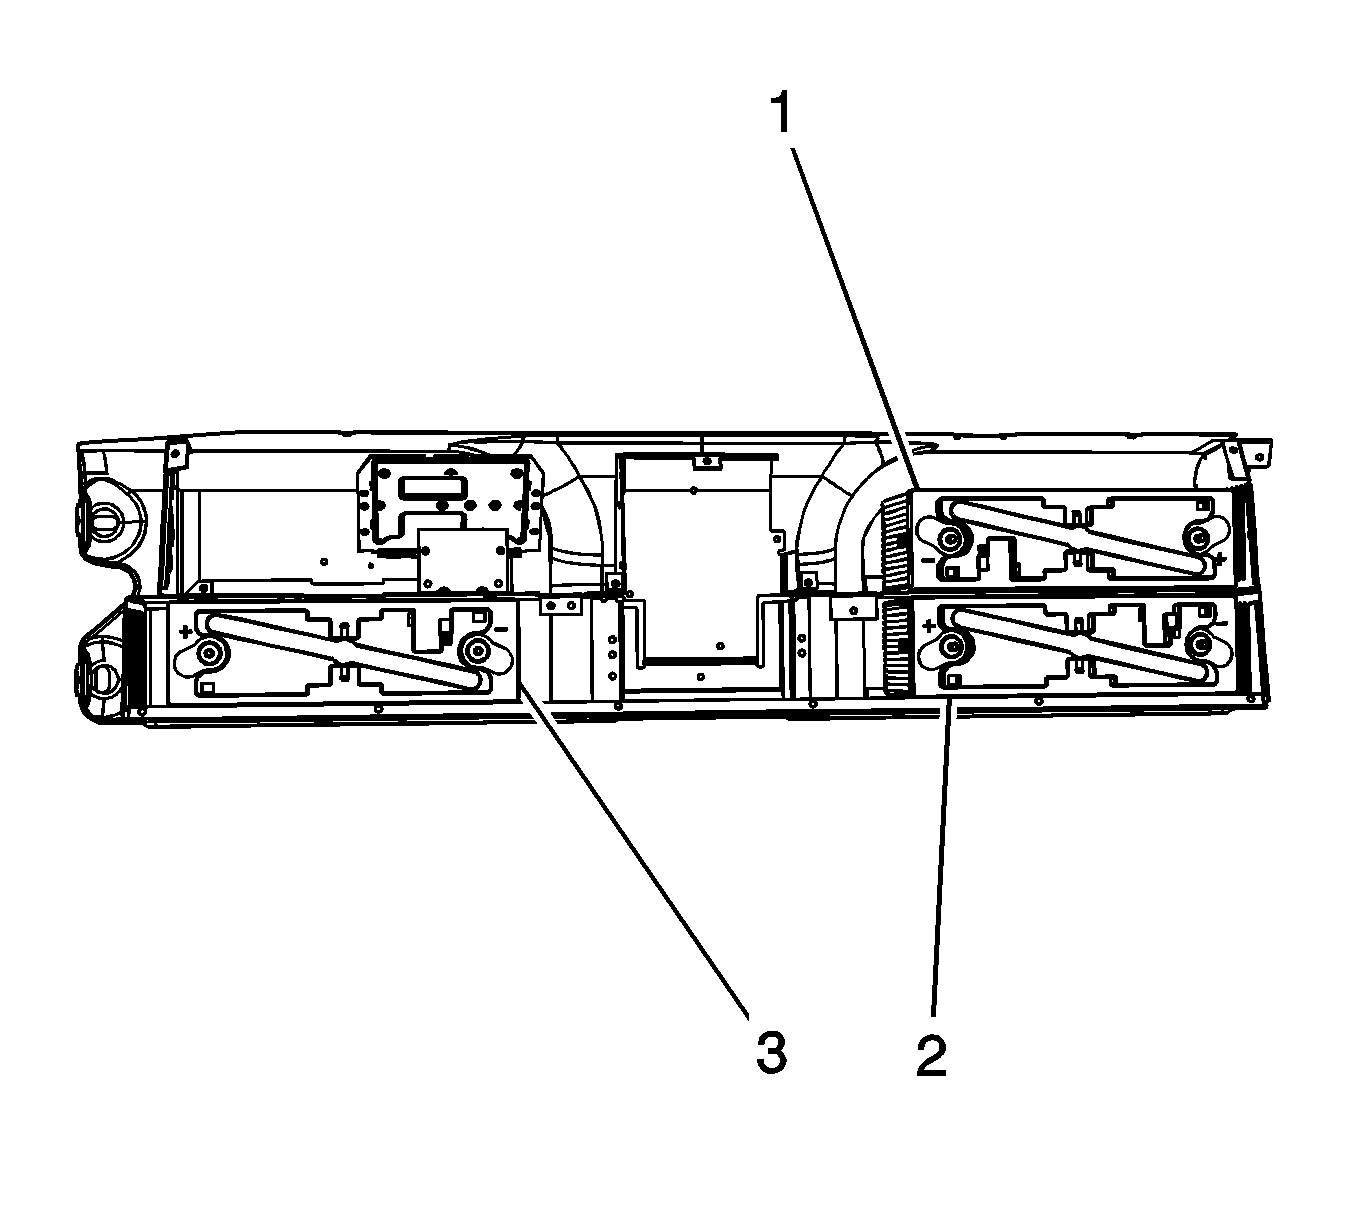
- Ensure that the batteries (1, 2 and 3) have the positive and negative terminals properly oriented.
- Install the appropriate battery hold down bracket.
- Install the appropriate battery hold down bracket nut.
- Install the battery vent cap (2) to the appropriate battery.
- Connect the battery vent hose(s) to the appropriate battery.
- If necessary, engage the retainers securing the battery vent hose.
- If necessary, install the battery resistor to the battery 3 positive terminal.
- Install the power cable (3) to battery 3.
- Install the power cable nut (1) to battery 3.
- If necessary, install the battery resistor to the battery 3 negative terminal.
- Install the power cable (2) to battery 2 and battery 3.
- Install the power cable nuts (3) to battery 2 and battery 3.
- Install NEW tie straps (1) securing the power cable to the generator battery carrier.
- If necessary, install the battery resistor to the battery 1 positive terminal.
- Install the power cable (3) to battery 1 and battery 2.
- Install the power cable nuts (1) to battery 1 and battery 2.
- Connect the battery thermistor electrical connectors to the appropriate battery.
- Connect the battery resistor electrical connectors (1) to the appropriate battery.
- If necessary, install the battery cut-off switch. Refer to Battery Service Disconnect Switch Replacement .
- Install the generator battery carrier intermediate cover. Refer to Battery Cover Replacement .



Notice: Refer to Fastener Notice in the Preface section.
Tighten
Tighten the nut to 10 N·m (89 lb in).


Tighten
Tighten the nut to 10 N·m (89 lb in).

Tighten
Tighten the nuts to 10 N·m (89 lb in).

Tighten
Tighten the nuts to 10 N·m (89 lb in).

