Gearshift Lever Case Replacement 4WD
Tools Required
J 36850 Transjel®
Transmission Assembly Lubricant
Removal Procedure
- Remove the following components
from the bottom of the gearshift lever case:
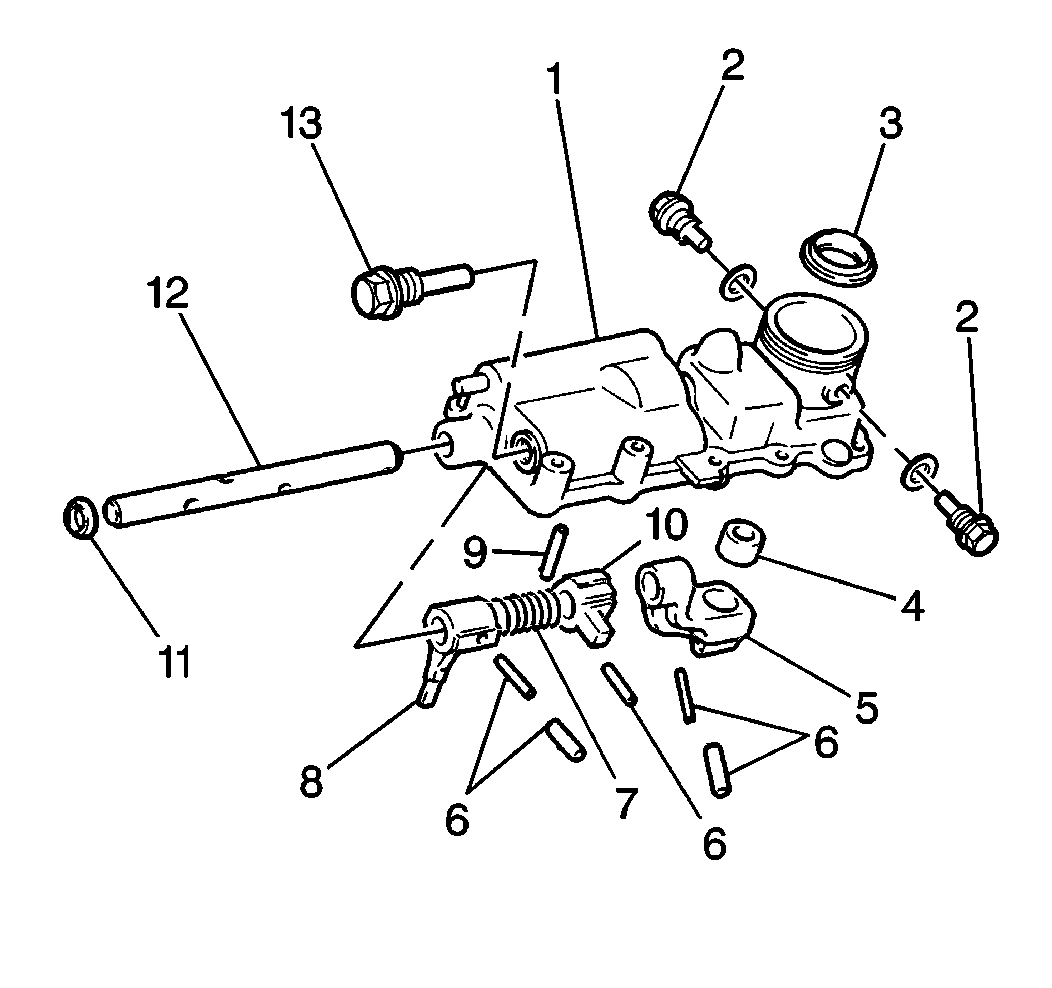
| 1.2. | The gearshift lever case plate (1) |
Important: The left side of the gearshift lever case contains an inner and an outer
select return spring.
The right side of the gearshift lever case contains only one select
return spring.
Note the location of these springs in order to ensure correct assembly.
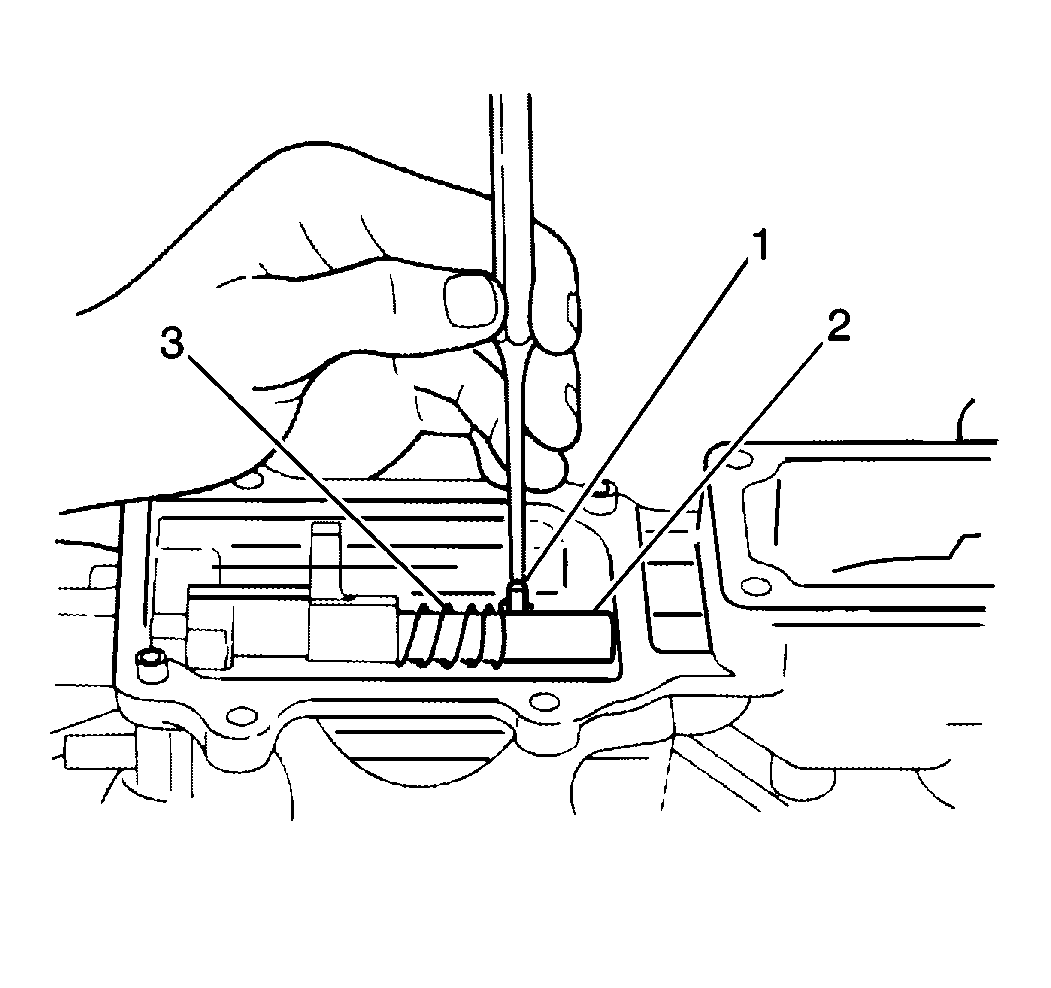
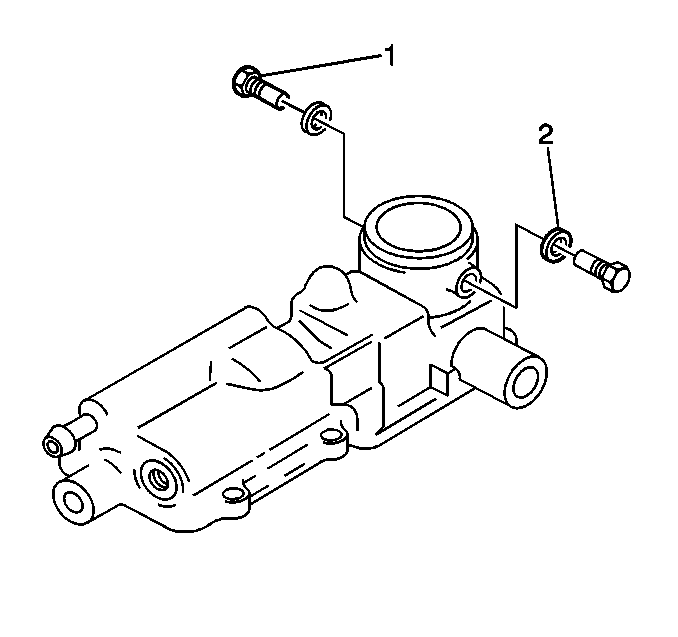
- Remove the following components from the gearshift lever case:
| 2.1. | The 2 select return spring bolts (1) |
| 2.2. | The 3 select return springs (2) |
| 2.3. | The 2 select guide pins (3) |
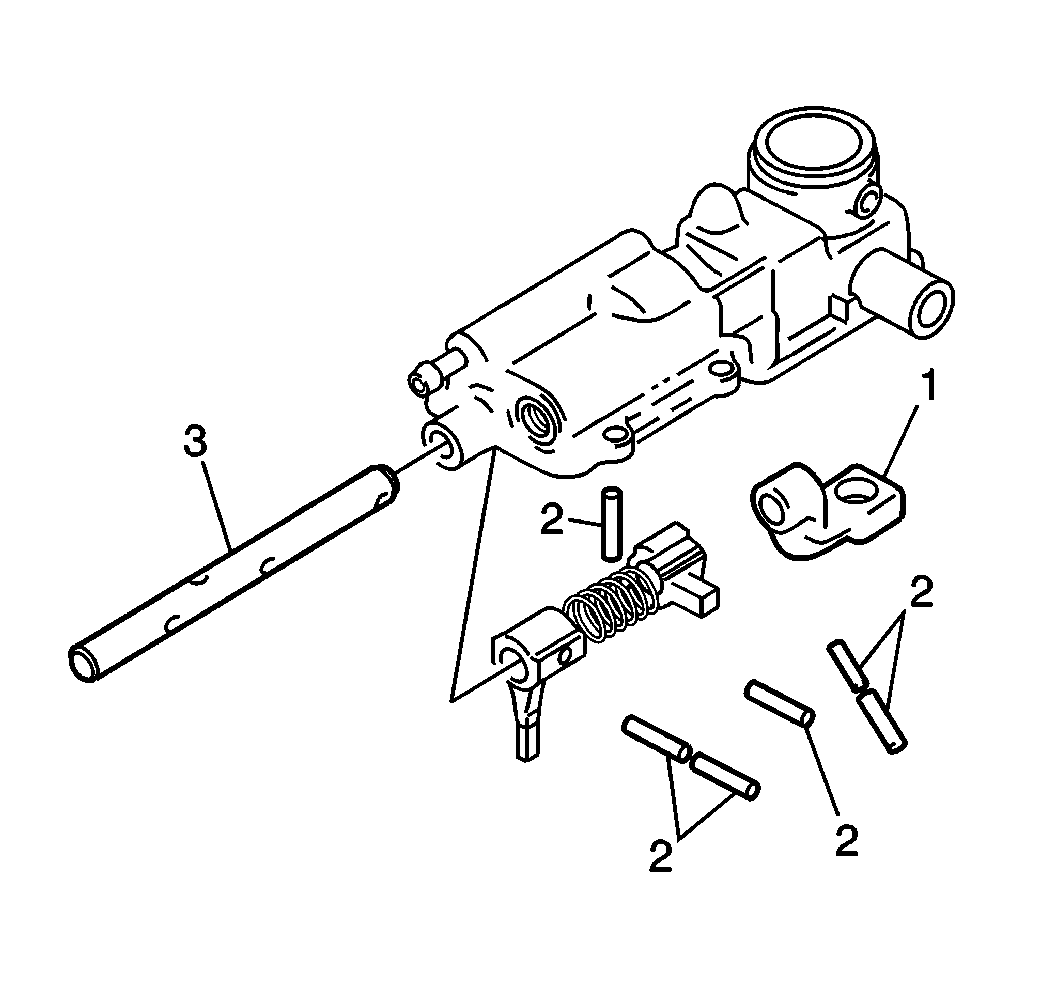
- Remove the following components
from the gearshift shaft (3):
| 3.1. | One inner roll pin and one outer roll pin (2) |
| 3.2. | The gearshift arm (1) |
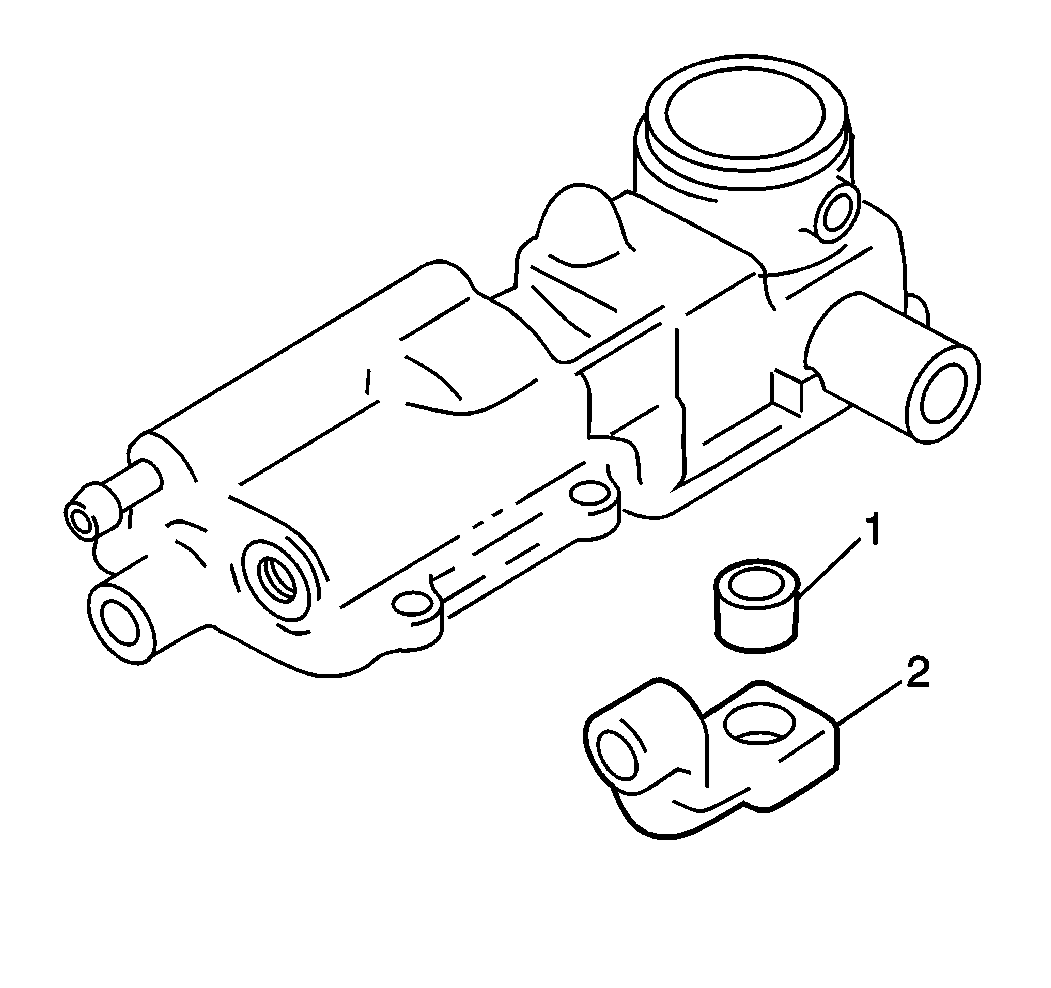
- Remove the gearshift control
lever bushing (1) from the gearshift arm (2).
- Remove one roll pin (1)
from the gearshift shaft (2) in order to release tension on the gearshift
limit spring (3).
- Remove the following components
from the gearshift lever (2):
- Remove one roll pin from the reverse gearshift limit yoke (1).
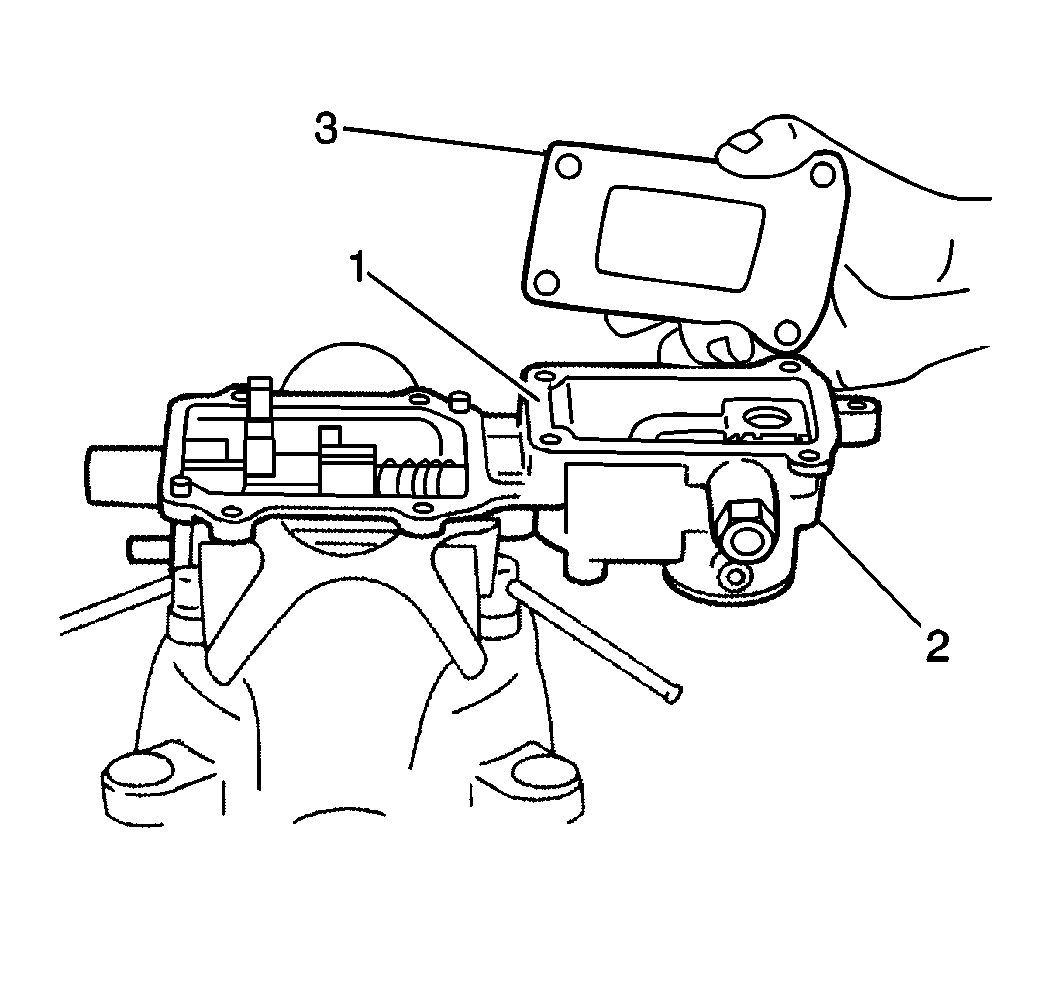
- Unstake the gearshift lever case plug.
- Remove the gearshift lever
case plug (1) from the gearshift lever case (2).

- Remove the gearshift shaft
(4) from the gearshift lever case while removing the following components
from the gearshift shaft:
| 10.1. | The gearshift lever (3) |
| 10.2. | The reverse gearshift limit yoke (1) |
| 10.3. | The gearshift limit spring (2) |
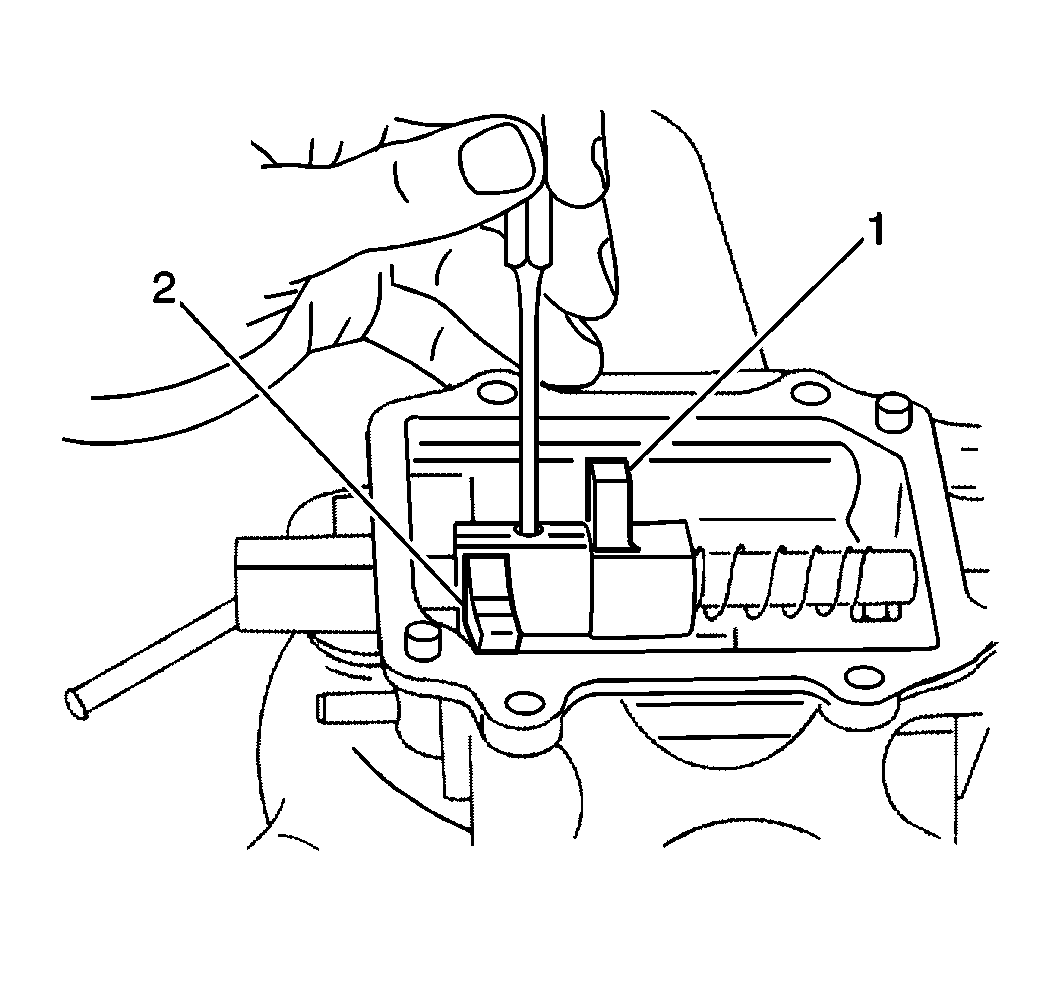
- Remove the gearshift limit
bolt (1) from the gearshift lever case.
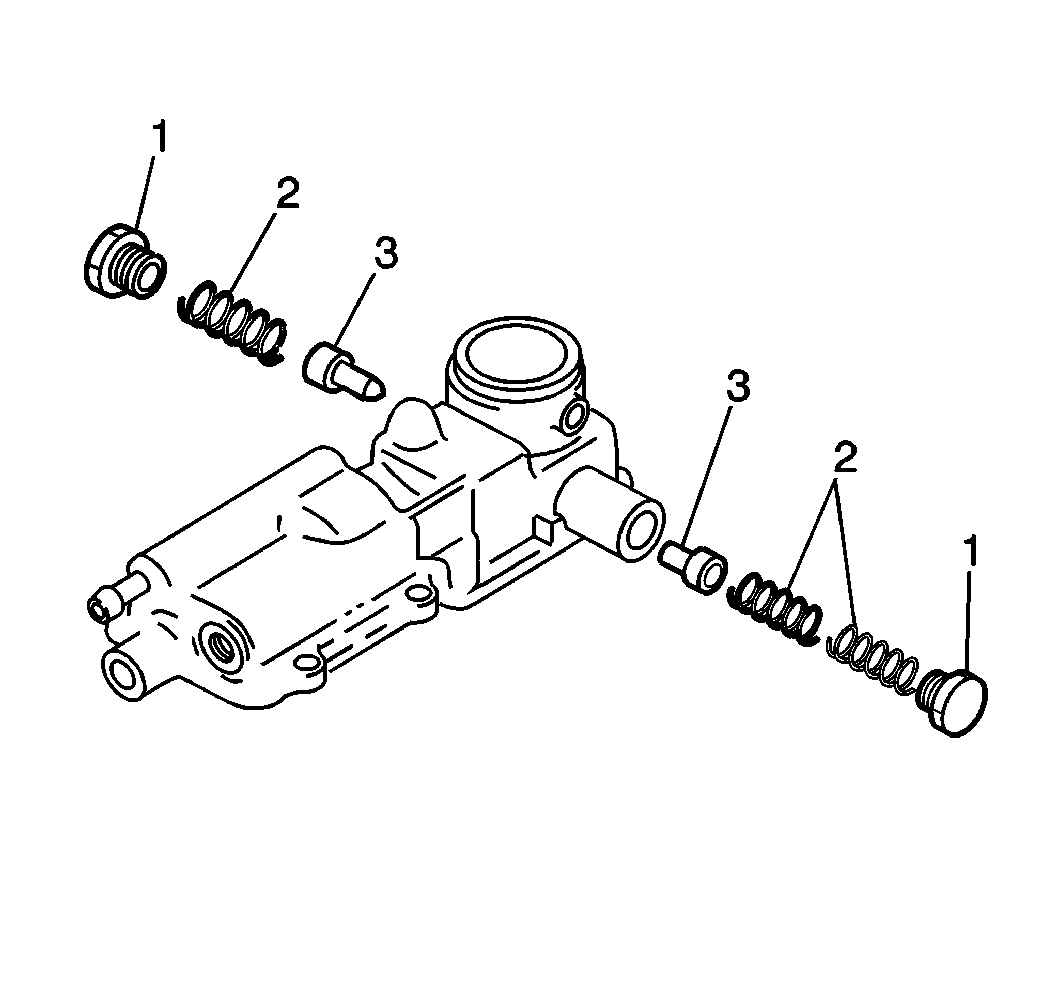
- Remove the following components
from the gearshift lever case:
| 12.1. | The 2 lever locating bolts (1) |
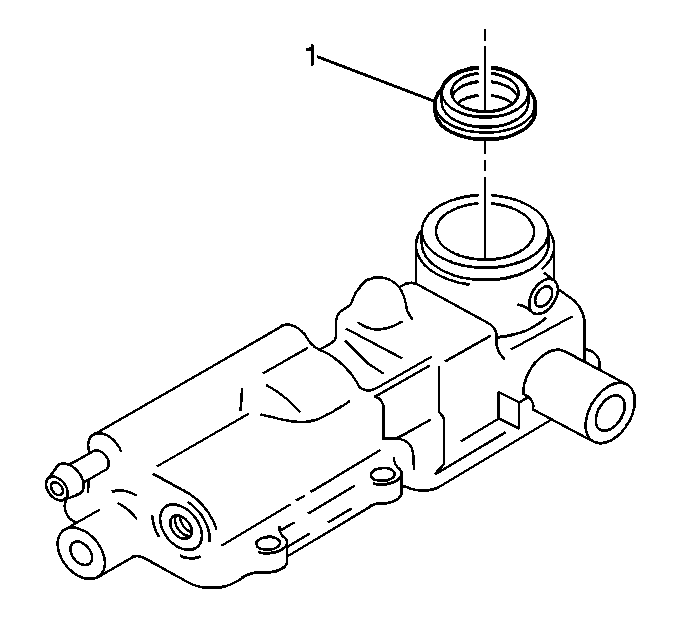
- Remove the gearshift lever
case seat (1) from the gearshift lever case.
- Clean the gearshift lever case mating surfaces.
- Use solvent in order to clean all of the gearshift lever case
components. Air dry the components.
- Inspect the gearshift shaft:
| 16.1. | Insert the gearshift shaft into the gearshift lever case. |
| 16.2. | Move the gearshift shaft back and forth. Ensure that the gearshift
shaft does not bind. |
| 16.3. | If the gearshift shaft does not move freely in and out of the
gearshift lever case, replace the gearshift lever case and the gearshift shaft. |
- Inspect the following components for smooth fit and movement on
the gearshift shaft:
| • | The reverse gearshift limit yoke |
| • | If any of these components bind on the gearshift shaft, replace them
all. |
- Inspect the gearshift limit spring for weakness or distortion.
Replace as necessary.
- Inspect the gearshift control lever bushing for excessive wear.
Replace as necessary.
- Inspect the gearshaft lever case seat for excessive wear.
Replace as necessary.
Installation Procedure
- Apply a thin coat of J 36850
to all of the components prior to assembly.
- Install the gearshift lever case seat into the gearshift lever
case.
Notice: Use the correct fastener in the correct location. Replacement fasteners
must be the correct part number for that application. Fasteners requiring
replacement or fasteners requiring the use of thread locking compound or sealant
are identified in the service procedure. Do not use paints, lubricants, or
corrosion inhibitors on fasteners or fastener joint surfaces unless specified.
These coatings affect fastener torque and joint clamping force and may damage
the fastener. Use the correct tightening sequence and specifications when
installing fasteners in order to avoid damage to parts and systems.
- Install the following
components into the gearshift lever case:
| 3.1. | The two lever locating bolts (1) |
Tighten
Tighten the lever locating bolts to 20 N·m (15 lb ft).
- Install the reverse gearshift
limit bolt (1) into the gearshift lever case.
Tighten
Tighten the reverse gearshift limit bolt to 35 N·m (26 lb ft).
Important: Position the portion of the gearshift shaft which has been machined
flat so that it faces downward, toward the inside of the gearshift lever case,
in order to ensure correct installation.
- Install the gearshift shaft (4) into the gearshift lever case while
installing the following components onto the gearshift shaft:
| 5.1. | The gearshift lever (3) |
| 5.2. | The reverse gearshift limit yoke (1) |
| 5.3. | The gearshift limit spring (2) |
- Install the gearshift lever case plug into the gearshift lever
case.
- Stake the gearshift lever case plug in 2 places.
- Install one roll pin into the reverse gearshift limit yoke.
- Install the following
components into the gearshift arm (1) and the gearshift shaft:
- Install one roll pin into the gearshift shaft in order to retain
tension on the gearshift limit spring.
- Install the gearshift control lever bushing into the gearshift
arm.
- Install one inner and one outer roll pin into the gearshift arm
and the gearshift shaft.
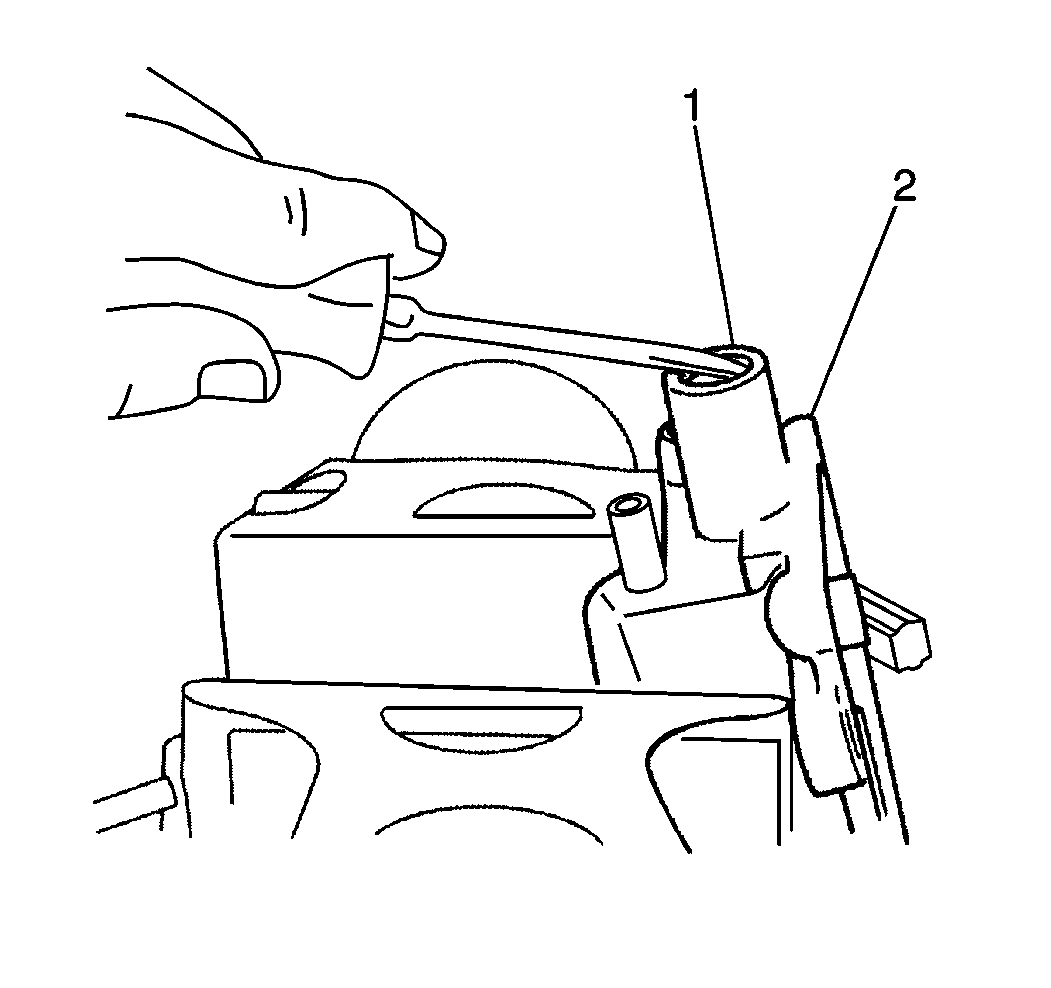
- Attach the hooked end
of the gearshift limit spring (3) around the roll pin (1).
Wind the gearshift limit spring until the straight end can be fitted
into the groove on the reverse gearshift limit yoke.
- Install the following
components into the gearshift lever case:
| 14.1. | The 2 select guide pins (3) |
| 14.2. | The 3 select return springs (2) |
| 14.3. | The 2 select return spring bolts (1) |
Tighten
Tighten the select return spring bolts to 23 N·m (17 lb ft).
- Apply Loctite™ 414 GM P/N 1345493 or equivalent to the threaded
portion of the reverse gearshift limit bolt.
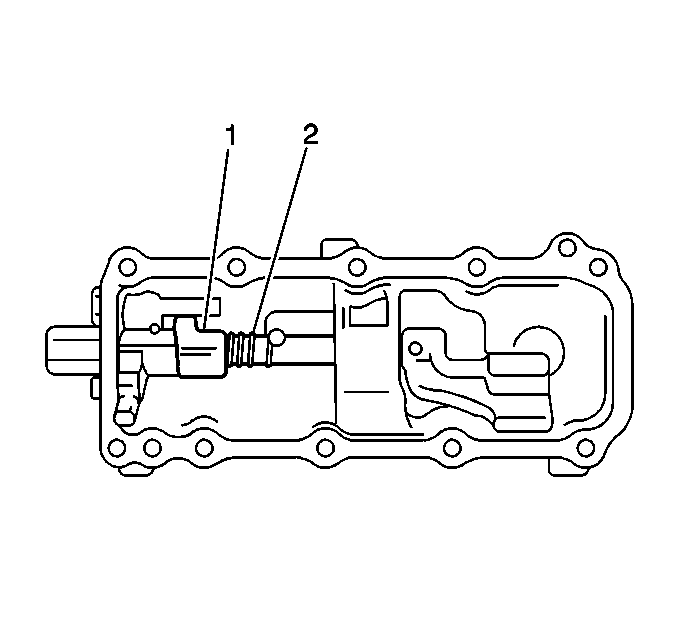
- Apply Loctite™ 599
RTV silicone sealer or equivalent to the gearshift lever case plate mating
surface (1) on the gearshift lever case (2).
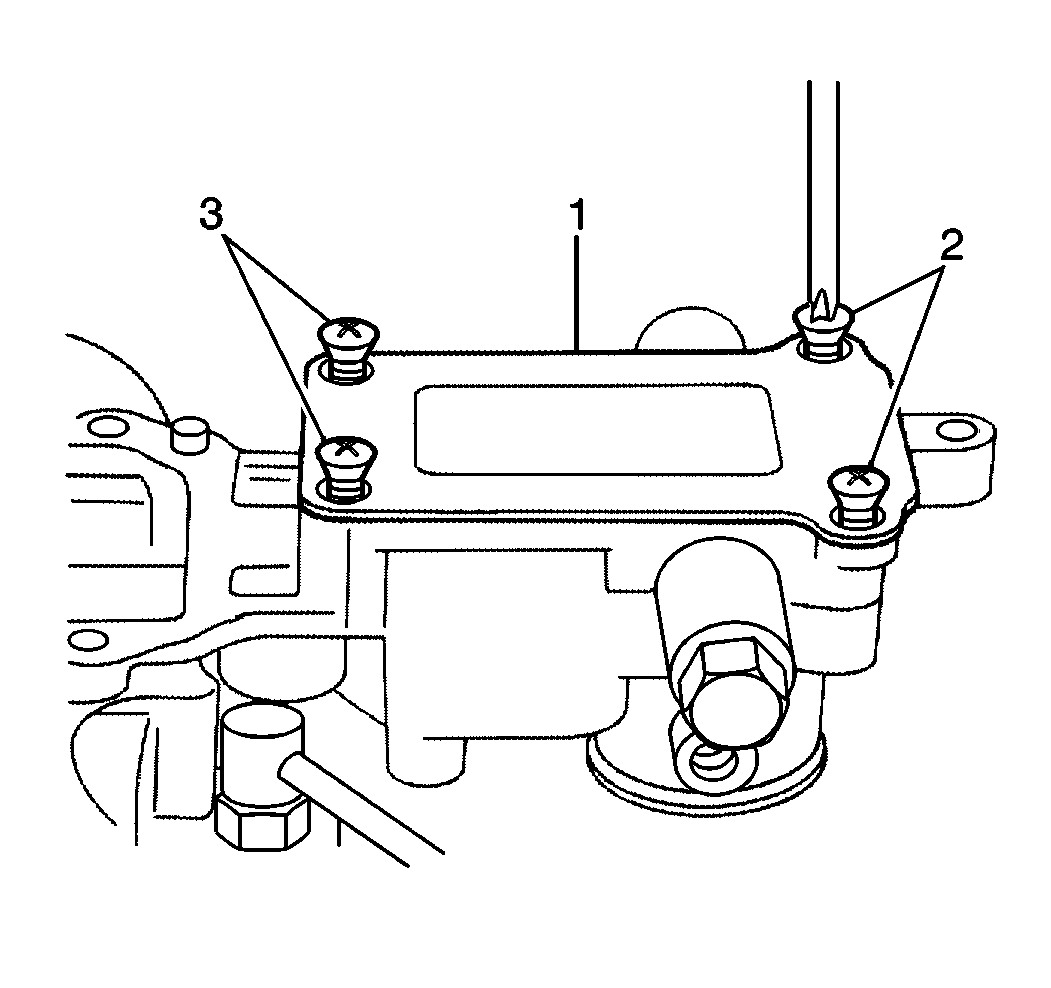
- Install the gearshift lever case plate (3) onto the bottom of
the gearshift lever case (2).
Secure the gearshift lever case plate (3) with the 4 screws.
Gearshift Lever Case Replacement 2WD
Tools Required
J 36850 Transjel®
Transmission Assembly Lubricant
Removal Procedure
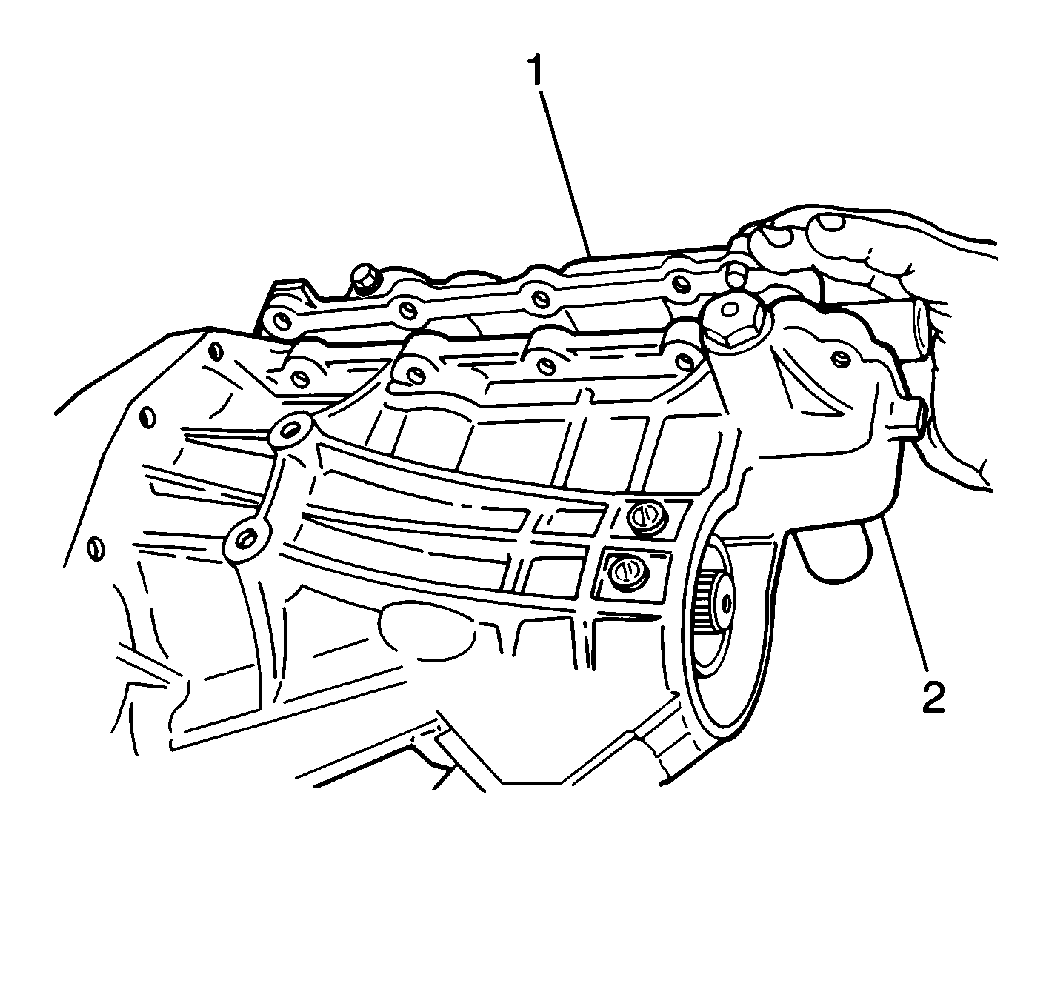
- Remove the ten bolts and
the gearshift lever case (1) from the extension case (2).
- Remove the following components
from the gearshift shaft (12):
- Remove the gearshift control lever bushing (4) from the gearshift
arm (5).
- Remove 1 roll pin (6) from the gearshift shaft (12).
The removal will release tension on the gearshift limit spring (7).
- Remove the following components from the gearshift lever (8):
- Unstake the gearshift lever case plug (11).
- Remove the gearshift lever case plug (11) from the gearshift lever
case (1).
- Remove the gearshift shaft (12) from the gearshift lever case
(1) while removing the following components as a unit from the gearshift shaft
(12):
| • | The gearshift lever (8) |
| • | The reverse gearshift limit yoke (10) |
| • | The gearshift limit spring (7) |
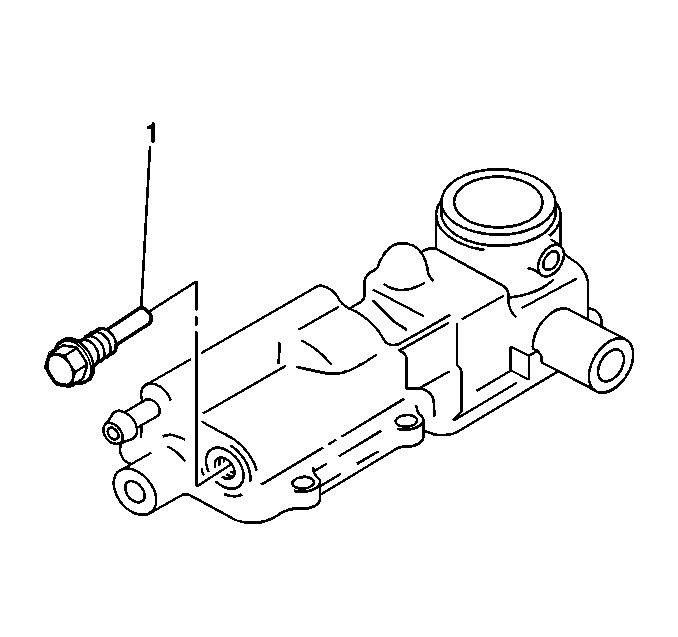
- Remove the reverse gearshift limit bolt (13) from the gearshift
lever case (1).
- Remove the following components from the gearshift lever case
:
| • | The lever locating bolts (1) |
- Remove the gearshift lever case seat (1) from the gearshift lever
case.
- Clean all the components thoroughly with solvent. Air dry the
components.
- Use the following procedure in order to inspect the gearshift
shaft:
| 13.1. | Insert the gearshift shaft into the lever case. |
| 13.2. | Work the gearshift shaft back and forth in order to feel for any
binding. |
| 13.3. | If the gearshift shaft does not move freely in and out of the
gearshift lever case, replace the gearshift lever case and the gearshift shaft. |
- Inspect the following components for smooth fit and movement on
the gearshift shaft:
| • | The reverse gearshift limit yoke |
| • | If any of the following components bind on the gearshift shaft, replace
the components: |
| - | The reverse gearshift limit yoke |
- Inspect the gearshift limit spring for weakness or distortion.
Replace the spring as necessary.
- Inspect the gearshift control lever bushing for excessive wear.
Replace the bushing as necessary.
- Inspect the gearshift lever case seat for excessive wear. Replace
the gearshift lever case seat as necessary.
Installation Procedure
- Apply J 36850
to
all of the components prior to assembly.
- Install the gearshift lever case seat into the gearshift lever
case.
Notice: Use the correct fastener in the correct location. Replacement fasteners
must be the correct part number for that application. Fasteners requiring
replacement or fasteners requiring the use of thread locking compound or sealant
are identified in the service procedure. Do not use paints, lubricants, or
corrosion inhibitors on fasteners or fastener joint surfaces unless specified.
These coatings affect fastener torque and joint clamping force and may damage
the fastener. Use the correct tightening sequence and specifications when
installing fasteners in order to avoid damage to parts and systems.
- Install the following
components into the gearshift lever case:
| • | The lever locating bolts (1) |
Tighten
Tighten the lever locating bolts to 20 N·m (15 lb ft).
- Apply Loctite™ 414 GM P/N 12345493 or equivalent to the
threaded portion of the reverse gearshift limit bolt.
- Install the reverse gearshift limit bolt into the gearshift lever
case.
Tighten
Tighten the reverse gearshift limit bolt to 35 N·m (26 lb ft).
Important: The portion of the gearshift shaft which has been machined flat must
be facing downward toward the inside of the gearshift lever case for correct
installation.
- Install the gearshift shaft into the gearshift lever case while installing
the following components as a unit onto the gearshift shaft:
| • | The reverse gearshift limit yoke |
| • | The gearshift limit spring |
- Install the gearshift lever case plug into the gearshift lever
case.
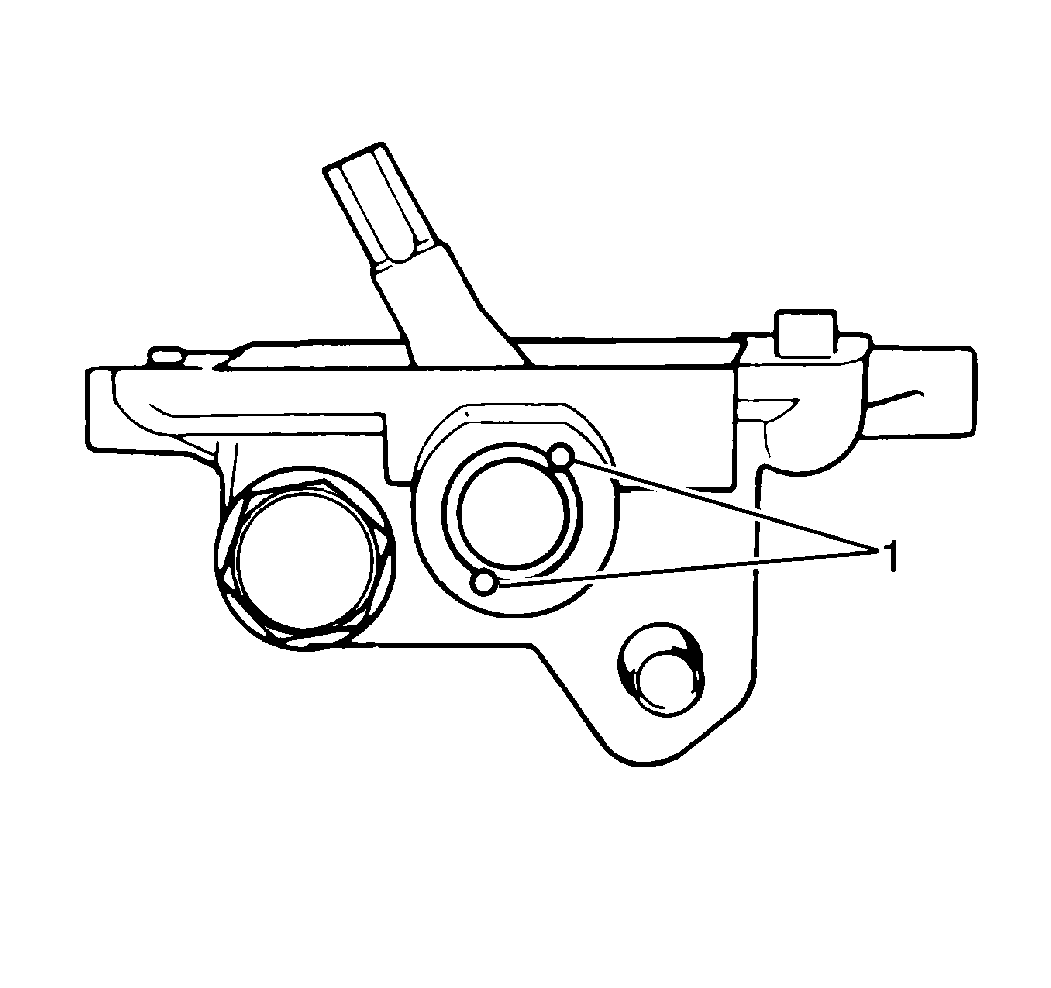
- Stake the gearshift lever
case plug in 2 places (1).
- Install the following components into the gearshift lever:
- Install a roll pin into the gearshift shaft in order to retain
tension on the gearshift limit spring.
- Install the following components into the gearshift arm and the
gearshift shaft:
- Attach the hooked end
of the gearshift limit spring (2) around the roll pin.
Wind the gearshift limit spring until the straight end can be fitted
into the groove on the reverse gearshift limit yoke (1).
- Install the gearshift
lever case (1) and the 10 bolts to the extension case (2).
Tighten
Tighten the 10 bolts to 17 N·m (12 lb ft).
