Tools Required
J 28458 Seal Protector Retainer Installer
Removal Procedure
- Remove the transmission filter. Refer to Automatic Transmission Fluid and Filter Replacement .
- Disconnect the transmission harness 20-way connector (1) from the transmission internal harness pass-through connector.
- Remove the 1-2 accumulator. Do not remove the spacer plate. Refer to Accumulator Assembly, Spacer Plate, and Gaskets .
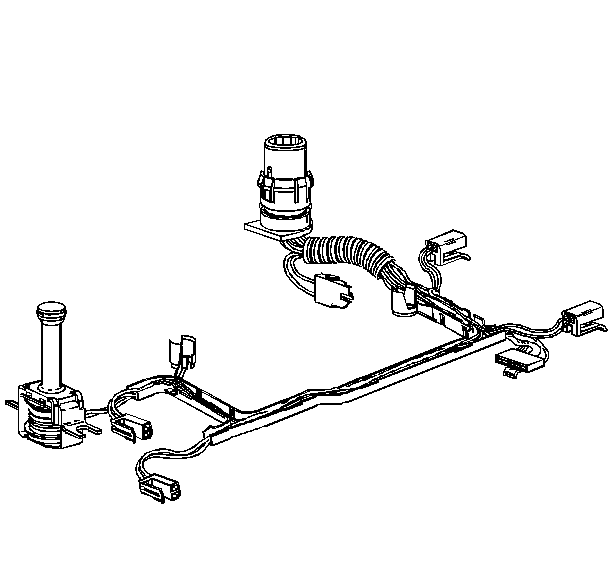
- Disconnect the internal wiring harness electrical connectors from the following components:
- Remove the TCC PWM solenoid retainer.
- Remove the TCC PWM solenoid in order to access one of the TCC solenoid bolts.
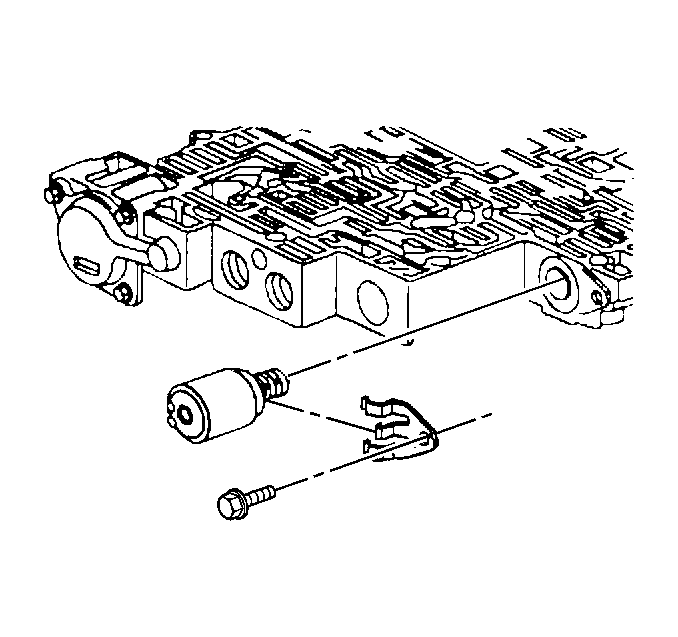
- Remove the pressure control solenoid retainer.
- Remove the pressure control solenoid.
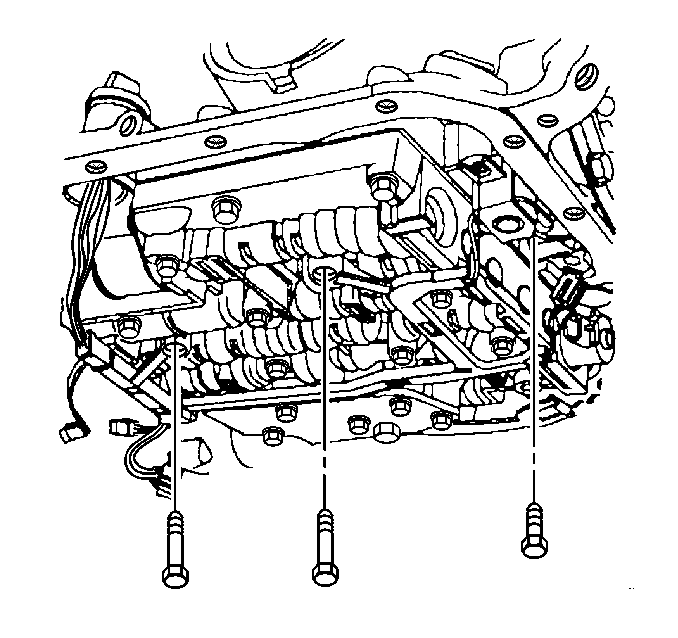
- Remove the TCC solenoid bolts and the valve body bolts which retain the internal wiring harness.
- Using J 28458 , release the pass-through electrical connector from the transmission case.
- Remove the TCC solenoid (with O-ring seal) and wiring harness.
- Inspect the TCC solenoid and wiring harness for the following defects:
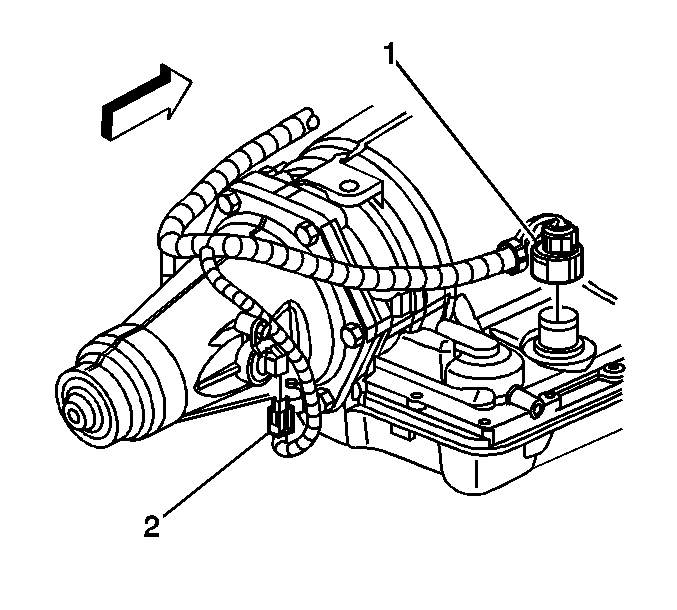
Depress both tabs on the connector and pull straight up; do not pry the connector.
Important: Removal of the valve body is not necessary for the following procedure.
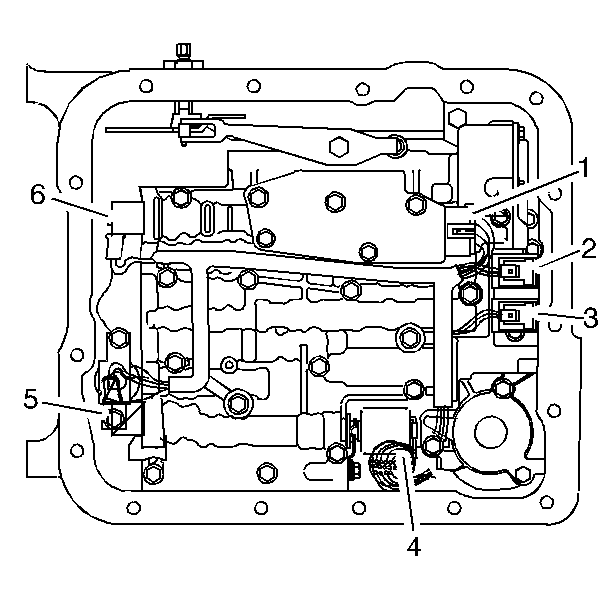
| • | Transmission fluid pressure switch (1) |
| • | 1-2 shift control solenoid (2) |
| • | 2-3 shift control solenoid (3) |
| • | Pressure control solenoid (4) |
| • | Torque converter clutch pulse width modulation (TCC PWM) solenoid (5) |
| • | 3-2 control solenoid (6) |
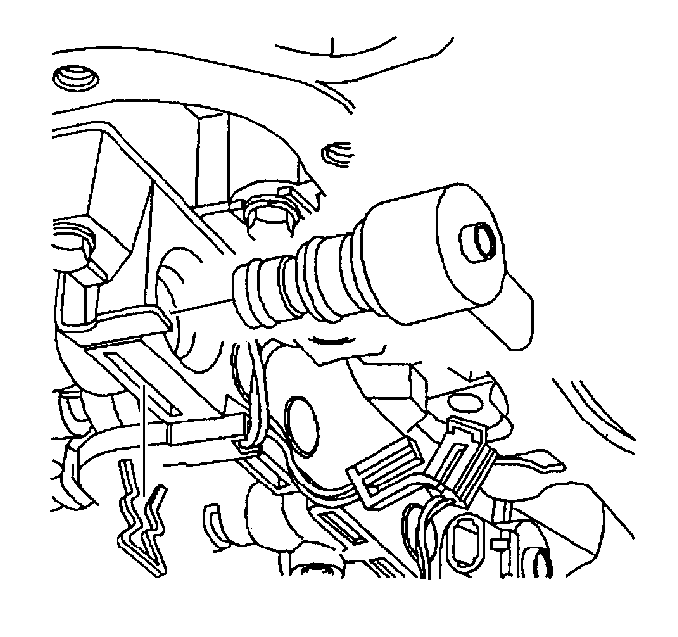
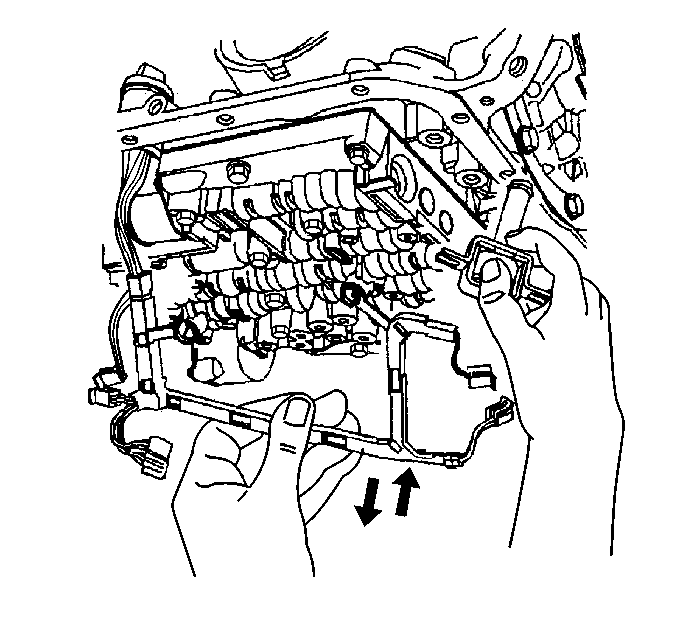
| 10.1. | Use the small end of the J 28458 over the top of the connector. |
| 10.2. | Twist in order to release the four tabs retaining the connector. |
| 10.3. | Pull the harness connector down through the transmission case. |
| • | Damage |
| • | Cracked connectors |
| • | Exposed wires |
| • | Loose pins |
Installation Procedure
- Install the wiring harness and TCC solenoid with a new O-ring seal to the transmission.
- Install the pass-through electrical connector to the transmission case.
- Install the valve body bolts which retain the internal wiring harness and install the TCC solenoid bolts.
- Install the pressure control solenoid.
- Install the pressure control solenoid retainer and bolt.
- Install the TCC PWM solenoid to the control valve body.
- Install the TCC PWM solenoid retainer.
- Connect the internal wiring harness electrical connectors to the following components:
- Install the 1-2 accumulator. Refer to Accumulator Assembly, Spacer Plate, and Gaskets .
- Connect the transmission harness 20-way connector (1) to the transmission pass-through connector.
- Install the transmission filter. Refer to Automatic Transmission Fluid and Filter Replacement .
- Reset the TAP values. Refer to Transmission Adaptive Functions .
Notice: Use the correct fastener in the correct location. Replacement fasteners must be the correct part number for that application. Fasteners requiring replacement or fasteners requiring the use of thread locking compound or sealant are identified in the service procedure. Do not use paints, lubricants, or corrosion inhibitors on fasteners or fastener joint surfaces unless specified. These coatings affect fastener torque and joint clamping force and may damage the fastener. Use the correct tightening sequence and specifications when installing fasteners in order to avoid damage to parts and systems.
Tighten
| • | Tighten the control valve body bolts to 11 N·m (97 lb in). |
| • | Tighten the TCC solenoid bolts to 11 N·m (97 lb in). |
Ensure that the electrical tabs are facing outboard.
Tighten
Tighten the bolt to 11 N·m (97 lb in).
| • | Transmission fluid pressure switch (1) |
| • | 1-2 shift control solenoid (2) |
| • | 2-3 shift control solenoid (3) |
| • | Pressure control solenoid (4) |
| • | TCC PWM solenoid (5) |
| • | 3-2 control solenoid (6) |
Align the arrows on each half of the connector and insert straight down.
Important: It is recommended that transmission adaptive pressure (TAP) information be reset.
Resetting the TAP values using a scan tool will erase all learned values in all cells. As a result, The ECM, PCM or TCM will need to relearn TAP values. Transmission performance may be affected as new TAP values are learned.