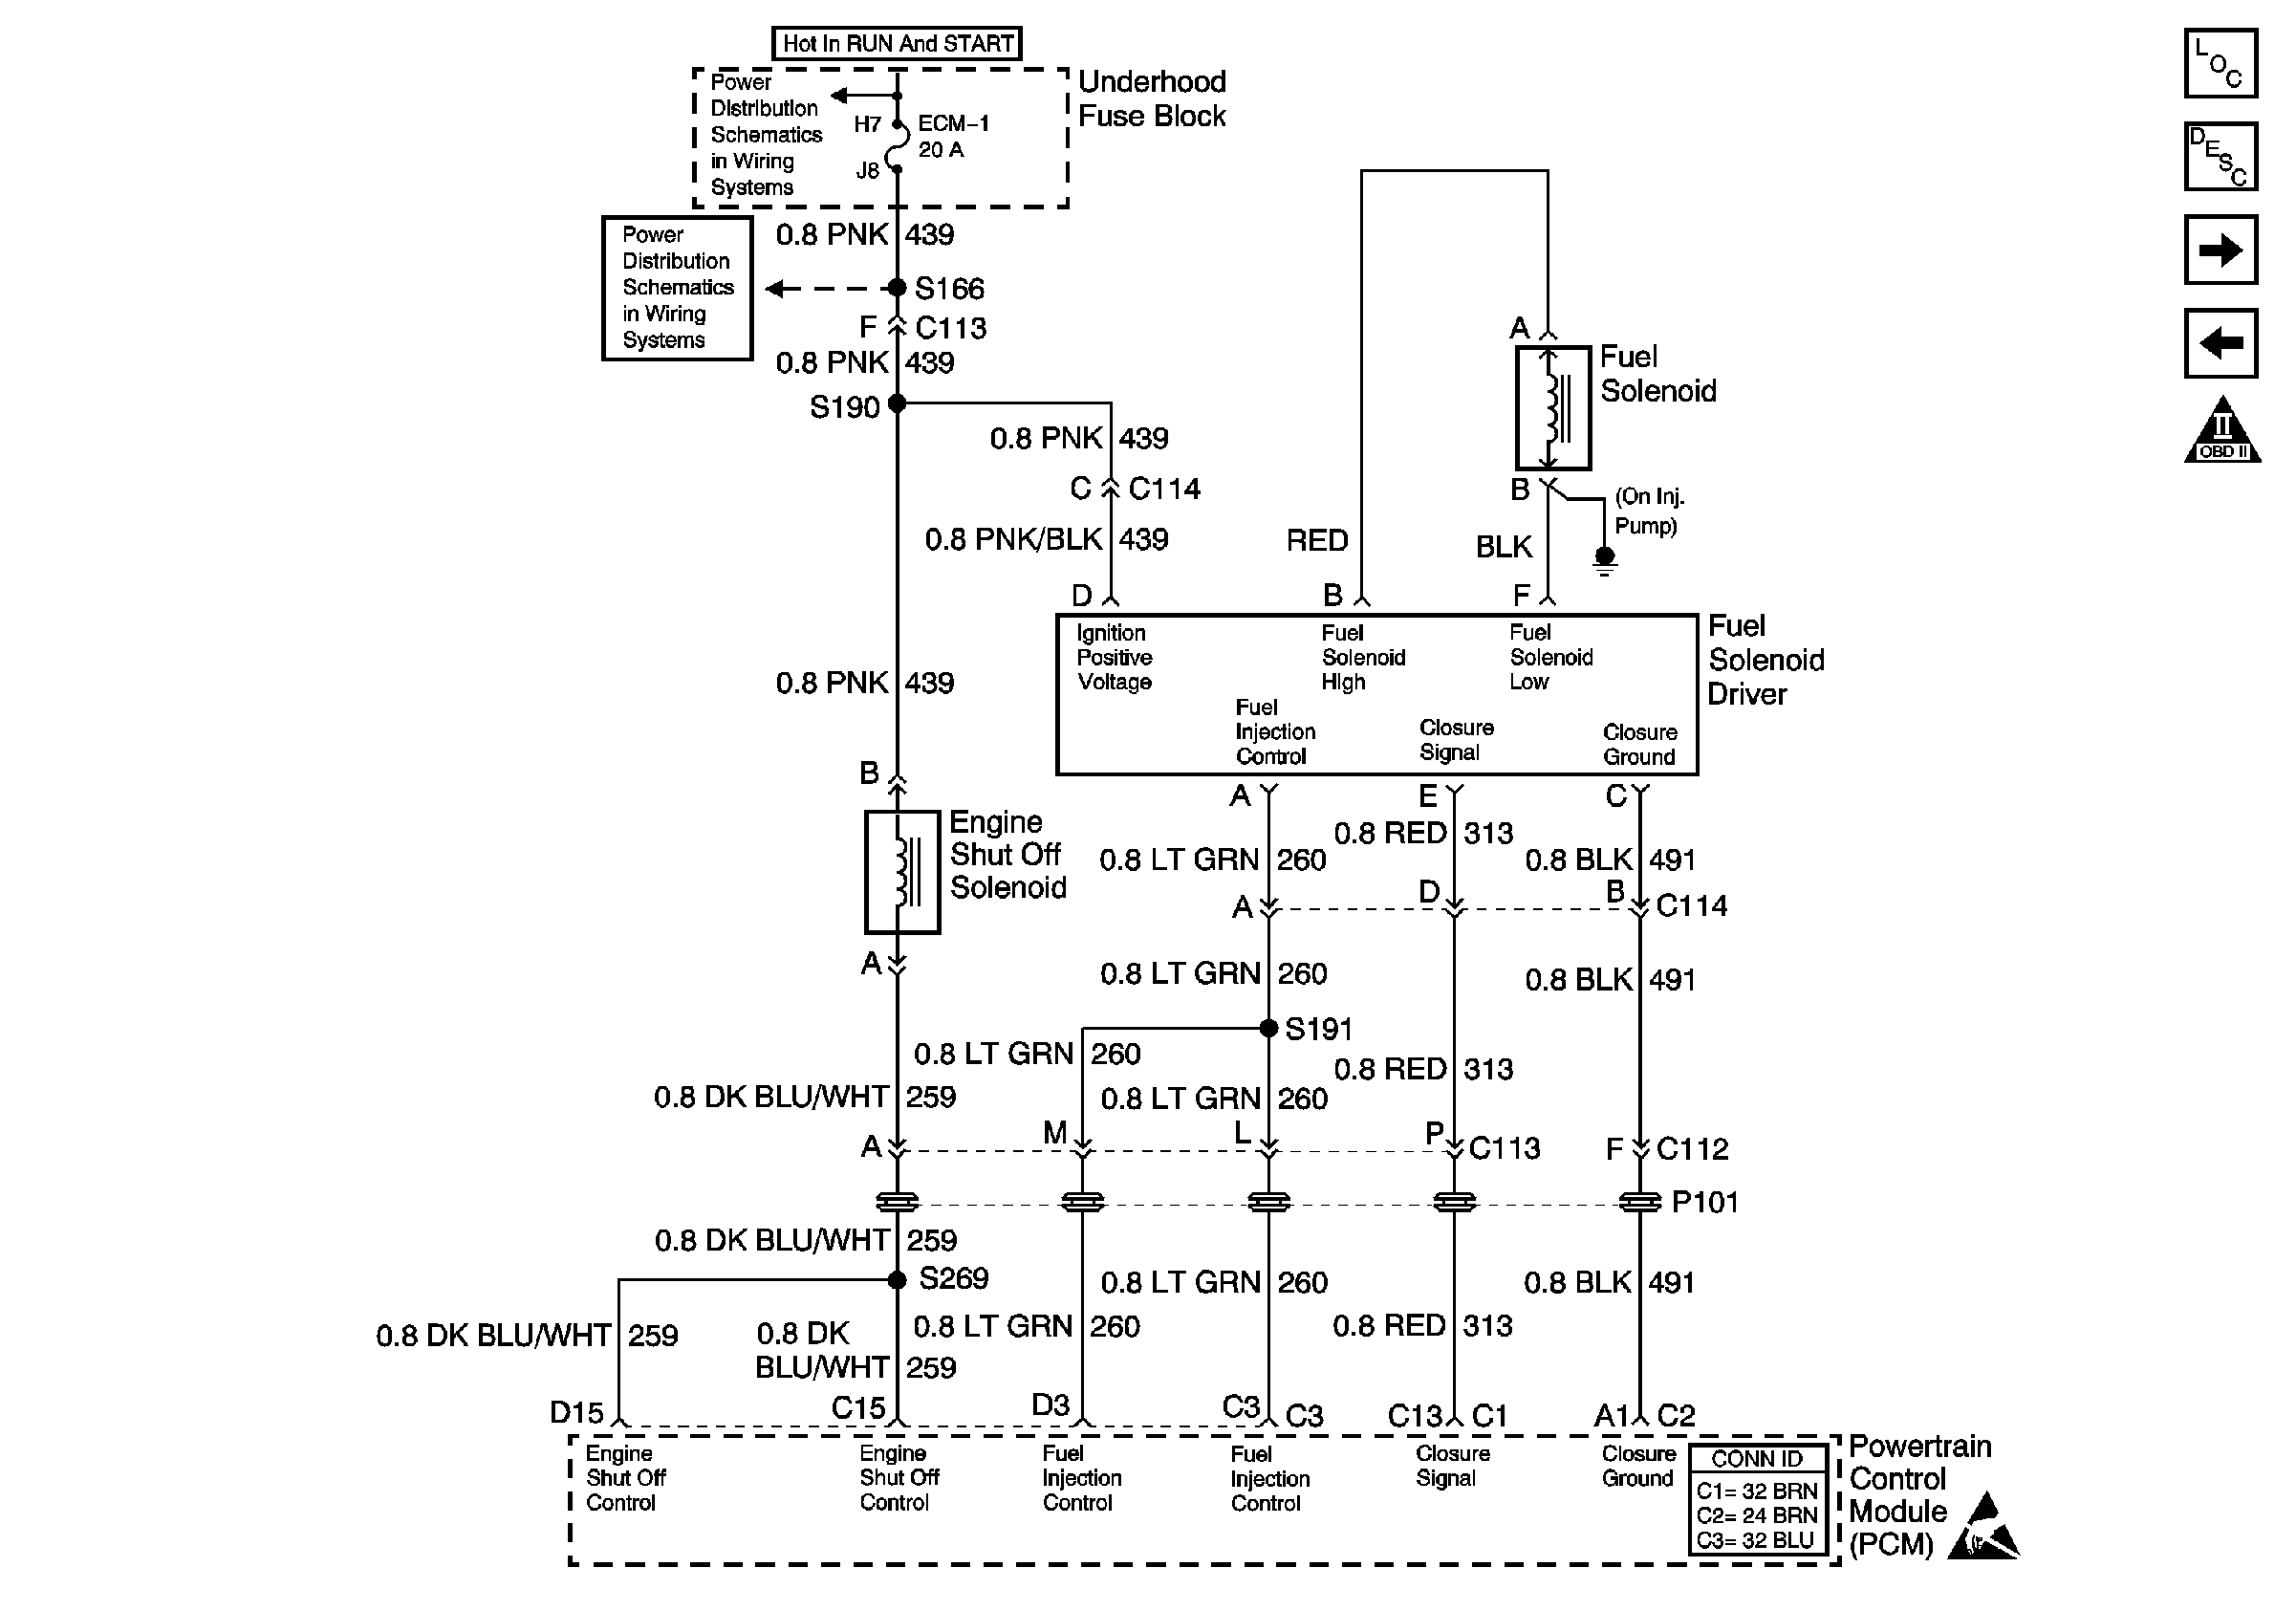
Refer to Engine Controls Schematics
Engine Shutoff Solenoid, Fuel Solenoid and Module
.
Circuit Description
This chart assumes that battery condition and engine cranking speed is OK. The quantity and quality of fuel is OK and the glow plug system is operating properly.
Diagnostic Aids
If no trouble is found and the cause of an Engine Cranks But Will Not Run has not been found, check for the following conditions:
| • | Proper cranking speed, 100 RPMs cold - 180 RPMs hot (a scan tool can be used to check cranking speed by pulling the FUEL SOL fuse and monitoring engine speed on scan tool while cranking) |
| • | Water or foreign material in fuel system |
| • | Basic engine problem |
If the crankshaft position sensor and the optical/fuel temperature sensor are disconnected or malfunctioning at the same time, an Engine Cranks But Will Not Run condition will exist.
Test Description
The numbers below refer to the step numbers on the diagnostic table.
-
This step checks for proper cranking speed (see Diagnostic Aids).
-
This step will check the ground wire on the injection pump (wire located on top of pump).
-
This step will determine if the injection pump or wiring is at fault.
Step | Action | Values | Yes | No |
|---|---|---|---|---|
1 |
Important: Before clearing DTCs use the Scan Tool Capture Info to record freeze frame and failure records for reference, as data will be lost when Clear Info function is used. Was the Powertrain On-Board Diagnostic (OBD) System Check performed? | -- | ||
2 | Check for proper condition of batteries. Refer to Engine Electrical. Is the condition of batteries OK? | -- | ||
3 | Check for adequate fuel in the tank. Is the fuel at an adequate level? | -- | ||
4 | Check the quality of the fuel. Is the fuel quality OK? | -- | ||
5 | Check the glow plug system operation. Refer to Glow Plug System Check . Are the glow plugs operating OK? | -- | ||
Check for the proper cranking speed. Refer to Diagnostic Aids. Is the cranking speed OK? | -- | |||
7 | Check the fuel supply system. Refer to Fuel Supply System Check . Does the fuel system operate properly? | -- | ||
Check the injection pump ground wire (located on top of the injection pump). Is the ground OK? | -- | |||
9 | Install a scan tool. Does the scan tool display data? | -- | ||
10 |
Does the VTD Fuel Disabled parameter display Active while the engine is being cranked? | -- | Go to Diagnostic System Check - Theft Deterrent in Theft Deterrent | |
11 |
Is there fuel at each injection line? | -- | ||
Disconnect the optical/fuel temperature sensor. Does the vehicle start? | -- | |||
Is the voltage more than or equal to the specified value? | 1.2 V | |||
14 |
Is the test lamp ON? | -- | ||
15 |
Is the test lamp ON? | -- | ||
16 | Replace fuel injection pump. Refer to Fuel Injection Pump Replacement . Is the action complete? | -- | -- | |
17 | The injection system is OK. Is the action complete? | -- | Go to Driveability Symptoms | -- |
18 | Check the fuel injection control circuit for an open or short to ground between the fuel solenoid driver and the PCM. Was a problem found? | -- | ||
19 | Check the closure ground circuit for an open between the fuel solenoid driver and the PCM. Was a problem found? | -- | ||
20 | Inspect the fuel solenoid driver connector and the PCM connector for a proper connection. Was a problem found? | -- | ||
21 | Repair the open in the ignition feed circuit. Is the action complete? | -- | -- | |
22 | Repair the circuit as necessary. Is the action complete? | -- | -- | |
23 | Make the appropriate repairs. Is the action complete? | -- | -- | |
24 |
Important: The new PCM must be programmed. Replace the PCM. Refer to Powertrain Control Module Replacement/Programming . Is the action complete? | -- | -- | |
25 |
Does the engine start and continue to run? | -- | ||
26 |
Are any DTCs displayed? | -- | Go to applicable DTC table | |
27 | Using the scan tool, select Capture Info, Review Info. Are any DTCs displayed that have not been diagnosed? | -- | Go to applicable DTC | System OK |
