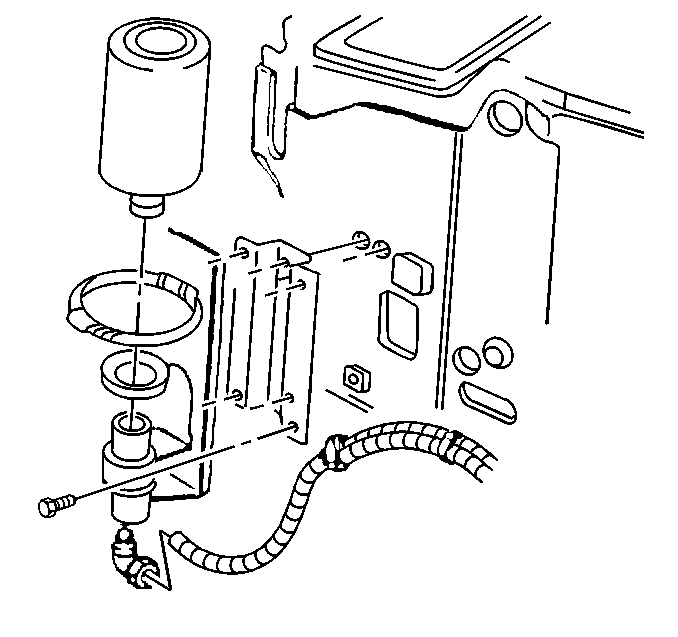
Removal Procedure
- Loosen the ether capsule bracket clamp.
- Clean all of the dirt from the neck of the ether capsule.
- Turn the capsule in a counter clockwise motion in order to remove the capsule from the control valve.
- Remove the gasket from the ether injector control valve.

Protect the top of the valve from dirt when removing the ether capsule.
Installation Procedure
- Install a new gasket to the ether capsule so the gasket rests at the bottom of the capsule neck.
- Turn the new ether capsule in a clockwise rotation until the capsule contacts the gasket in order to install the new ether capsule.
- Tighten the ether capsule another half turn (180 degrees). Do not overtighten the ether capsule.
- Tighten the ether capsule bracket clamp.
- Allow the contents of the new ether capsule to settle for 15-20 minutes before attempting to start the vehicle.

Only use one gasket. Spread a light film of clean oil on the gasket.
Important:
• Ensure that the capsule has been threaded in the control valve
correctly and tightened properly. • The gasket may inhibit observation of leakage caused by an improperly
installed capsule.
Notice: Use the correct fastener in the correct location. Replacement fasteners must be the correct part number for that application. Fasteners requiring replacement or fasteners requiring the use of thread locking compound or sealant are identified in the service procedure. Do not use paints, lubricants, or corrosion inhibitors on fasteners or fastener joint surfaces unless specified. These coatings affect fastener torque and joint clamping force and may damage the fastener. Use the correct tightening sequence and specifications when installing fasteners in order to avoid damage to parts and systems.
Tighten
Tighten the ether capsule bracket clamp to 2 N·m (18 lb in).
