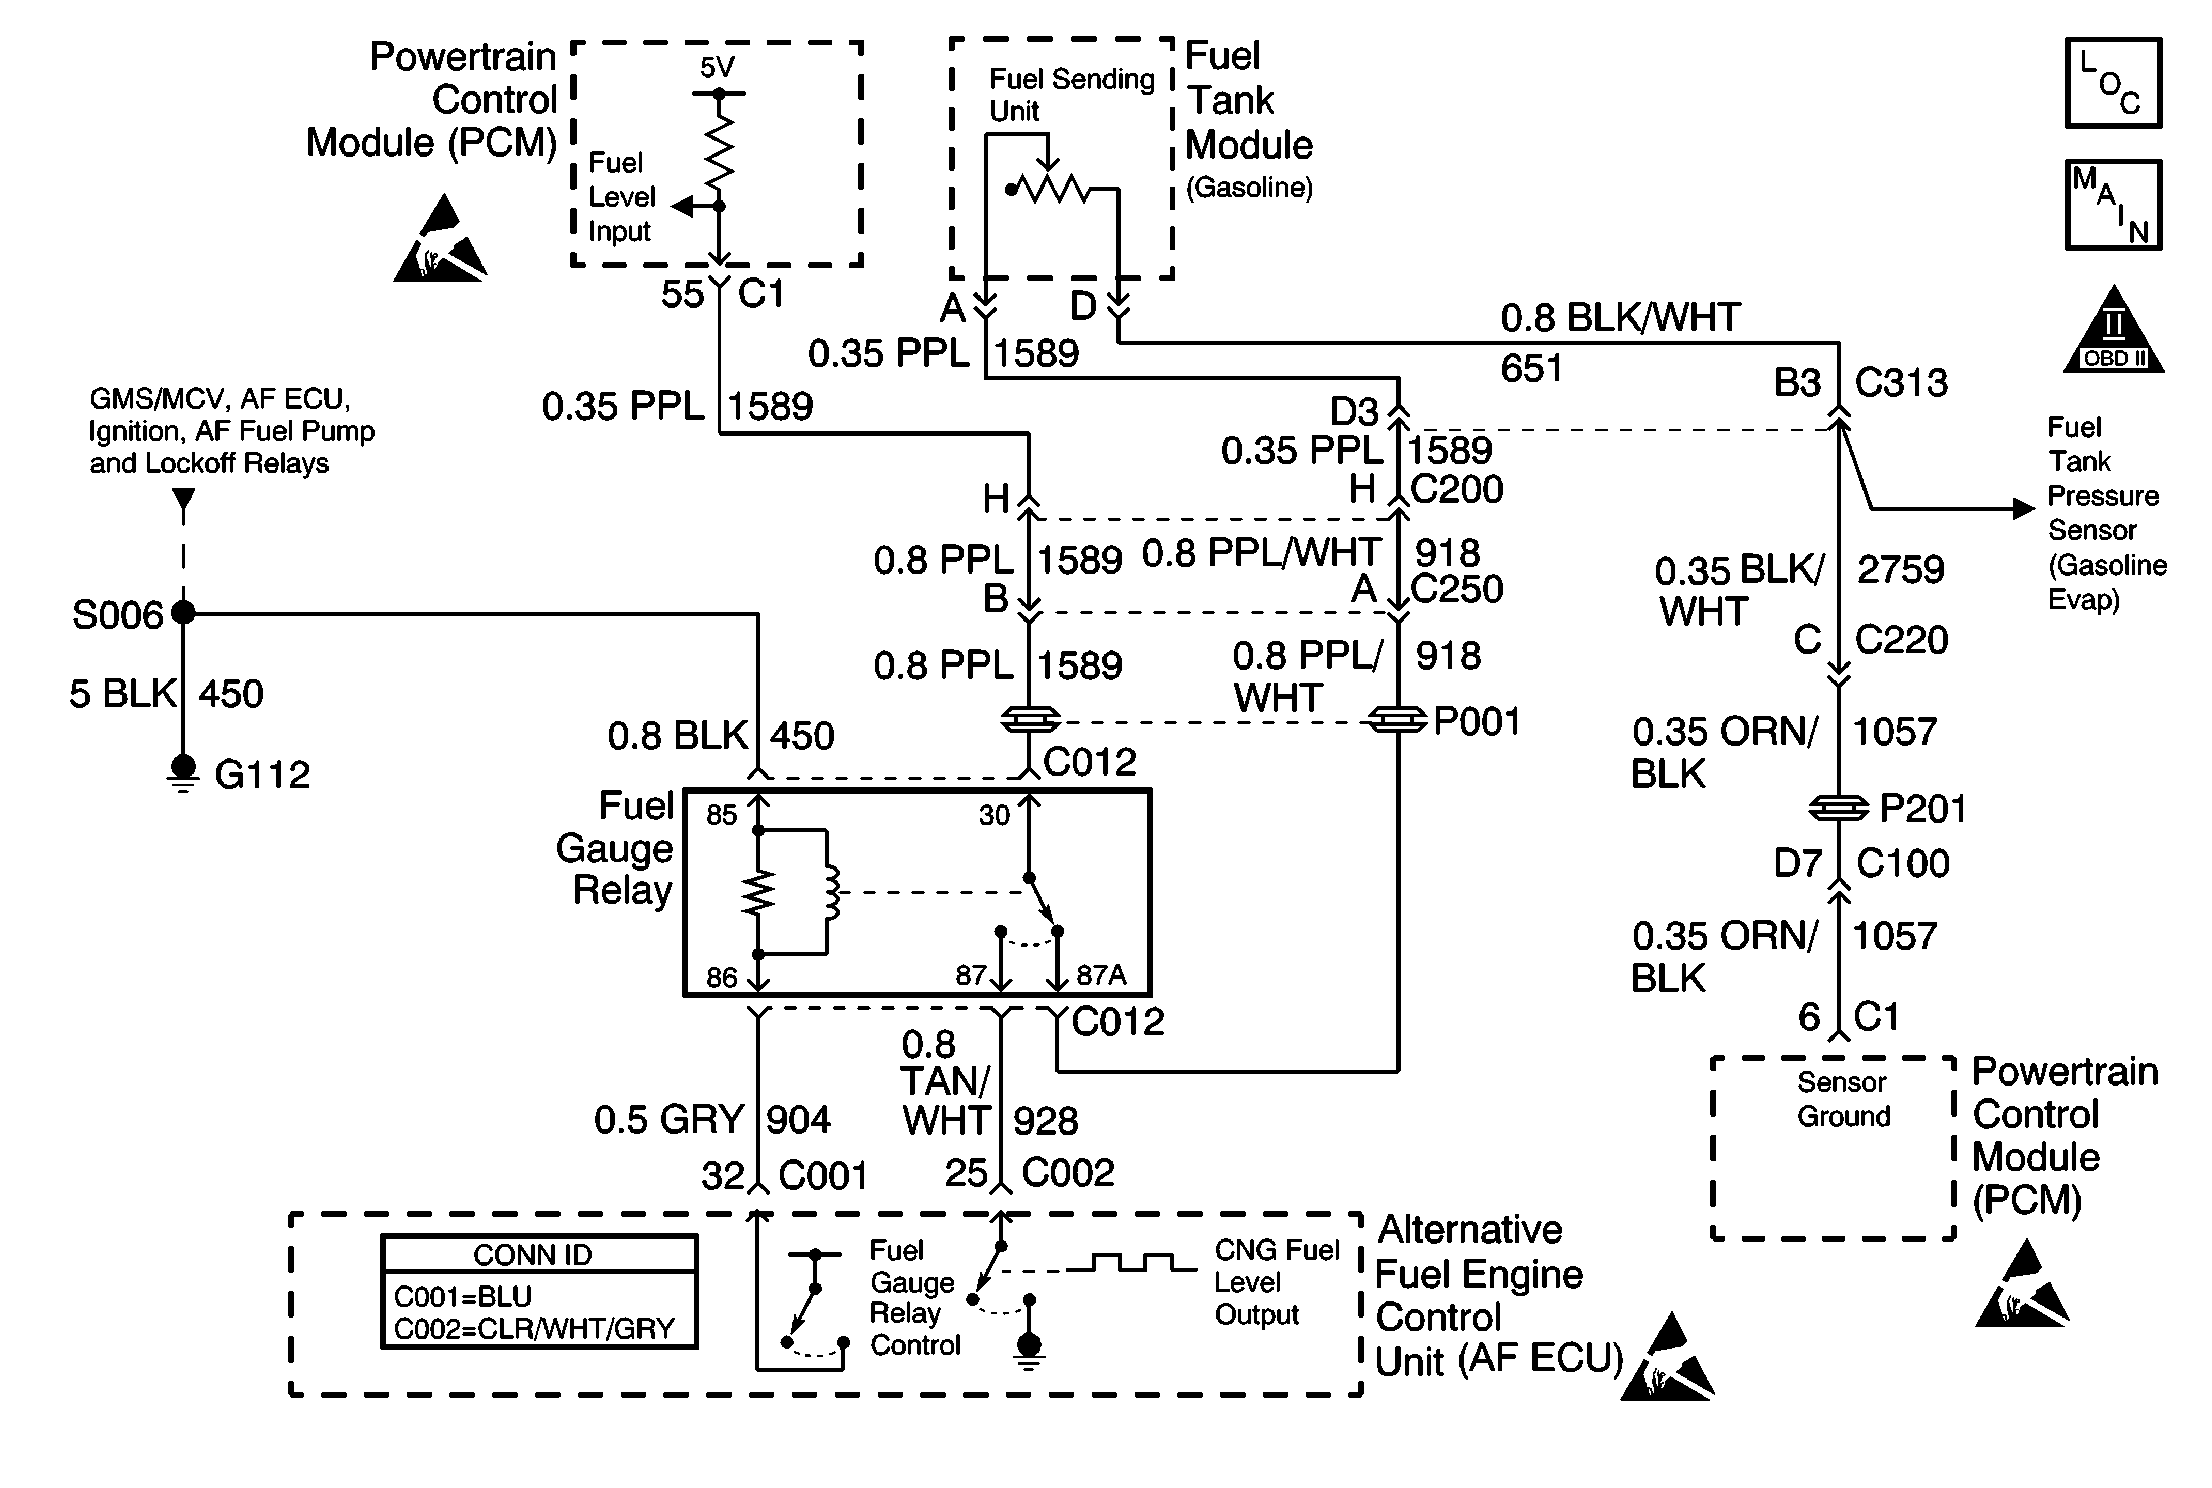
Circuit Description
The fuel gauge relay coil is supplied a ground path all the time. The coil power is supplied by the AF ECU. When the vehicle is operating in the CNG mode the AF ECU energizes the fuel gauge relay allowing the CNG Fuel Level Output to be monitored by the PCM. When the vehicle is operating in the gasoline mode the AF ECU does NOT energize the fuel gauge relay allowing the gasoline Fuel Level Output to be monitored by the PCM. The PCM sends the fuel level information to the instrument panel using the Class 2 serial data circuit.
Regardless of the fuel system in operation the AF ECU monitors the Fuel Gauge Select Switch Input circuit. When the vehicle operator depresses the switch the AF ECU will energize (when operating on gasoline) or de-energize (when operating on CNG) the fuel gauge relay causing the IP to display the DORMANT (non-operating) fuel system level. The dormant fuel level will be displayed for about 10 seconds.
Passenger vehicles have a filtered fuel level display, depress the fuel gauge select switch 30 seconds after the vehicle speed sensor indicates the vehicle is at rest in order to avoid inaccurate gauge displays.
Test Description
The number(s) below refer to the step number(s) on the diagnostic table.
-
This step tests for proper communication between the PCM and the instrument panel. Without communication the instrument panel may default the fuel gauge to empty.
-
With the vehicle operating on CNG this step inspects for PCM DTCs which may have detected a circuit fault on the CNG fuel level output or the PCM fuel level input circuits.
-
With the vehicle operating on gasoline this step inspects for PCM DTCs which may have detected a circuit fault on the fuel level sending unit (gasoline) circuits.
Step | Action | Value(s) | Yes | No |
|---|---|---|---|---|
1 |
Important: The vehicle must operate on CNG in order to use this diagnostic procedure. Were you sent here from other diagnostic service information? | -- | Go to Step 2 | Go to Alternative Fuels (AF) Powertrain On Board (OBD) System Check |
2 |
Does the relay turn ON and OFF as commanded? | -- | Go to Step 3 | Go to Step 11 |
Inspect the PCM for stored DTCs. Is a PCM to IPC serial data DTC present? | -- | Go to Step 4 | ||
Is a PCM Fuel Level Sensor DTC present? | -- | Go to Step 8 | Go to Step 5 | |
Is a PCM Fuel Level Sensor DTC present? | -- | Go to Step 10 | Go to Step 6 | |
6 | Is there a gasoline fuel gauge accuracy concern? | -- | Go to Body and Accessories in the J platform service manual | Go to Step 7 |
7 | Is there a CNG fuel gauge accuracy concern? | -- | System OK | |
8 |
Is the voltage within the value range specified? | 4.8 - 5.2V | Go to Step 9 | Go to Step 13 |
9 |
Does the test lamp blink and/or increase and decrease in brightness as the Fuel Gauge Output is commanded? | -- | Go to Step 18 | Go to Step 14 |
10 |
Is the resistance wthin the value range specified? | 40-250 ohms | Go to Step 18 | Go to Step 15 |
11 |
Is the test lamp illuminated? | -- | Go to Step 12 | Go to Step 17 |
12 |
Does the test lamp turn ON and OFF when the fuel gauge relay is commanded ON and OFF? | -- | Go to Step 18 | Go to Step 16 |
13 |
Was a terminal or wiring repair made? | -- | Go to Step 21 | Go to Step 20 |
14 |
Was a terminal or wiring repair made? | -- | Go to Step 21 | Go to Step 19 |
15 |
Test the fuel sending unit output circuit between the fuel gauge relay and the fuel tank module (gasoline) for an open, short to ground or short to battery positive. Was a terminal, wiring repair or fuel sending unit replacement made? | -- | Go to Step 21 | Go to Step 20 |
16 |
Was a terminal or wiring repair made? | -- | Go to Step 21 | Go to Step 19 |
17 | Repair the open fuel gauge relay ground circuit. Is the repair complete? | -- | Go to Step 21 | -- |
18 | Replace the fuel gauge relay. Is the replacement complete? | -- | Go to Step 21 | -- |
19 |
Is the replacement complete? | -- | Go to Step 21 | -- |
20 |
Important: The following control module replacement procedures must all be completed before attempting to operate the vehicle.
Important: In order to perform the variation learn procedure a switch-over to gasoline operation is necessary. Remove the CNG 20 amp fuse in order to perform the switch-over. All of the above procedures are located in the gasoline service manual. Is the replacement complete? | -- | Go to Step 21 | -- |
21 |
Does the vehicle operate on CNG with normal driveability, no FIL/MIL illumination and no stored DTCs? | -- | System OK | Go to Alternative Fuels (AF) Powertrain On Board (OBD) System Check |
