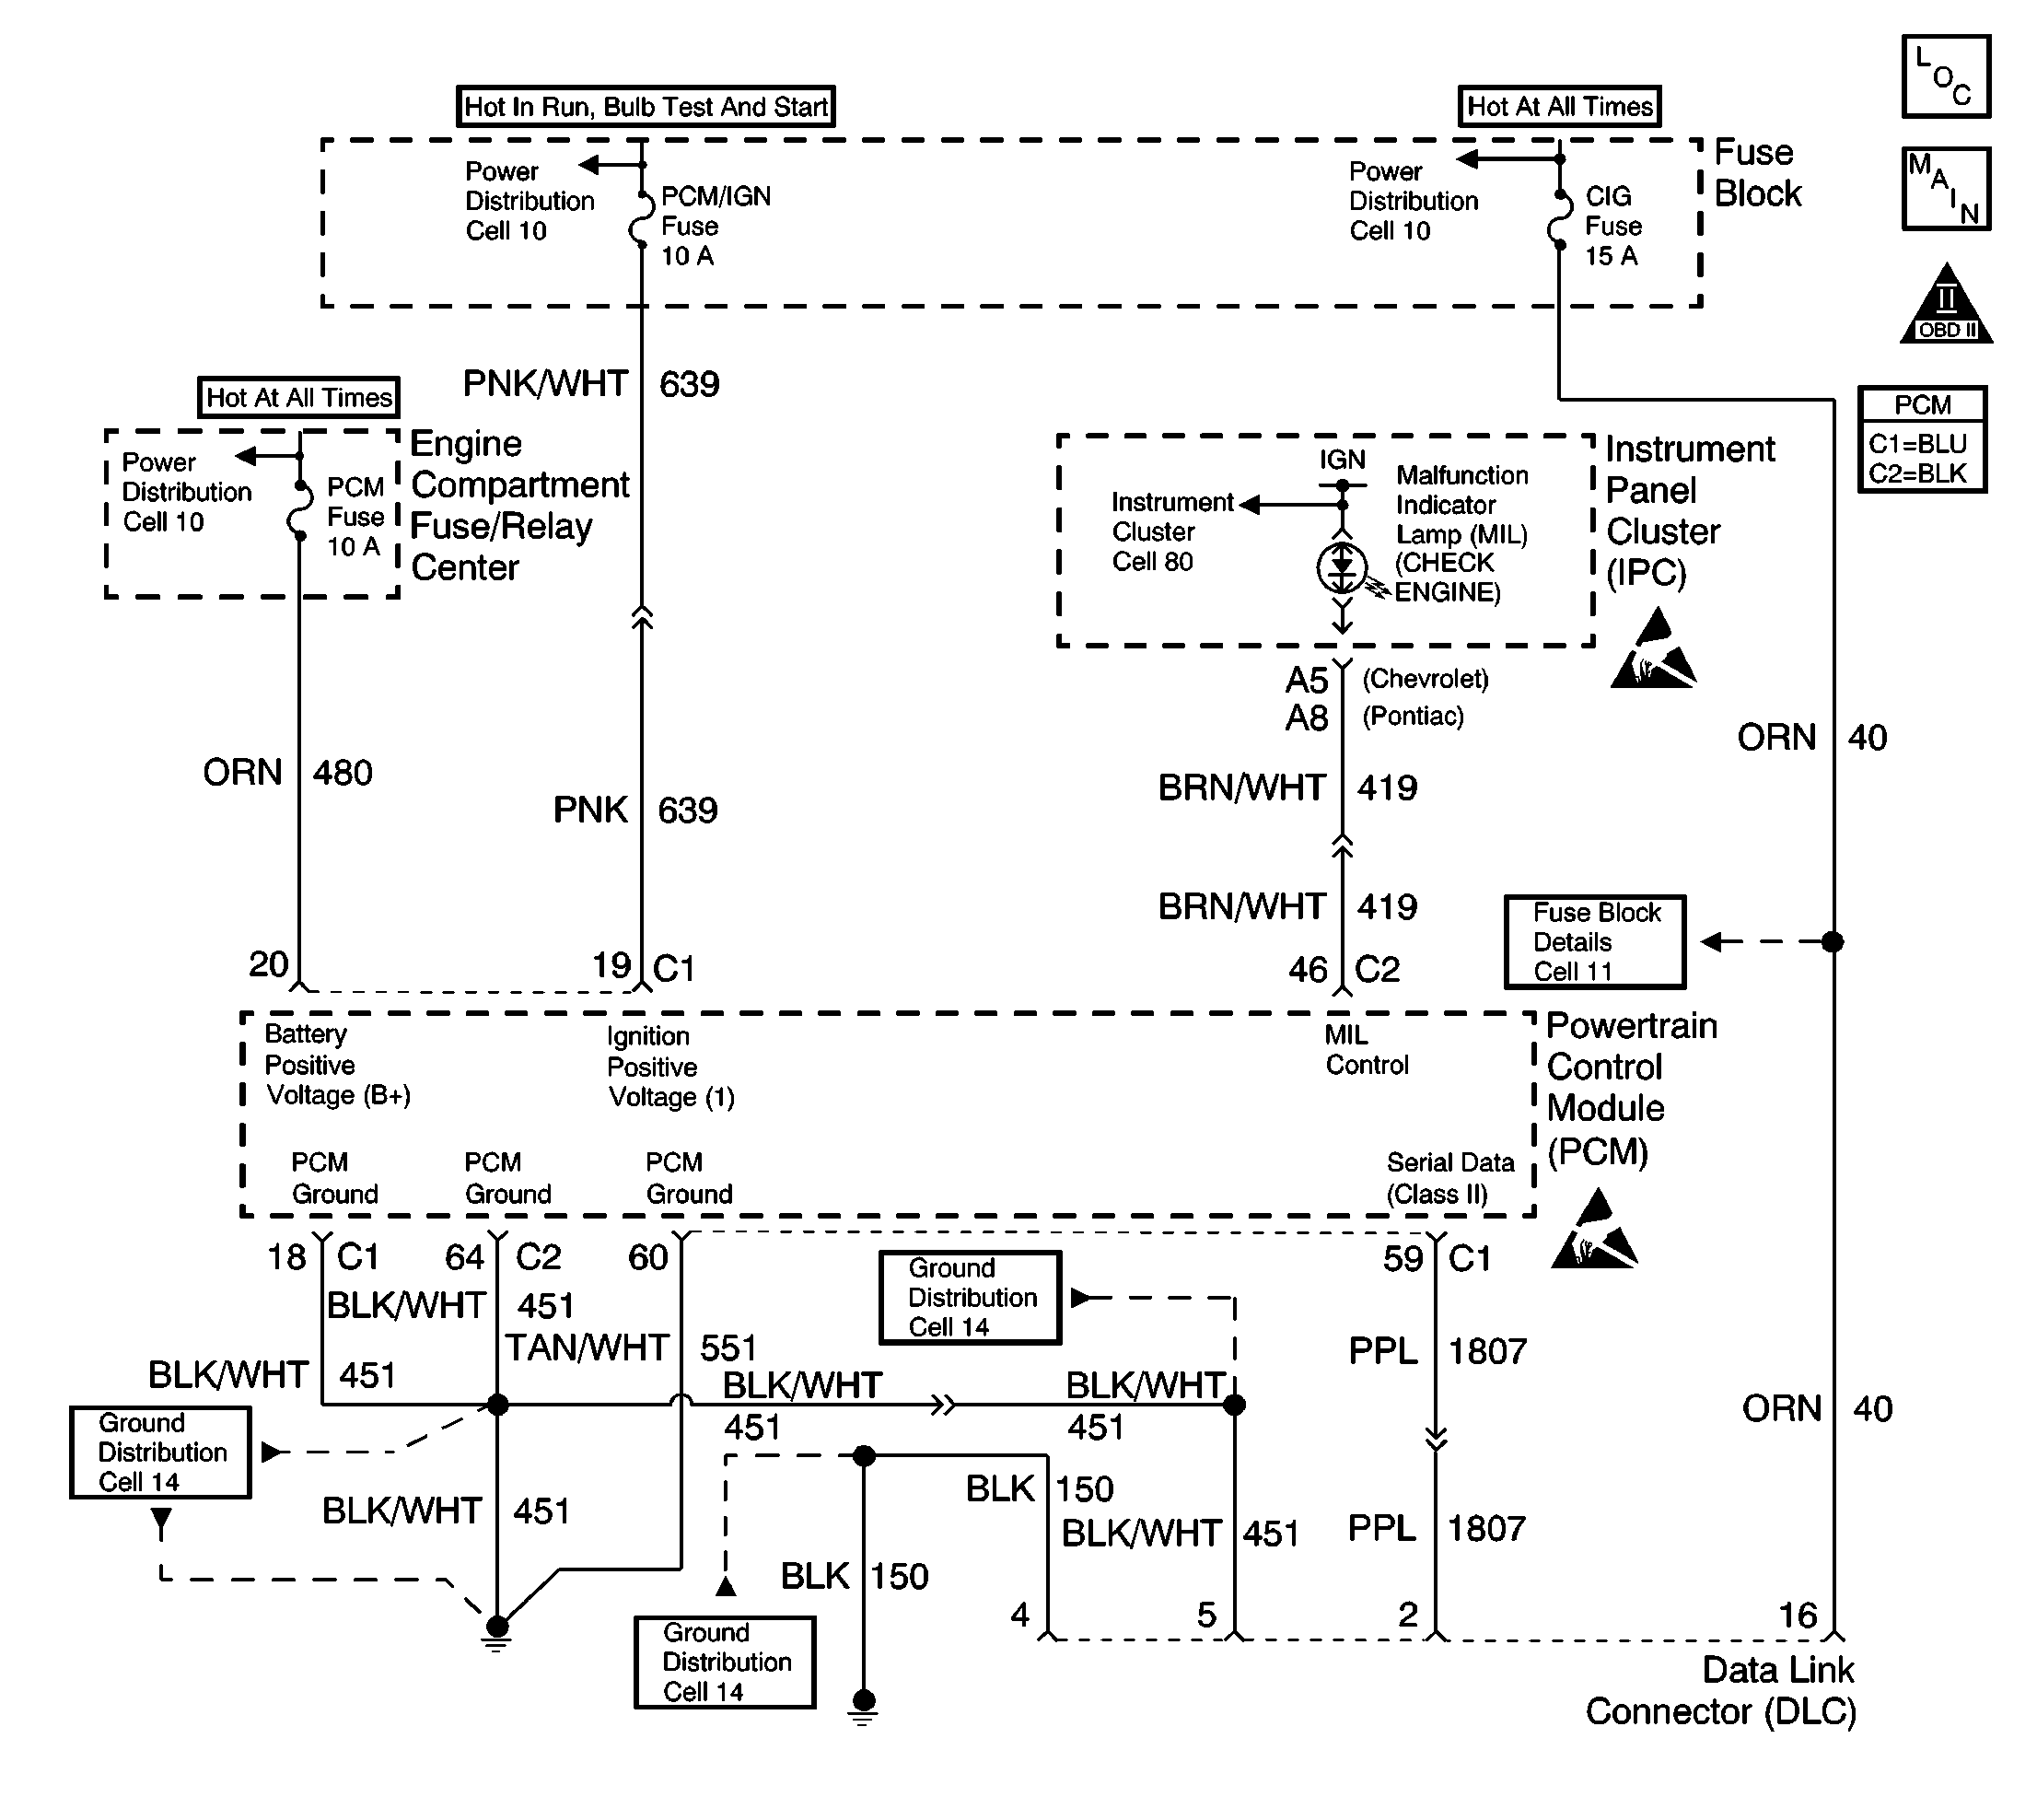
Circuit Description
The provision for communicating with the control module is the Data Link Connector (DLC). The DLC is usually located under the instrument panel. The DLC is used to connect to a scan tool. Some common uses of the scan tool are:
| • | Identifying stored diagnostic trouble codes (DTCs) |
| • | Clearing DTCs |
| • | Performing output control tests |
| • | Reading serial data |
Battery power and ground is supplied for the scan tool through the DLC. The Class 2 serial data circuit to the DLC allows the PCM to communicate with the scan tool.
Diagnostic Aids
Ensure that the correct application, including the model year, the car line, and the VIN code has been selected on the scan tool. If communication still cannot be established, try the scan tool on another vehicle in order to ensure that the scan tool or the cables are not the cause of the condition.
An intermittent may be caused by the following:
| • | Faulty connections |
| • | Rubbed-through wire insulation |
| • | Broken wire inside the insulation |
Any circuitry that is suspected of causing an intermittent complaint should be thoroughly inspected for the following conditions:
| • | Backed-out terminals |
| • | Improper mating of terminals |
| • | Broken locks |
| • | Improperly formed or damaged terminals |
| • | Faulty terminal-to-wire connections |
| • | Physical damage to the wiring harness |
| • | Corrosion |
Test Description
The numbers below refer to the step numbers on the diagnostic table.
-
If the scan tool is using an external power supply, inspect the external supply for proper voltage and ground as well as the voltage and ground supplies in the DLC.
-
The only time the Class 2 serial data circuit has any voltage on it is when a scan tool asks the PCM for information and the PCM sends the information out.
-
Locate and repair any shorts that may have caused the fuse to open before replacement, if the no voltage condition was due to a open fuse.
-
Replacement PCMs must be reprogrammed and the crankshaft position system variation procedure must be performed. Refer to the latest Techline™ information for PCM programming and perform the Crankshaft Position System Variation Learn Procedure.
-
Refer to Diagnostic Aids if the scan tool will not display scan data. If the scan tool can communicate with the PCM and you were sent here from the Powertrain On-Board Diagnostic (OBD) System Check table, return to that table and complete the diagnostics there.
-
The scan tool or associated cables could be malfunctioning. Refer to the scan tool manual for repair information.
Step | Action | Value(s) | Yes | No | ||||
|---|---|---|---|---|---|---|---|---|
1 | Was the Powertrain On-Board Diagnostic (OBD) System Check performed? | -- | ||||||
2 |
Is the MIL ON? | -- | ||||||
Install a scan tool. Does the scan tool power up? | -- | |||||||
Does the DMM read near the specified value? | 0 V | |||||||
5 |
Does the DMM read the specified value? | B+ | ||||||
6 |
Does the DMM read the specified value? | B+ | ||||||
7 |
Was a repair necessary? | -- | ||||||
8 |
Does the DMM read the specified value for both circuits? | B+ | ||||||
Is the action complete? | -- | -- | ||||||
10 |
Was a repair necessary? | -- | ||||||
11 |
Was a repair necessary? | -- | ||||||
|
Important: Refer to Powertrain Control Module Replacement/Programming . Replace the PCM. Refer to Powertrain Control Module Replacement . Did you complete the replacement? | -- | -- | ||||||
13 |
Is the action complete? | -- | -- | |||||
Reinstall the scan tool. Can the scan tool communicate with the PCM? | -- | |||||||
15 |
Does the scan tool work properly on a different vehicle? | -- | ||||||
16 |
Was a repair necessary? | -- | ||||||
Is the action complete? | -- | -- | ||||||
18 |
Does the engine start and continue to run? | -- | ||||||
19 |
Are any DTCs displayed that have not been diagnosed? | -- | Go to Applicable DTC table | System OK |
