For 1990-2009 cars only
Removal Procedure
- Discharge and recover refrigerant. Refer to Refrigerant Recovery and Recharging .
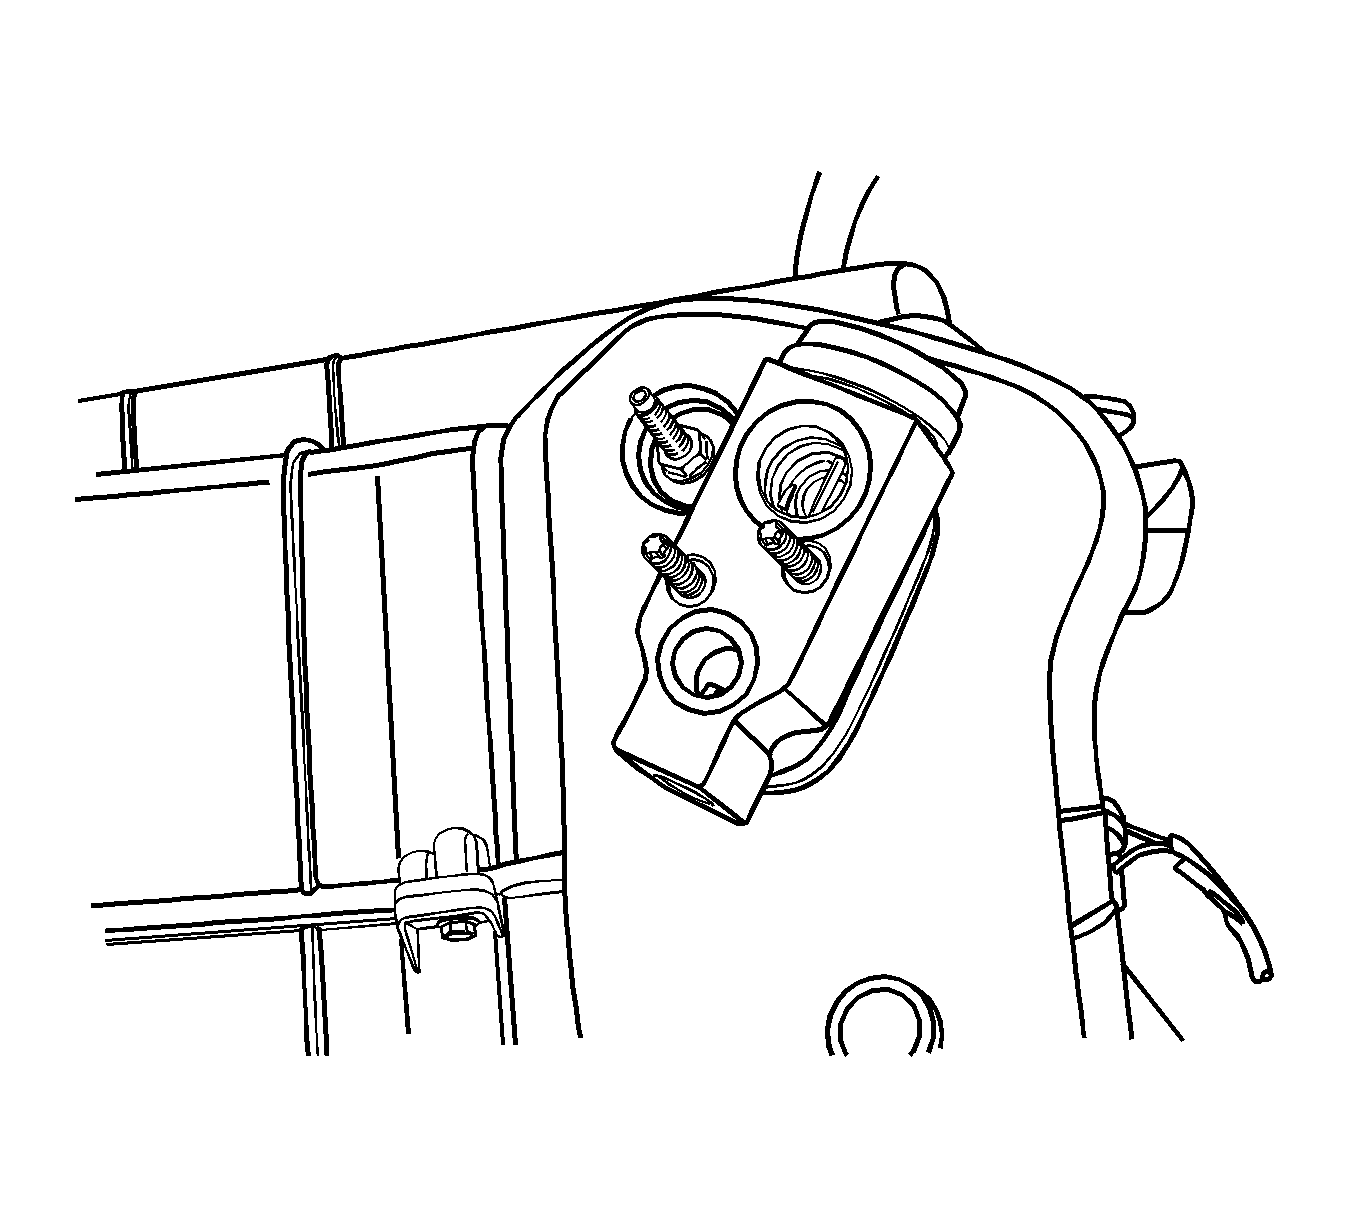
- Remove the nuts retaining the liquid line and evaporator outlet hose clips to the vehicle.
- Remove the nuts retaining the liquid line and evaporator outlet hose to the thermal expansion valve.
- Remove the liquid line and evaporator outlet hose fron the thermal expansion valve.
- Remove the thermal expansion valve bolts.
- Remove the thermal expansion valve.
- Remove and discard the O-rings from the evaporator lines. Refer to O-Ring Replacement
- Cap all of the openings to prevent contamination.
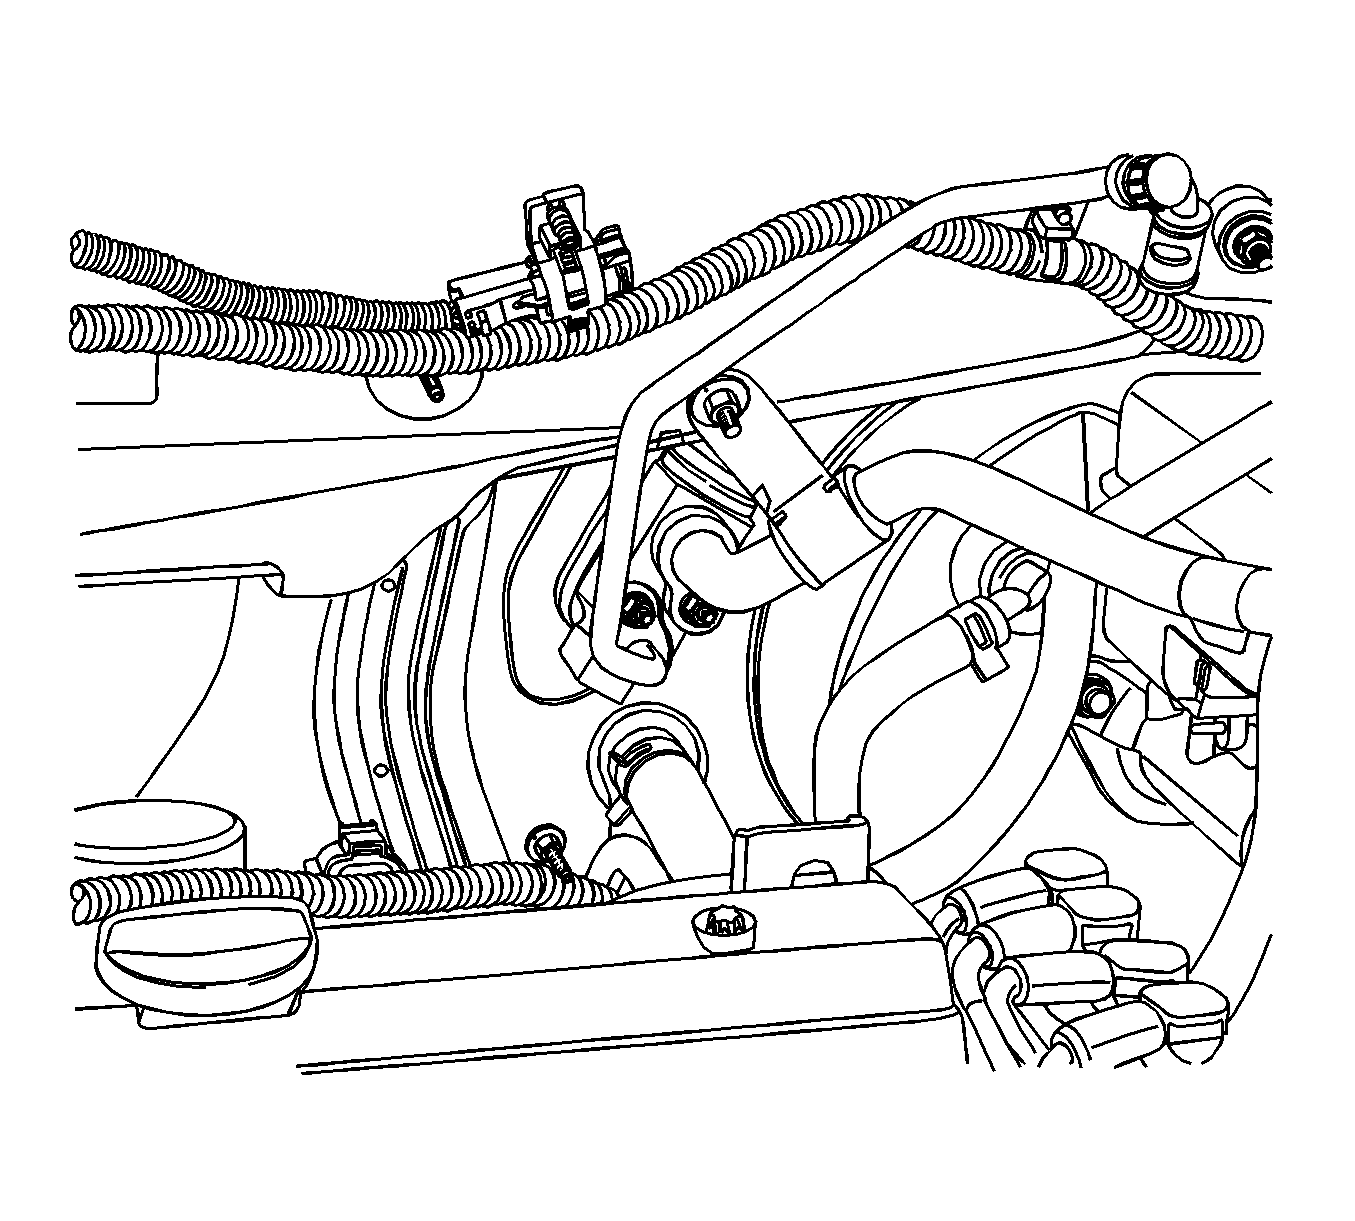
Important: The left-hand drive is shown. The right-hand drive is similar.
Installation Procedure
- Clean the O-ring surface areas of dirt or contamination.
- Install the new O-rings on the evaporator lines. Refer to O-Ring Replacement
- Install a new thermal expansion valve onto the evaporator lines.
- Install the thermal expansion valve bolts.
- Install the liquid line and evaporator outlet hose to the thermal expansion valve.
- Install the liquid line and evaporator outlet hose nuts to the thermal expansion valve.
- Install the liquid line and evaporator outlet hose clip nuts to the vehicle.
- Recharge the A/C system. Refer to Refrigerant Recovery and Recharging .
Notice: Refer to Fastener Notice in the Preface section.
Tighten
Tighten the thermal expansion valve bolts to 10 N·m (89 lb in).
Tighten
Tighten the liquid line and evaporator outlet hose nuts to 16 N·m (12 lb ft).
Tighten
Tighten the liquid line and evaporator outlet hose clip nuts to 16 N·m (12 lb ft).
