For 1990-2009 cars only
Brake Pad Inspection Front CSV HSV VXR8
Front Type B
- Raise and support the vehicle. Refer to Lifting and Jacking the Vehicle .
- Remove the front wheels. Refer to Tire and Wheel Removal and Installation .
- Carry out a visual inspection of the front brake assemblies.
- Remove the front brake pads. Refer to Front Disc Brake Pads Replacement .
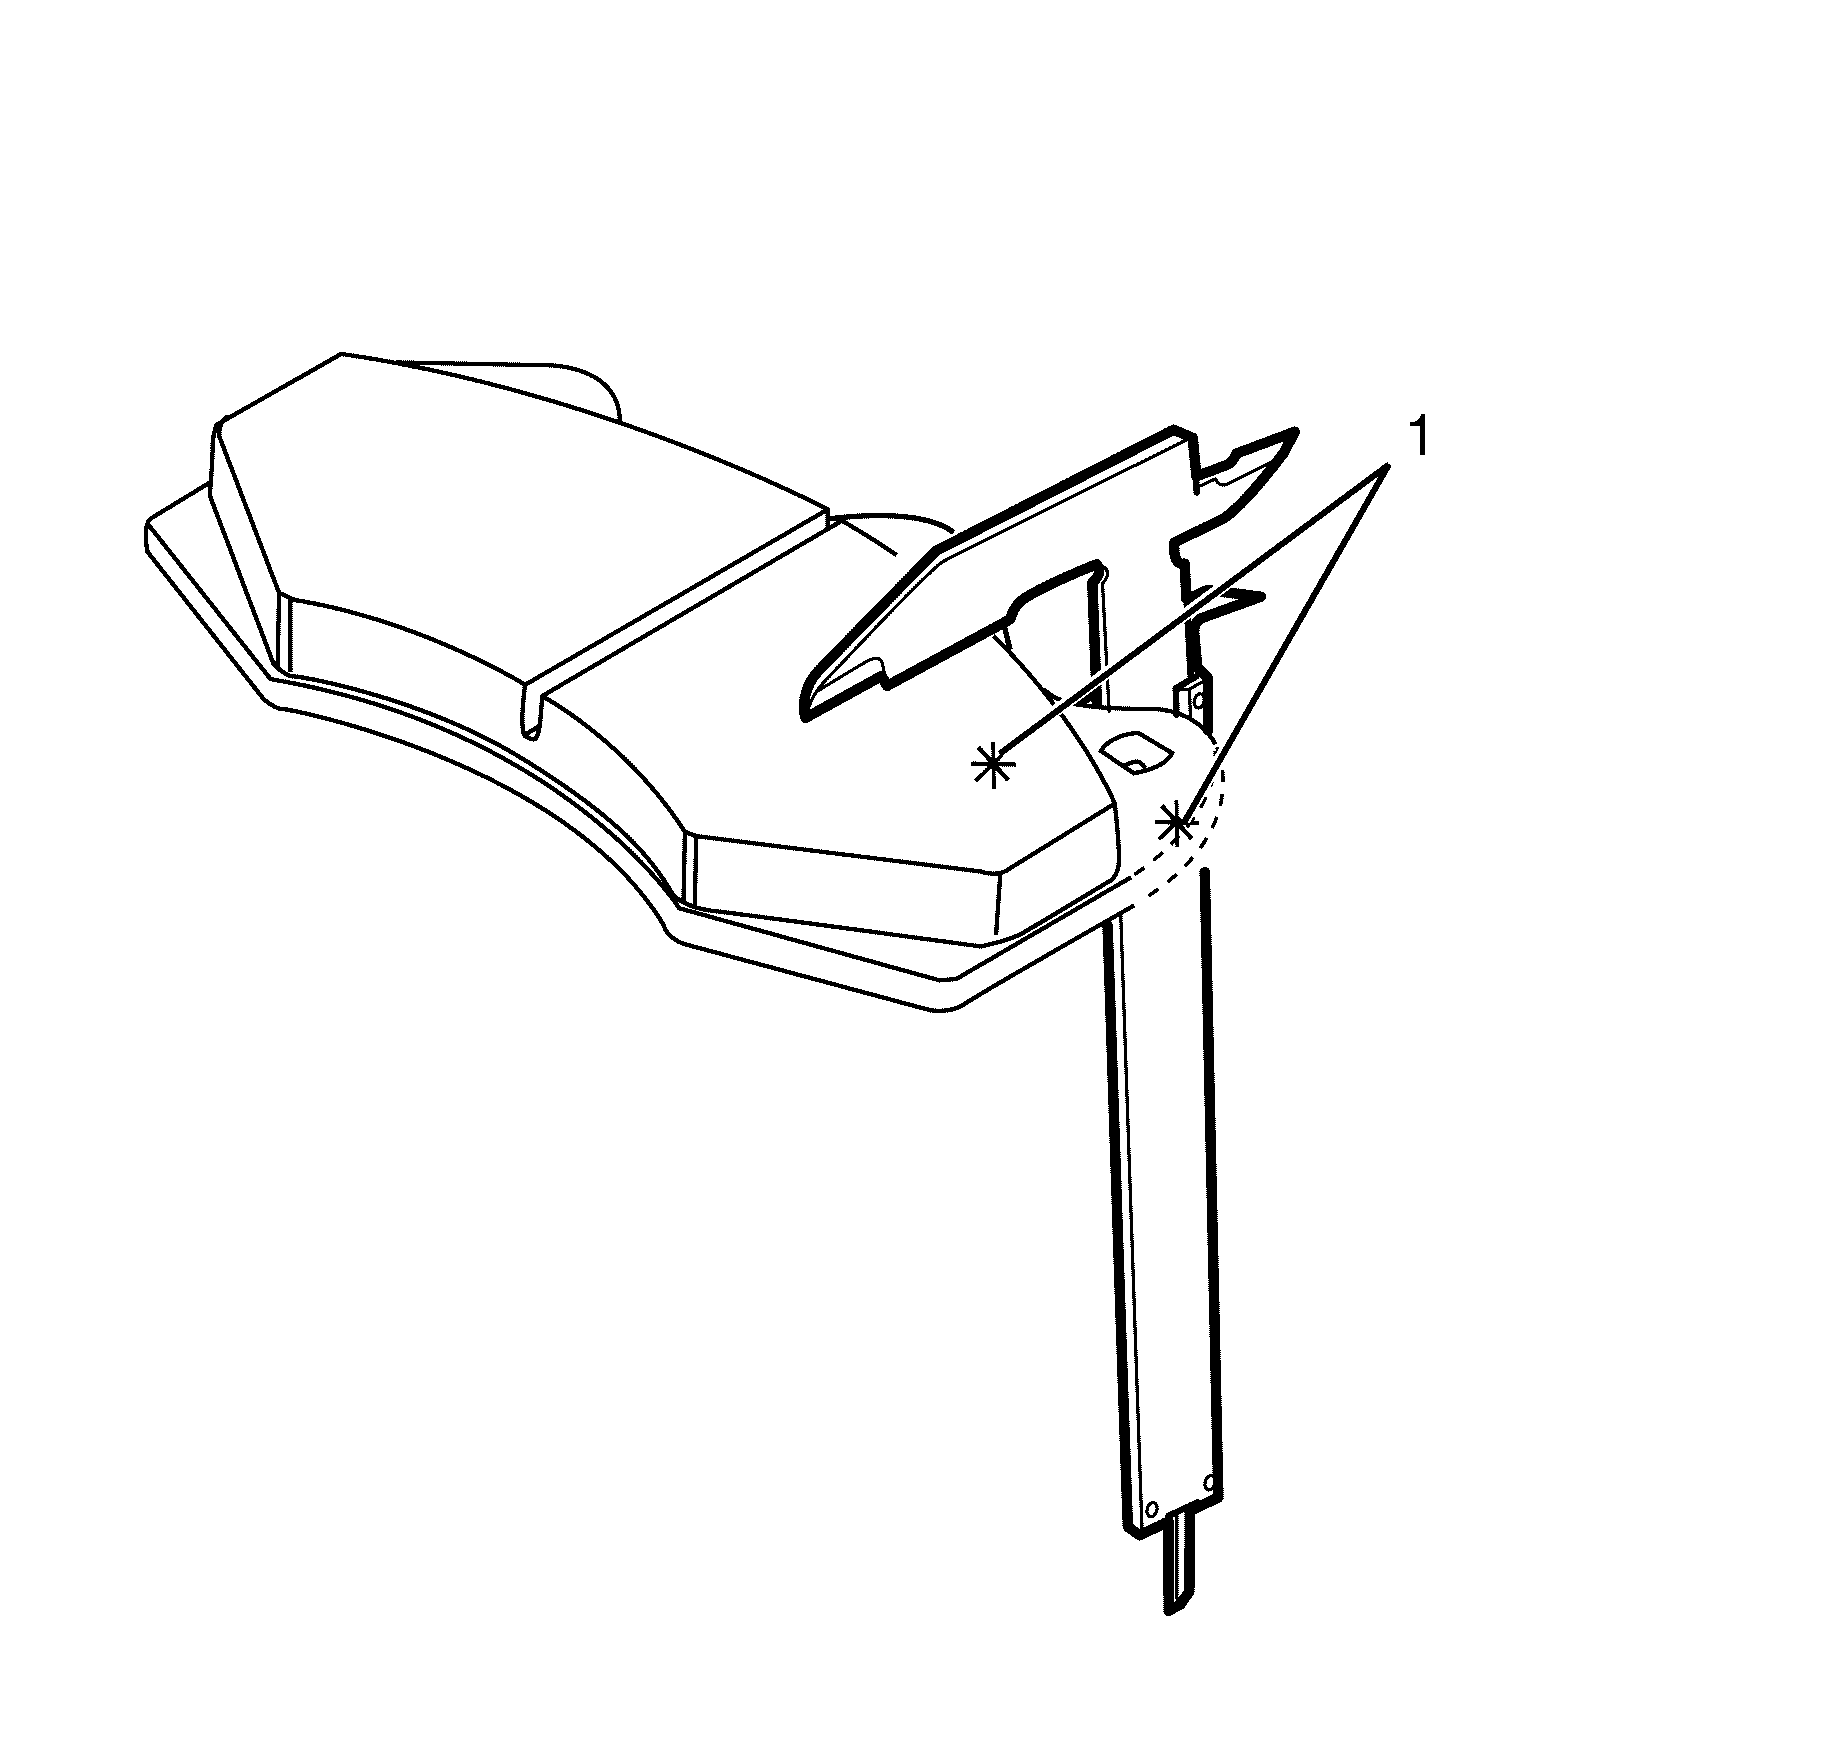
- Using a vernier caliper gauge on the outer brake pad, take note of the measurement from the brake pad backing plate to the brake pad friction surface between two points (1).
- Using a vernier caliper gauge on the inner brake pad, take note of the measurement from the brake pad backing plate to the brake pad friction surface between two points (1).
- Replace the brake pads if:
- Install the front wheels. Refer to Tire and Wheel Removal and Installation .
- Lower the vehicle to the ground. Refer to Lifting and Jacking the Vehicle .
Caution: Refer to Safety Glasses Caution in the Preface section.
Caution: Refer to Vehicle Lifting Caution in the Preface section.
Caution: Refer to Brake Dust Caution in the Preface section.
Important: Make sure shims are securely affixed to the backing plate of the brake pads.
| • | Either reading is 8.0 mm or less (this equates to 3 mm lining material remaining on the brake pad). |
| • | If there is more than 2.0 mm variation between the inner and outer brake pad reading, this maybe an indication that the caliper slide is partially sticking. |
| • | If there is more than 2.0 mm difference between the leading and trailing edge of the same brake pad. |
Brake Pad Inspection Rear CSV HSV VXR8
Rear Type B
- Raise and support the vehicle. Refer to Lifting and Jacking the Vehicle .
- Remove the rear wheels. Refer to Tire and Wheel Removal and Installation .
- Carry out a visual inspection of the rear brake pads.
- Remove the rear brake pads. Refer to Rear Disc Brake Pads Replacement .
- Using a vernier caliper gauge on the outer brake pad, take note of the measurement from the brake pad backing plate to the brake pad friction surface between two points (1).
- Using a vernier caliper gauge on the inner brake pad, take note of the measurement from the brake pad backing plate to the brake pad friction surface between two points (1).
- Replace the brake pads if:
- Install the rear wheels. Refer to Tire and Wheel Removal and Installation .
- Lower the vehicle to the ground. Refer to Lifting and Jacking the Vehicle .
Caution: Refer to Safety Glasses Caution in the Preface section.
Caution: Refer to Vehicle Lifting Caution in the Preface section.
Caution: Refer to Brake Dust Caution in the Preface section.
Important: Make sure shims are securely affixed to the backing plate of the brake pads.
| • | Either reading is 8.0 mm or less (this equates to 3 mm lining material remaining on the brake pad). |
| • | If there is more than 2.0 mm variation between the inner and outer brake pad reading, this maybe an indication that the caliper slide is sticking. |
| • | If there is more than 2.0 mm difference between the leading and trailing edge of the same brake pad. |
Brake Pad Inspection LWB SWB
- Raise and support the vehicle. Refer to Lifting and Jacking the Vehicle .
- Remove the front wheels. Refer to Tire and Wheel Removal and Installation .
- Carry out a visual inspection of the front brake assemblies.
- With the aid of an assistant or a brake pedal holding bar, apply and hold the foot brake.
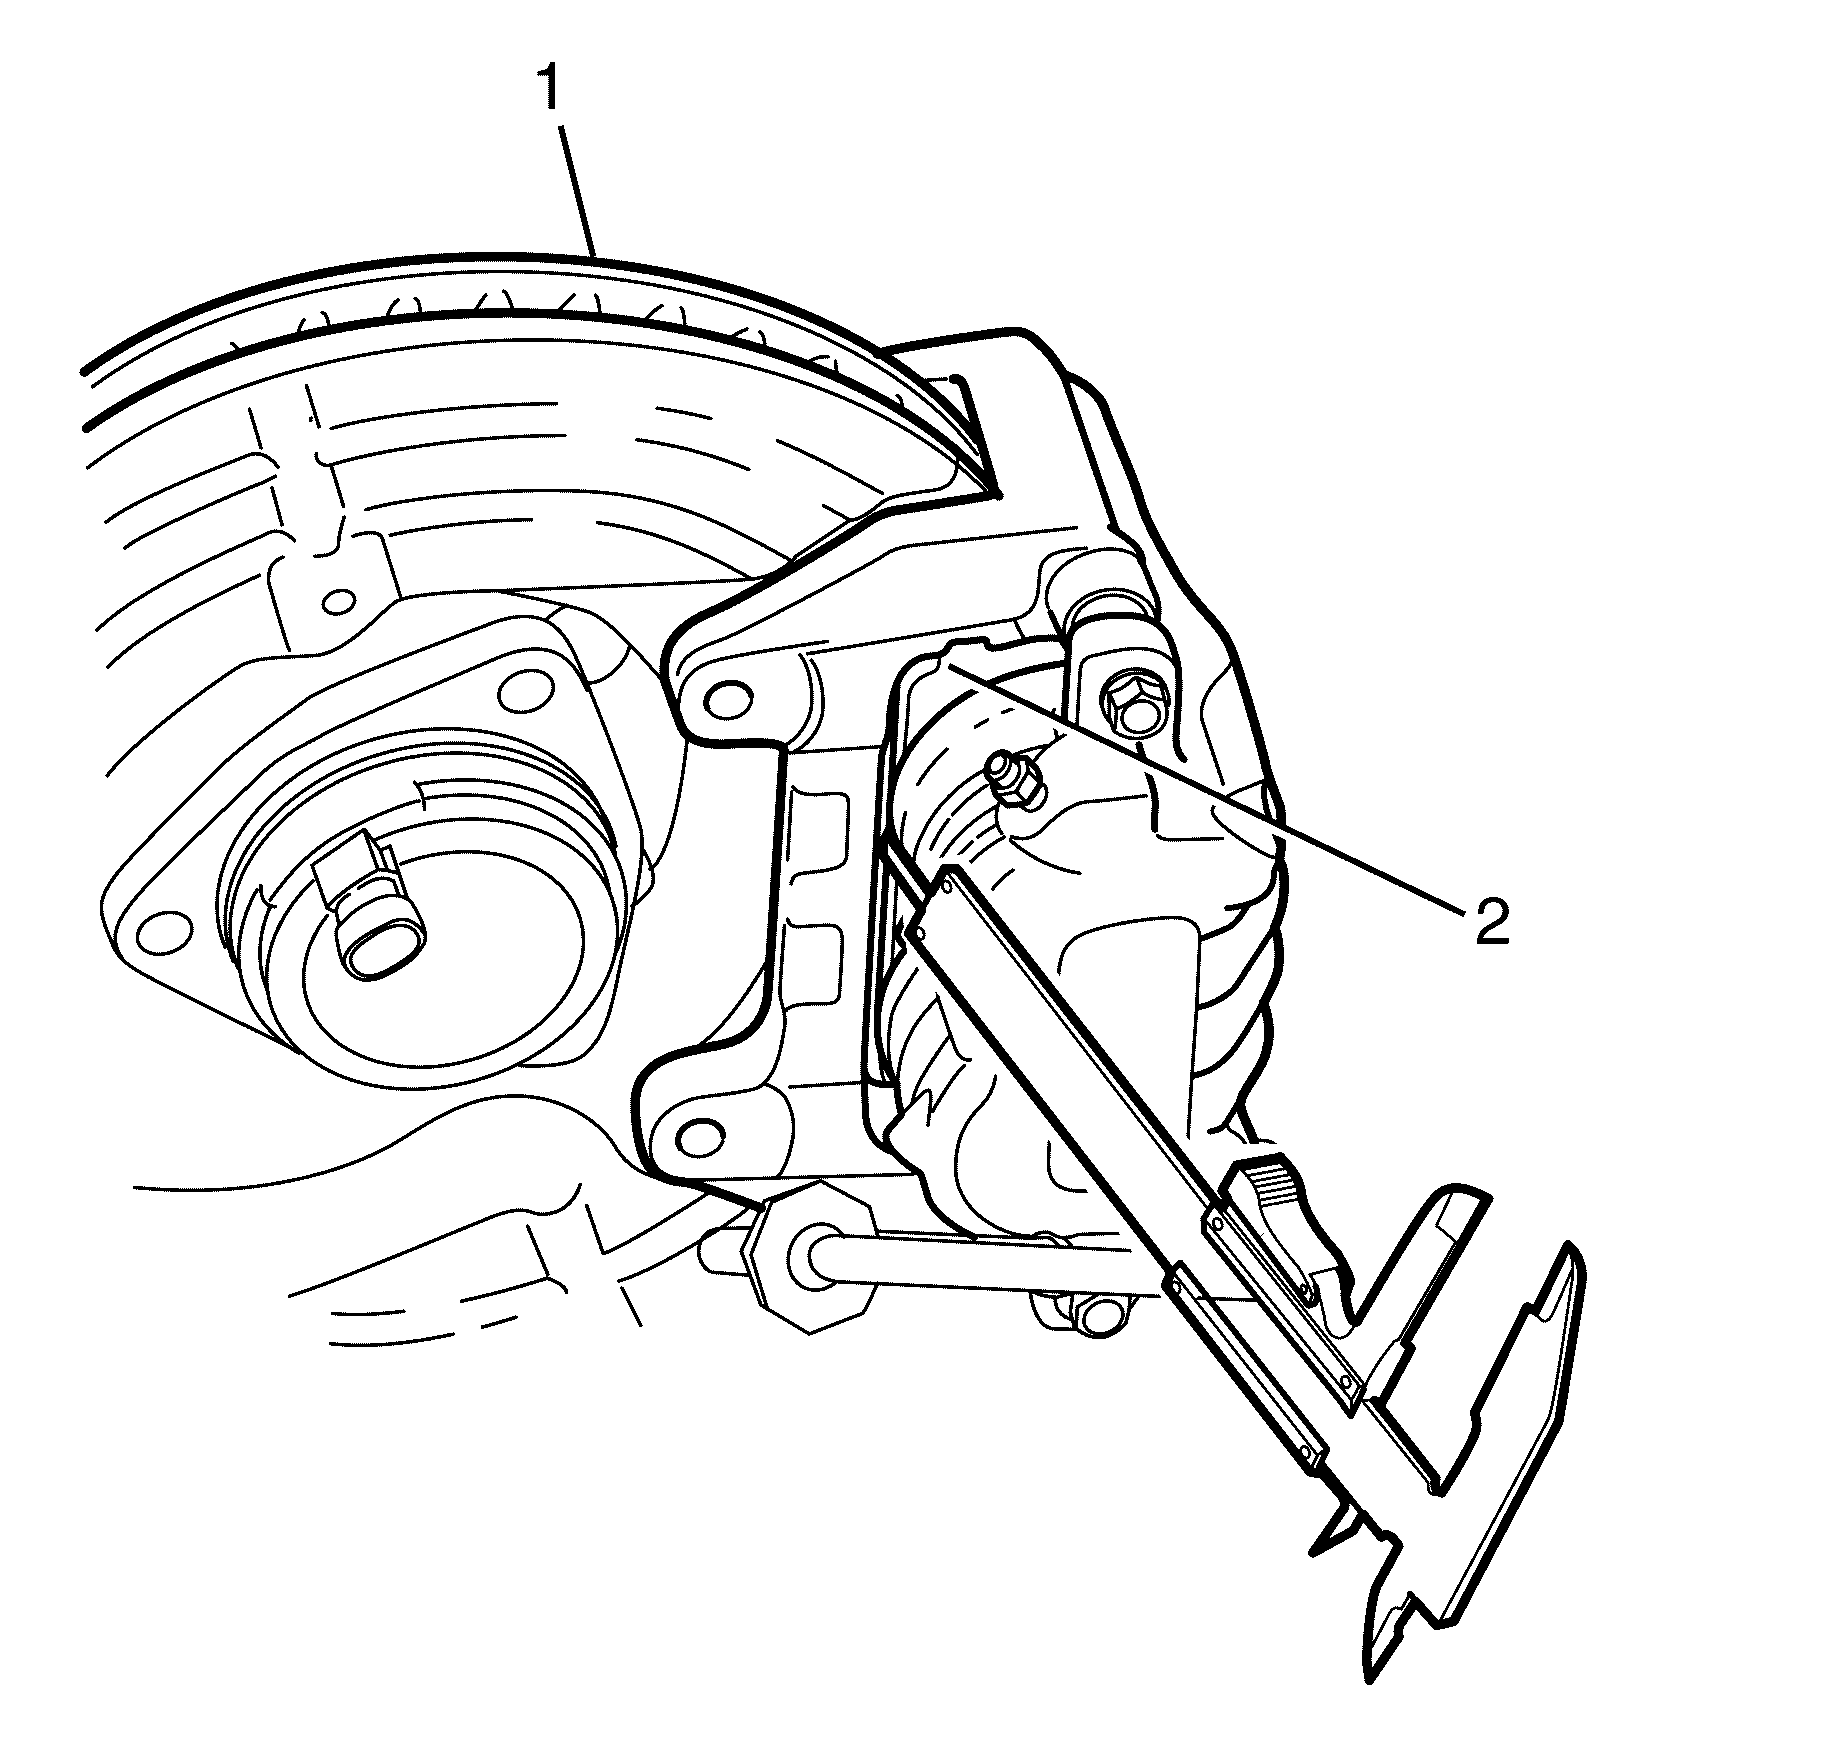
- Using a vernier caliper gauge, on the outer brake pad backing plate (2), take note of the measurement from the brake pad backing plate (2) to the brake disc (1), as shown in the diagram.
- Using a vernier caliper gauge, on the inner brake pad (2), take note of the measurement from the brake pad backing plate (2) to the brake disc (1), as shown in the diagram
- Replace the pads if .
Caution: Refer to Safety Glasses Caution in the Preface section.
Caution: Refer to Vehicle Lifting Caution in the Preface section.
Caution: Refer to Brake Dust Caution in the Preface section.

| • | Either reading is 10 mm or less (this equates to 3 mm lining material remaining on the brake pad). |
| • | If there is more than 2 mm variation between the inner and outer brake pad reading, this may indicate that the caliper is partially sticking. |
