Master Cylinder Bench Bleeding LHD
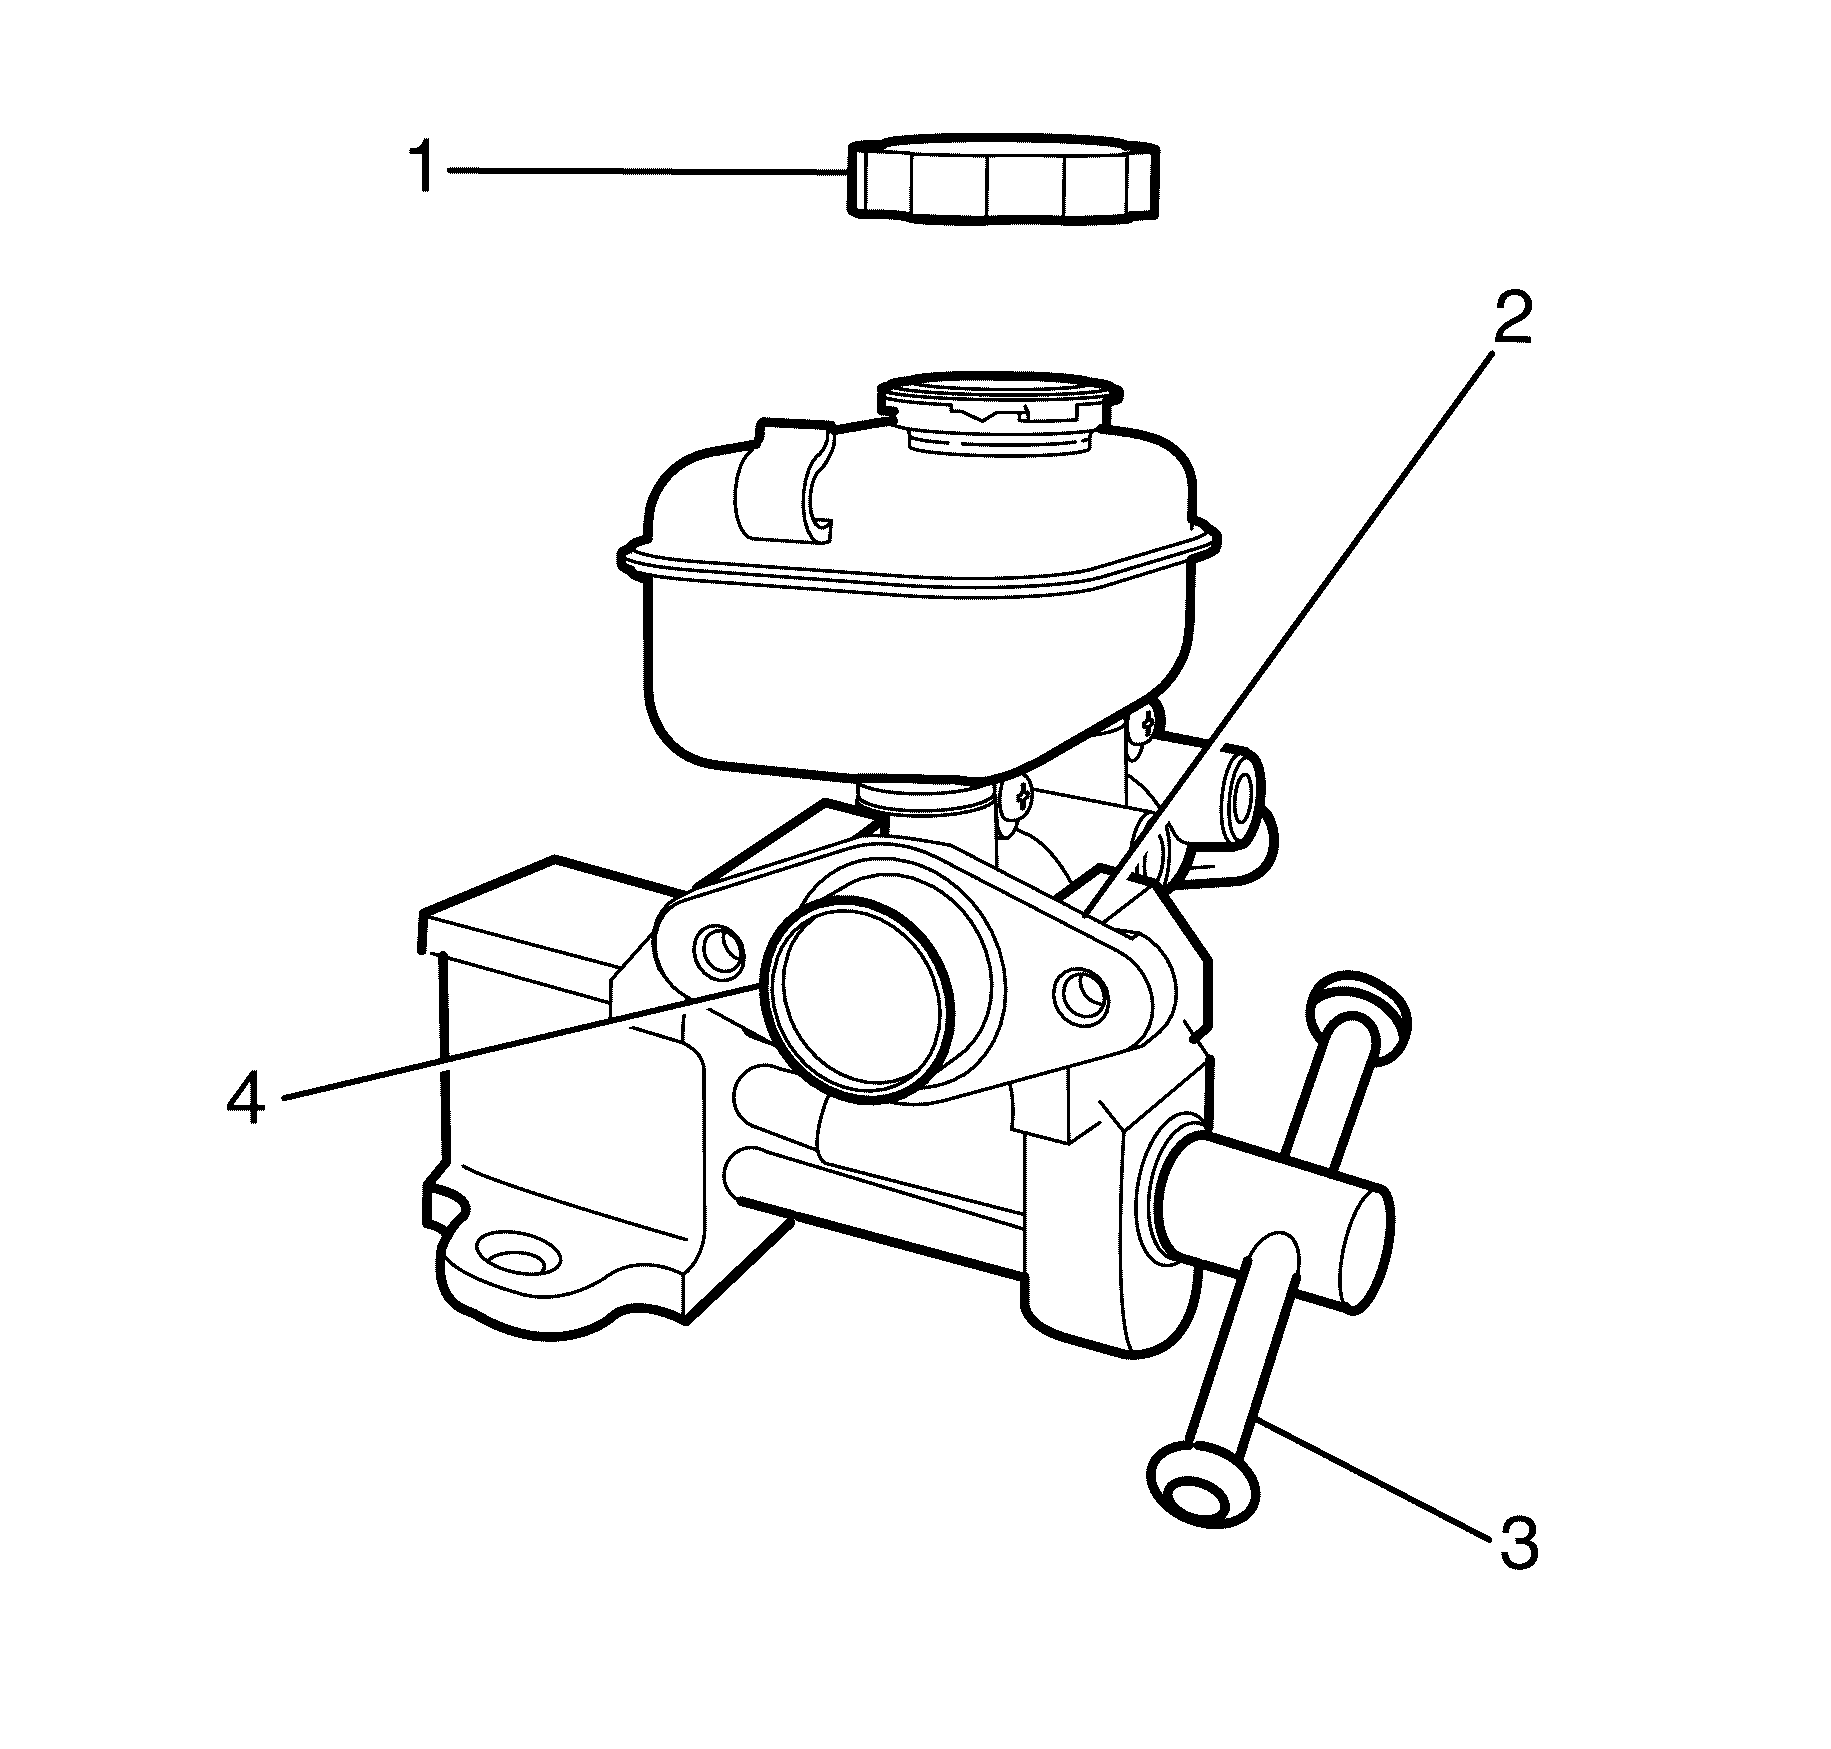
- Secure the mounting flange of the brake master cylinder (2) in a bench vice (3).
- Remove the master cylinder reservoir cap (1).
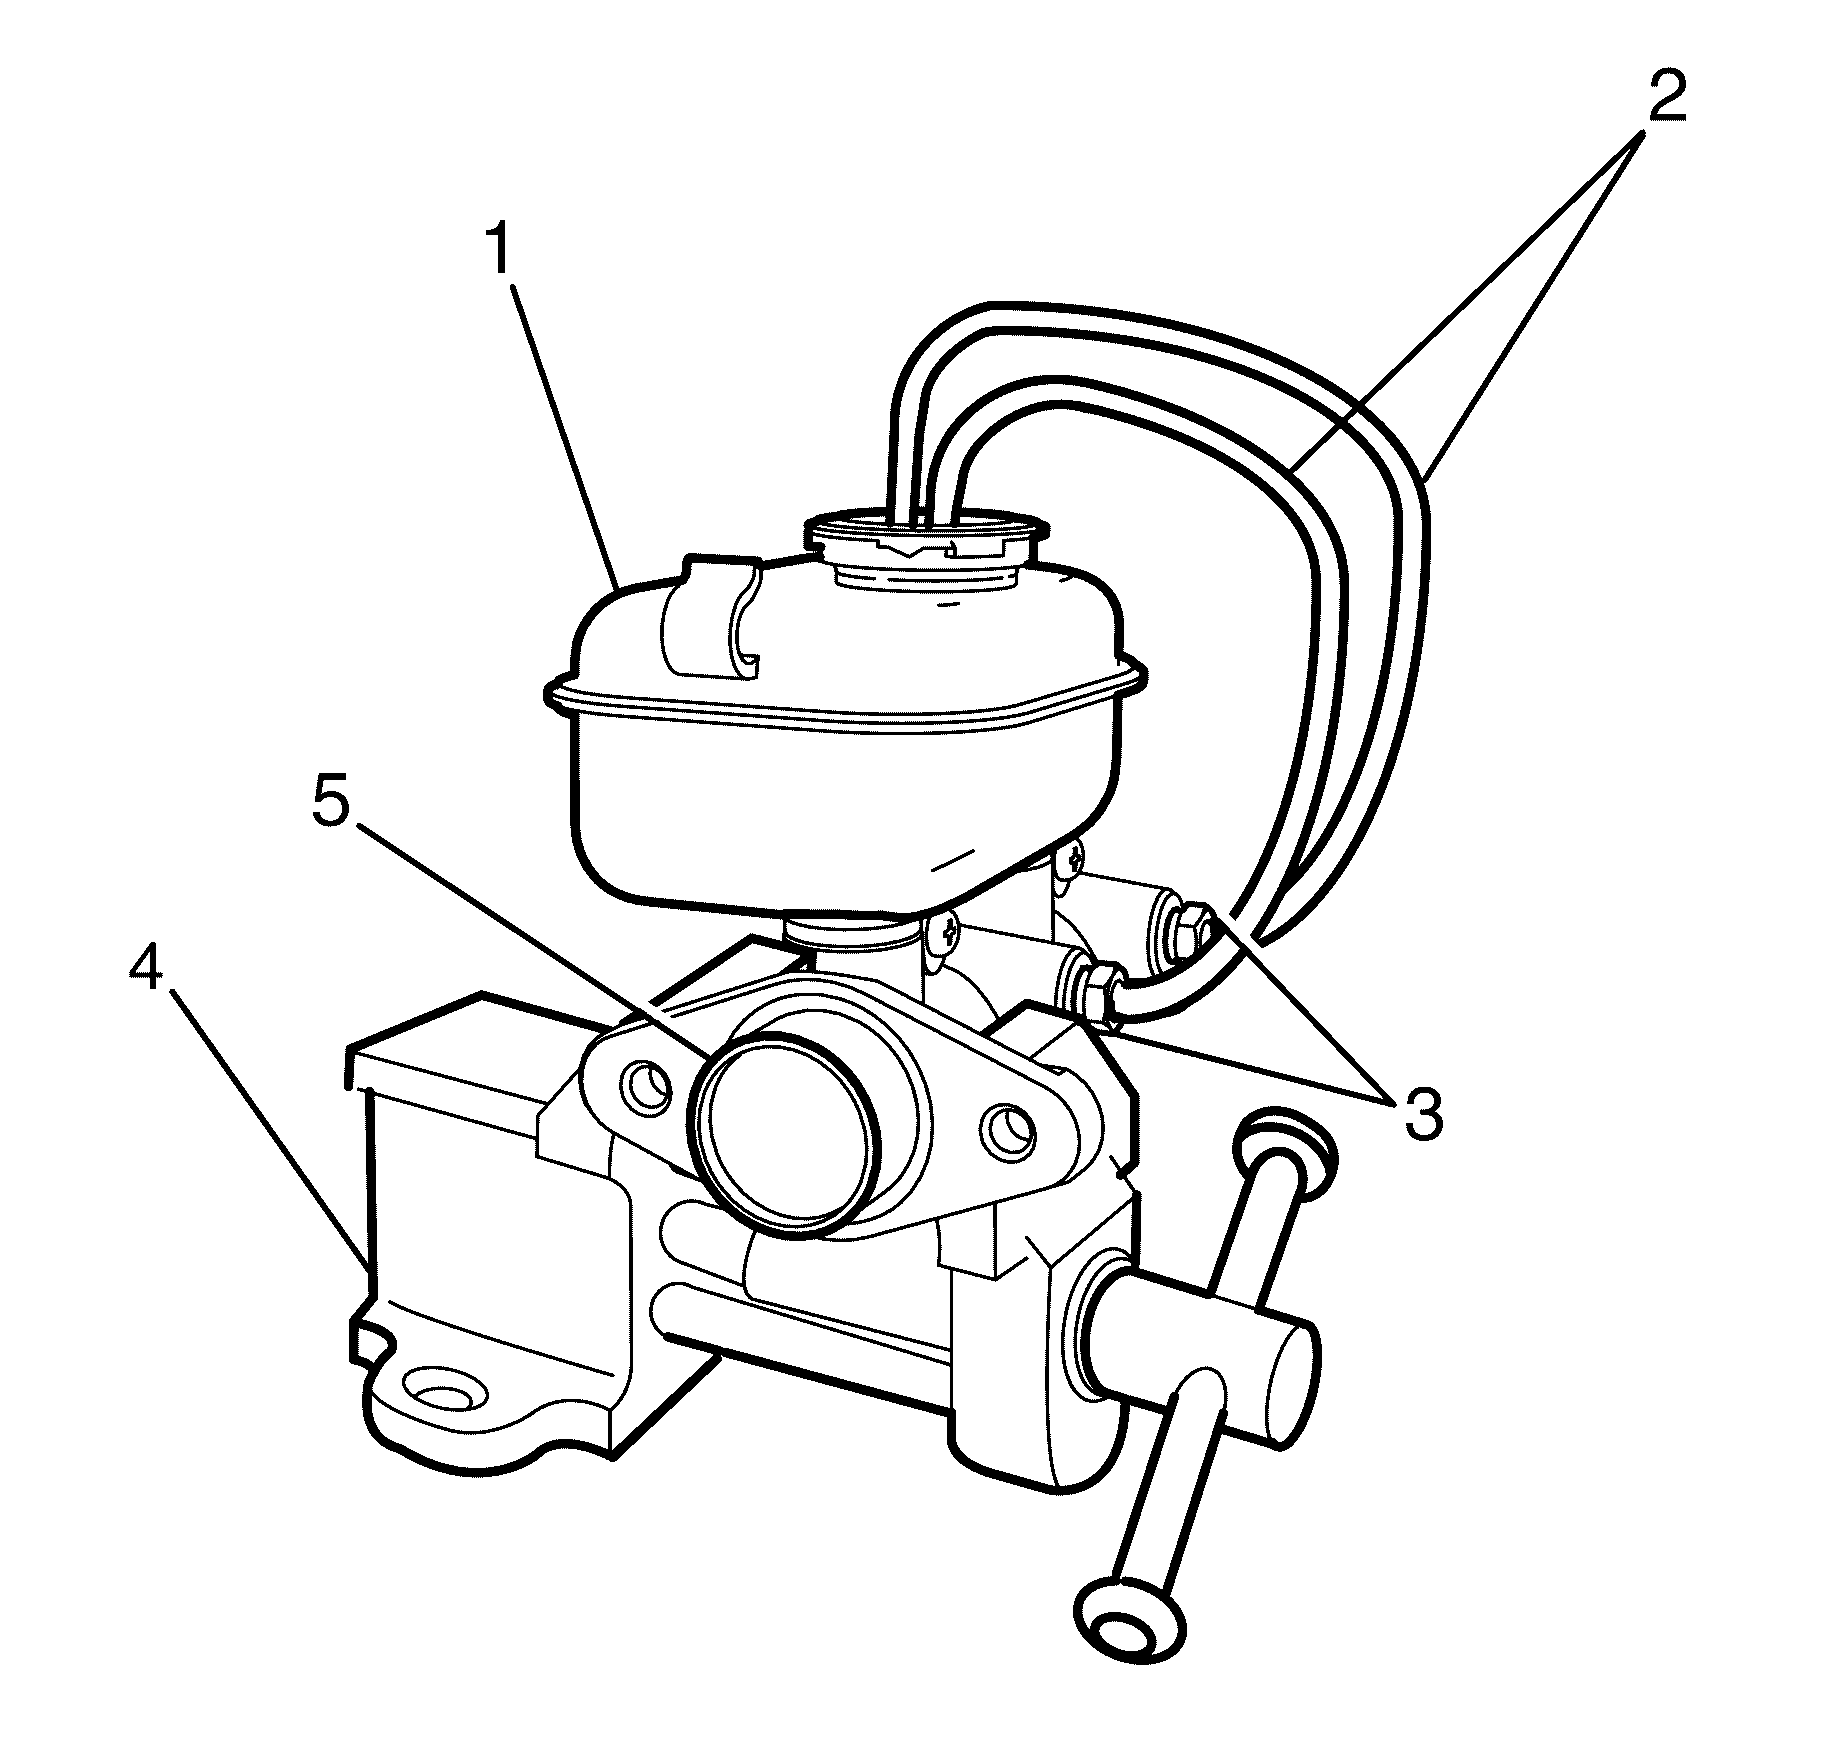
- Install suitable fittings to the master cylinder ports (5) that match the type of flare seat required and also provide for hose attachment.
- Install transparent hoses (1) to the fittings installed to the master cylinder ports (5).
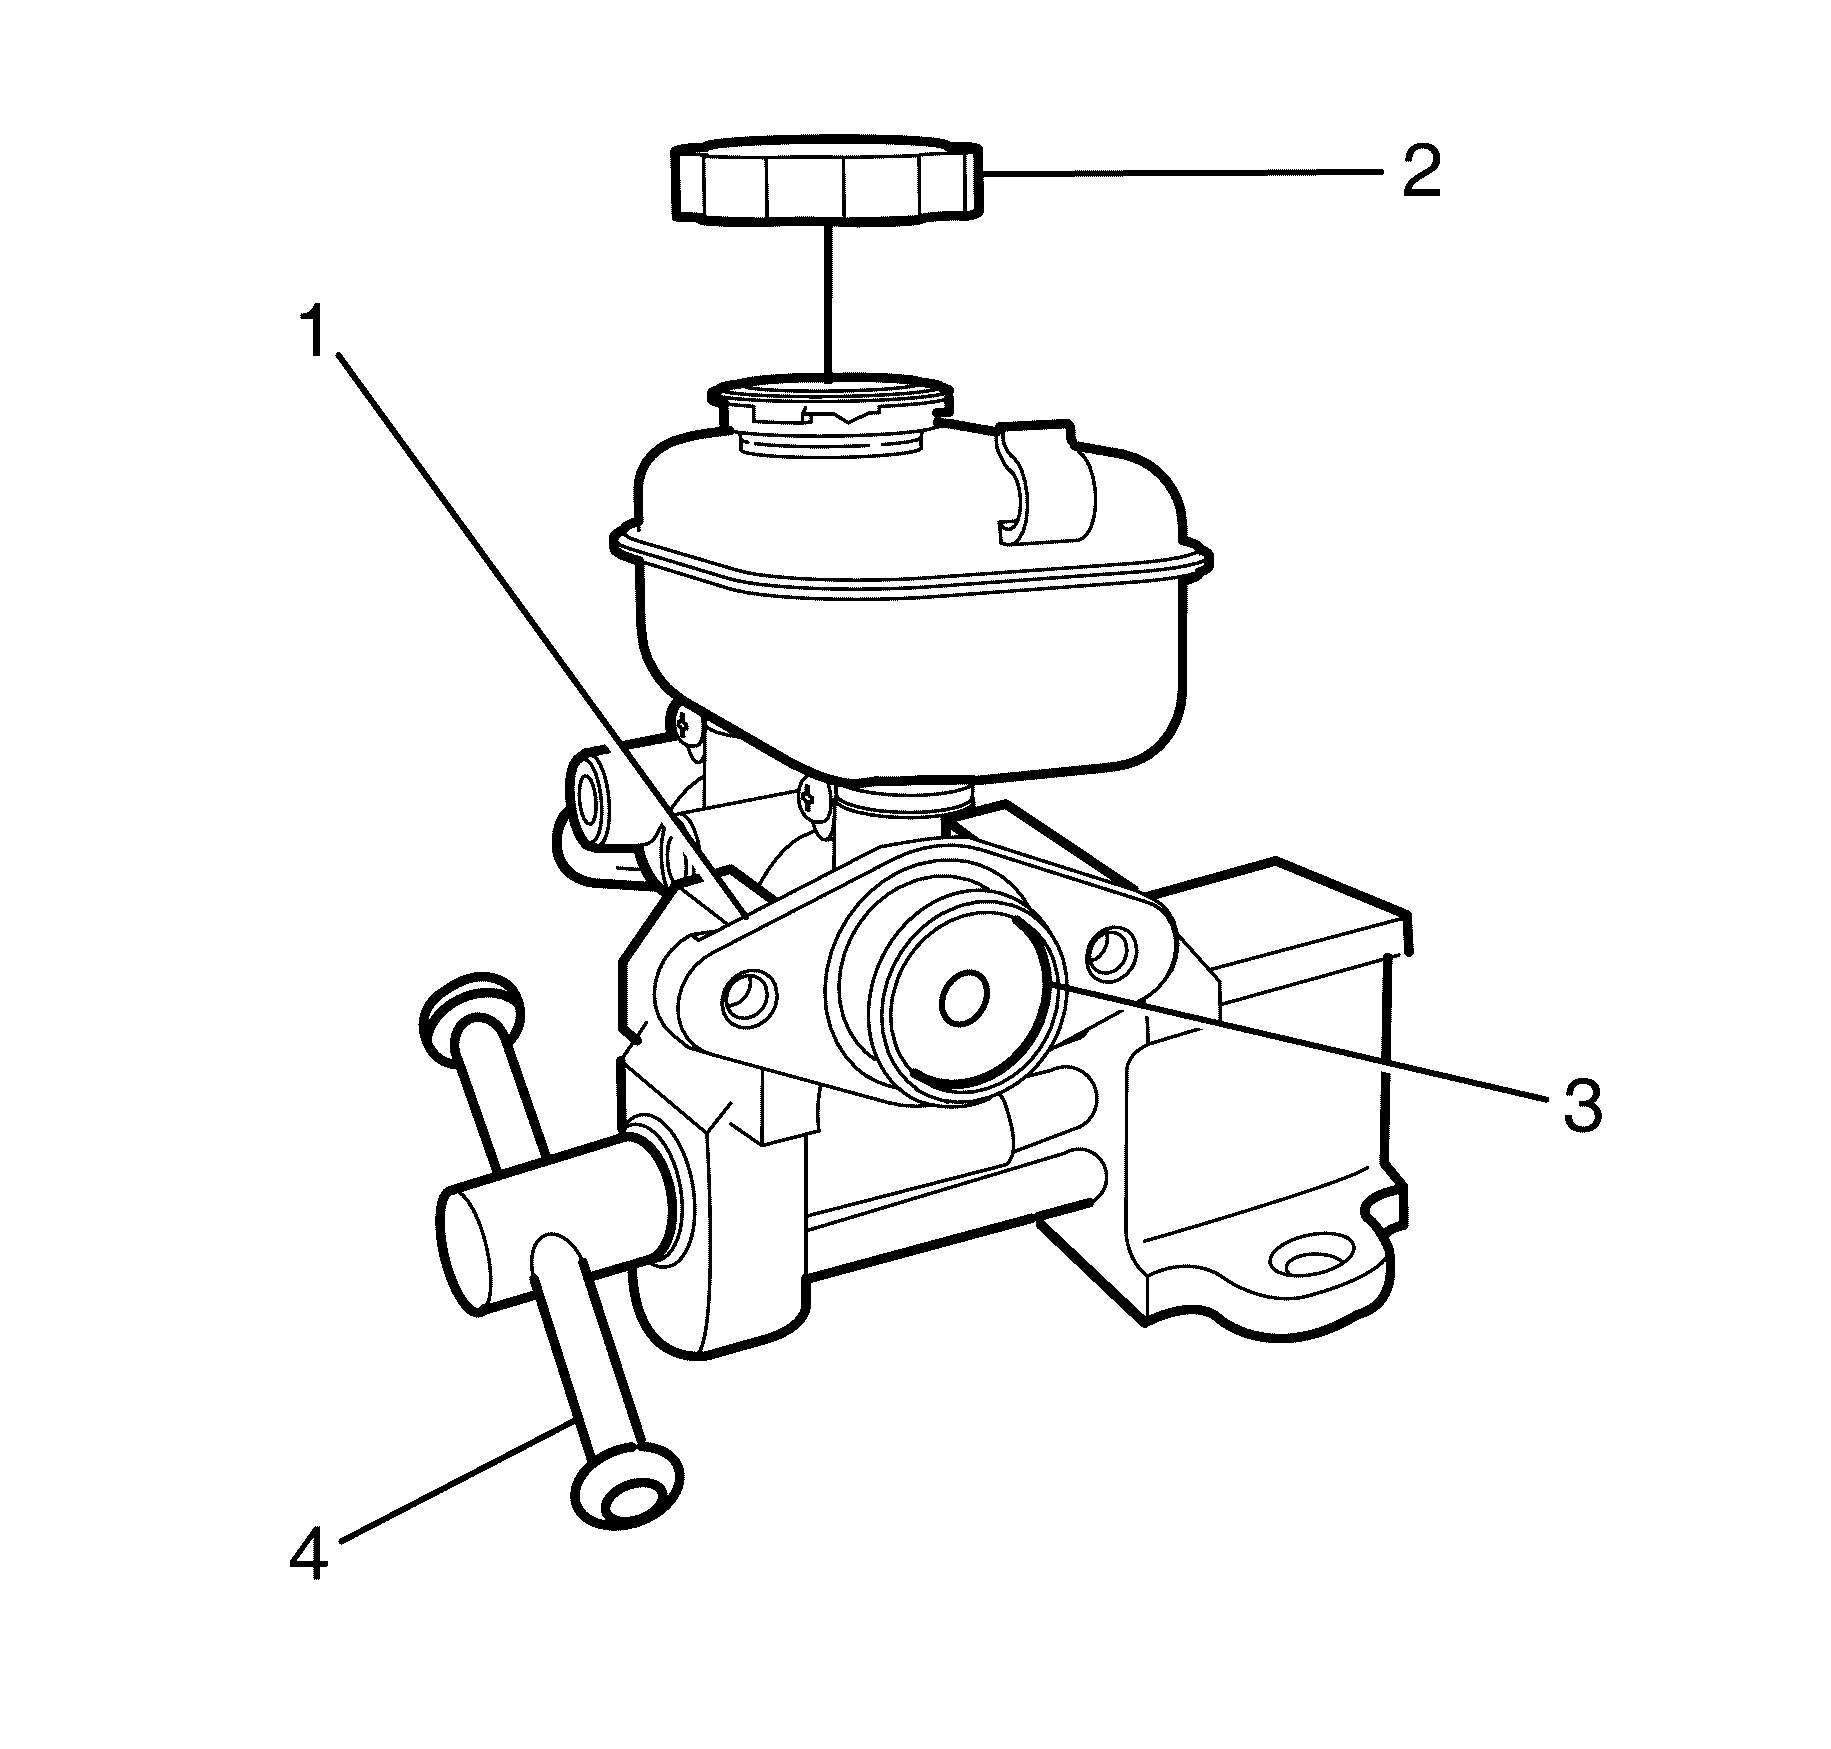
- Fill the master cylinder reservoir (2) to the maximum fill level.
- Depress and release the primary piston (3).
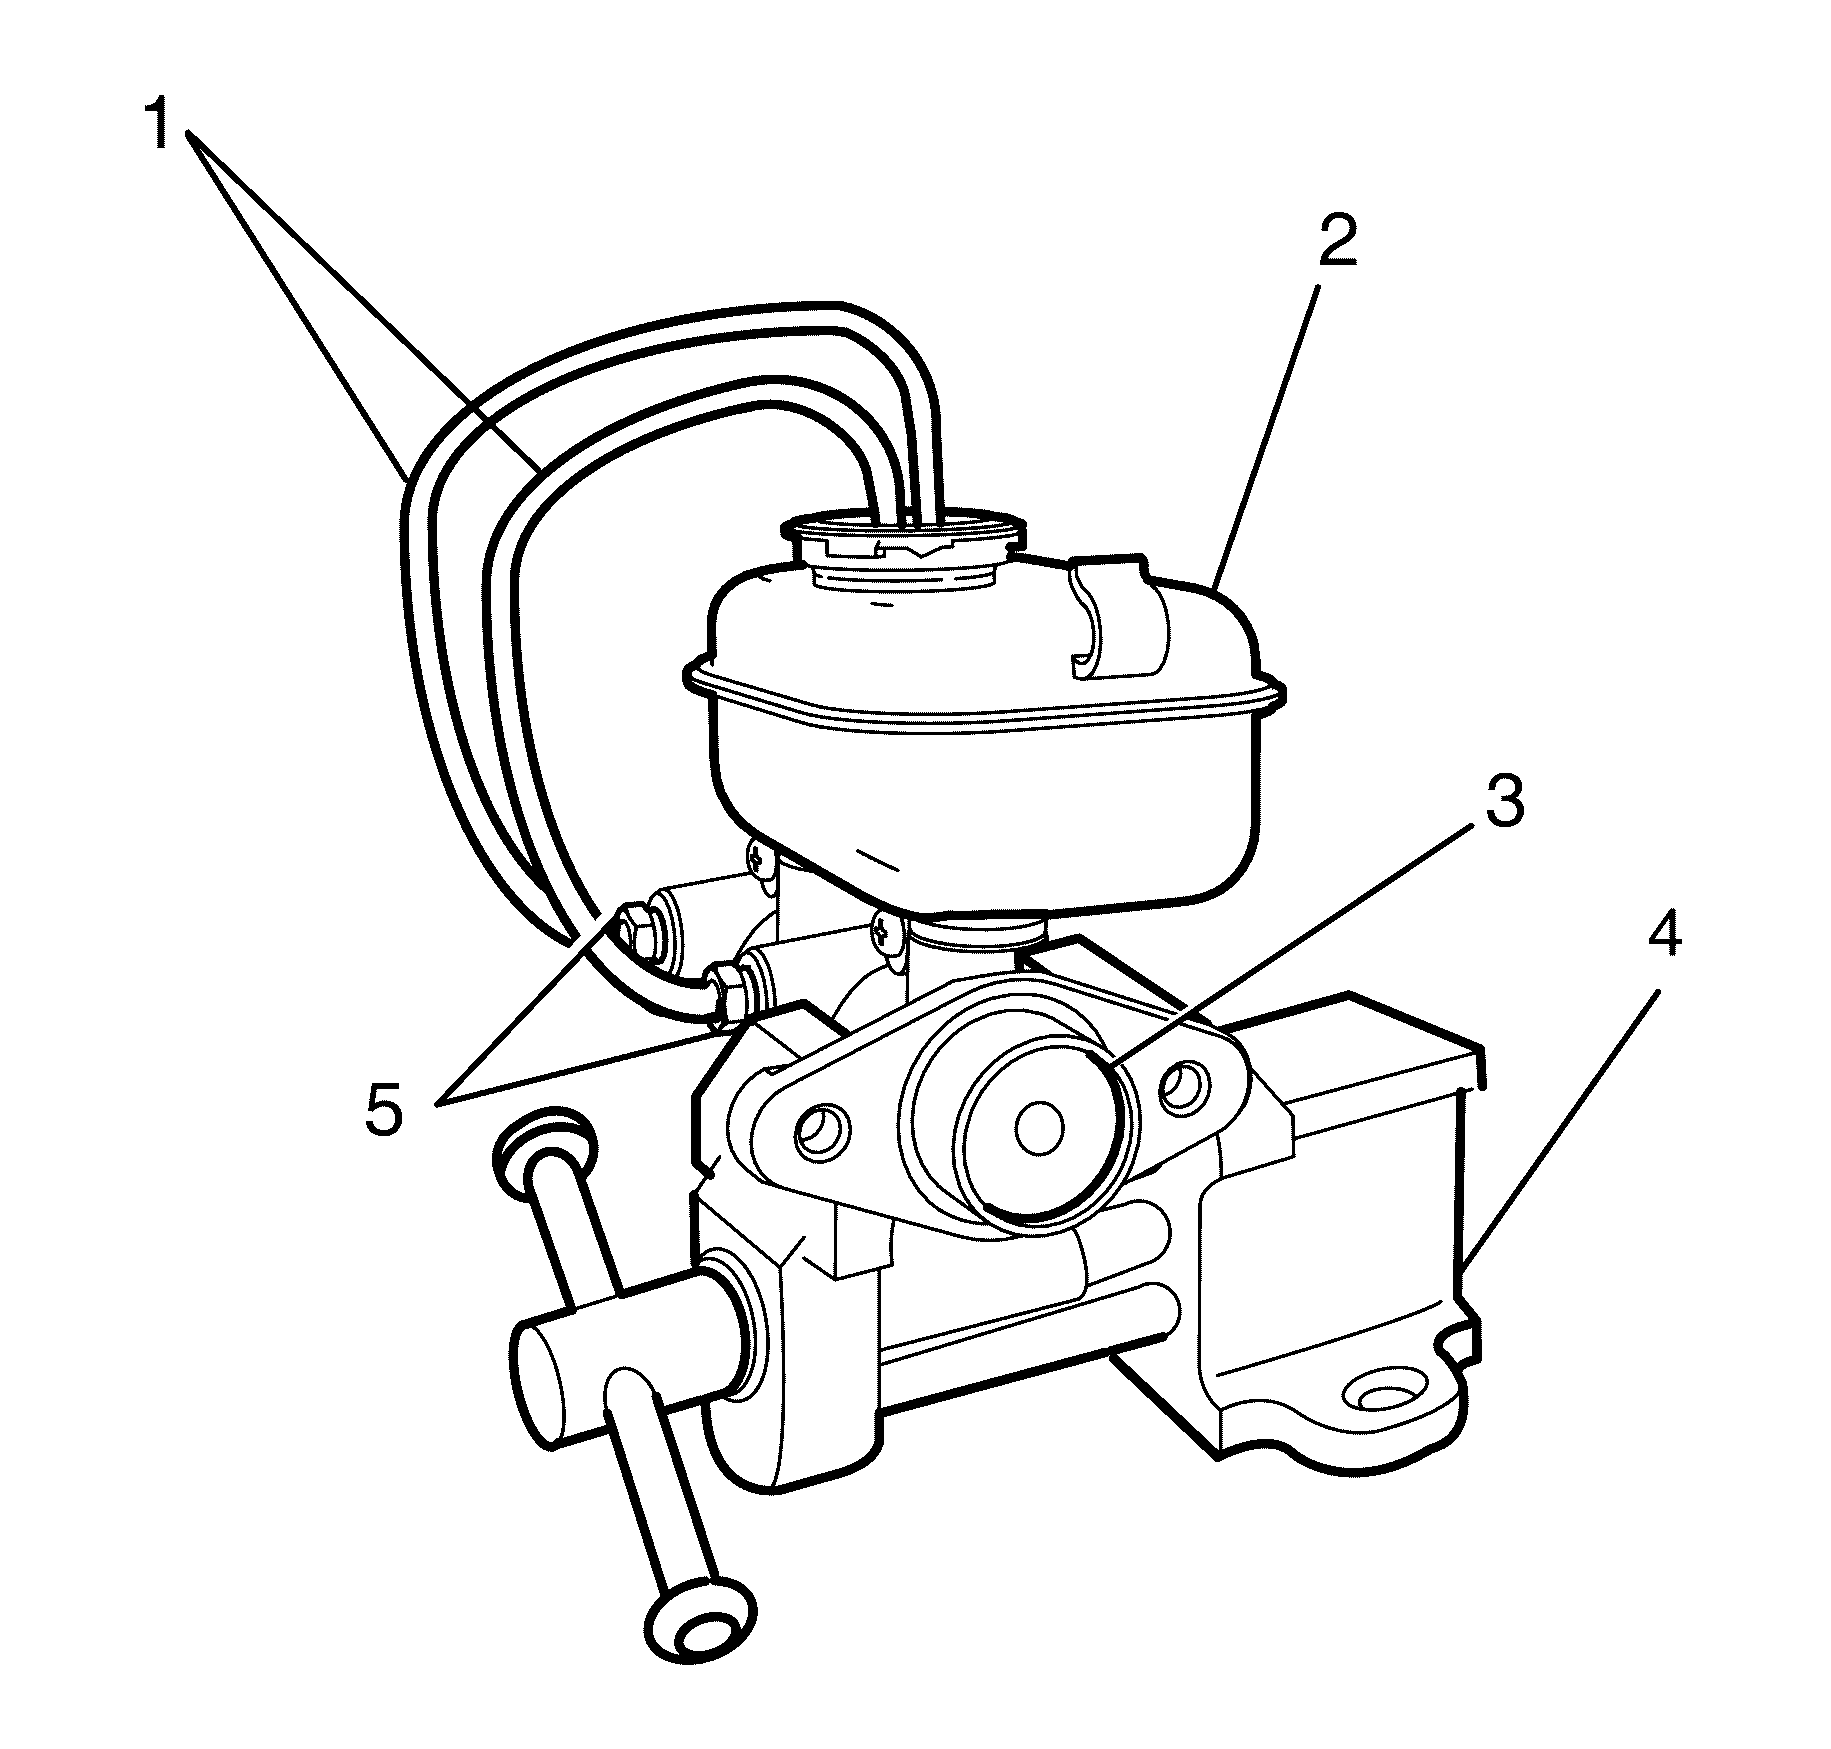
- Continue to depress and release the primary piston (3) until fluid flows freely from the ports with no evidence of air bubbles.
- Remove the fittings installed to the master cylinder ports (5) and transparent hoses (1).
- Install the master cylinder reservoir cap.
- Remove the master cylinder from the vice.
Caution: Refer to Brake Fluid Caution in the Preface section.
Caution: Refer to Brake Fluid Irritant Caution in the Preface section.
Notice: Refer to Adding Fluid to the Brake System Notice in the Preface section.
Notice: Refer to Brake Fluid Effects on Paint and Electrical Components Notice in the Preface section.
Important: The rear of the primary piston (4) must be accessible.
Route the hoses into the master cylinder reservoir (2).
Important: Brake fluid from a clean, sealed brake fluid container must be used when topping up the brake fluid level.
Important: Make sure that the ends of the transparent hoses (1) running into the master cylinder reservoir (2) are fully submerged in the brake fluid.
Important: As air is bled from the primary and secondary pistons, the effort required to depress the primary piston (3) will increase and the amount of travel will decrease.
Important: Use a suitable smooth, round-ended tool to depress and release the primary piston (3) as far as it will travel. Observe the flow of fluid coming from the ports.
Wrap the master cylinder with a clean shop cloth to prevent brake fluid spills.
Master Cylinder Bench Bleeding RHD
- Secure the mounting flange of the brake master cylinder (1) in a suitable bench vise (4).
- Remove the master cylinder reservoir cap (2).
- Install suitable fittings to the master cylinder ports (5).
- Install transparent hoses (1) to the fittings installed to the master cylinder ports (5).
- Fill the master cylinder reservoir (2) to the maximum fill level.
- Depress and release the primary piston (3).
- Continue to depress and release the primary piston (3) until fluid flows freely from the ports with no evidence of air bubbles.
- Remove the fittings installed to the master cylinder ports (5) and transparent hoses (1).
- Install the master cylinder reservoir cap.
- Remove the master cylinder from the suitable bench vise (4).
Caution: Refer to Brake Fluid Caution in the Preface section.
Caution: Refer to Brake Fluid Irritant Caution in the Preface section.
Notice: Refer to Adding Fluid to the Brake System Notice in the Preface section.
Notice: Refer to Brake Fluid Effects on Paint and Electrical Components Notice in the Preface section.
Important: The rear of the primary piston (3) must be accessible.
Important: Install suitable fittings to the master cylinder ports (5) that match the type of flare seat required and also provide for hose attachment.
Route the hoses into the master cylinder reservoir (2).
Important: Brake fluid from a clean, sealed brake fluid container must be used when topping up the brake fluid level.
Important: Make sure that the ends of the transparent hoses (1) running into the master cylinder reservoir (2) are fully submerged in the brake fluid.
Important: As air is bled from the primary and secondary pistons, the effort required to depress the primary piston (3) will increase and the amount of travel will decrease.
Important: Use a suitable smooth, round-ended tool to depress and release the primary piston (3) as far as it will travel. Observe the flow of fluid coming from the ports.
Wrap the master cylinder with a clean shop cloth to prevent brake fluid spills.
