For 1990-2009 cars only
Tools Required
| • | J 8037 Ring Compressor |
| • | J 8087 Cylinder Bore Gage |
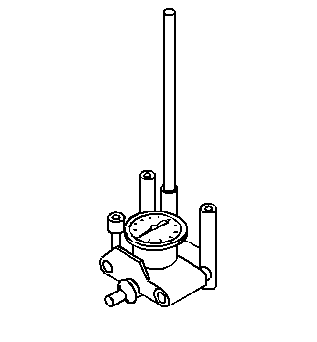
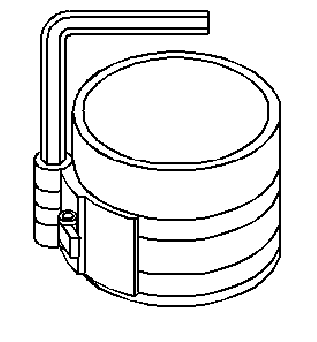
| • | J 41556 Connecting Rod Guide |
| • | J 45059 Angle Meter |
Piston Selection
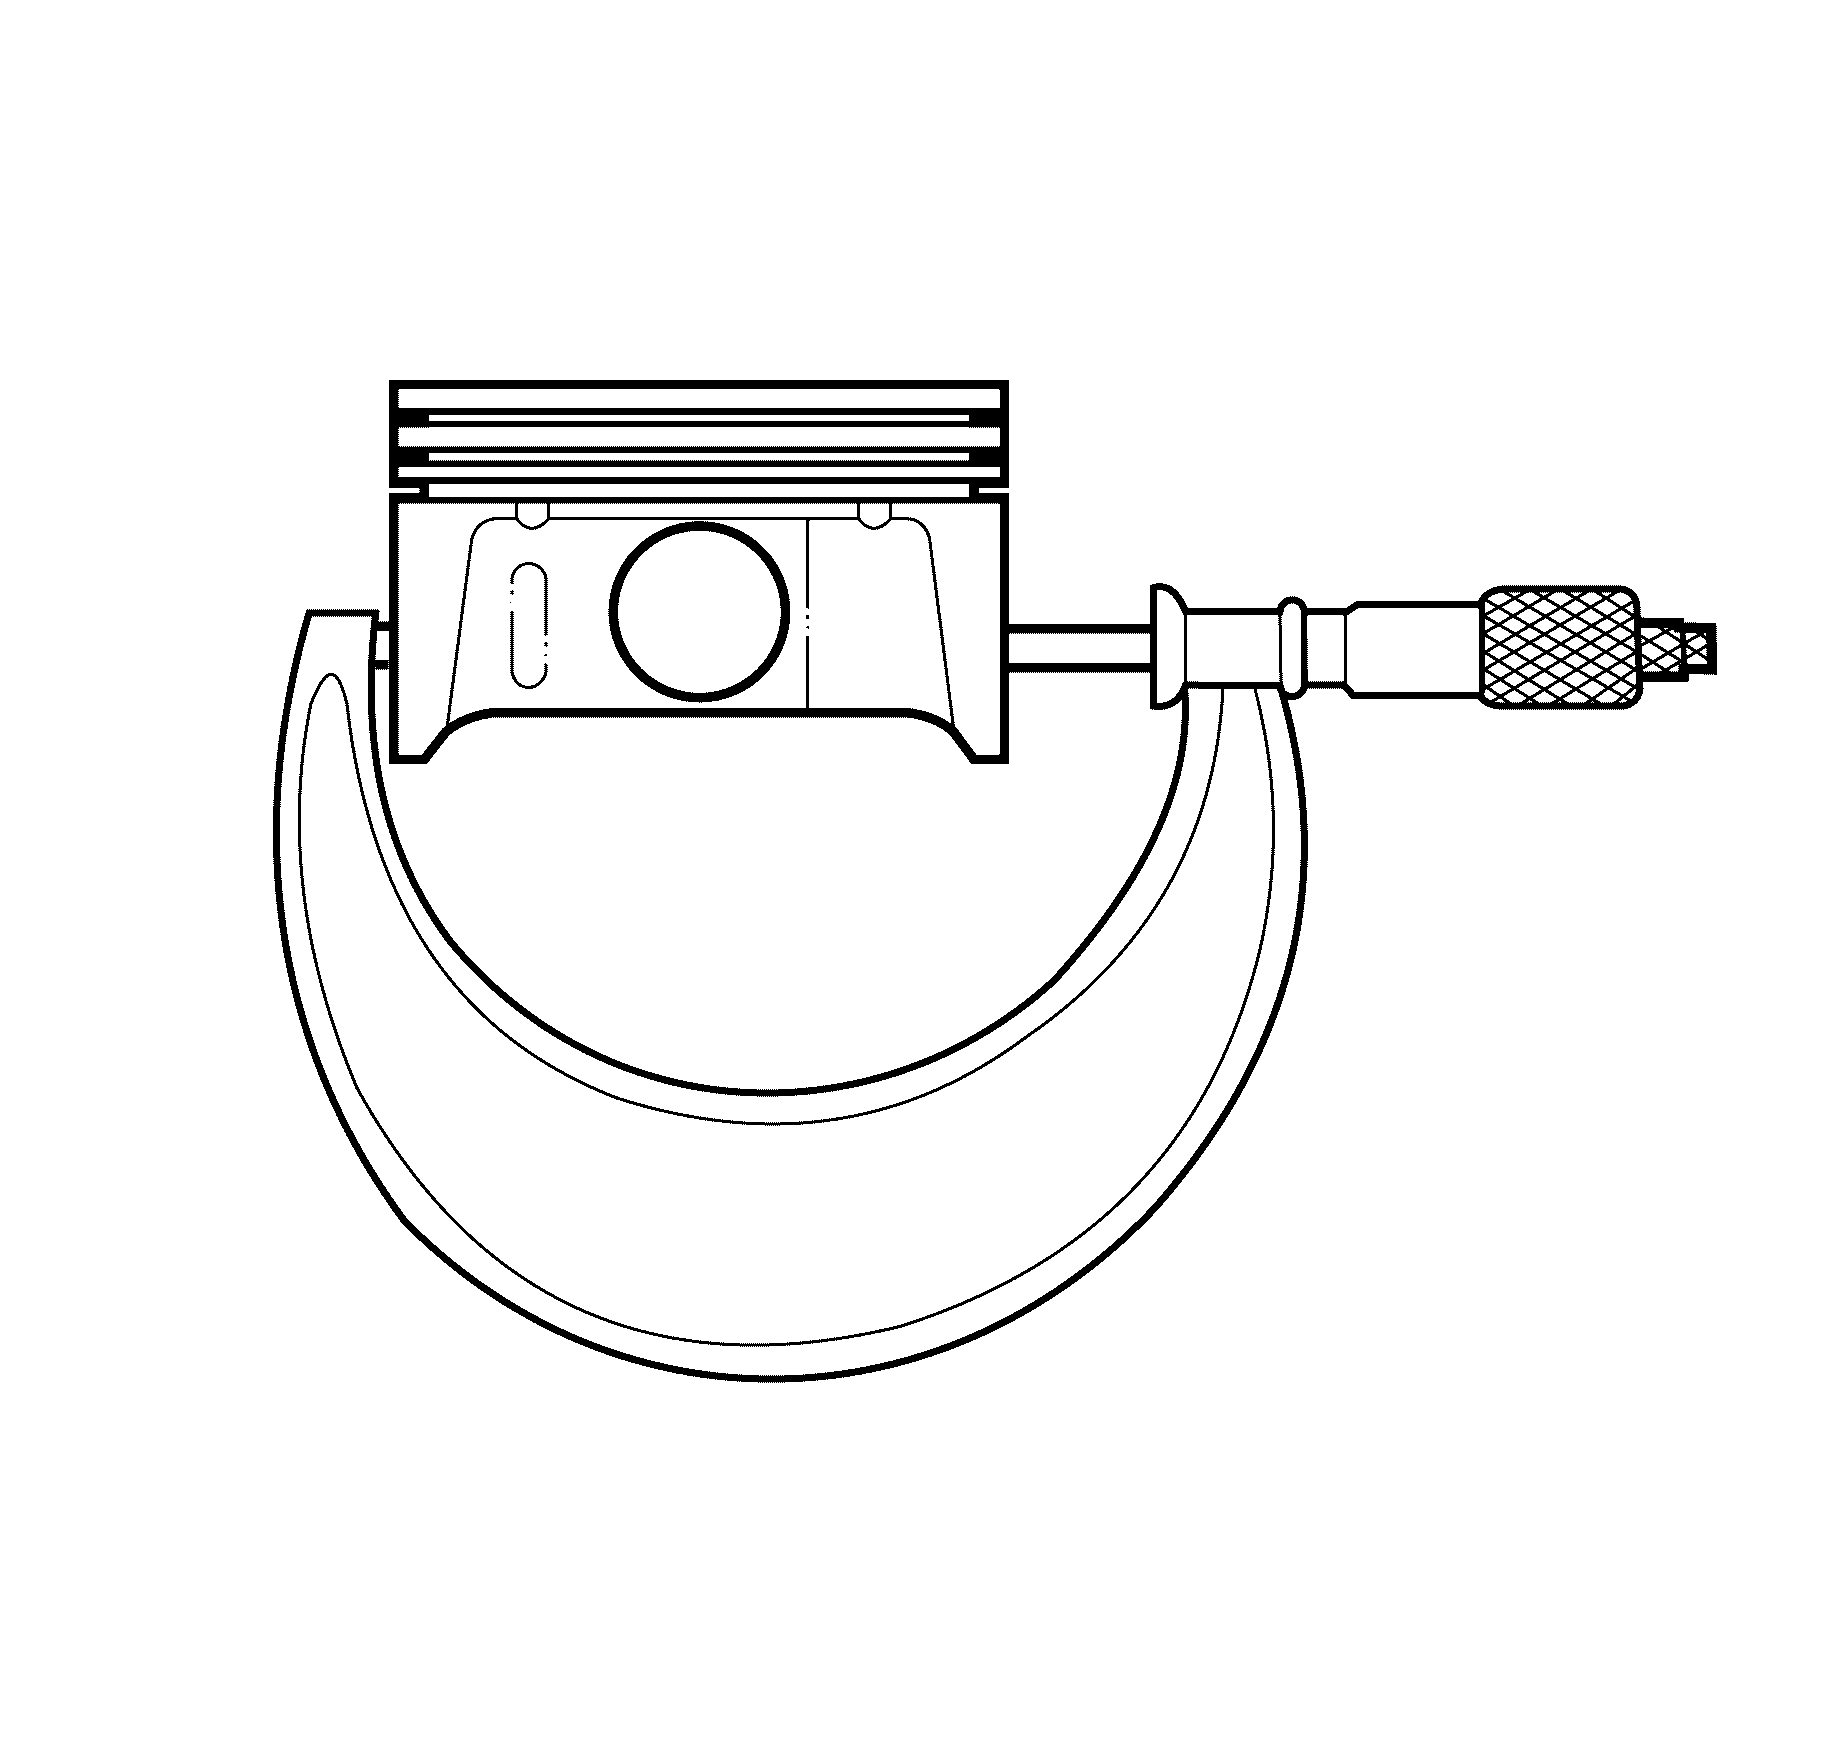
- With a micrometer at a right angle, measure the piston outside diameter (OD). Measure the diameter 43 mm (1.69 in) from the top of the piston. Refer to Engine Mechanical Specifications .
- Record the piston OD.
- Adjust the micrometer to the recorded piston OD.
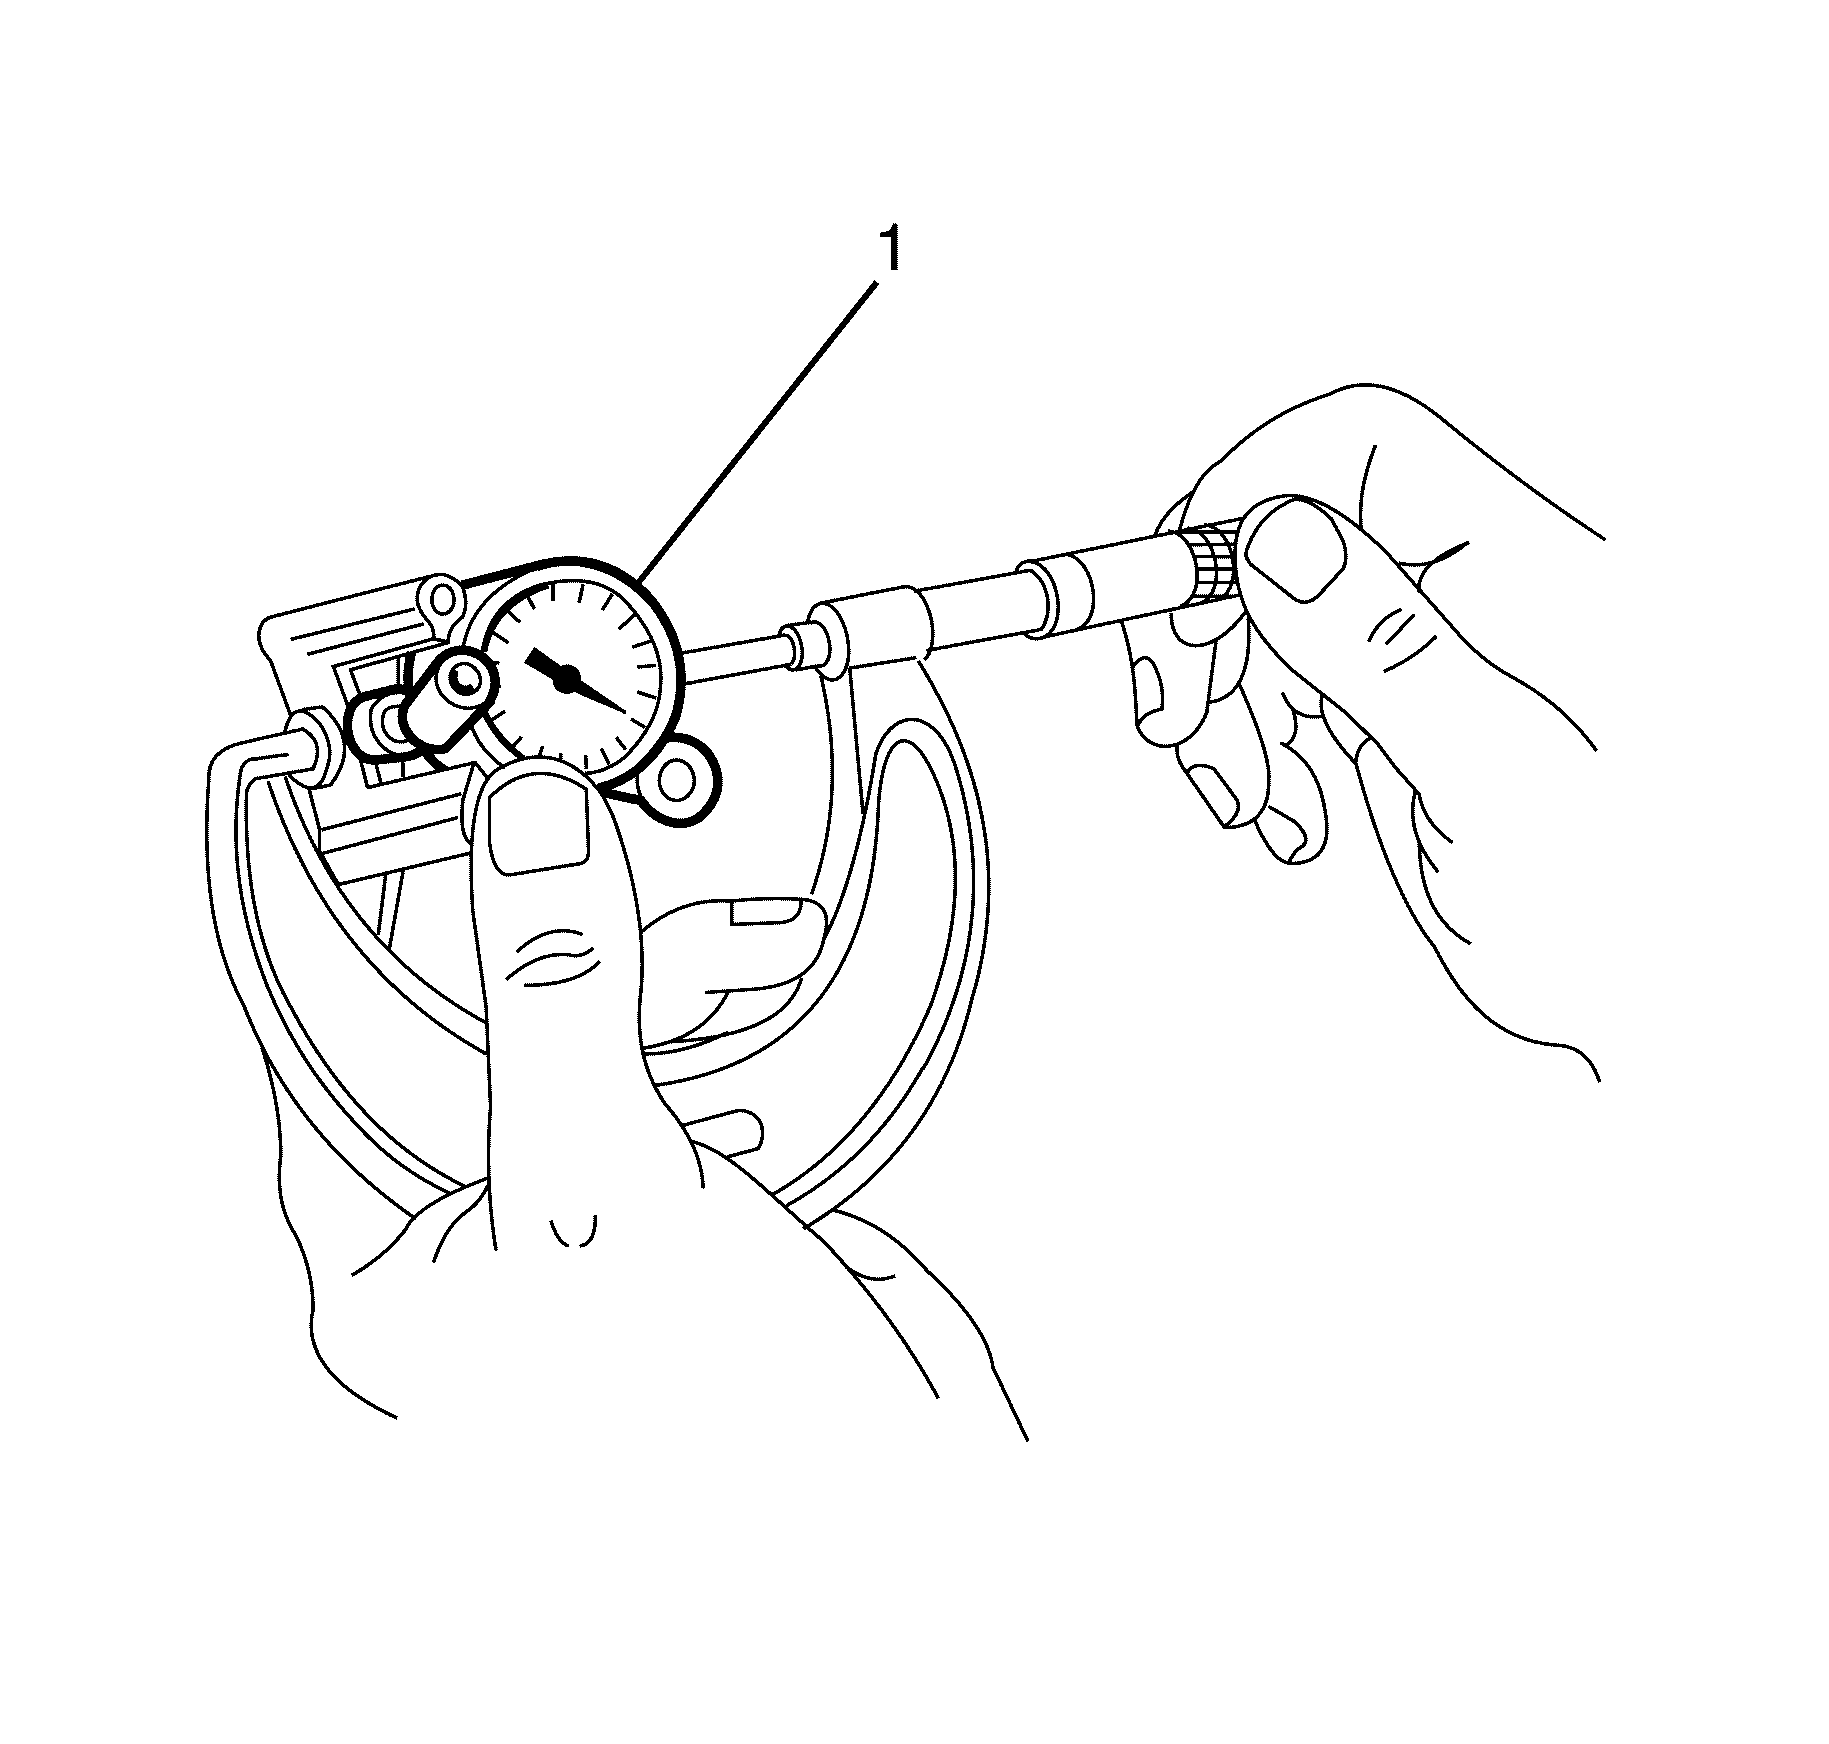
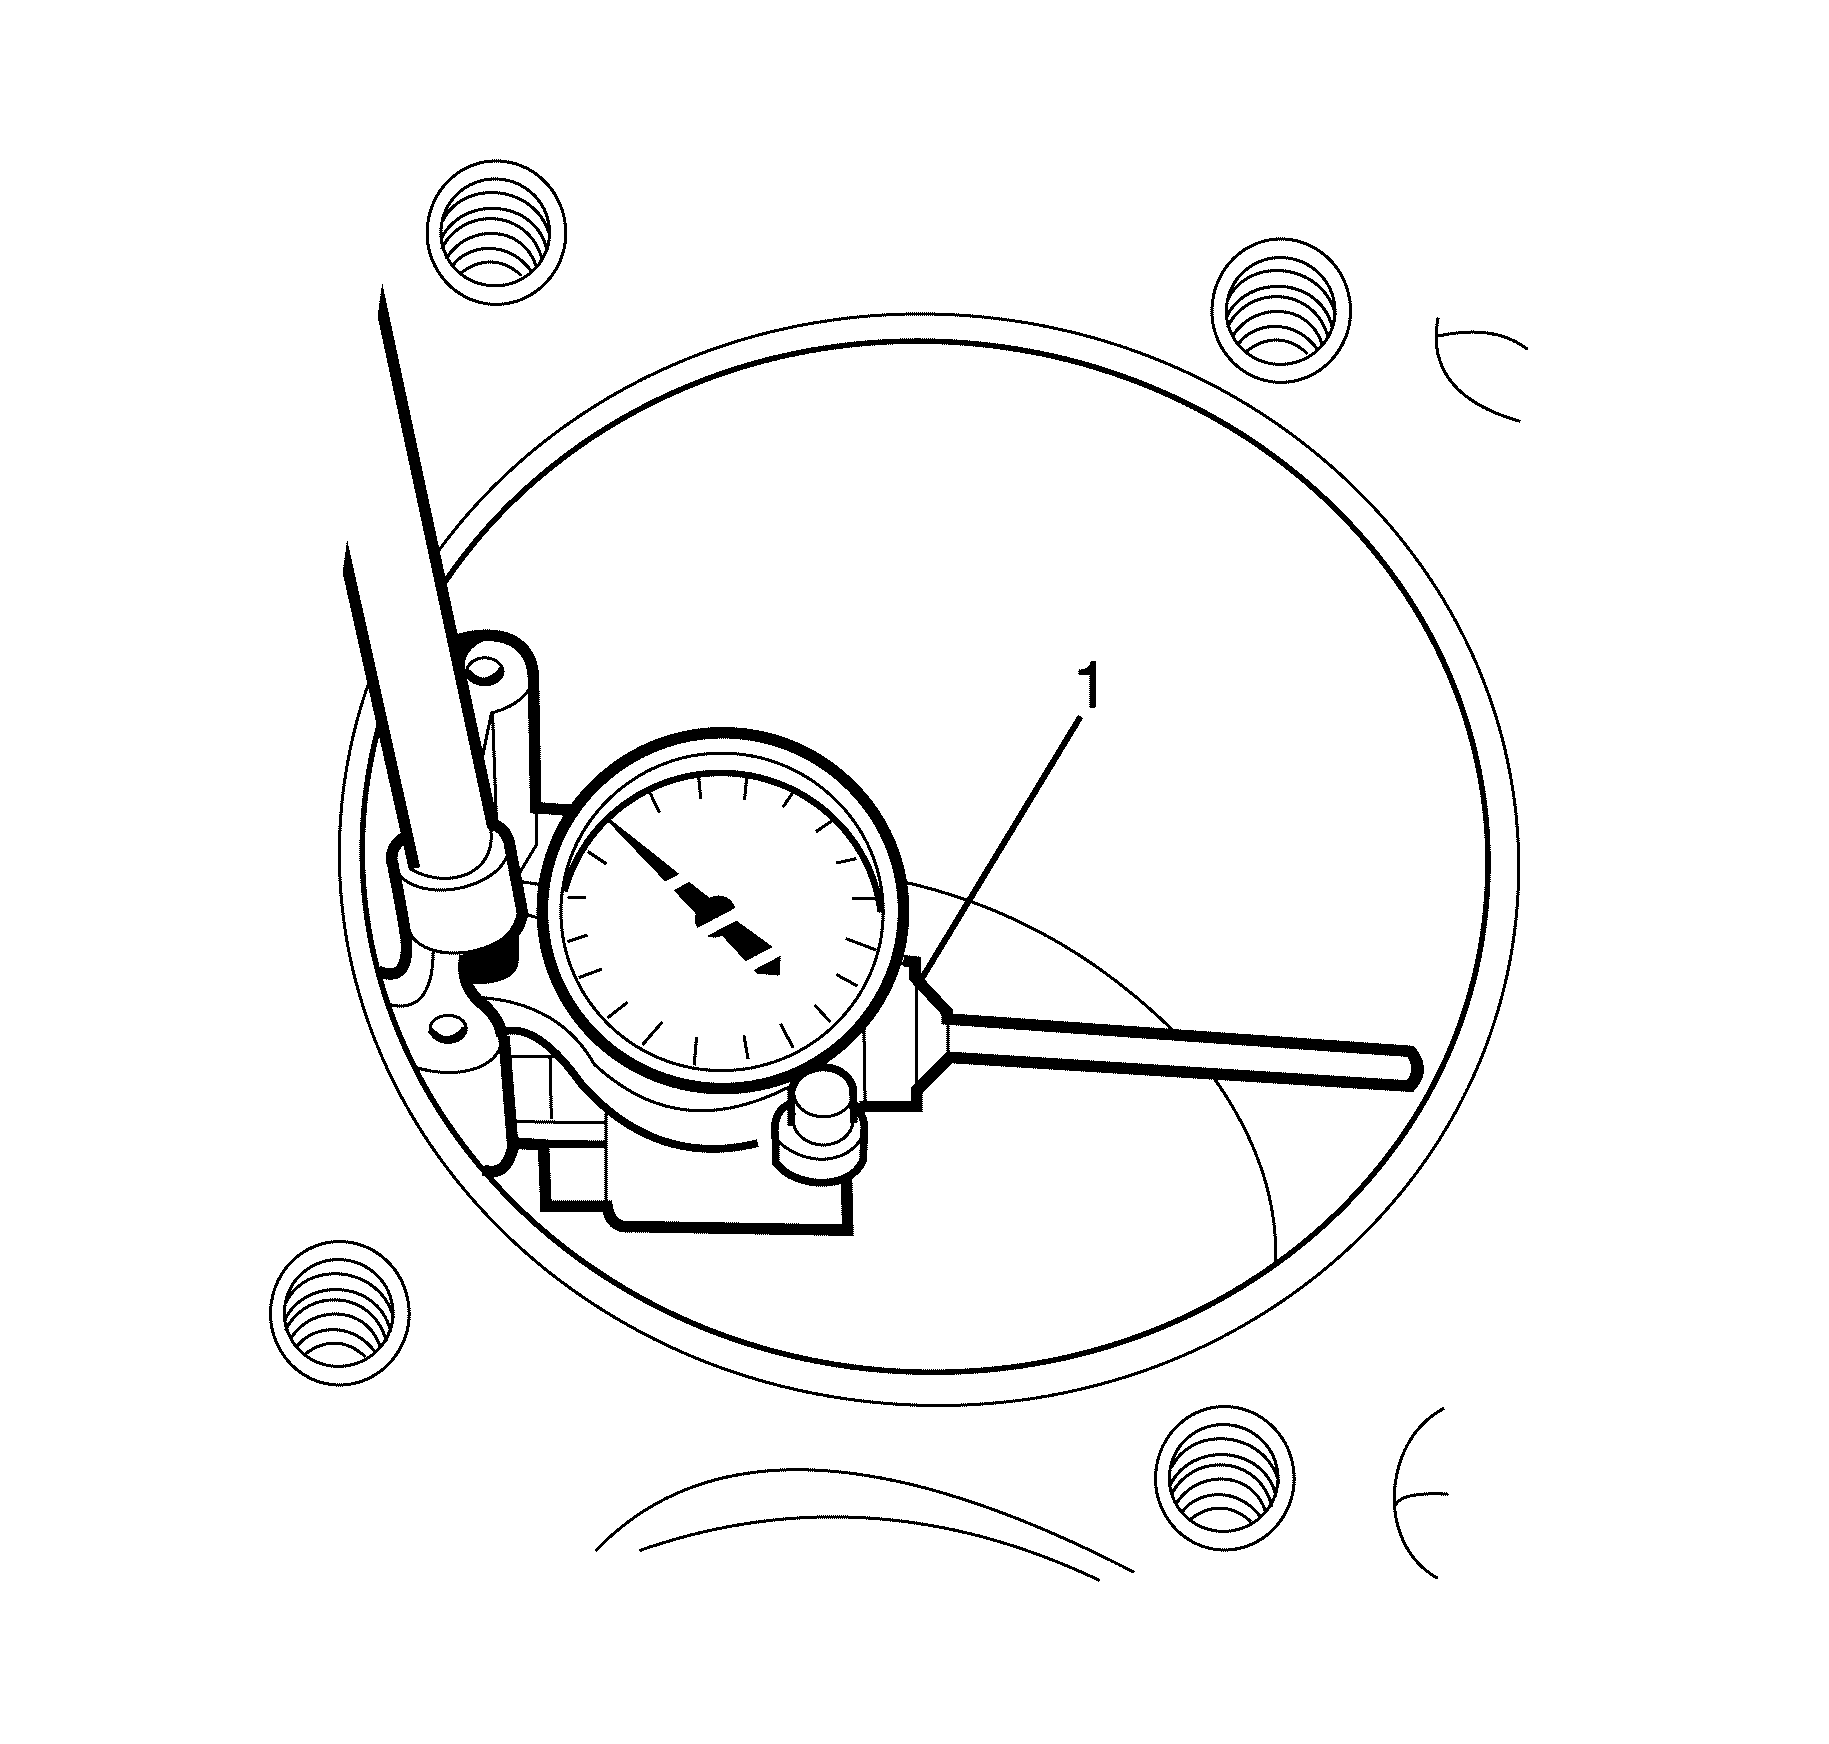
- Insert the J 8087 (1) into the micrometer and zero the gage dial.
- Using the J 8087 (1), measure the cylinder bore inside diameter (ID). Measure at a point 64 mm (2.5 in) from the top of the cylinder.
- Record the cylinder bore ID.
- Subtract the piston OD from the cylinder bore ID to determine the piston-to-bore clearance. Refer to Engine Mechanical Specifications .
- If the correct clearance cannot be obtained, select another piston, pin, and connecting rod assembly and again measure the clearances. If the correct fit cannot be obtained, the cylinder bore may require honing for an oversize piston.
Important: Measurements of all components should be taken with the components at normal room temperature. For correct piston fit, the engine block cylinder bores must not have above acceptable wear or taper. A used piston, pin, and connecting rod assembly may be installed if, after inspection is within specifications.
Piston, Pin, and Connecting Rod Installation
- Liberally lubricate the cylinder walls, piston rings and piston skirts with engine oil.
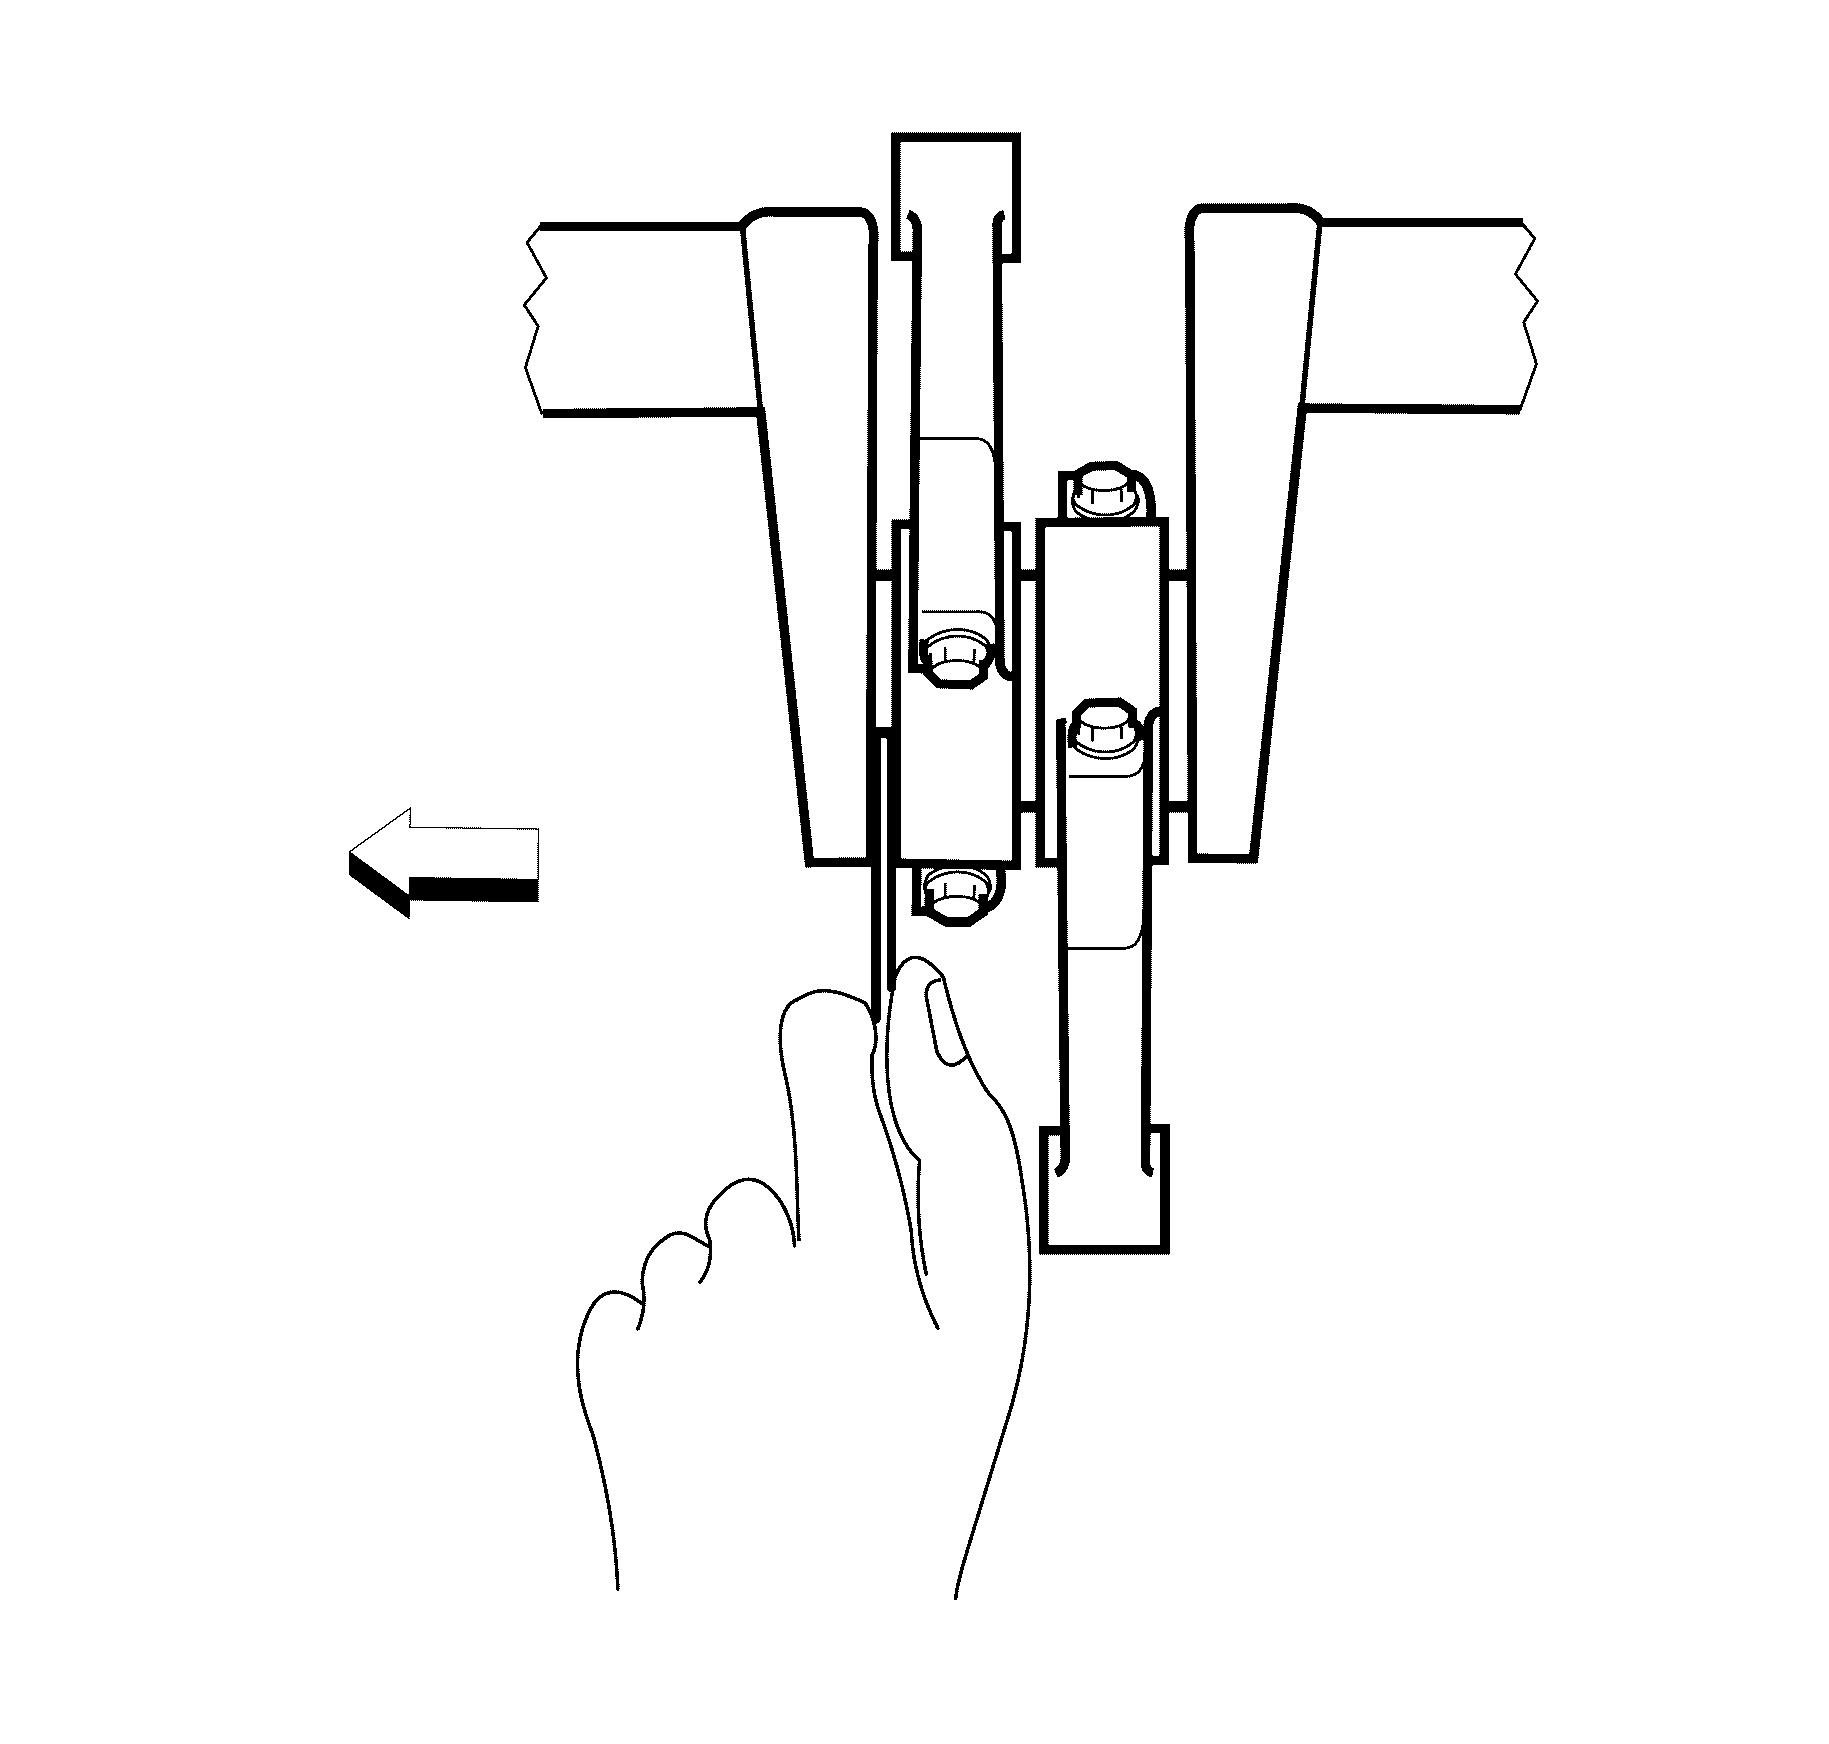
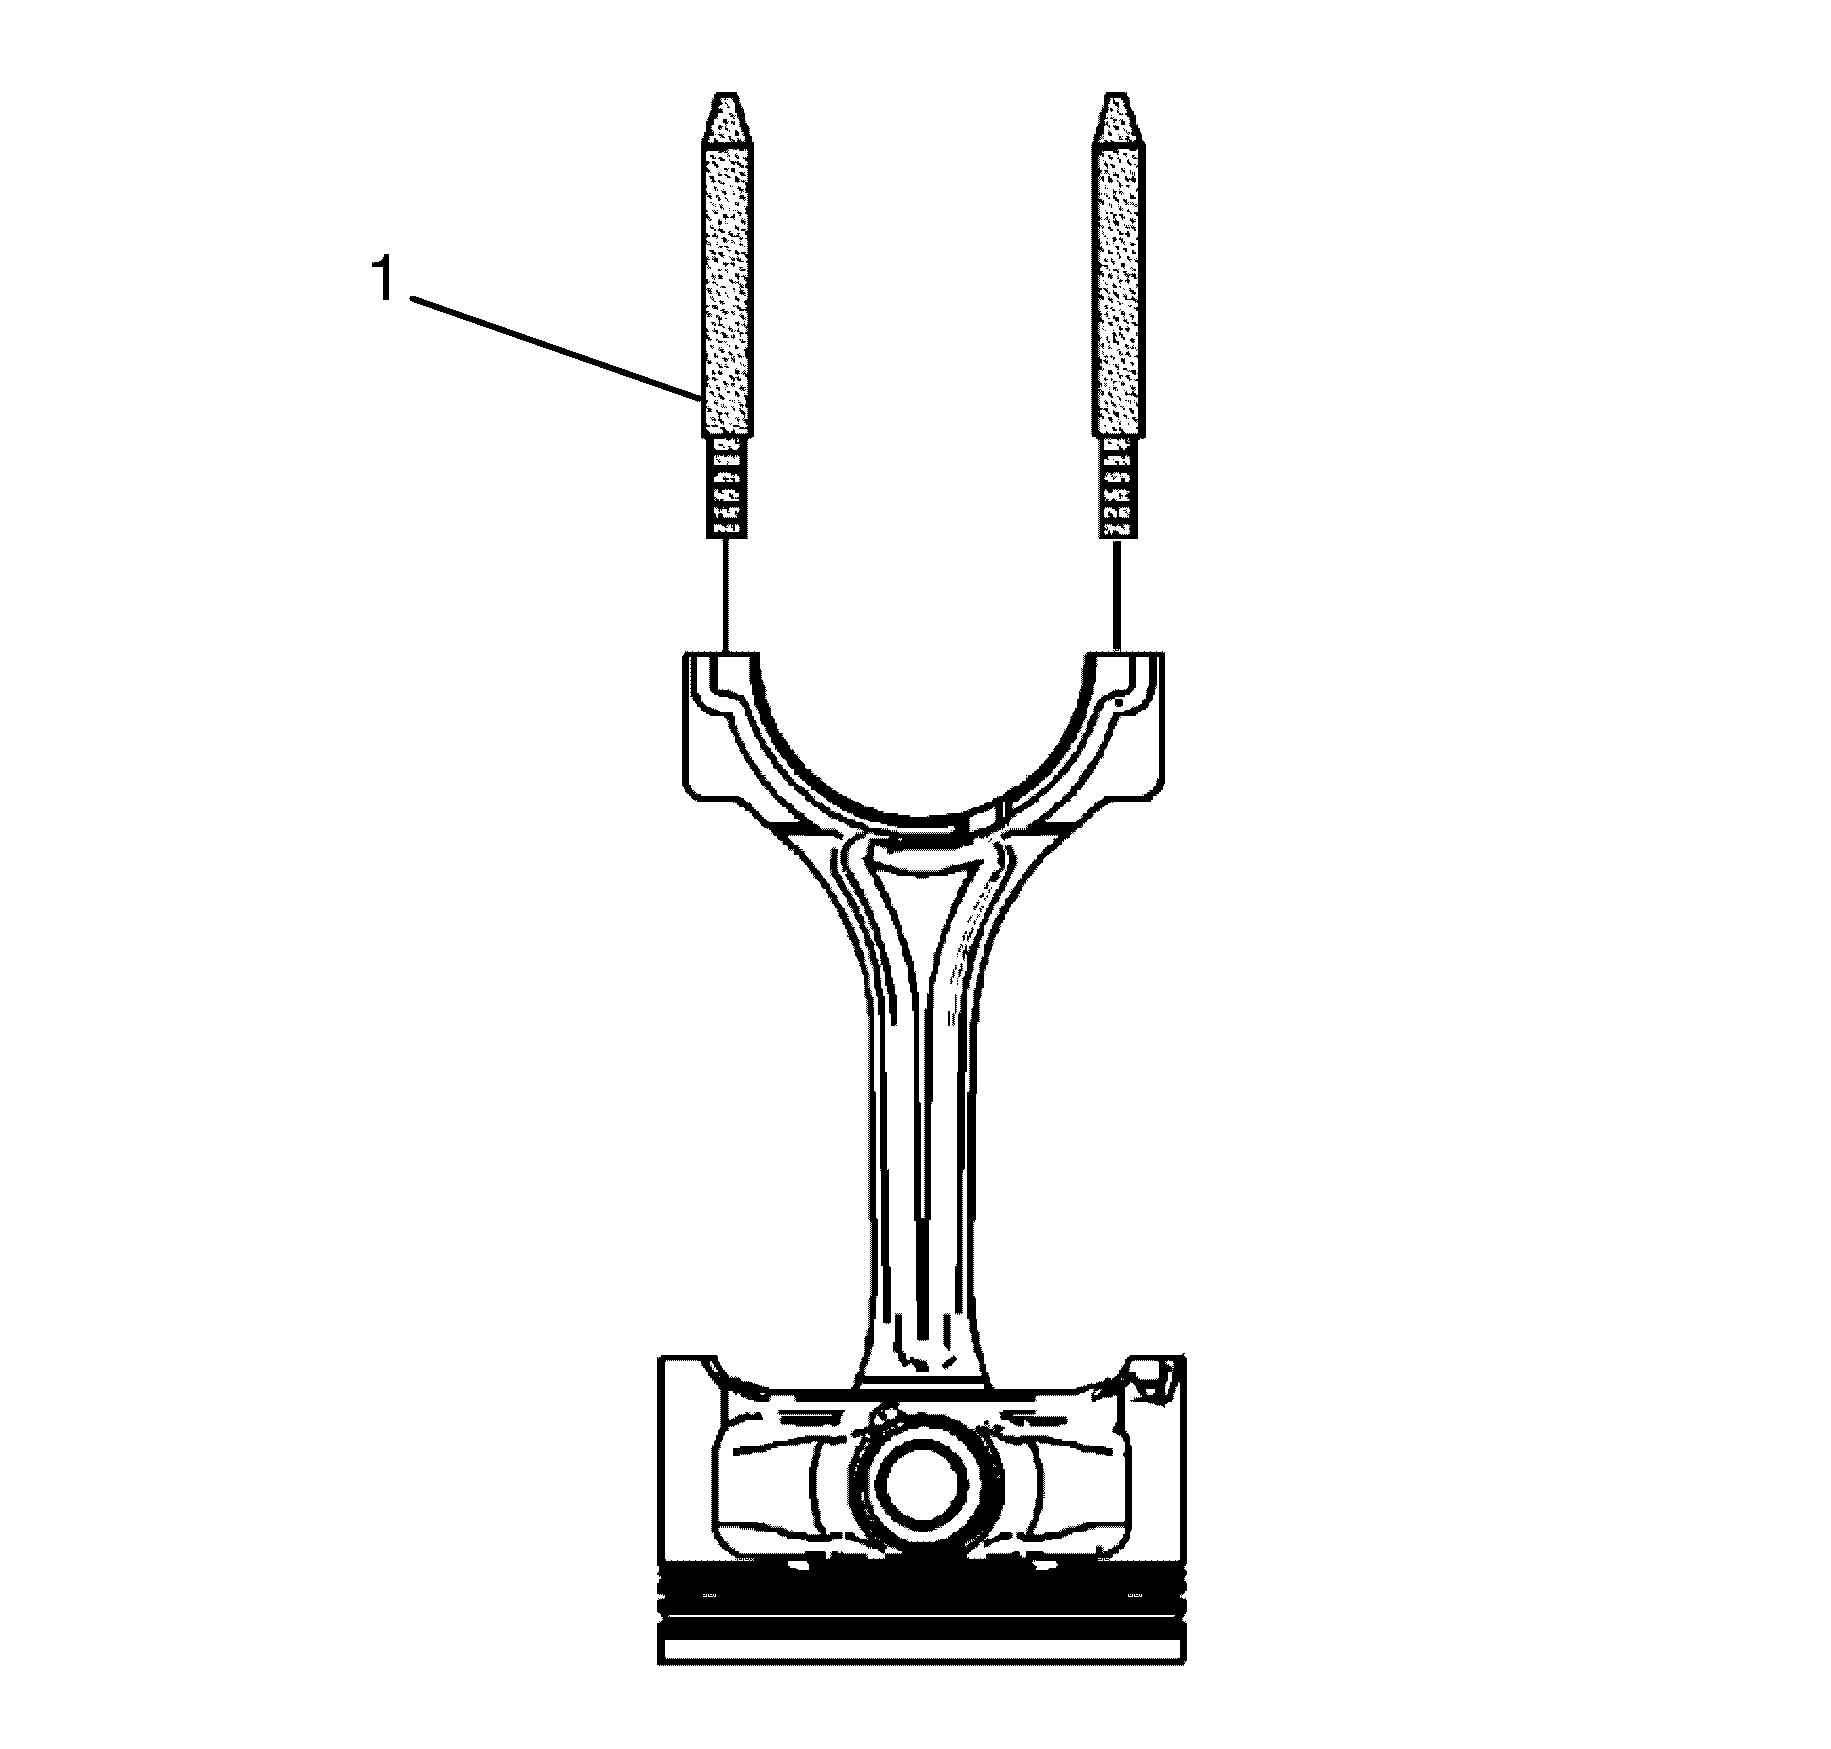
- Select the correctly numbered piston/connecting rod assembly for the cylinder. The mark (1) on top of the piston and the painted mark (2) on the connecting rod show the proper piston orientation.
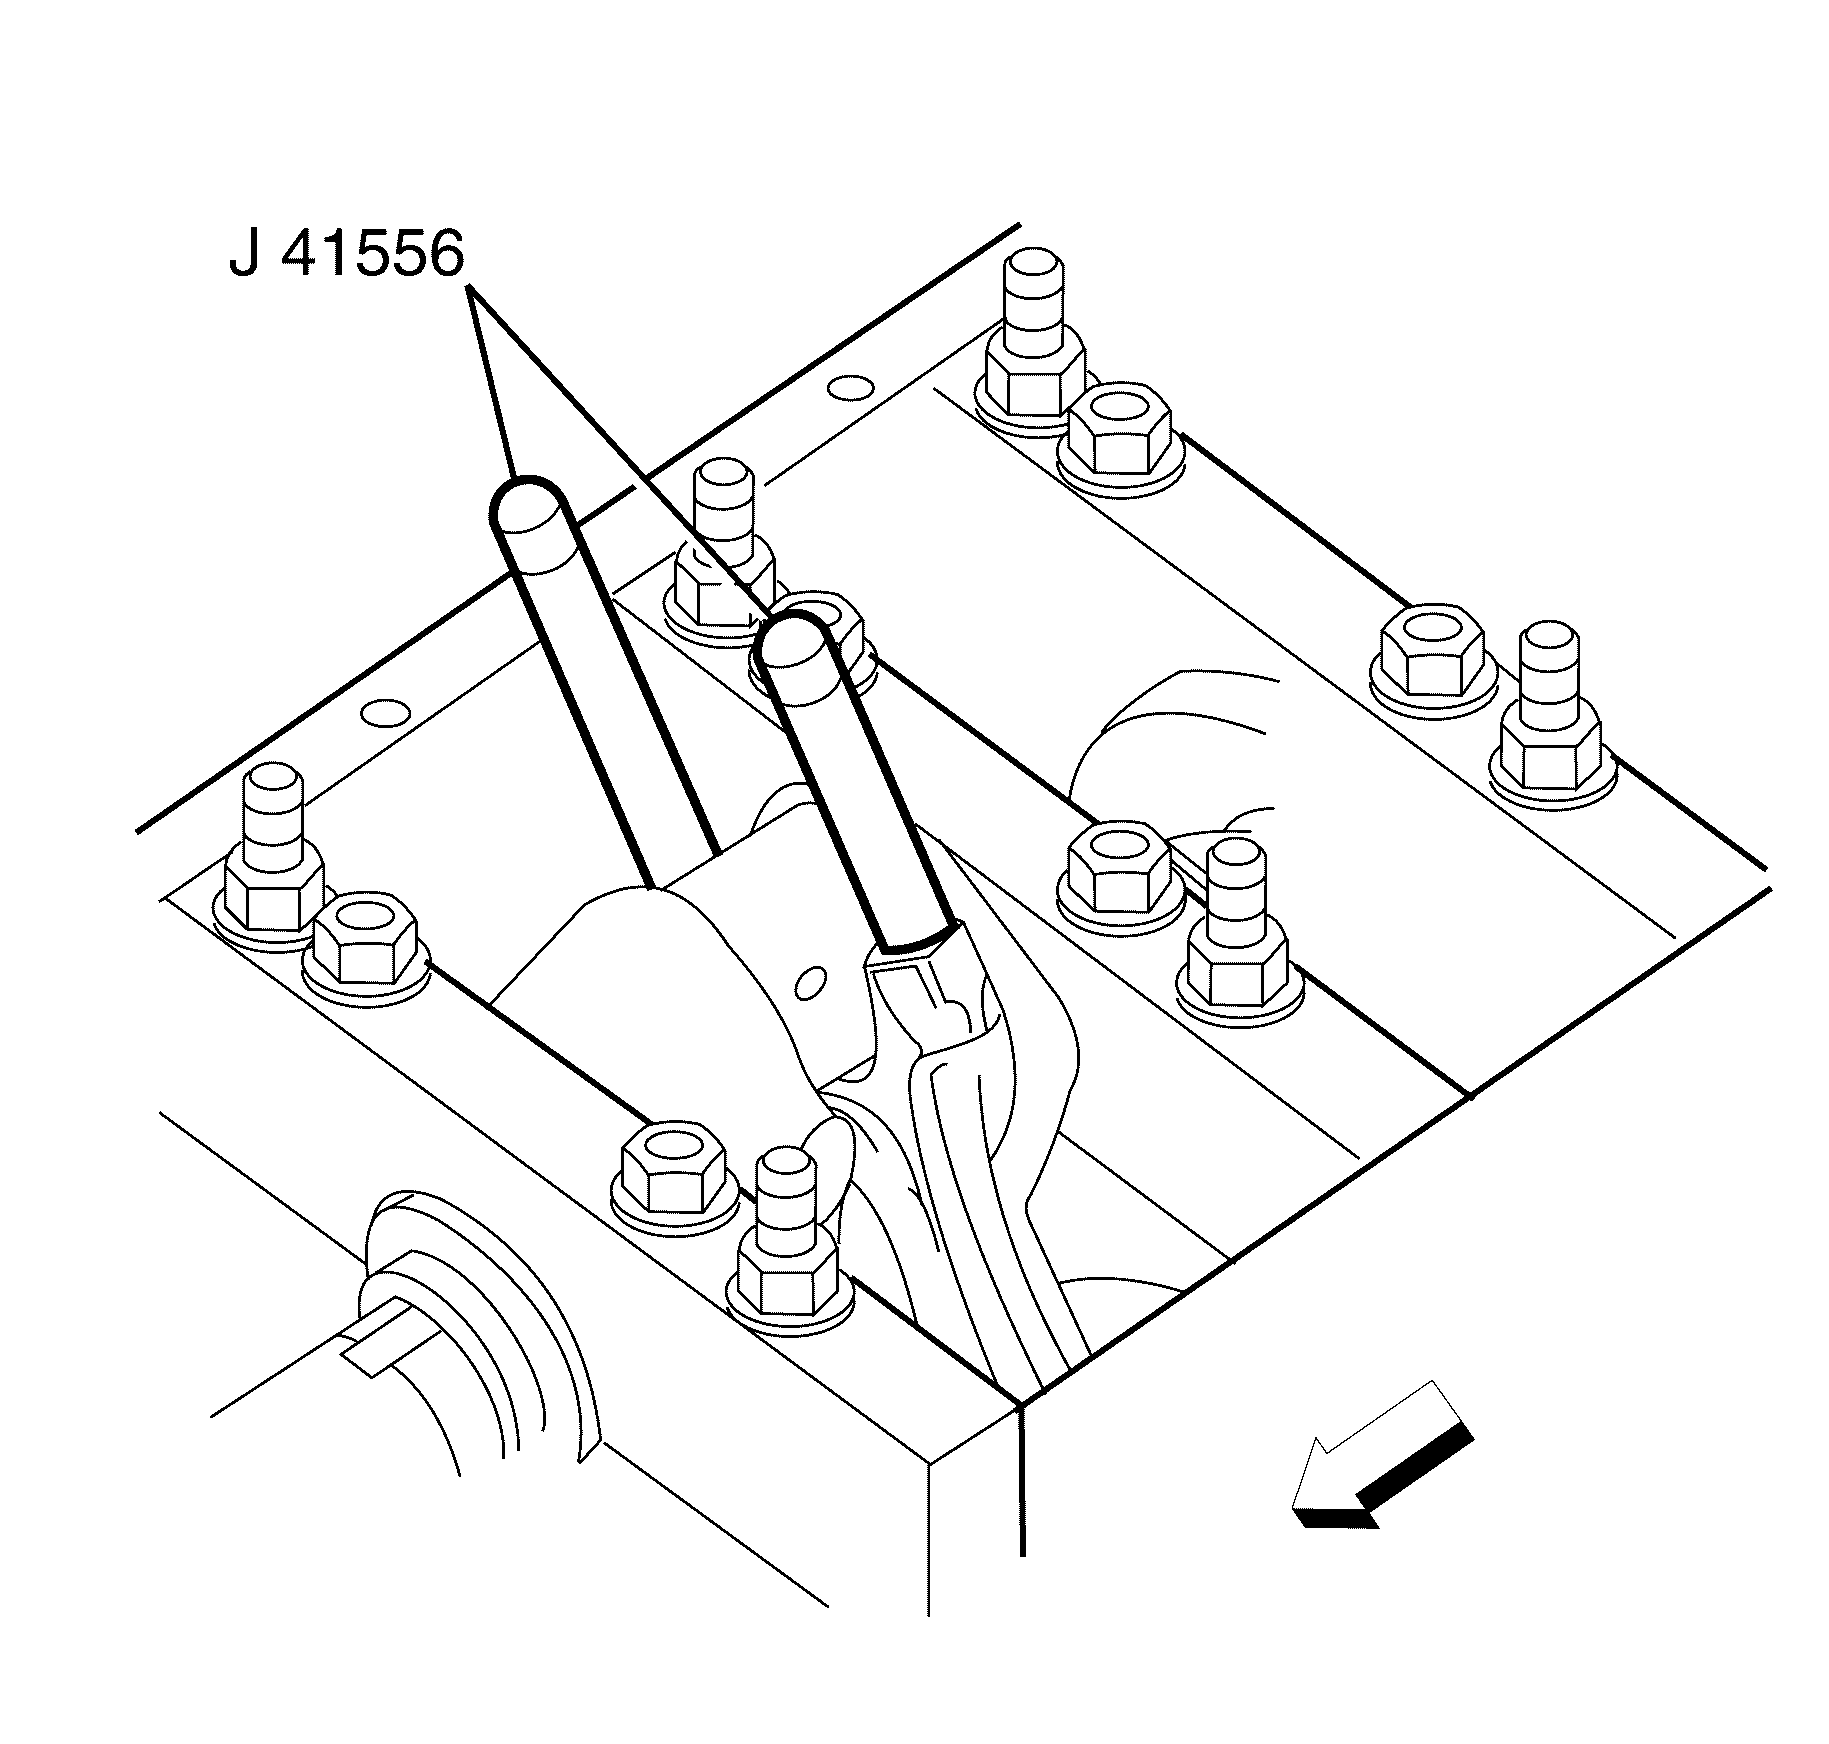
- Install the J 41556 to the connecting rod.
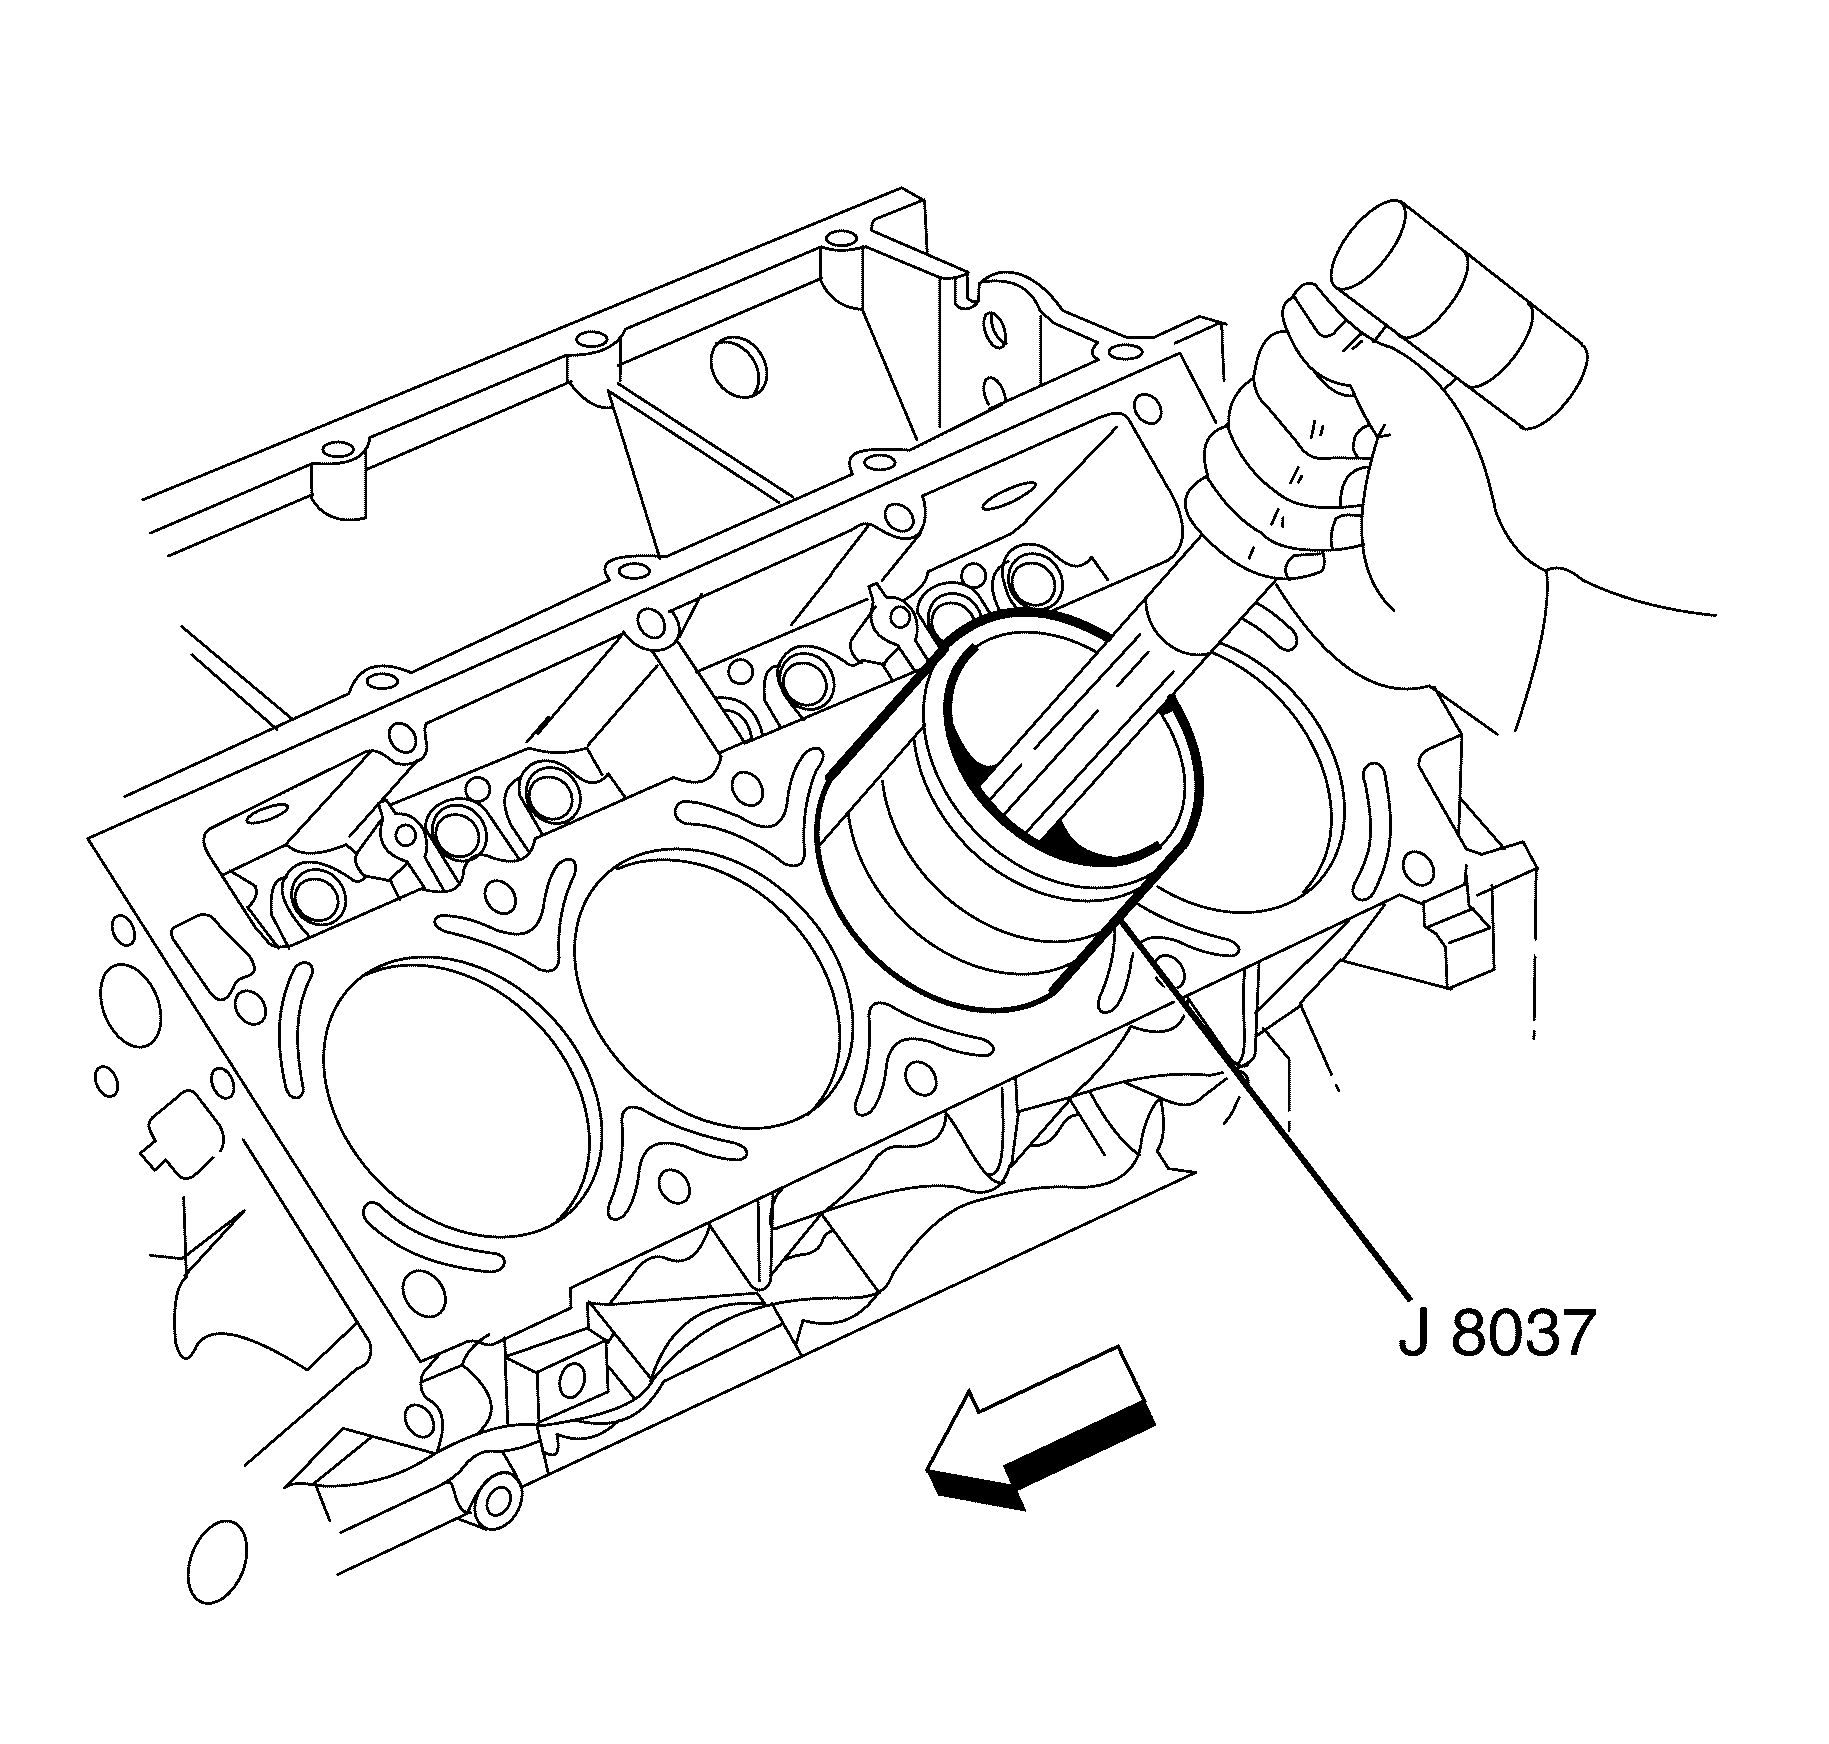
- Install the J 8037 onto the piston and compress the piston rings.
- Install the piston, pin, and connecting rod assembly into the cylinder bore. Hold the piston ring compressor firmly against the engine block. Using a soft hammer handle, lightly tap the top of the piston until all the piston rings have entered the cylinder bore.
- Use the J 41556 (1) to guide the connecting rod onto the crankshaft journal.
- Remove the J 41556 (1) from the connecting rod.
- Install the bearing cap (3), bearing half (2), and connecting rod bolts (1) to the connecting rod (4).
- Tighten the bolts a first pass to 20 N·m (15 lb ft).
- Tighten the bolts a final pass to 75 degrees using the J 45059 .
- Measure the connecting rods for the correct side clearance. Refer to Engine Mechanical Specifications .
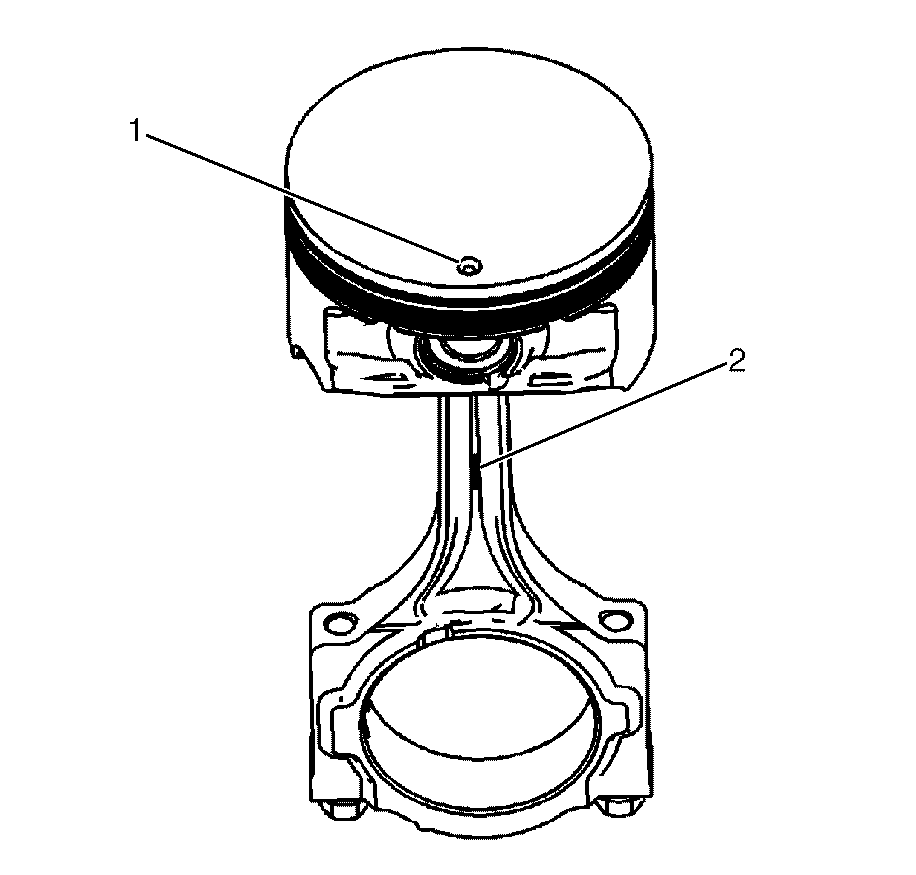
Important: The piston is directional and must be installed in the cylinder block in the correct direction. The markings on the piston and connecting rod should face the front of the engine.
Notice: Refer to Fastener Notice in the Preface section.
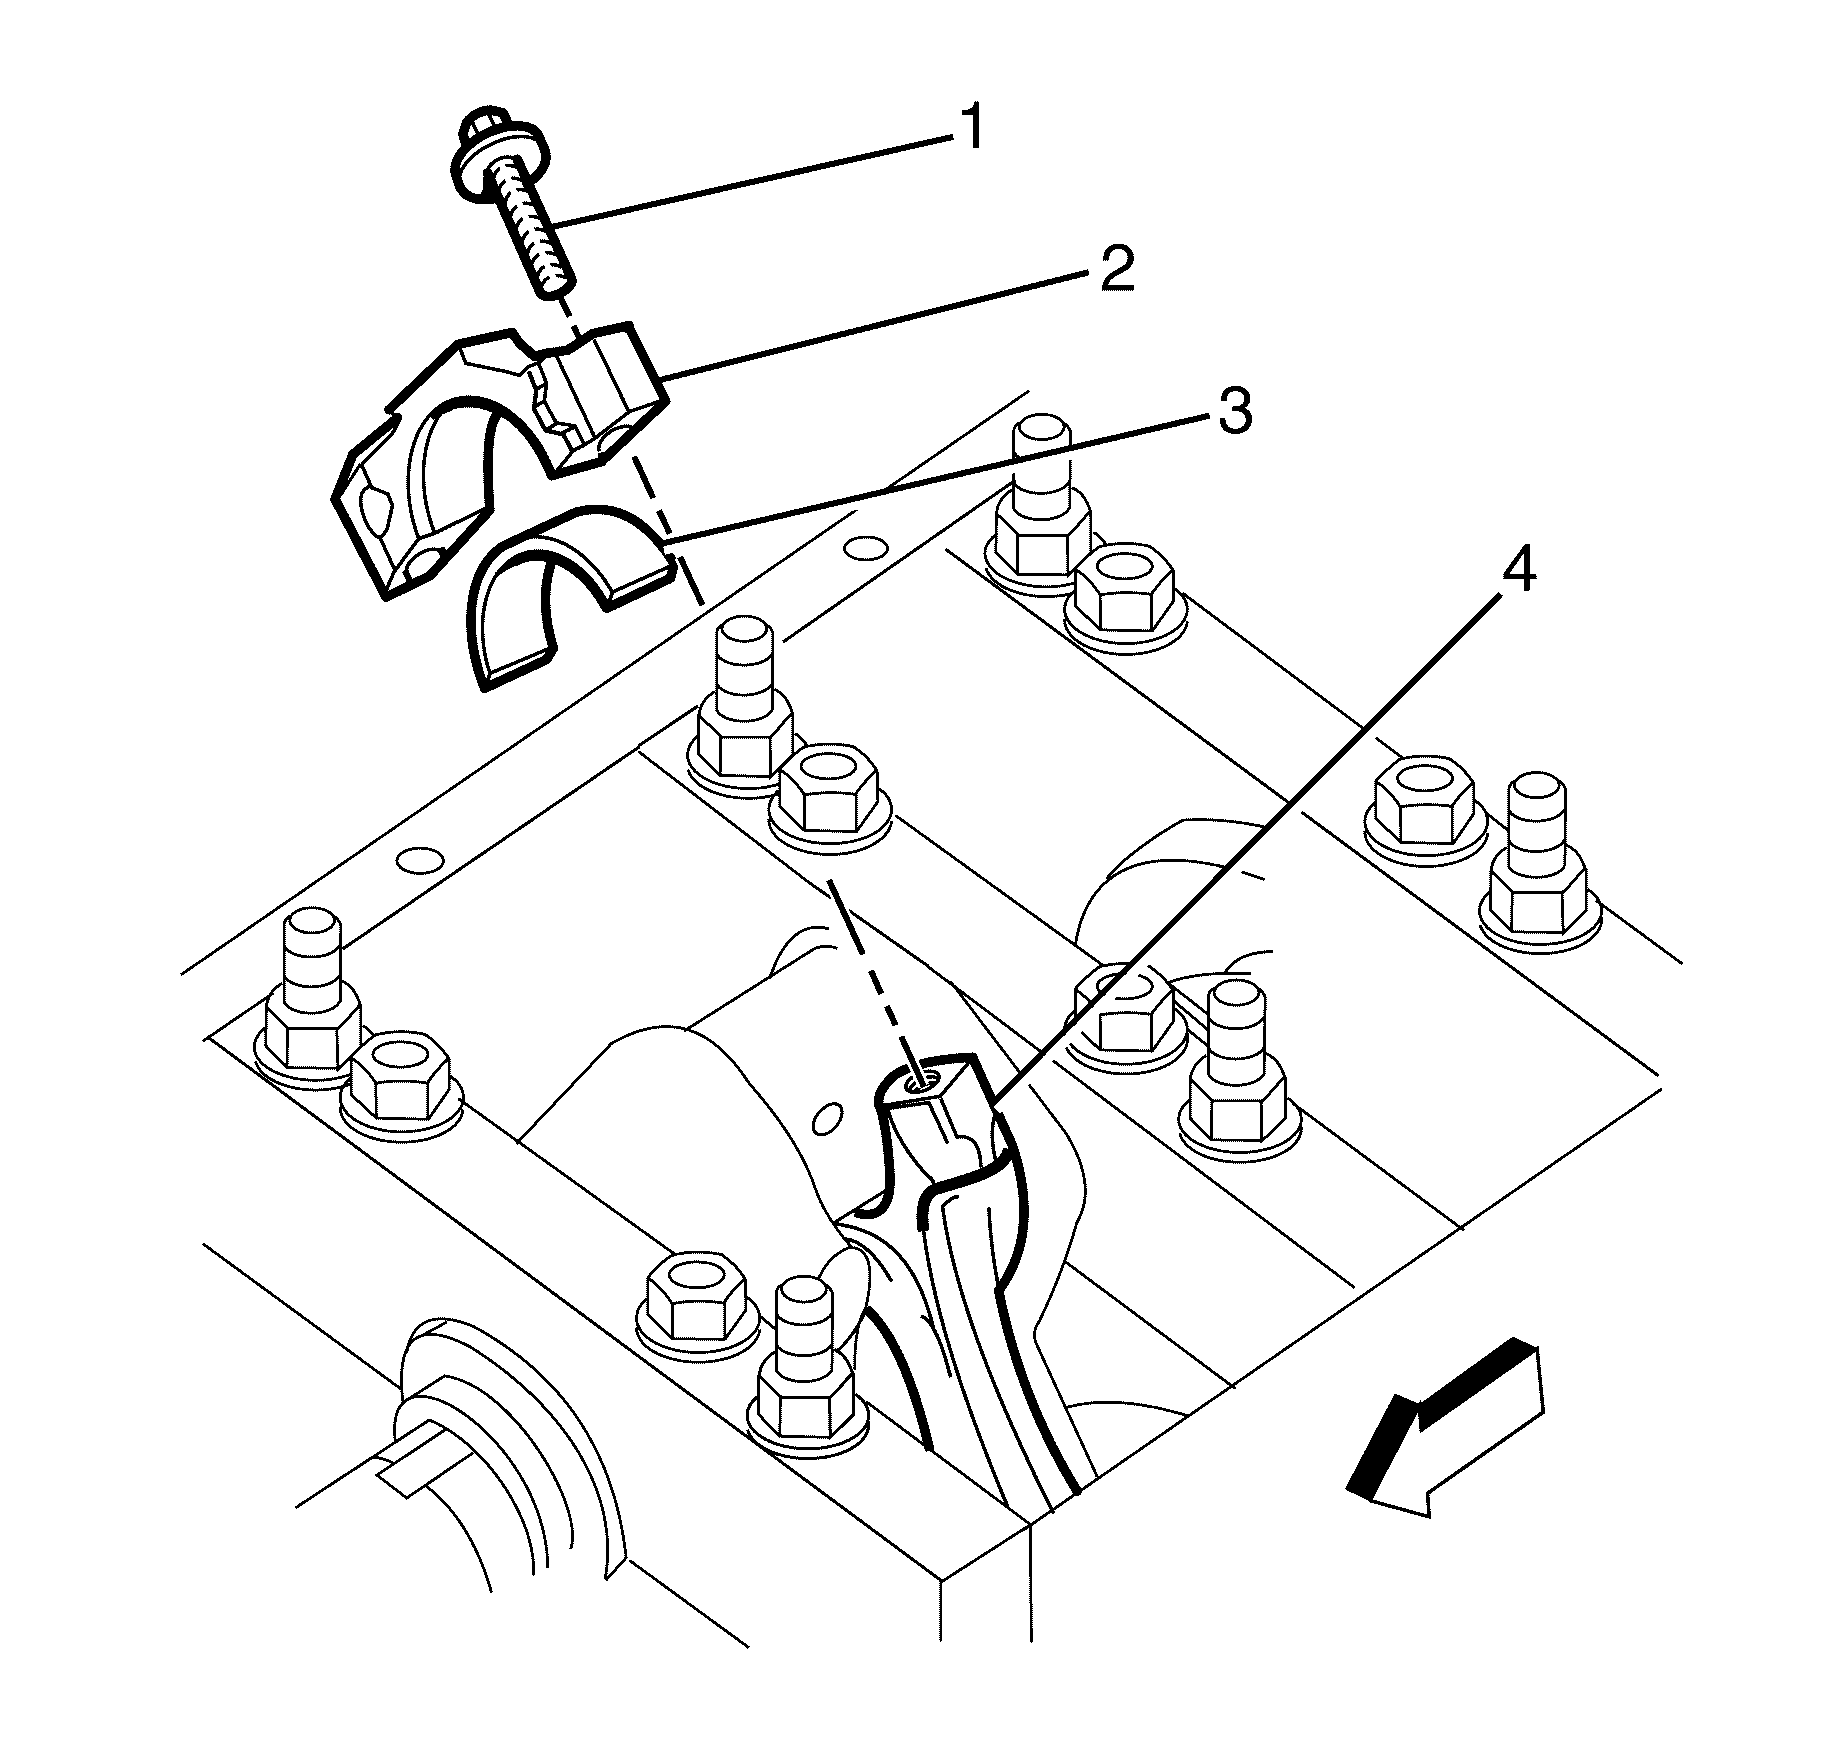
Important: The connecting rod and cap must be assembled with the mating surfaces correctly aligned.
Tighten