Seat Belt Buckle Pretensioner Replacement LHD
Removal Procedure
- Disable the SIR system. Refer to SIR Disabling and Enabling .
- Remove the front seat. Refer to Front Seat Replacement - Bucket .
- Remove the seat.
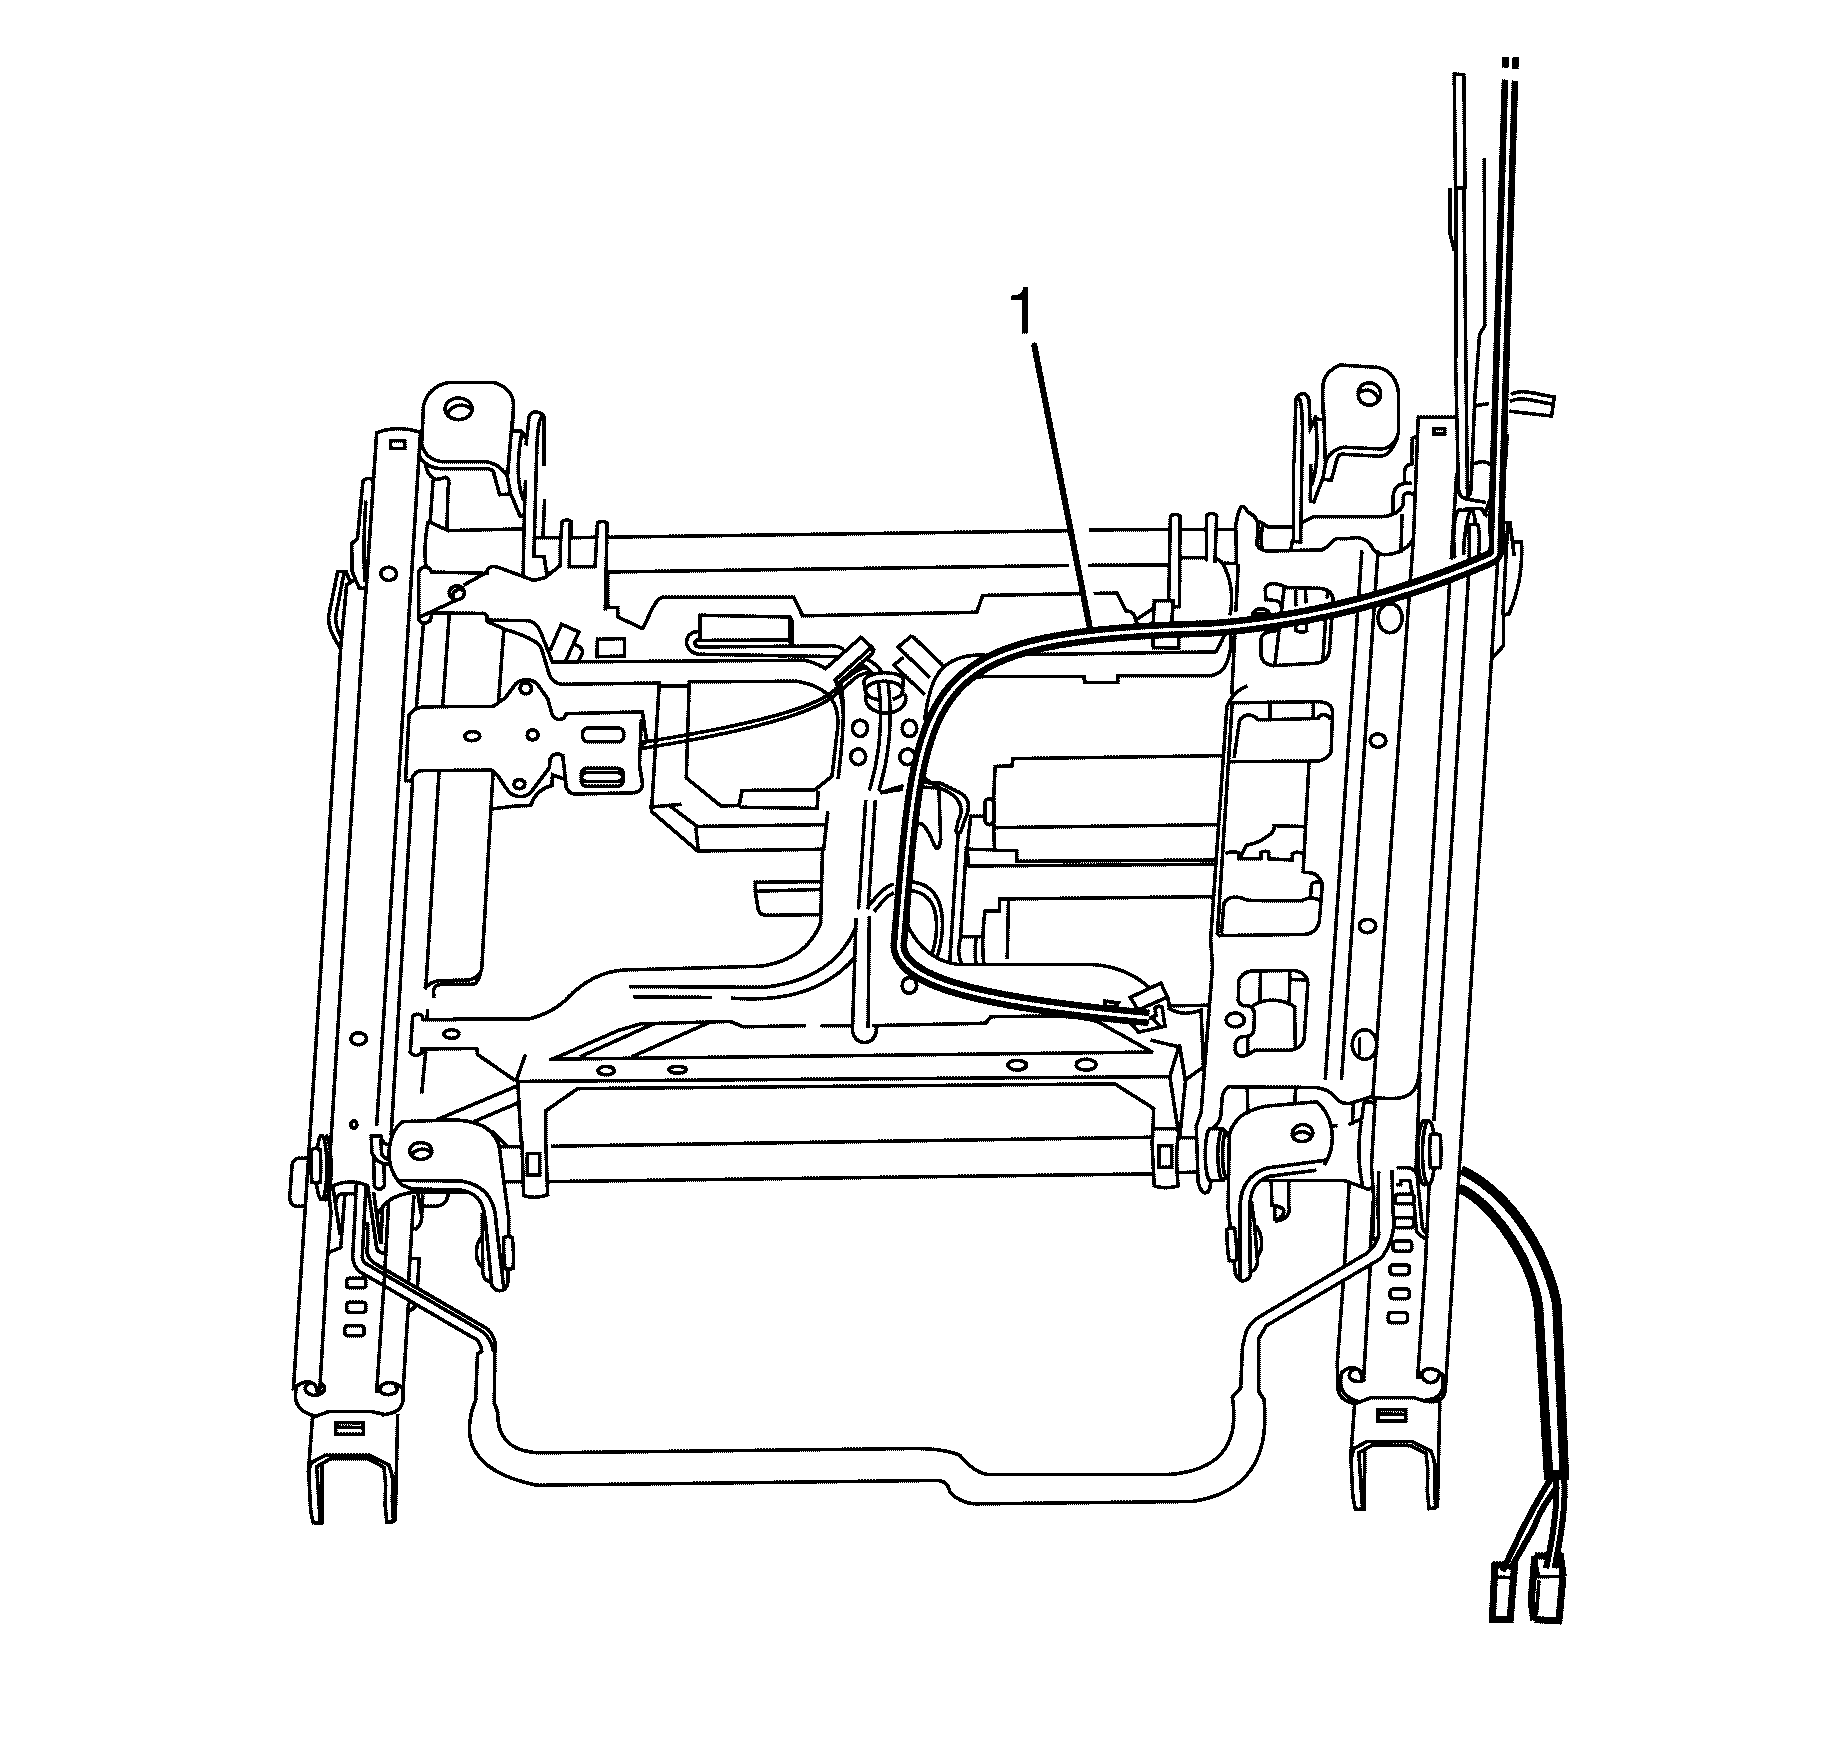
- With the seat on the work bench, lay the seat on it side and remove the wiring harness (1) from the underside of the seat rail.
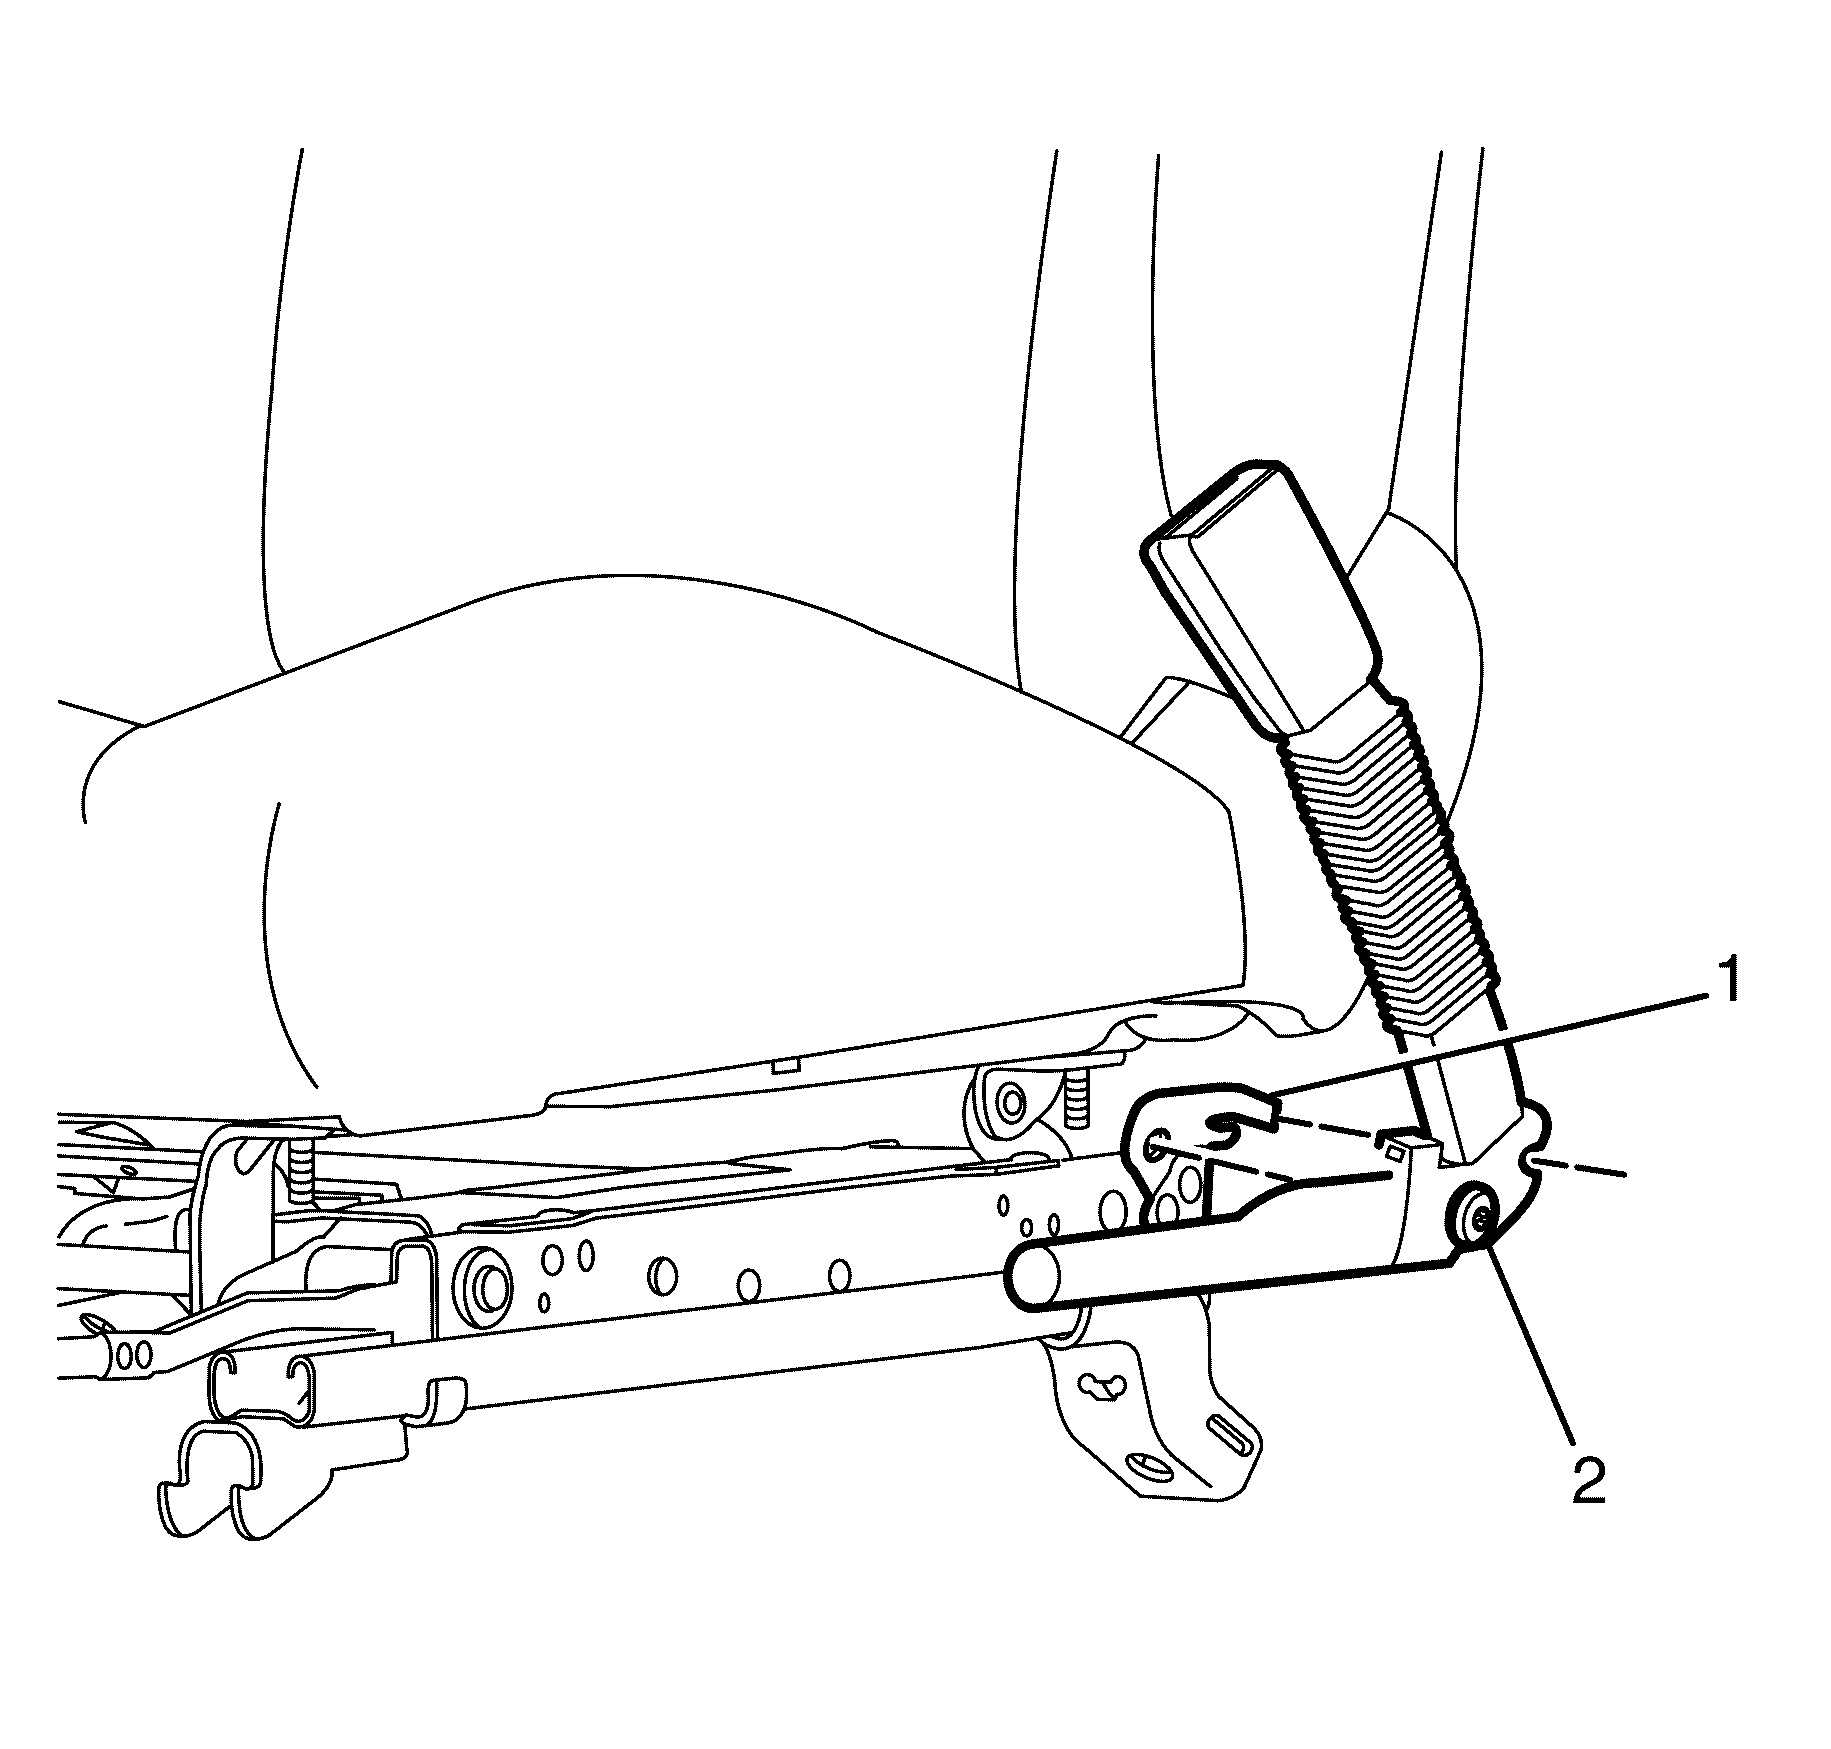
- Remove the pretensioner bolt (2) and the pretensioner (1) from the seat.
- Fully deploy the buckle pretensioner before disposal. If the buckle pretensioner was replaced under warranty, fully deploy and dispose of the module after the required retention period. Refer to Pretensioner Handling and Scrapping .
Caution: Refer to SIR Caution in the Preface section.
Caution: Refer to SIR Inflator Module Handling and Storage Caution in the Preface section.
Important: Note the wiring and connector routing during the removal, in order to route the wiring properly during assembly.


Installation Procedure
- Align the locating tab to the slot and install the pretensioner (1) to the seat.
- Install the bolt (2) while holding the pretensioner in place.
- With the seat on the work bench, lay the seat on it side and install the wiring harness (1) to the underside of the seat rail.
- Install the seat. Refer to Front Seat Replacement - Bucket .
- Enable the SIR system. Refer to SIR Disabling and Enabling .

Important: The pretensioner has a locating tab that ensures the pretensioner is in the proper position.
Notice: Refer to Fastener Notice in the Preface section.
Tighten
Tighten the bolt to 43 N·m (32 lb ft).

Seat Belt Buckle Pretensioner Replacement RHD
Removal Procedure
- Disable the SIR system. Refer to SIR Disabling and Enabling .
- Remove the front seat. Refer to Front Seat Replacement - Bucket .
- Remove the seat.
- With the seat on the work bench, lay the seat on it side and remove the wiring harness (1) from the underside of the seat rail.
- Remove the pretensioner bolt (2) and the pretensioner (1) from the seat.
- Fully deploy the buckle pretensioner before disposal. If the buckle pretensioner was replaced under warranty, fully deploy and dispose of the module after the required retention period. Refer to Pretensioner Handling and Scrapping .
Caution: Refer to SIR Caution in the Preface section.
Caution: Refer to SIR Inflator Module Handling and Storage Caution in the Preface section.
Important: Note the wiring and connector routing during the removal, in order to route the wiring properly during assembly.


Installation Procedure
- Align the locating tab to the slot and install the pretensioner (1) to the seat.
- Install the bolt (2) while holding the pretensioner in place.
- With the seat on the work bench, lay the seat on it side and install the wiring harness (1) to the underside of the seat rail.
- Install the seat. Refer to Front Seat Replacement - Bucket .
- Enable the SIR system. Refer to SIR Disabling and Enabling .

Important: The pretensioner has a locating tab that ensures the pretensioner is in the proper position.
Notice: Refer to Fastener Notice in the Preface section.
Tighten
Tighten the bolt to 43 N·m (32 lb ft).

