Rear Brake Caliper Overhaul CSV HSV VXR8
Disassembly Procedure
- Remove the brake pads, brake pad retaining pins and anti-rattle clip. Refer to Rear Disc Brake Pads Replacement.
- Remove the brake caliper from the vehicle. Refer to Rear Brake Caliper Replacement.
- Drain the brake fluid from the brake caliper.
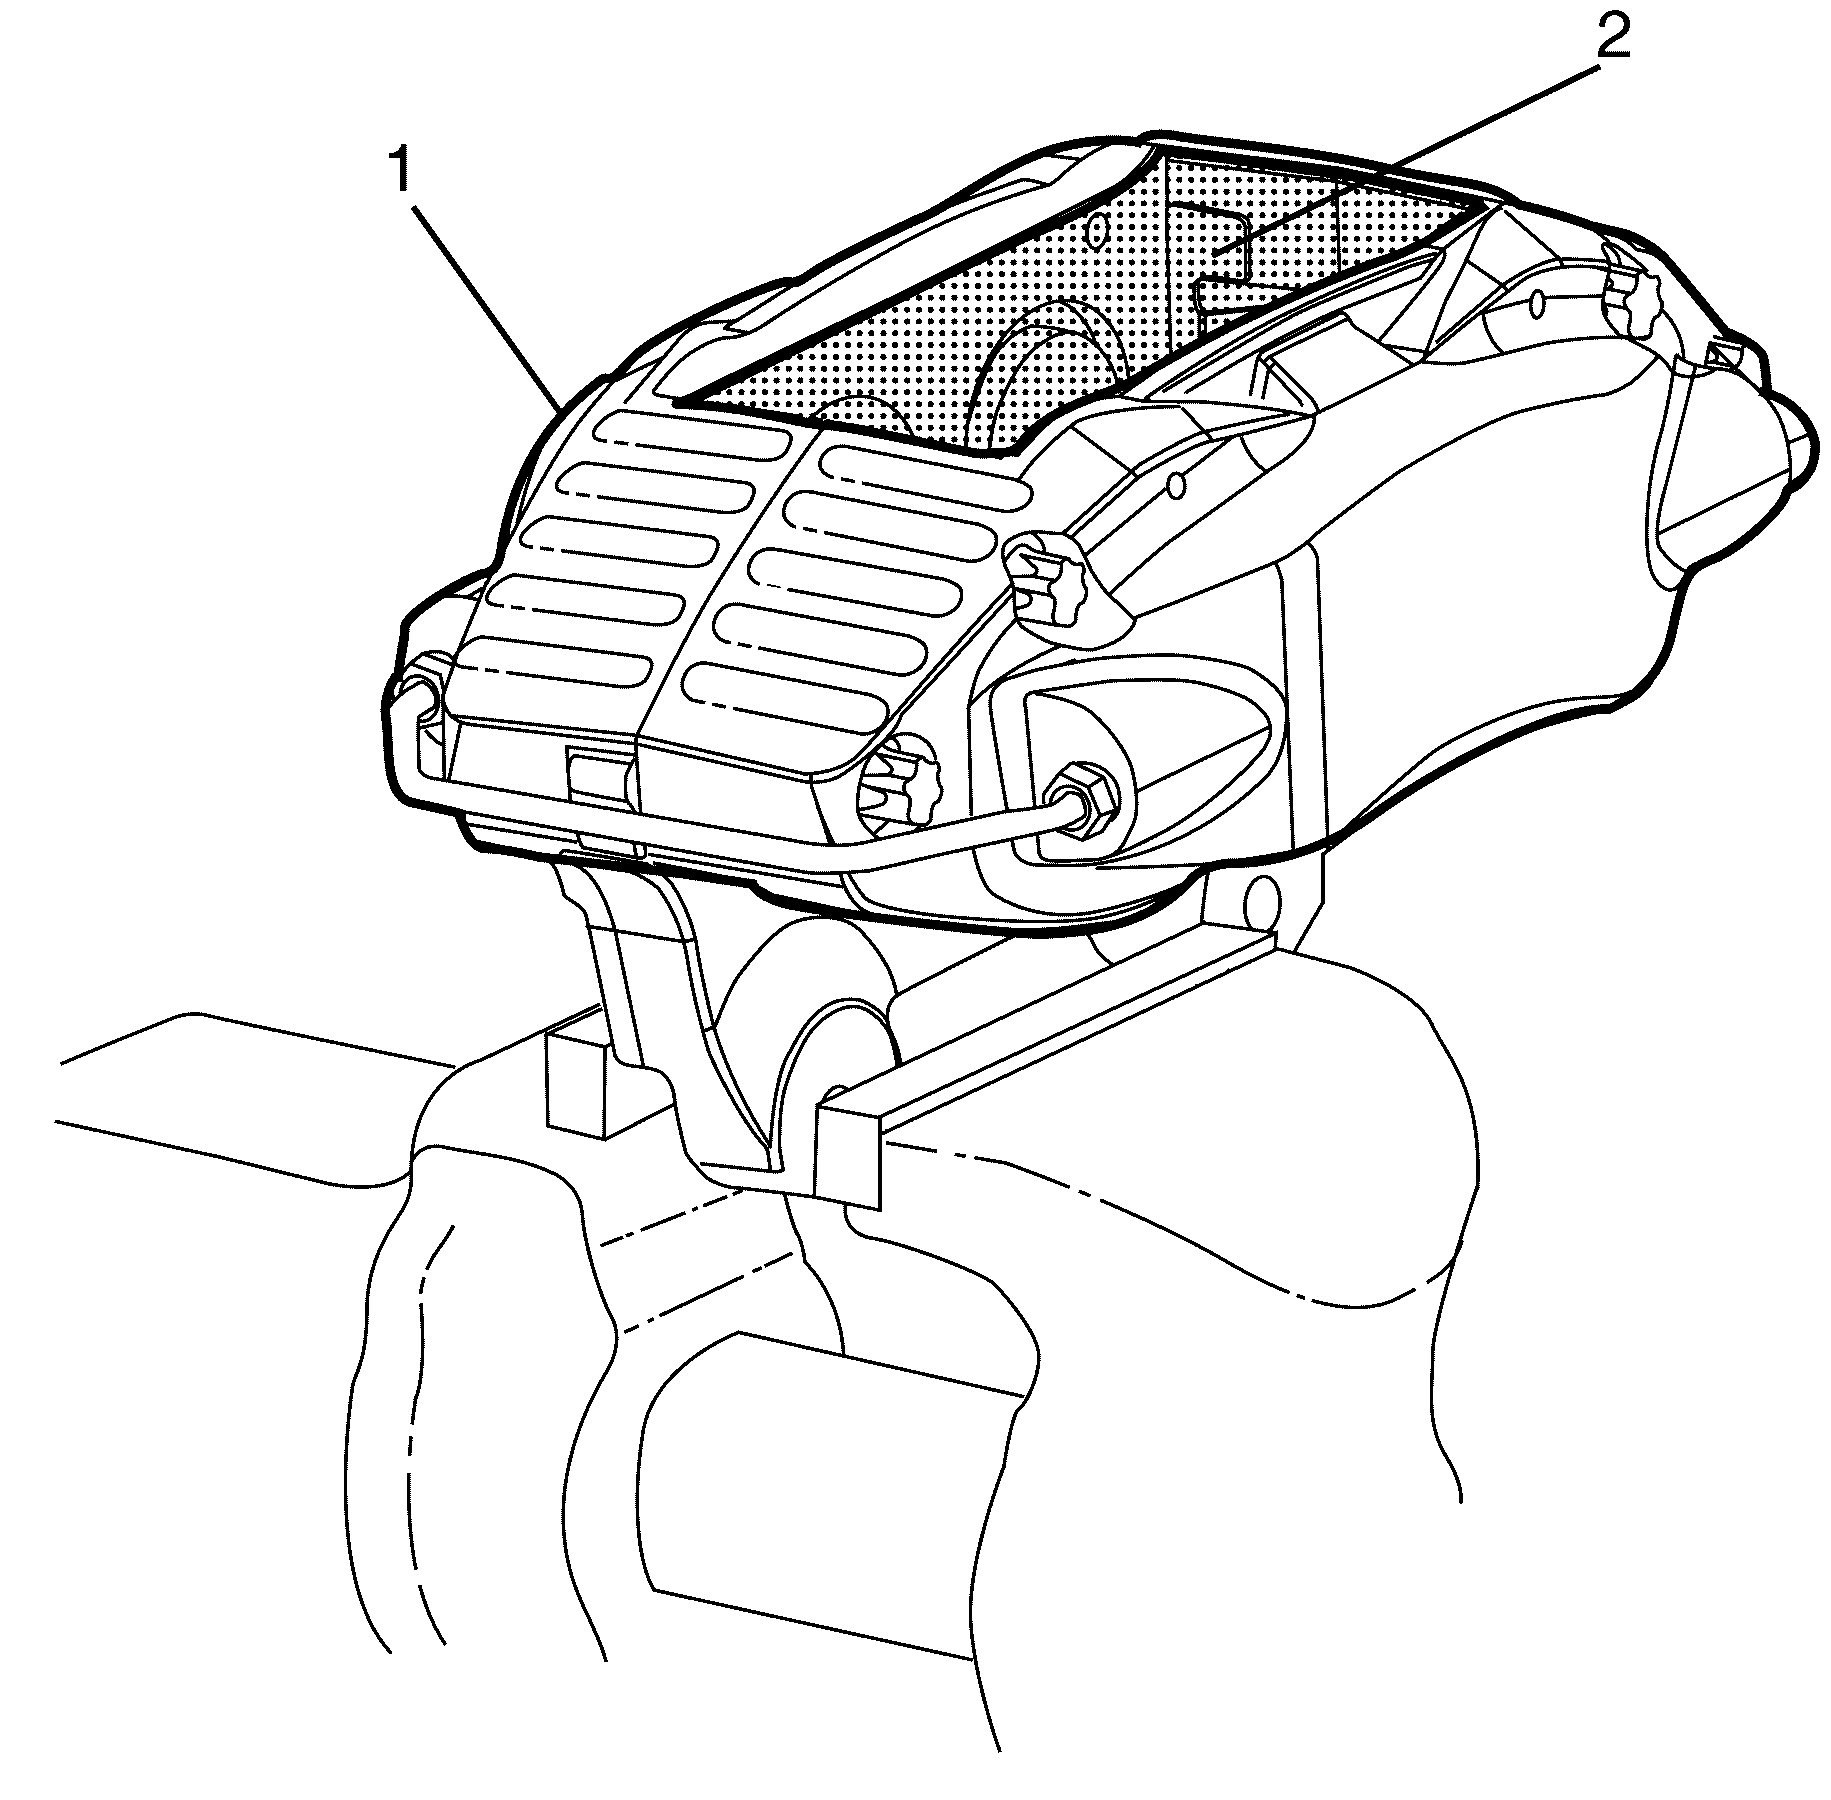
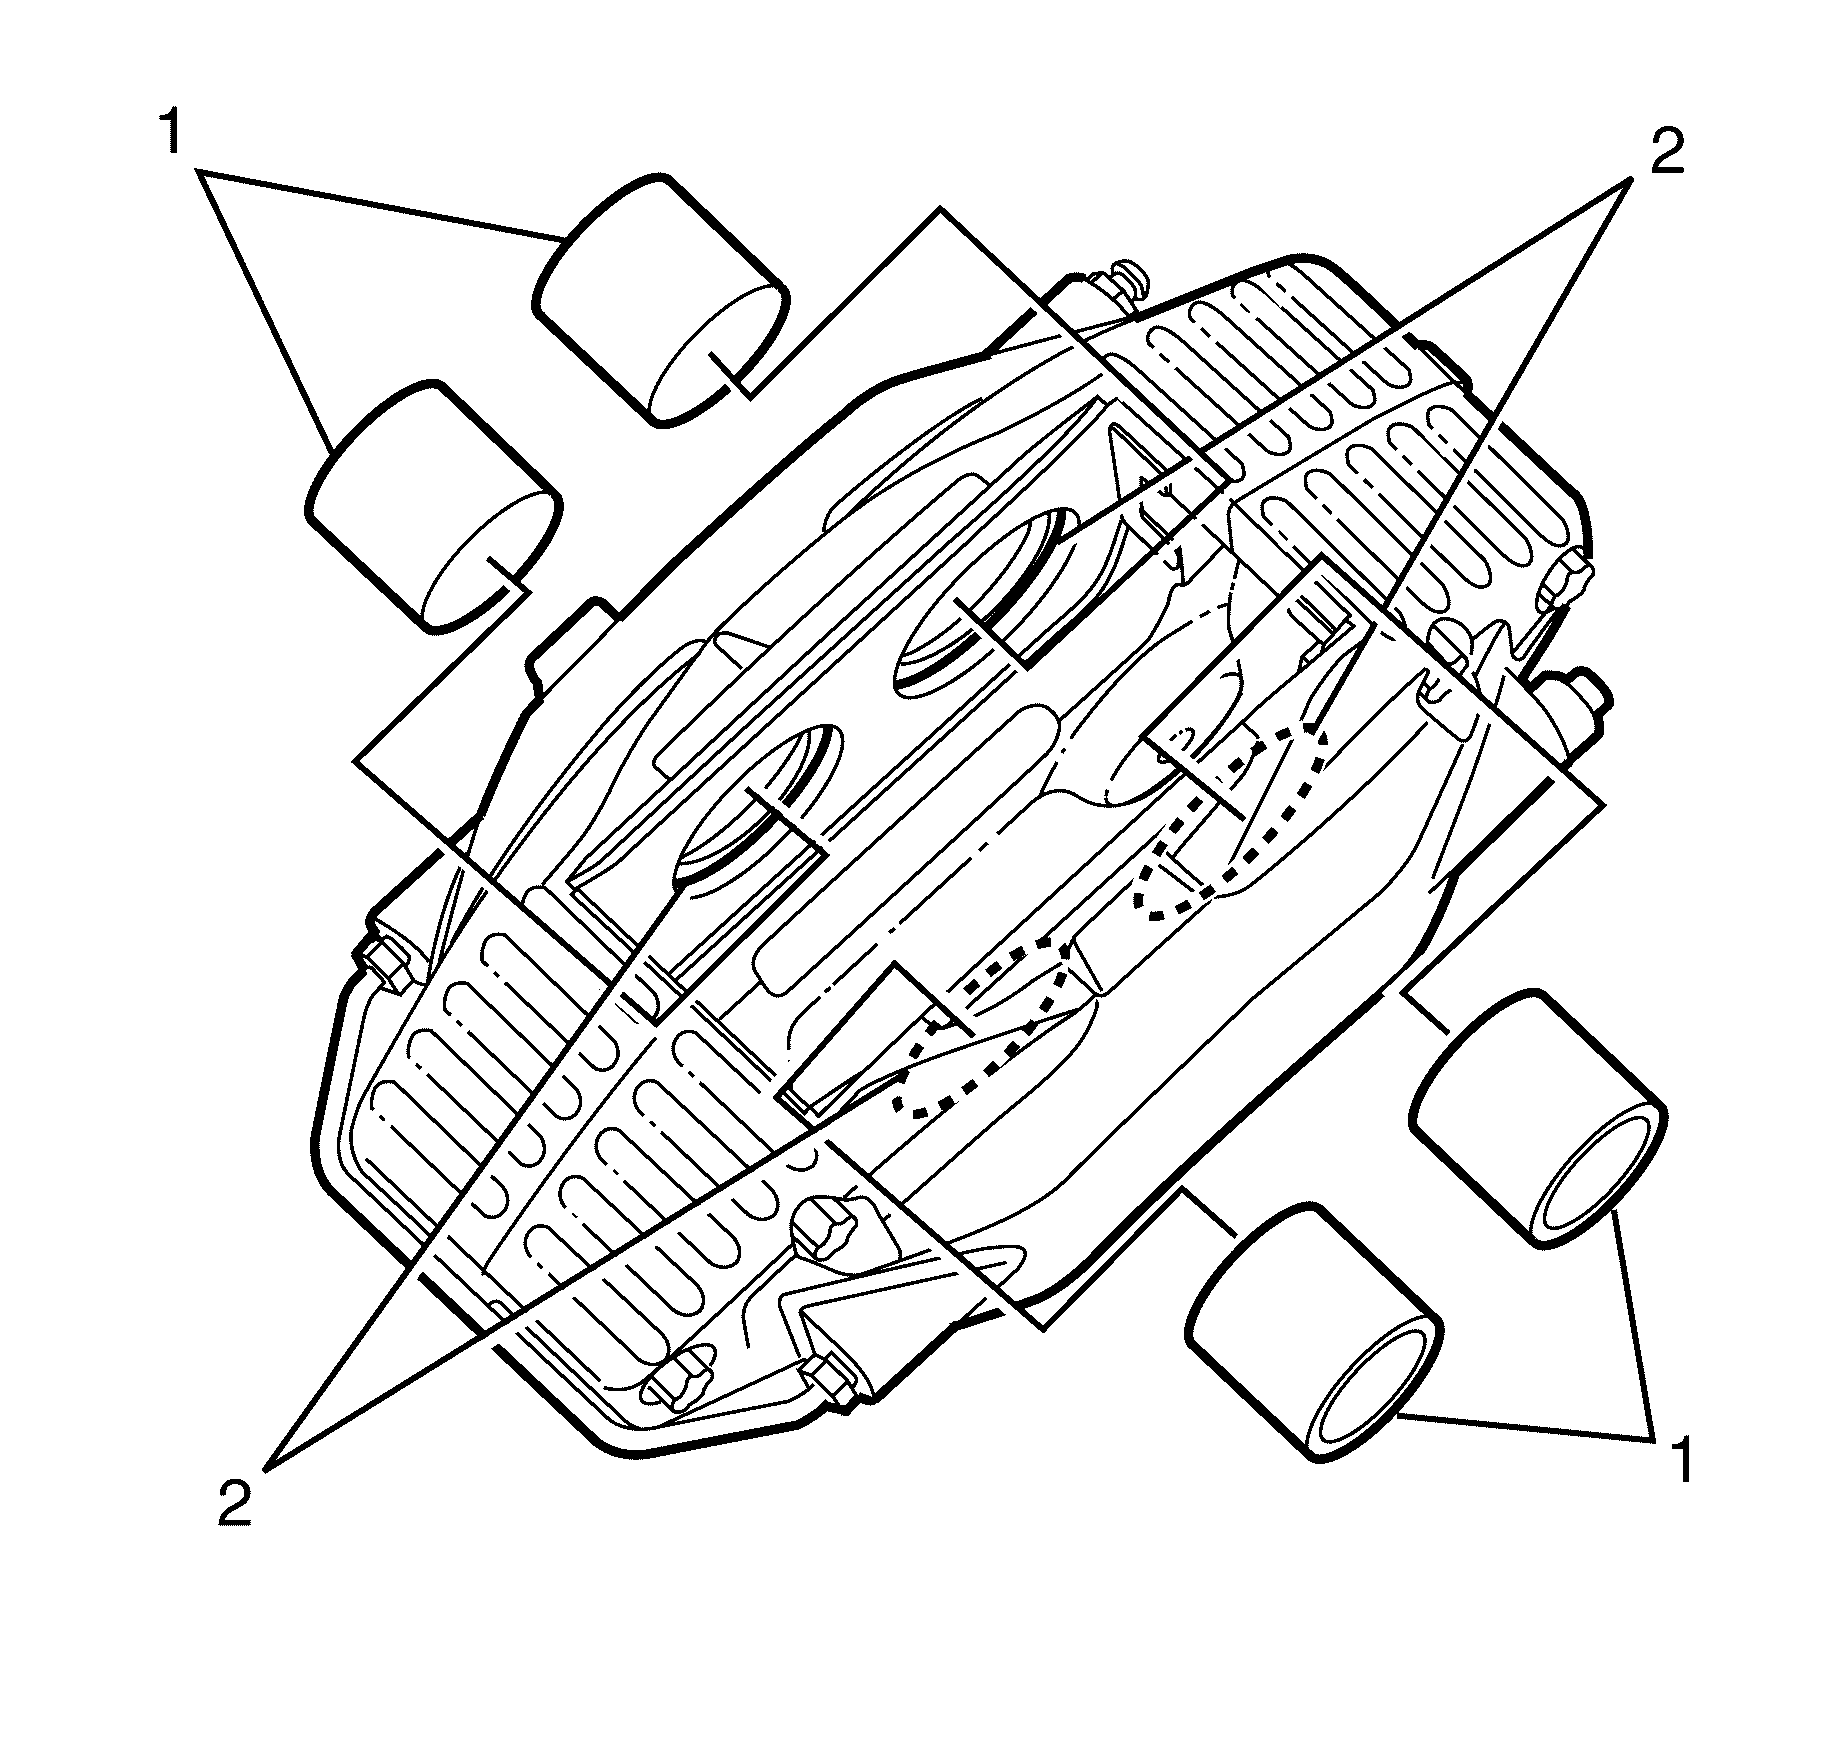
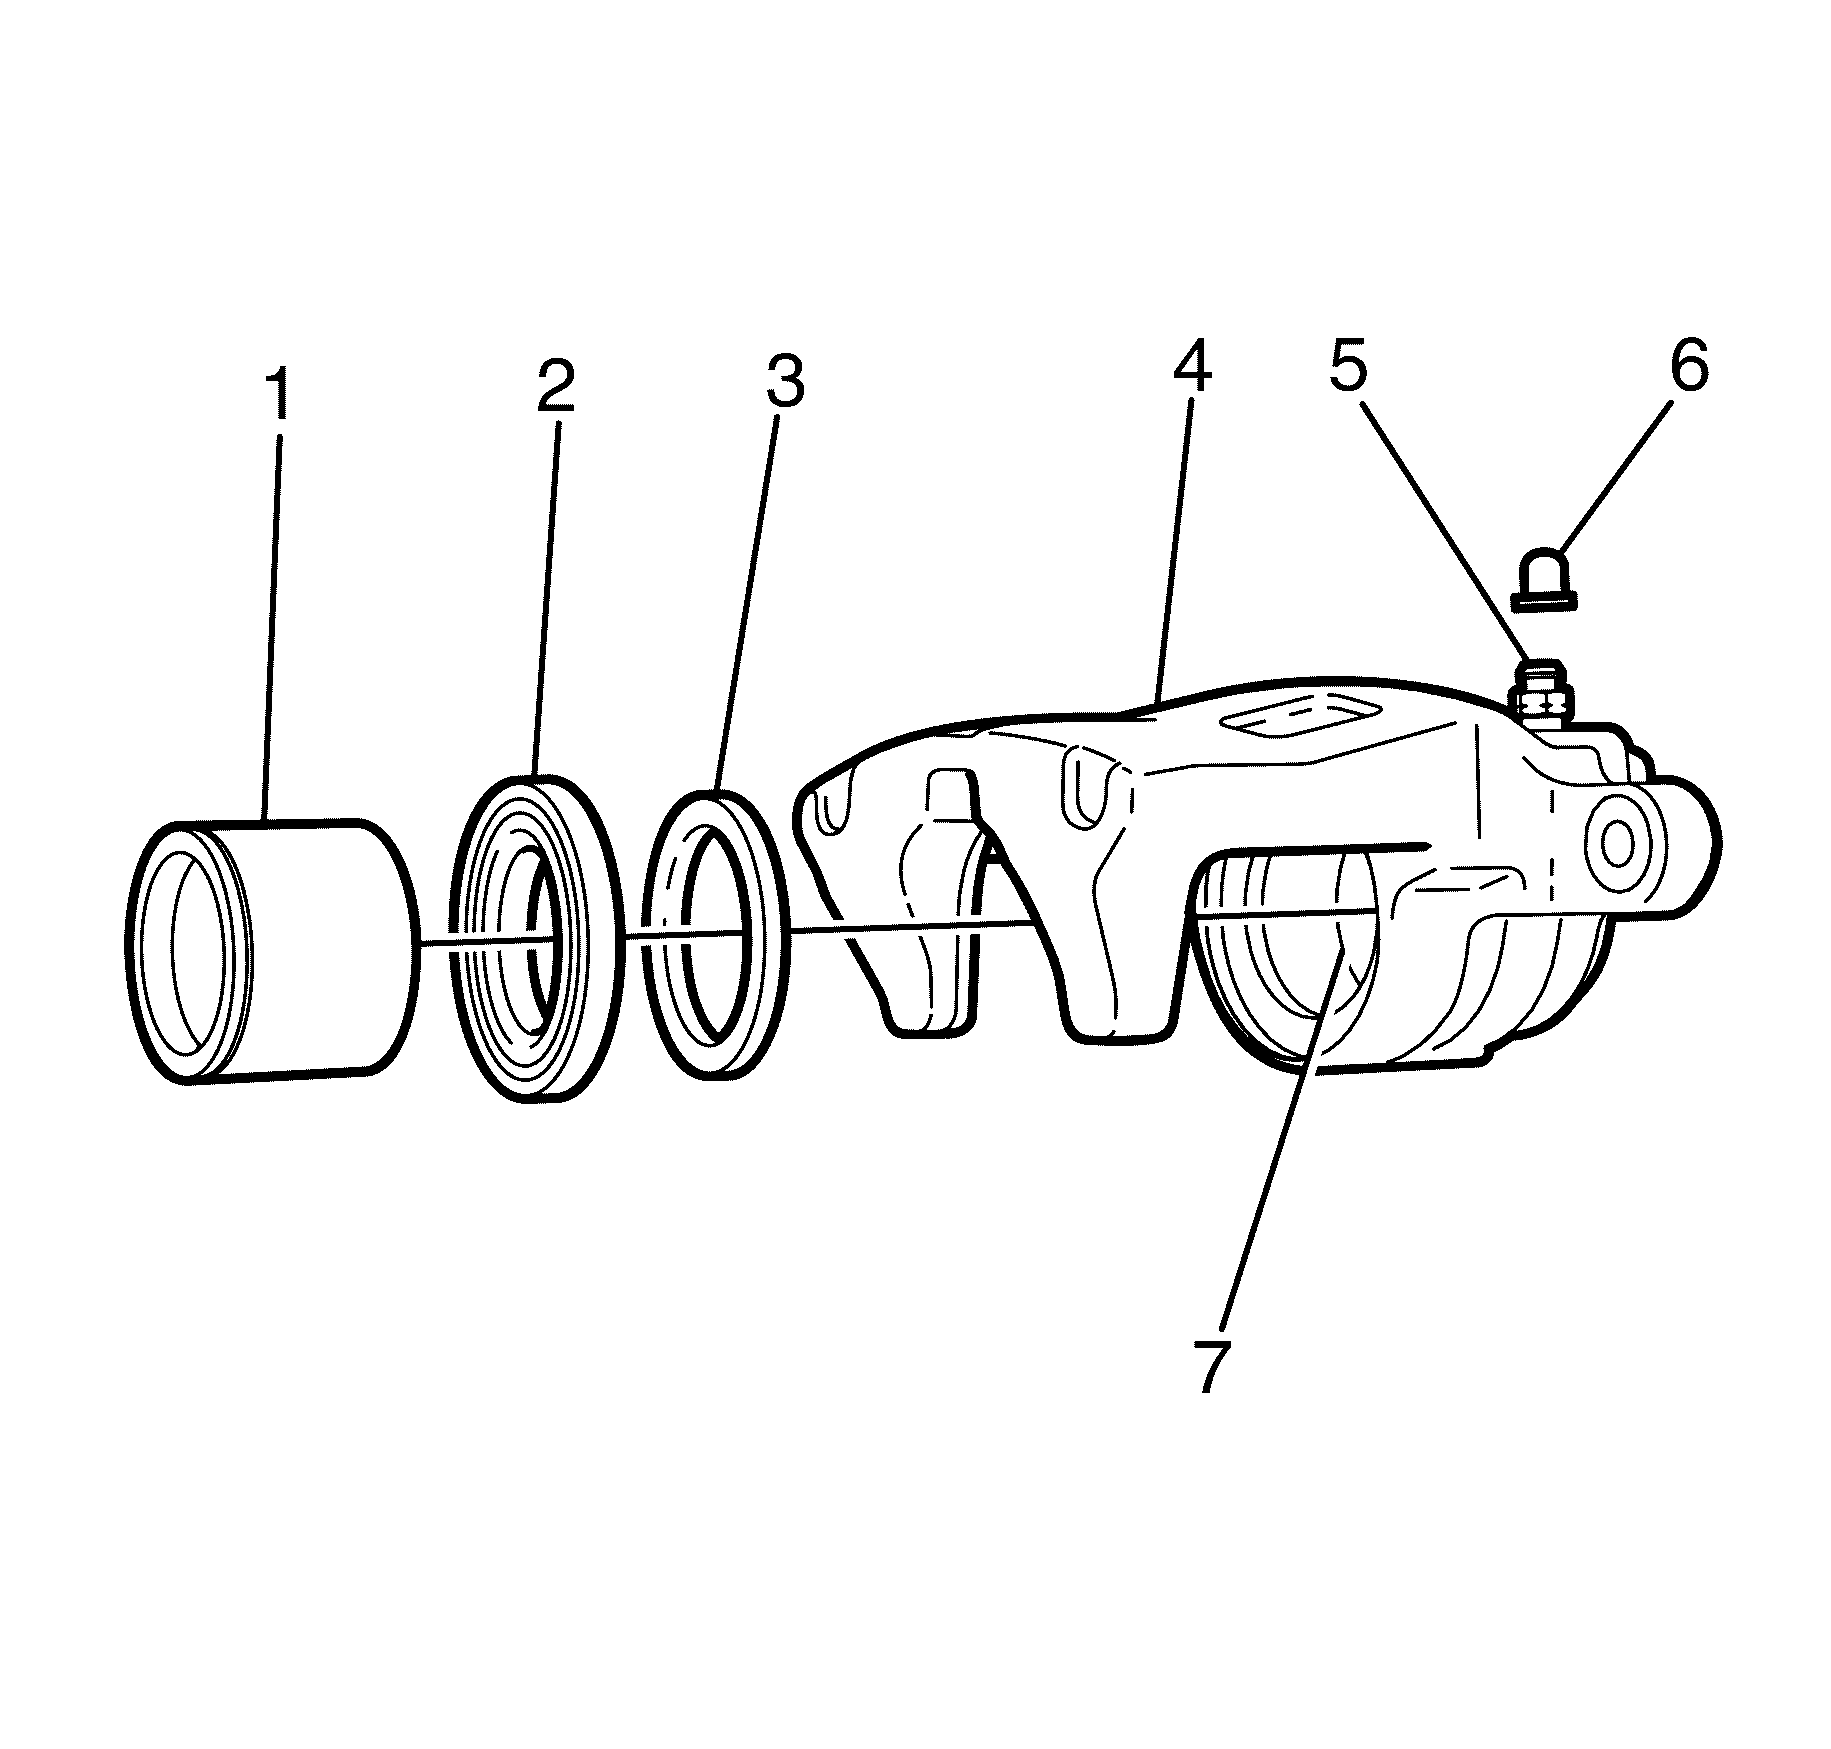
- Using a suitable vice, securely position the brake caliper (1) in a way that permits full access to the working area of the brake caliper pistons (2).
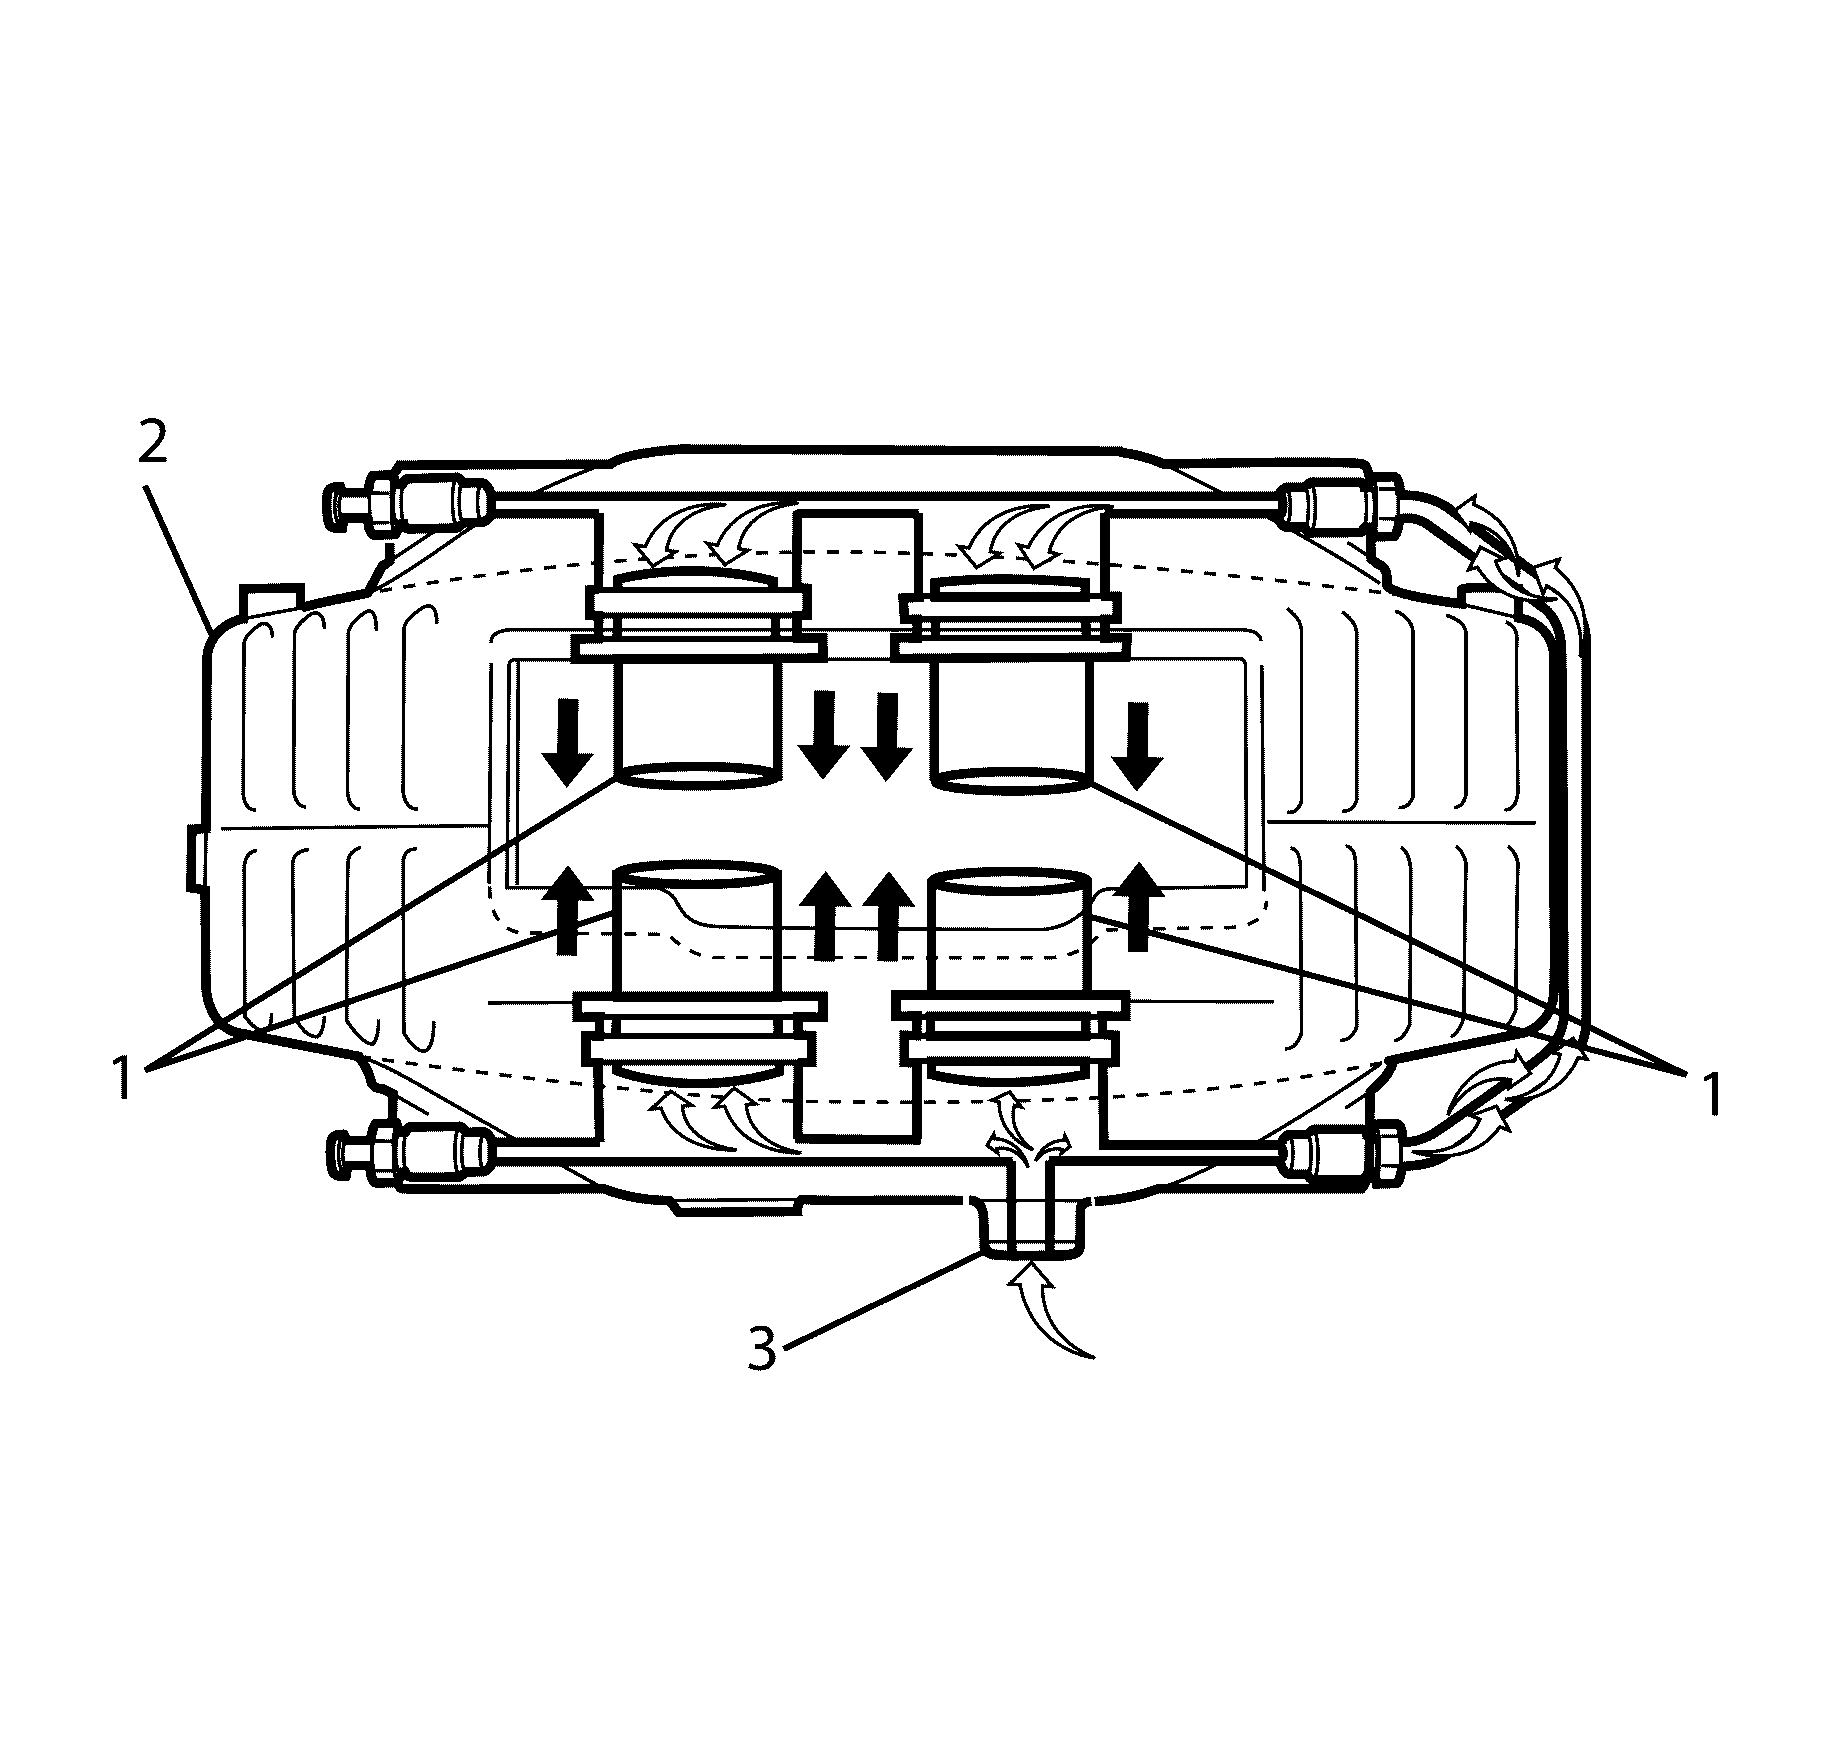
- Expel the brake caliper pistons (1) from the brake caliper (2) by directing low pressure compressed air into the brake fluid inlet hole (3).
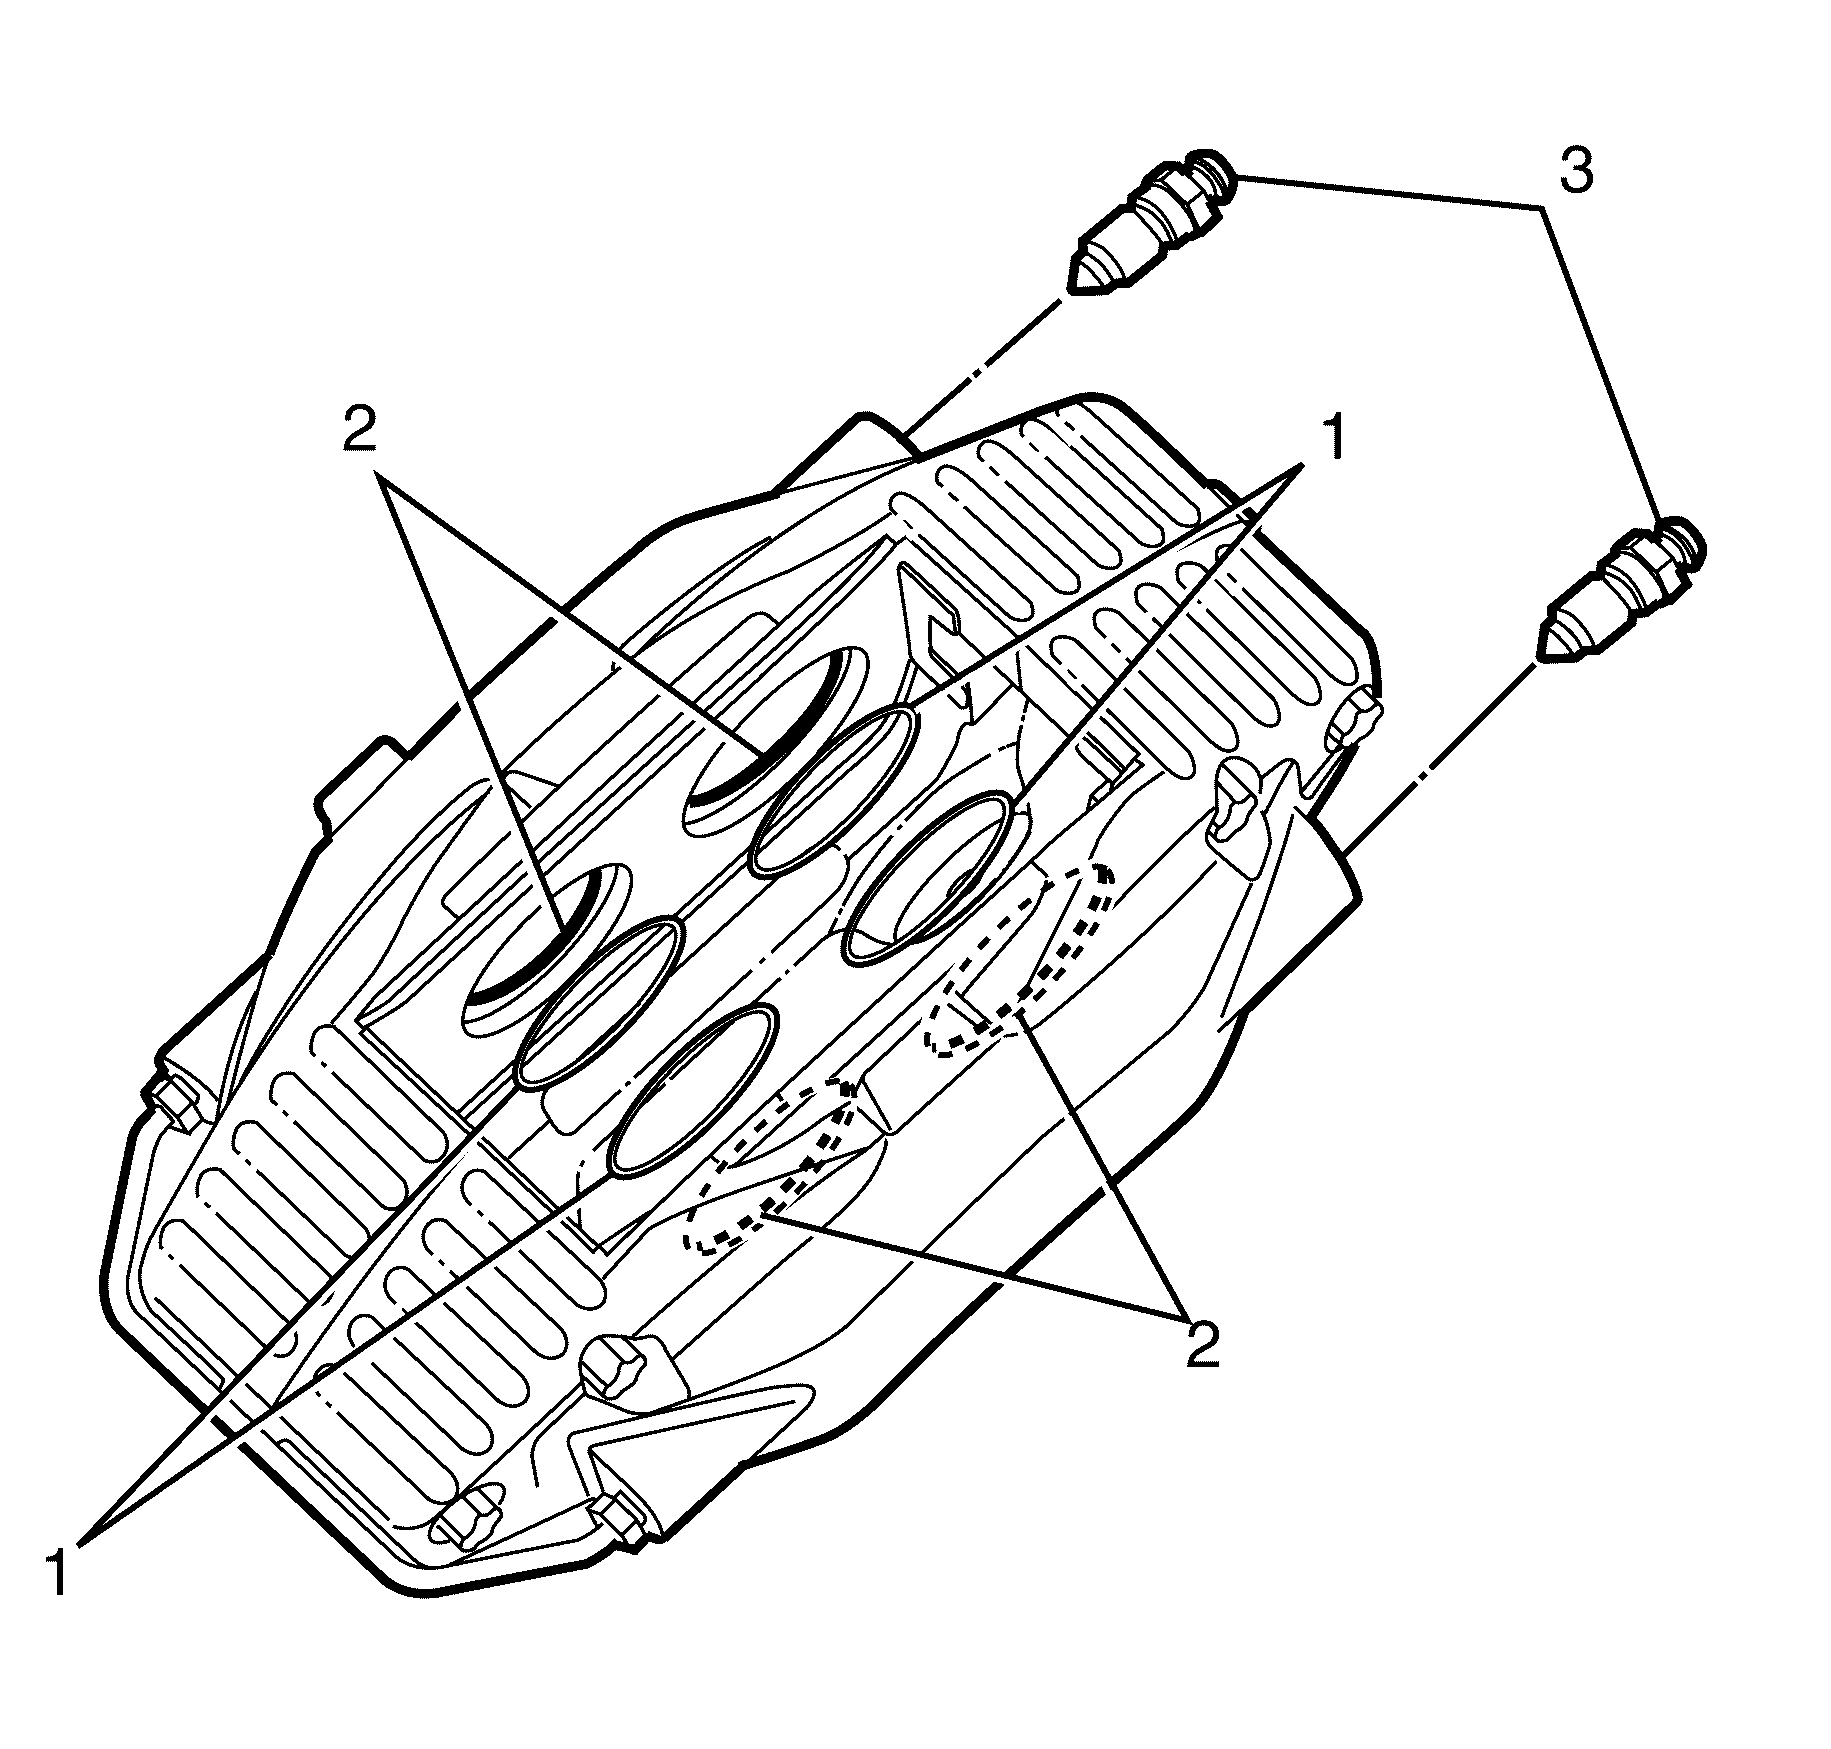
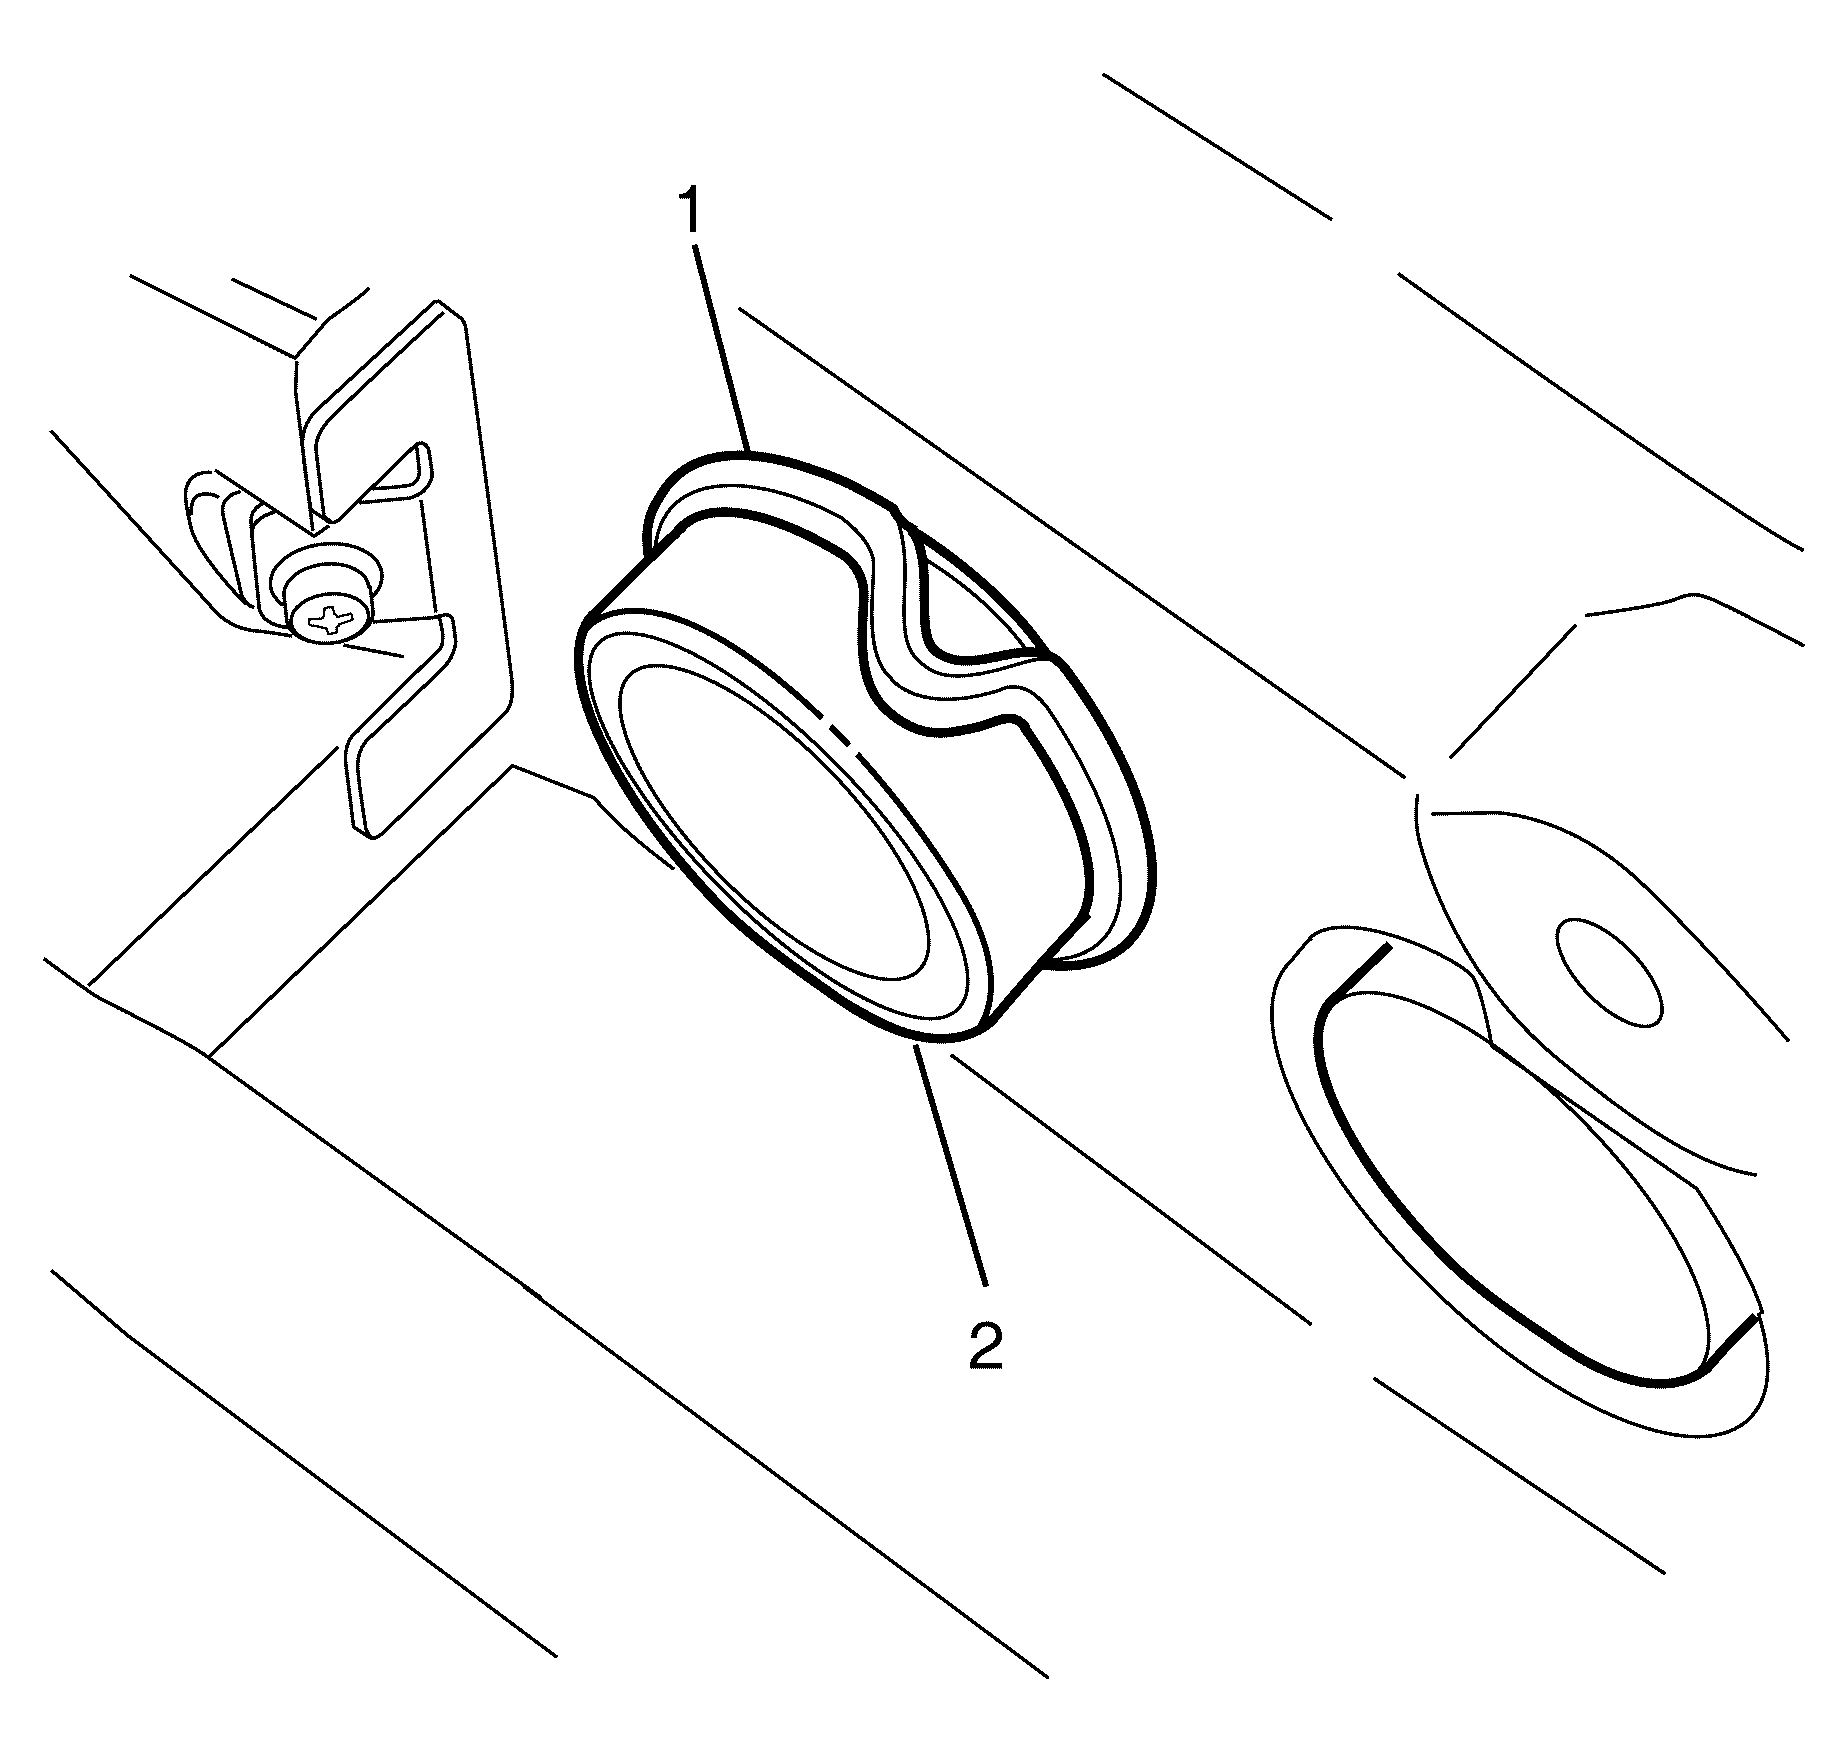
- With the brake caliper pistons removed, remove all the brake caliper piston dust boot seals (1) from the brake caliper (2).
- Remove all 4 brake caliper piston seals (1) from the grooves in the brake caliper piston bores (2) and discard.
- Remove the brake caliper bleeder valves (3).
- Clean the brake caliper piston bores (2) with denatured alcohol, or equivalent.
- Clean the brake caliper pistons with denatured alcohol or equivalent.
- Clean the brake caliper bleeder valves (3) with denatured alcohol or equivalent.
- Dry the brake caliper piston bores with non-lubricated, filtered air.
- Dry the brake caliper pistons with non-lubricated, filtered air.
- Dry the brake caliper bleeder valves (3) with non-lubricated, filtered air.
- Inspect the brake caliper piston bores (2) for cracks, scoring, pitting or excessive corrosion.
- Inspect the brake caliper pistons for cracks, scoring and/or damage.
Caution: Refer to Brake Fluid Caution in the Preface section.
Caution: Refer to Brake Fluid Irritant Caution in the Preface section.
Caution: Refer to Brake Dust Caution in the Preface section.
Notice: Refer to Brake Fluid Effects on Paint and Electrical Components Notice in the Preface section.
Important:
• Replace all the components included in the repair kit used to service
the brake caliper. • Lubricate the rubber parts with brake fluid conforming to specification
to make assembly easier. Refer to
Brake System Specifications for correct
brake fluid specification. • If any hydraulic component is removed or disconnected, it may be necessary
to bleed all or part of the brake system. • The torque values specified are for dry, non-lubricated fasteners. • Perform the service operations on a clean bench, free from all mineral
oil materials.
Caution: Do not place fingers in front of the caliper piston(s) in an attempt to catch or protect it when applying compressed air. The piston(s) can fly out with force and could result in serious bodily injury.
Notice: Use clean cloths to pad interior of caliper housing during piston removal. Use just enough air to ease the pistons out of the bores. If the pistons are blown out, even with the padding provided, it may be damaged.
Important: Observe the pistons coming out of the bores. If one of the pistons appears to be seized, STOP applying air pressure.
If one of the pistons appears to be seized, perform the following steps:
| 5.1. | Evenly push the seized piston back into the bore using a suitable block of nylon or wood. |
| 5.2. | Repeat Step 5 until all brake caliper pistons have been expelled from the brake caliper. |
Important: Use a small wooden or plastic tool to avoid damage to the brake caliper (2) when removing the brake caliper piston dust boot seals (1).
Important: Brake caliper piston dust boot seals (1) are single use components only and must be discarded after removal.
Discard the brake caliper piston dust boot seals (1).
Important: Use a small wooden or plastic tool to avoid damage to the brake caliper piston bores (2) when removing the brake caliper piston seals (1).
Important: Brake caliper piston seals (1) are single use components only and must be discarded after removal.
Discard the brake caliper piston seals (1).
Important: DO NOT use abrasives to clean the brake caliper piston.
| • | If light corrosion is present in the brake caliper bores, attempt to remove the imperfection with a fine emery paper. If the imperfection cannot be removed, replace the brake caliper assembly. |
| • | If cracks, scoring, pitting or corrosion are present in the piston bores, replace the brake caliper assembly. |
If cracks, scoring or damage are present on the brake caliper pistons, they must be replaced.
Assembly Procedure
- Install the brake caliper bleeder valves (3).
- Lubricate the NEW brake caliper piston seals with brake fluid conforming to specification from a clean, sealed brake fluid container. Refer to Brake System Specifications for correct brake fluid specification.
- Install the brake caliper piston seals (1) into the grooves in the brake caliper piston bores (2).
- Lubricate all the brake caliper piston bores (2) with brake fluid conforming to specification. Refer to Brake System Specifications for correct brake fluid specification.
- Lubricate and install all the brake caliper pistons (1) into the brake caliper piston bores (2).
- Install the NEW brake caliper piston dust boot seals (1) over the brake caliper pistons (2).
- Complete the following for all brake caliper piston dust boot seals (1).
- Install the brake pads, anti-rattle clip, and brake pad retainer pins into the brake caliper. Refer to Rear Disc Brake Pads Replacement.
- Install the brake caliper assembly to the vehicle. Refer to Rear Brake Caliper Replacement.
Notice: Refer to Fastener Notice in the Preface section.
Important:
• Replace all the components included in the repair kit used to service
the brake caliper. • Lubricate the rubber parts with brake fluid conforming to specification
to make assembly easier. Refer to
Brake System Specifications for correct
brake fluid specification. • If any hydraulic component is removed or disconnected, it may be necessary
to bleed all or part of the brake system. • The torque values specified are for dry, non-lubricated fasteners. • Perform the service operations on a clean bench, free from all mineral
oil materials.
Tighten
Tighten the valves to 17 Nm (97 lb in).
Important: When installing, make sure the brake caliper piston seals (1) are not twisted.
| 7.1. | Fully seat the brake caliper piston dust boot seals (1) into the brake caliper (2). |
| 7.2. | Make sure the brake caliper piston dust boot seals (1) are correctly seated into the groove in the brake caliper piston bores (3). |
Important: The brake pads are marked as inner and outer only. Failure to install the brake pads in their correct position will cause the brakes not to seat correctly in the brake caliper.
Important: The anti-rattle clip can only be installed with the arrow facing the direction of majority rotation. Failure to do so will cause vibration under heavy load.
Rear Brake Caliper Overhaul LWB SWB
Caution: Refer to Brake Fluid Irritant Caution in the Preface section.
Caution: Refer to Brake Dust Caution in the Preface section.
Notice: Refer to Brake Fluid Effects on Paint and Electrical Components Notice in the Preface section.
Disassembly Procedure
Important:
• Replace all the components included in the repair kit used to service
the brake caliper. • Lubricate the rubber parts with brake fluid conforming to specification
to make assembly easier. Refer to
Brake System Specifications for correct
brake fluid specification. • If any hydraulic component is removed or disconnected, it may be necessary
to bleed all or part of the brake system. • The torque values specified are for dry, non-lubricated fasteners. • Perform the service operations on a clean bench, free from all mineral
oil materials.
- Remove the brake caliper from the vehicle. Refer to Rear Brake Caliper Replacement.
- Drain the brake fluid from the brake caliper.
- Remove the guide pin retaining bolts (1).
- Separate the brake caliper housing (2) from the brake caliper anchor plate (5).
- Remove the brake pads (6 and 8).
- Remove the retainer clips (7)
- Withdraw the guide pins (3) and dust boots (4) from the brake caliper anchor plate (5).
- Separate the dust boots (4) from the guide pins (3).
- Install clean cloths to pad the interior of the caliper (4) between the caliper piston (1) and the caliper (4).
- Carefully remove the brake caliper piston (1) by directing low pressure compressed air into the brake caliper (1) inlet hole.
- With the brake caliper piston (1) removed, remove the brake caliper piston dust boot seal (2) from the brake caliper (4).
- Remove the brake caliper piston seal (3) from the brake caliper (4) and discard the brake caliper piston seal (3).
- Remove the brake caliper bleeder valve cap (6).
- Remove the brake caliper bleeder valve (5).
- Inspect the brake caliper anchor plate guide surfaces for corrosion and wear. Replace the brake caliper assembly if damaged or worn.
- Clean the brake caliper piston bore (7) with denatured alcohol, or equivalent.
- Clean the brake caliper piston (1) with denatured alcohol, or equivalent.
- Clean the brake caliper bleeder valve (5)
- Dry the brake caliper piston bore (7) with non-lubricated, filtered air.
- Dry the brake caliper piston (1) with non-lubricated, filtered air.
- Dry the brake caliper bleeder valve (5) with non-lubricated, filtered air.
- Inspect the brake caliper bore (7) for cracks, scoring, pitting, too much corrosion.
- If light corrosion is present in the brake caliper bore (7), attempt to remove the imperfection with a fine emery paper. If the imperfection cannot be removed, replace the brake caliper assembly.
- If cracks, scoring, pitting, and too much corrosion are present in the brake caliper bore (7), replace the brake caliper assembly.
- Inspect the brake caliper piston (1) for cracks, scoring, and/or damage, replace the brake caliper piston (1) if any of these conditions exist.
Important: To remove the guide pin bolts (1) use a suitable tool to hold the flat section on the guide pins (3) whilst loosening the guide pin bolts (1).
Caution: Do not place fingers in front of the caliper piston(s) in an attempt to catch or protect it when applying compressed air. The piston(s) can fly out with force and could result in serious bodily injury.
Notice: Use clean cloths to pad interior of caliper housing during piston removal. Use just enough air to ease the pistons out of the bores. If the pistons are blown out, even with the padding provided, it may be damaged.
Important: Use a small wooden or plastic tool to avoid damage to the brake caliper (4).
Important: Brake caliper seals are single use components only and must be discarded after removal.
Discard the brake caliper piston dust boot seal (2).
Discard the brake caliper piston seal (3).
Important: DO NOT use abrasives to clean the brake caliper piston (1).
Caution: Refer to Brake Fluid Irritant Caution in the Preface section.
Caution: Refer to Brake Dust Caution in the Preface section.
Notice: Refer to Brake Fluid Effects on Paint and Electrical Components Notice in the Preface section.
Assembly Procedure
Important:
• Replace all the components included in the repair kit used to service
the brake caliper. • Lubricate the rubber parts with brake fluid conforming to specification
to make assembly easier. Refer to
Brake System Specifications for correct
brake fluid specification. • If any hydraulic component is removed or disconnected, it may be necessary
to bleed all or part of the brake system. • The torque values specified are for dry, non-lubricated fasteners. • Perform the service operations on a clean bench, free from all mineral
oil materials.
- Install the brake caliper bleeder valve (6) to the brake caliper (4).
- Install the brake caliper bleeder valve cap (7) to the brake caliper bleeder valve (6).
- Lubricate the NEW brake caliper piston seal (3) with brake fluid conforming to specification, from a clean, sealed brake fluid container. Refer to Brake System Specifications for correct brake fluid specification.
- Install the lubricated brake caliper piston seal (3) into the seal groove in the brake caliper bore (7). Make sure the brake caliper piston seal (3) is not twisted.
- Lubricate the brake caliper bore (7) and the brake caliper piston (1) with brake fluid.
- Install the brake caliper piston (1) into the brake caliper bore (7).
- Install the NEW brake caliper piston dust boot seal (2) over the brake caliper piston (1).
- Complete the following for the brake caliper piston dust boot seal (2).
- Lubricate the guide pins (1) with silicone grease, such as Dow Corning No. 44 or equivalent.
- Install guide pins (1) into the brake caliper anchor plate (5).
- Install the brake caliper (4) to the brake caliper anchor plate (5) and install NEW guide pin bolts (3).
- Use an open-end spanner to hold the guide pin flat section, tighten the NEW guide pin bolts (3) to the correct torque.
- Detach the brake caliper (4) from the brake caliper anchor plate (5) and install the NEW guide pin boots (4) to the guide pins (3).
- Assemble the brake caliper (4) and brake caliper anchor plate (5) together.
- Install the brake pads. Refer to Rear Disc Brake Pads Replacement.
- Install the brake caliper to the vehicle. Refer to Rear Brake Caliper Replacement.
Notice: Refer to Fastener Notice in the Preface section.
Tighten
Tighten the brake caliper bleeder valve when dry
12 Nm (106 lb in).
| 8.1. | Fully seat the brake caliper piston dust boot seal (2) into the brake caliper (4). |
| 8.2. | Make sure the brake caliper piston dust boot seal (2) is correctly seated into the groove in the brake caliper bore (7). |
Do not fit the two guide pin boots (2) at this stage.
Tighten
Tighten the guide pin bolt to 42 Nm (31 lb ft).
Important: Make sure that the brake caliper and guide pins slide in and out easily from the brake caliper anchor plate. If any binding is evident, then steps 9-12 must be repeated.
Important: Remove all excess air from the guide pin boot and make sure that each guide pin boot is correctly located in the guide pin and brake caliper anchor plate grooves.
