Tools Required
J 8001 Dial Indicator
Set
- Recondition the valve
seats by grinding. Use an oscillating type valve seat grinder. Follow the
grinder manufacturer's instructions. If the valve seat is too wide after
grinding, use a 20 degree stone or a 70 degree stone in order
to narrow the valve seat. The 20 degree stone will lower the seat.
The 70 degree stone will raise the seat. Replace or recondition
the valves if the seats are reconditioned.
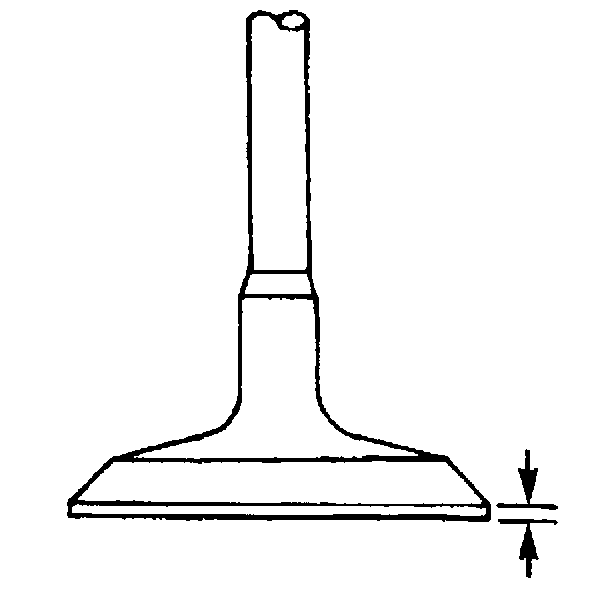
- After grinding the valves, measure the valve margin. Replace the
valve if less than the minimum recommended specification (0.79 mm (0.031 in).
Caution: Bodily injury may occur if the cleaning solvent is inhaled or exposed
to the skin.
Notice: Clean the valve guides before reaming. Packing of chips or carbon may
result in the reamer jamming into the valve guide or broken reamer flutes.
- Clean any foreign material from the valves. Use a wire brush to remove
carbon. Do not scratch the valve stem. Soak the valves in cleaning solvent
to remove varnish.
- Use a suitable tool to clean the valve guides.
- Follow the grinder manufacturer's instructions. Ensure that the
new surface is perpendicular to the valve stem.
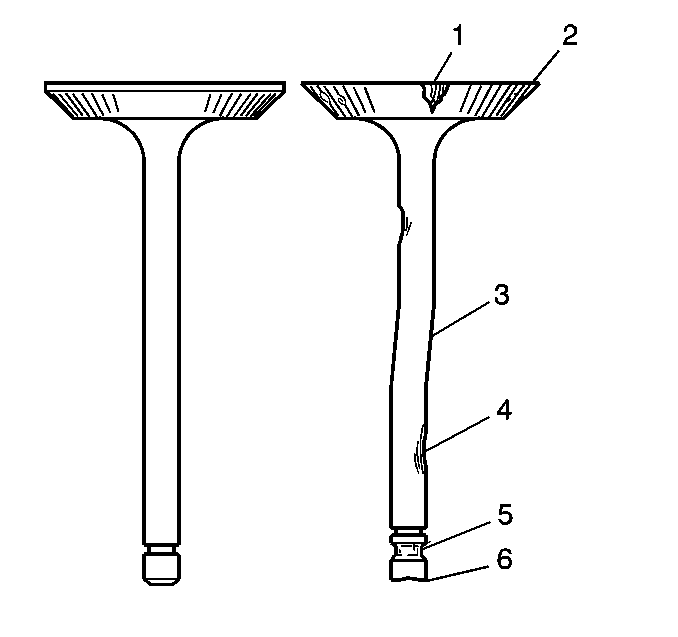
- Inspect the valve key
grooves for chipped or worn lands (5). Replace the valve if the valve key
groove is damaged.
- Inspect the valve stem tip for wear (6). Recondition the valve
stem tip by grinding.
- Inspect the valve stem for burrs and scratches (4). Use an oil
stone to remove burrs and minor scratches.
- Inspect the valve stem for straightness (3). Use V blocks to inspect
the valve head for bending or distortion. Replace any bent or distorted valves.
- Inspect the valve face for grooving (1, 2). If the groove is so
deep that refacing the valve face would result in a knife edge, replace the
valve.
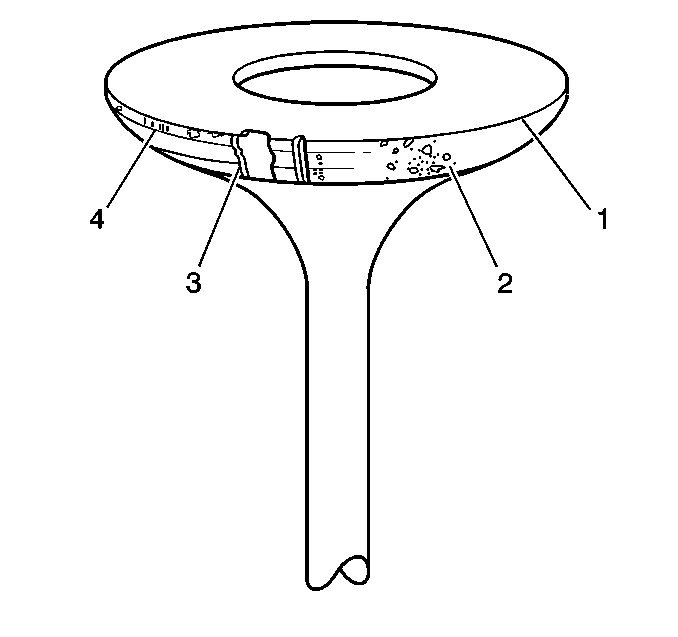
- Inspect the valve face
for burning, pitting, or cracking (1, 2, 3, 4). If pieces of the valve face
are broken off, replace the valve and inspect the corresponding piston and
cylinder head area for damage.
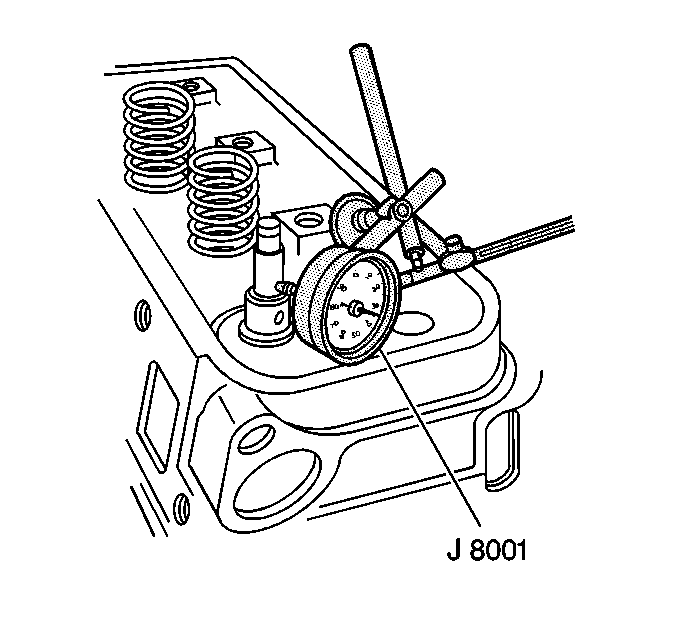
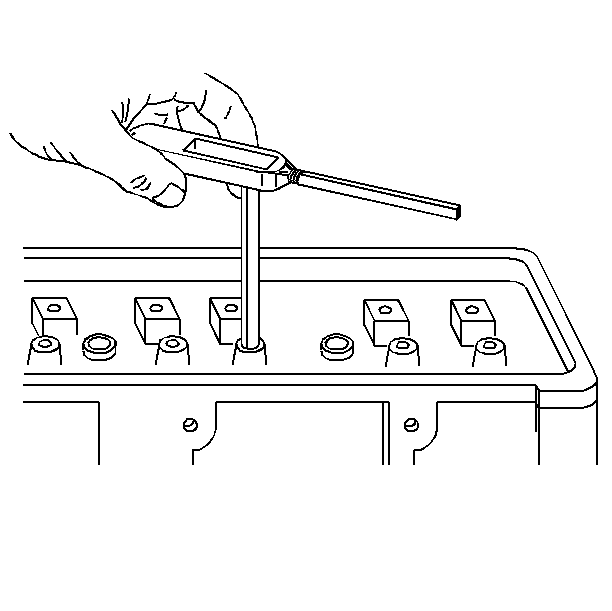
- Measure the valve stem
clearance:
| 12.1. | Insert the valve into the guide. |
| 12.2. | Lift the valve 2 mm (1/8 in) off of the seat. |
| 12.3. | Move the valve from side to side. |
| 12.4. | Use J 8001
to
measure the amount of movement. |
The intake valve stem clearance should be between 0.031-0.071 mm
(0.0012-0.0028 in).
The exhaust valve stem clearance should be between 0.036-0.074 mm
(0.0014-0.0029 in).
Important: Clean the valve guide before reaming to avoid breaking the reamer flutes.
Do not push down on the reamer.
- Ream the valve guides for oversize valves if the clearance exceeds the
specifications.
- Ream the valve guide bores for the oversize valves.
- Recondition the valve seats after reaming the valve guide bores
or installing the new valve guides.
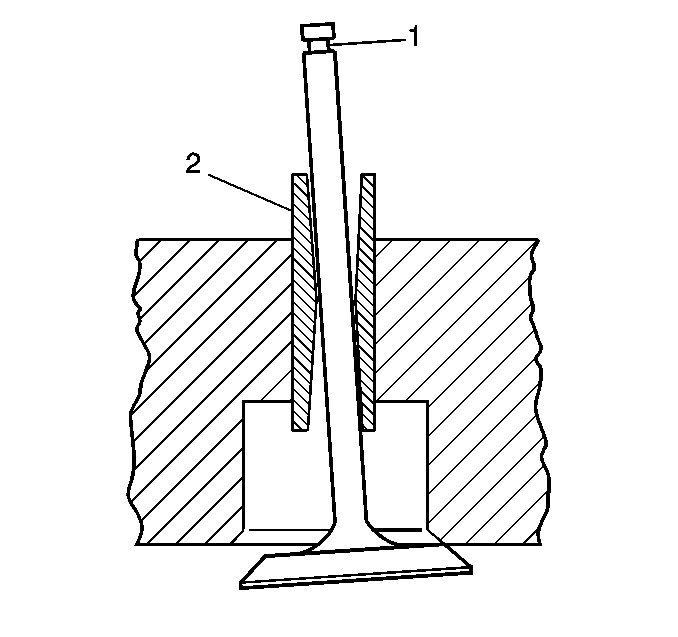
- Inspect the valve stem
for straightness. Use V blocks to inspect the valve head for bending or distortion.
Replace any bent or distorted valves.
| • | It is essential that the valve guide bores are free of carbon
or dirt to ensure the proper centering of the pilot in the guide. |
| • | The valve seats should be concentric to within 0.05 mm (0.031 in)
total indicator reading. |
| • | Reface pitted valves on a valve refacing machine to ensure the
correct relationship between the valve head and the valve stem. |
| • | Replace the valve if the valve stem is warped (2), or if the valve
stem shows signs of excessive wear. |
| • | Inspect the valve key area (1) for damage and carbon build up. |
| • | Replace the valve if the edge of the head is less than 0.79 mm
(0.031 in) thick after grinding. |
| • | Use the manufacturer's recommendations of equipment for the proper
results. |
