For 1990-2009 cars only
Removal Procedure
- Lower the folding top.
- Remove the right and left windshield side upper garnish moldings. Refer to Windshield Pillar Garnish Molding Replacement in Interior Trim.
- Remove the right and left body hinge pillar trim panels.
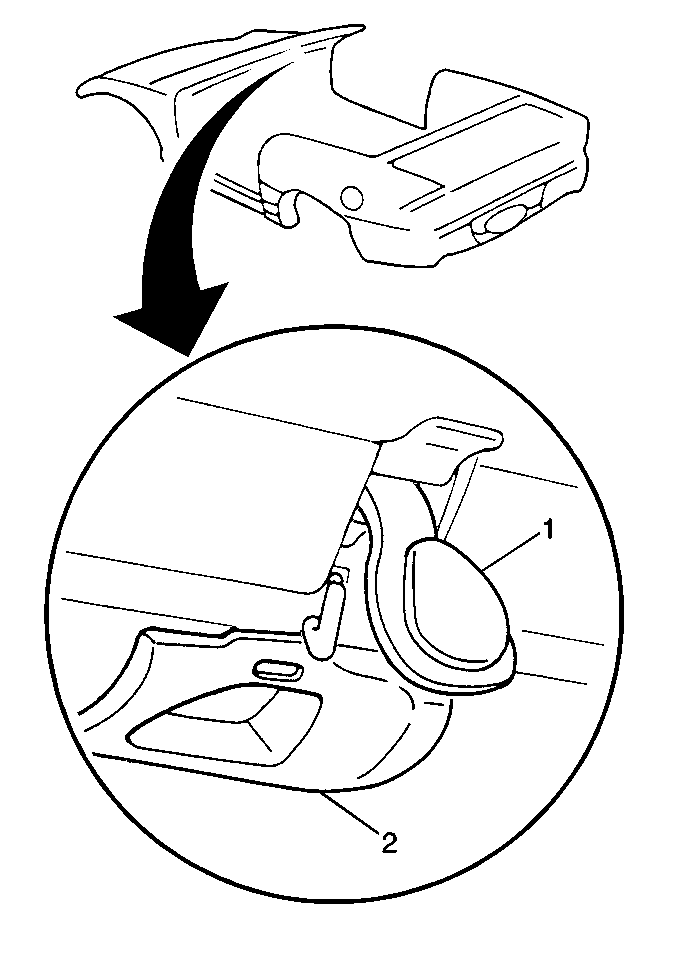
- Remove the right and left front latch striker bolts.
- Remove the right and left front latch striker (2).
- Remove the front weatherstrip (1).
Installation Procedure
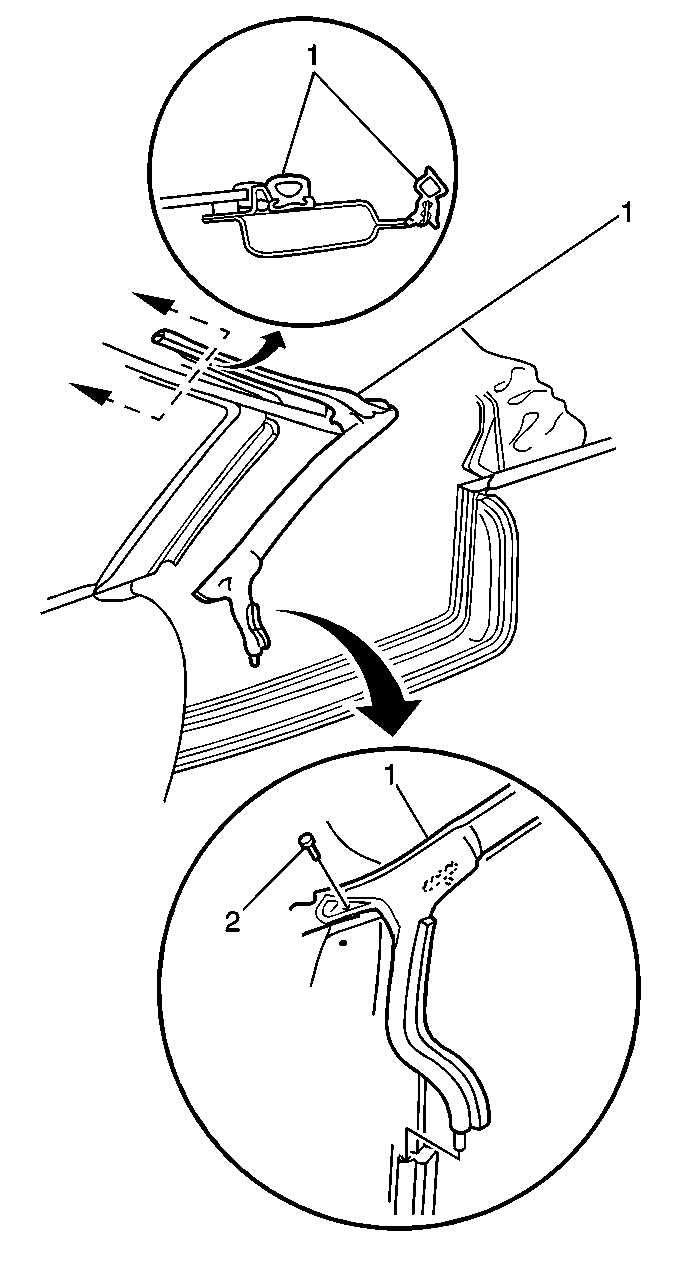
- Remove the paper backing from the adhesive on the molded details of the weatherstrip at the top of the A-pillar.
- Position the molded details of the weatherstrip to the top of the A-pillar.
- Drive the front weatherstrip bolt (2) into the previously drilled hole in the body.
- Insert the front top section of the weatherstrip into the retainer on the windshield header.
- Roll the entire length onto the channel.
- Insert the rear top section of the weatherstrip into the retainer on the windshield header.
- Roll the entire length of the flange.
- Remove the paper backing from the adhesive on the molded details of the weatherstrip at the top of the hinge pillar.
- Position the weatherstrip to the hinge pillar.
- Insert a plastic nail through the hole in the weatherstrip into the hole in the body at the top of the hinge pillar.
- Insert the weatherstrip into the A-pillar retainer.
- Roll the entire length into the channel.
- Insert the tapered end of the weatherstrip into the hole in the front side door lower weatherstrip.
- Insert the remaining length of weatherstrip onto the flange
- Roll the weatherstip into place.
- Install the right and left front latch striker (2).
- Install the right and left latch striker bolts.
- Install the right and left body hinge pillar trim panels.
- Install the right and left windshield side upper garnish moldings. Refer to Windshield Pillar Garnish Molding Replacement in Interior Trim.
- Raise the folding top.
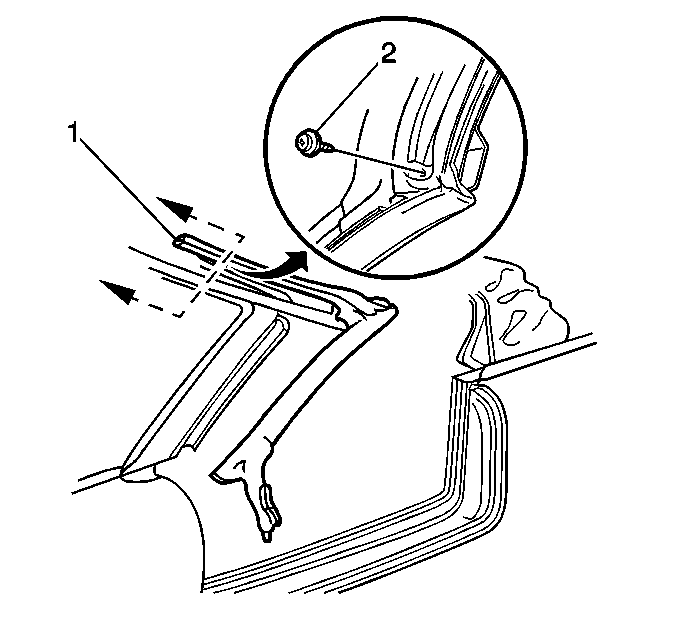
Align the hole in the weatherstrip to the previously drilled hole in the body.
Notice: Use the correct fastener in the correct location. Replacement fasteners must be the correct part number for that application. Fasteners requiring replacement or fasteners requiring the use of thread locking compound or sealant are identified in the service procedure. Do not use paints, lubricants, or corrosion inhibitors on fasteners or fastener joint surfaces unless specified. These coatings affect fastener torque and joint clamping force and may damage the fastener. Use the correct tightening sequence and specifications when installing fasteners in order to avoid damage to parts and systems.
Tighten
Tighten the bolt (2) to 1.3 N·m (12 lb in).
