Circuit Description
The diagnostic tables in this section are designed for use with a scan tool. If the scan tool is inoperative, this must be corrected before beginning any other diagnostic procedures. DO NOT Clear Info unless instructed by a diagnostic procedure.
Important: This vehicle is equipped with a Powertrain Control Module (PCM) utilizing an Electrically Erasable Programmable Read Only Memory (EEPROM). When diagnostics call for replacement of the PCM, the new PCM must be programmed. Refer to Powertrain Control Module Replacement/Programming .
Test Description
Number(s) below refer to the step number(s) on the Diagnostic Table.
-
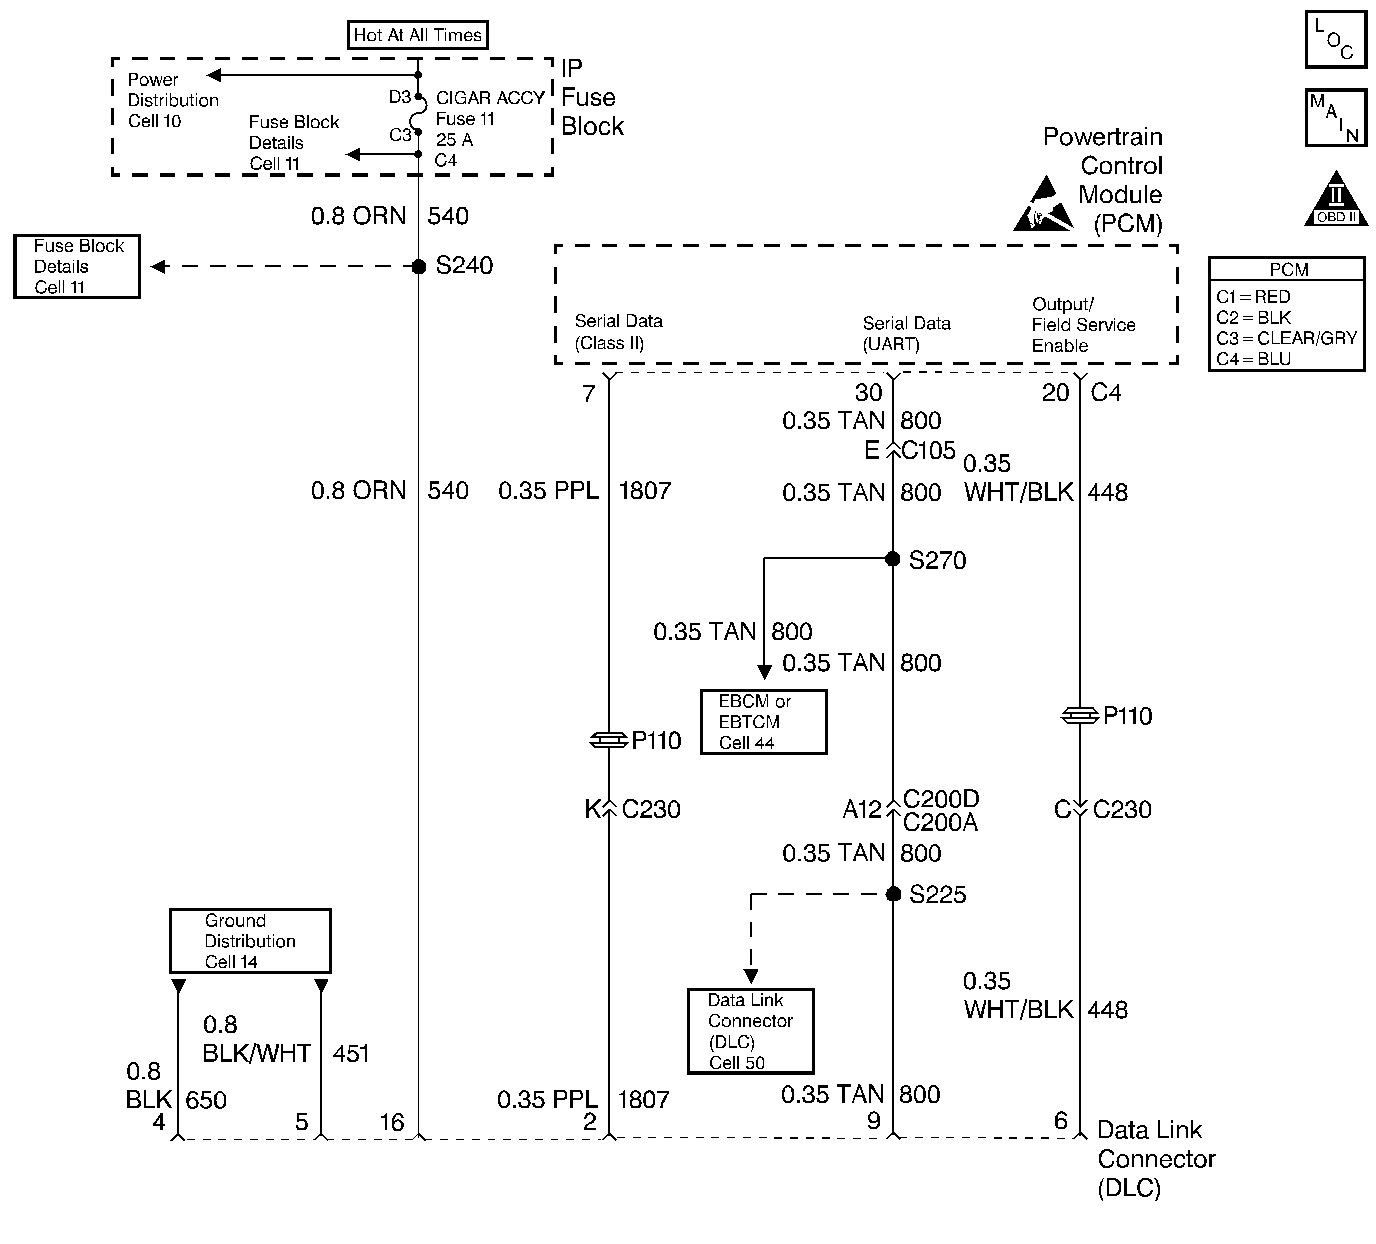
Some older scan tools are powered through a separate power cord from the cigar lighter. If this type of scan tool is being used, and the tool will not power up, check for a poor connection, or a malfunctioning lighter socket. Refer to Repair Procedures in Electrical Diagnosis (8A, Cell 114, Cigar Lighter) for circuit details.
-
Before trying a different scan tool, check for poor connections between the DLC and the scan tool cable. A faulty Vehicle Interface Module (VIM) can also cause loss of communication.
-
If there is no communication between the PCM and the scan tool, no data will be displayed. Class 2 Serial Data is shut down when system voltage is below 9.0 Volts or above 16.0 Volts. A scan tool will not display data if system voltage is outside this range. If no data is displayed with the engine running, but data is displayed with the ignition ON, engine OFF, high system voltage (overcharging) may be at fault. If this is the case, the scan tool should display DTC P0563 System Voltage High with the ignition ON, engine OFF.
-
Before trying a different scan tool, check for poor connections between the DLC and the scan tool cable. A faulty Vehicle Interface Module (VIM) can also cause loss of communication.
Some older scan tools are powered through a separate power cord from the cigar lighter, but the VIM gets its power and ground through the DLC connector. If this type of scan tool is being used, and the tool powers up but no data is displayed, proceed to Step 10.
Step | Action | Value(s) | Yes | No |
|---|---|---|---|---|
1 | Was the Powertrain On-Board Diagnostic (OBD) System Check performed? | -- | ||
2 |
Does the scan tool power up and show data? | -- | ||
3 | Does the engine start and run? | -- | ||
4 |
| -- | ||
5 | Using the DVM J 39200, measure the resistance between the chassis ground and the PCM ground circuits in the PCM harness connectors. Does the DVM display the specified value (or lower) on each circuit? | 5 ohms | ||
6 | Check for faulty connections at the PCM. Was a problem found and corrected? | -- | ||
7 | Repair the circuit that did not illuminate the test light. Is the action complete? | -- | -- | |
8 | Repair the faulty PCM ground circuit(s). Is the action complete? | -- | -- | |
9 |
Important:: Replacement PCM must be programmed. Refer to Powertrain Control Module Replacement/Programming . Replace the PCM. Is the action complete? | -- | -- | |
| -- | |||
11 | Using DVM J 39200, measure the resistance between DLC terminals 4 and 5 and chassis ground. Does the DVM display the value shown (or lower)? | 5 ohms | ||
12 | Repair the B+ circuit to DLC terminal 16. Refer to Electrical Diagnosis, Data Link Connector (DLC). Is the action complete? | -- | -- | |
13 | Repair the ground circuit to DLC terminals 4 and 5. Refer to Electrical Diagnosis, Data Link Connector (DLC). Is the action complete? | -- | -- | |
Replace the faulty scan tool. Is the action complete? | -- | -- | ||
Using the DVM J 39200, measure the resistance between DLC terminals 4 and 5 and chassis ground. Does the DVM display the specified value (or lower)? | 5 ohms | |||
16 | Check the Class 2 Serial Data circuit for being open, shorted to power or ground. Refer to Electrical Diagnosis, Data Link Connector (DLC). Was a problem found and corrected? | -- | ||
17 | Repair the ground circuit to DLC terminals 4 and 5. Refer to Electrical Diagnosis, Data Link Connector (DLC). Is the action complete? | -- | -- | |
Verify the scan tool operation on another vehicle. Does the scan tool display data? | -- | |||
19 |
Important:: Replacement PCM must be programmed. Refer to Powertrain Control Module Replacement/Programming . Replace the PCM. Is the action complete? | -- | -- | |
20 | Replace the faulty scan tool. Is the action complete? | -- | -- |
