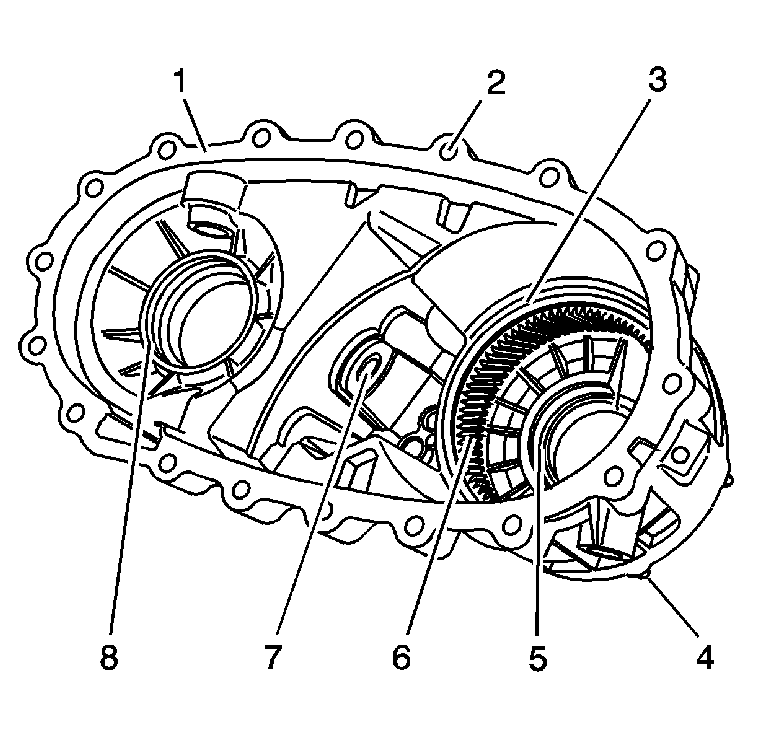
Front Case Half
- Clean the front case half
in cleaning solvent and air dry.
Notice: Do not nick, scratch or damage the sealing surface. The
sealing surface is a machined surface. Damage to the machined surface can
cause leakage.
- Remove the sealer from
the case sealing surfaces.
- Inspect the case for being broken or cracked.
- Inspect the front output shaft front bearing bore (8) for:
- Inspect the input shaft bearing bore (5) for:
- Replace the front case half if any of the above is found.
- Inspect the sealing surfaces (1) for damage.
- Repair small scratches or nicks with a soft stone.
- Inspect the front case to transmission case mounting surface for
damage.
- Inspect the case threaded bolt holes (2) for damage.
- Repair any damaged threads.
- Inspect the transmission to transfer case studs (4) for
damage.
- Replace any damaged studs. Refer to
Transfer Case Assemble
.
- Inspect the retaining ring (3) of the annulus gear to ensure
it is properly seated.
- Inspect the annulus gear (6) for the following:
| • | Debris embedded in the root of the teeth |
- Replace the front case half if the annulus gear is damaged.
- Inspect the control actuator lever shaft bearing and seal (7)
for the following:
- Replace the control actuator lever shaft bearing if it is faulty.
Refer to
Transfer Case Disassemble
and
Transfer Case Assemble
.
- Inspect the dowel pins for being loose or missing.
- Repair or replace any damaged dowel pins.
- Inspect the front output shaft front bearing and the input shaft
bearing for the following:
- Replace the bearings if any of the above conditions are found.
Refer to
Transfer Case Disassemble
and
Transfer Case Assemble
.
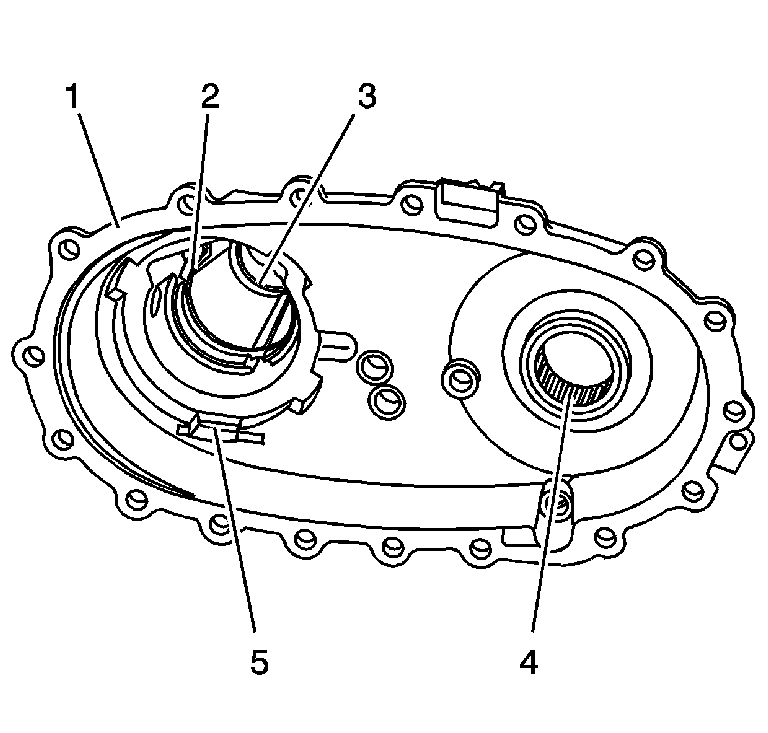
Rear Case Half
- Clean the rear case half
in cleaning solvent and air dry.
Notice: Do not nick, scratch or damage the sealing surface. The
sealing surface is a machined surface. Damage to the machined surface can
cause leakage.
- Remove the sealer from
the case sealing surfaces.
- Inspect the case for being broken or cracked.
- Replace the case if it is broken or cracked.
- Inspect the sealing surfaces (1) for damage.
- Repair small scratches or nicks with a soft stone.
- Inspect the case threaded bolt holes for damage.
- Repair any damaged threads.
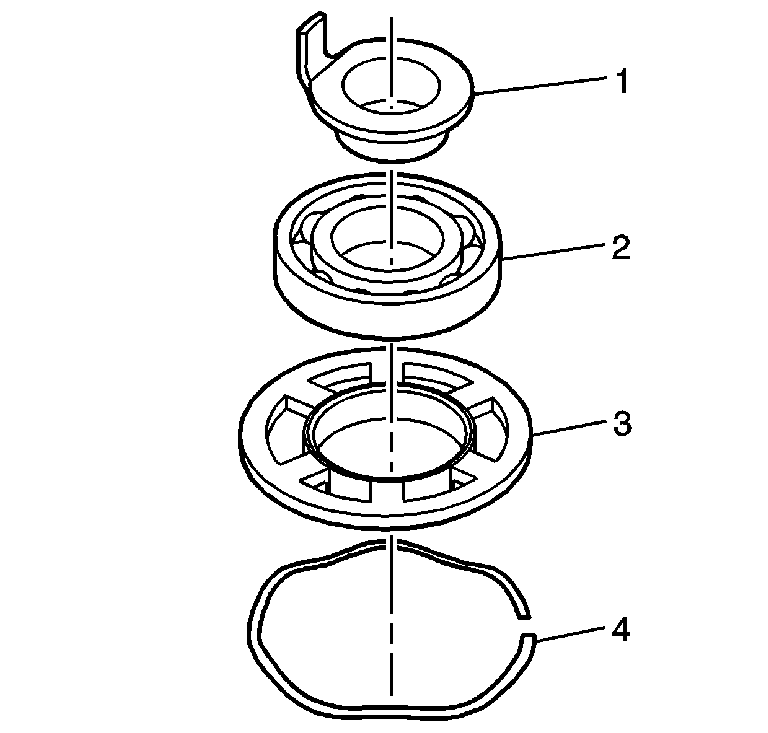
- Inspect the oil pump retainer (3) for wear or damage.
- Replace the oil pump retainer if faulty.
- Inspect the front output shaft rear bearing (2) for the
following:
- Replace the front output shaft rear bearing if any of the above
conditions are found. Refer to
Transfer Case Disassemble
and
Transfer Case Assemble
.
- Inspect the rear output shaft bearing for the following:
- Inspect for a spun bearing bore for the rear output shaft rear
bearing.
- Replace the case if a bearing has spun.
- Inspect the retaining ring (5) for the rear output shaft
rear bearing for being bent or twisted.
- Replace a faulty retaining ring.
- Inspect the rear output shaft bushing (4) for scoring or
wear.
- Replace a faulty rear output shaft bushing. Refer to
Transfer Case Disassemble
and
Transfer Case Assemble
.

- Remove the oil pump suction
pipe and the oil pump suction hose from the oil pump screen.
- Clean the pipe, hose, and screen in cleaning solvent and air dry.
- If the screen is embedded with debris, replace the screen.
- Inspect the hose for cracking or tears.
- Replace the hose if it is faulty.
- Inspect the oil pump for free movement.
- Replace the oil pump if there is any binding. Do not disassemble
the oil pump. The oil pump is serviced as a unit.
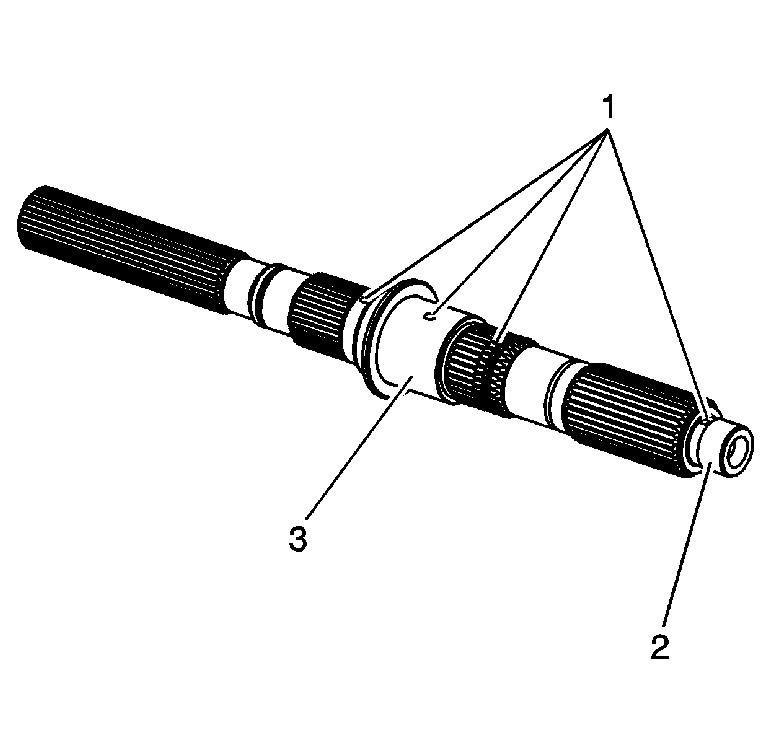
Rear Output Shaft
- Clean the rear output
shaft in cleaning solvent.
- Clean the rear output shaft oil galleries (1) and air
dry.
Important: Do not attempt to smooth any roughness in the bearing journals.
- Inspect the input gear pilot bearing surface (2) and the clutch
housing bearing surface (3) for the following:
- Inspect the splines on the rear output shaft for damage or excessive
wear. Witness marks at the location of the gears is normal.
- Replace the rear output shaft if any of the above conditions are
found.
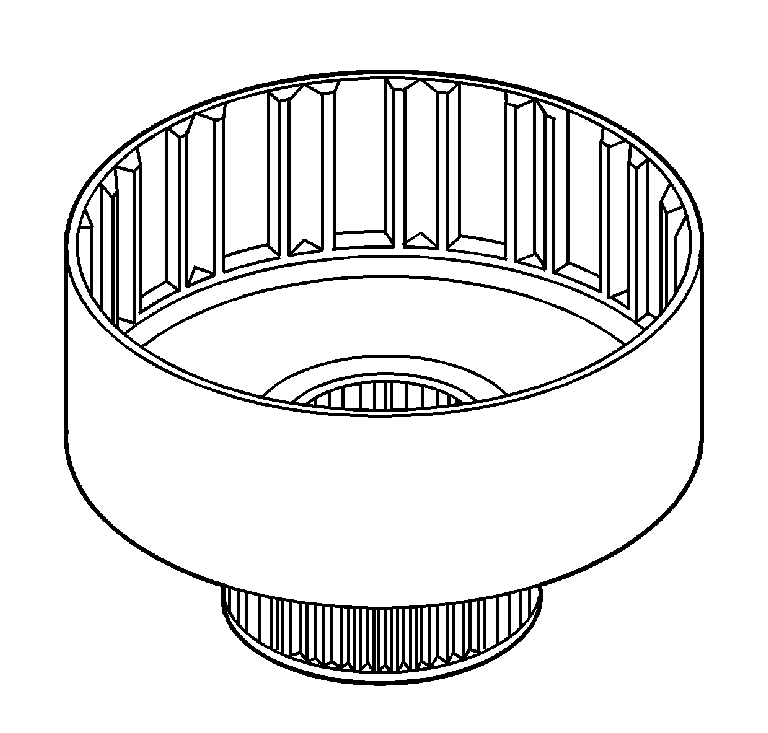
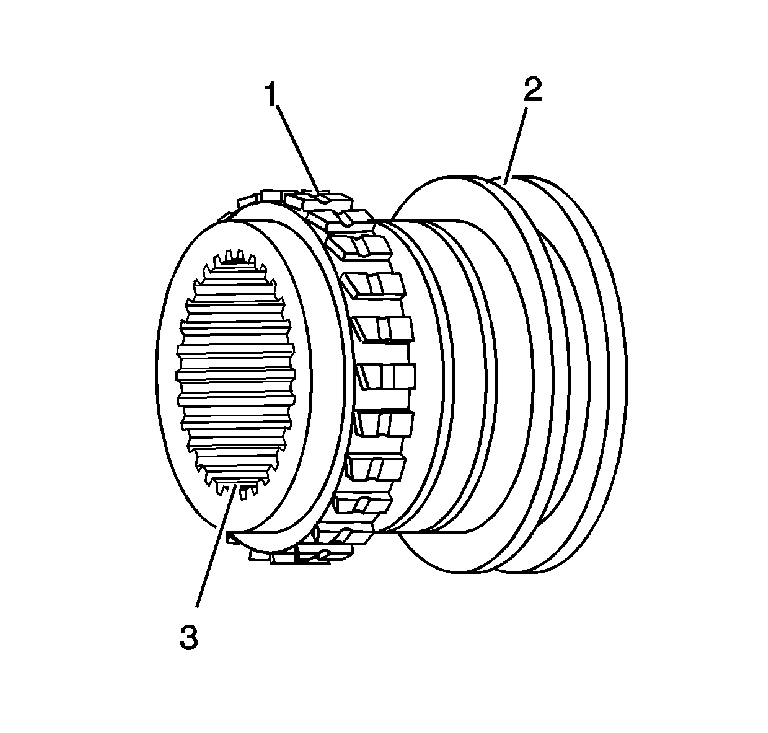
Clutch Components
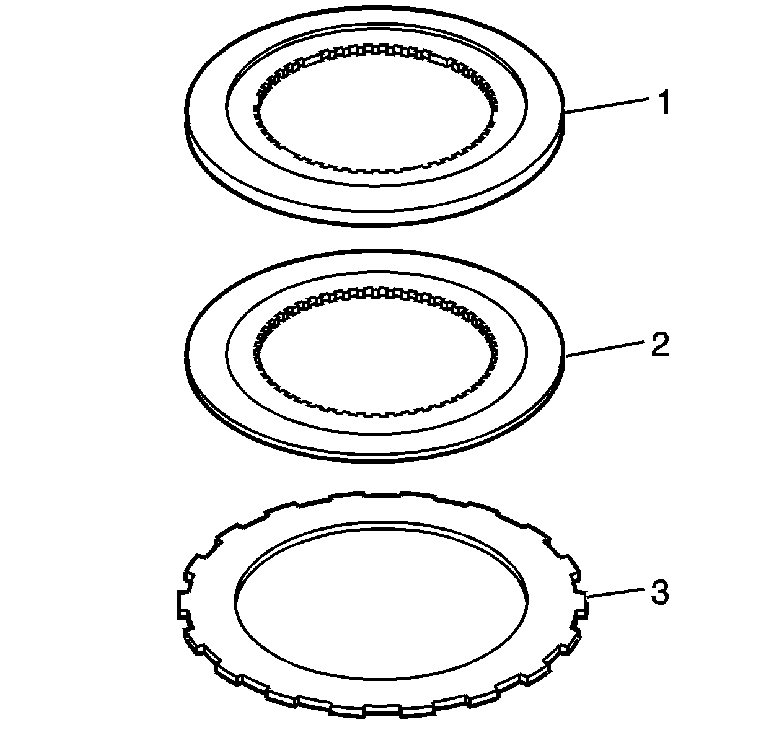
- Do not clean the inner
clutch discs (2) in cleaning solvent.
- Inspect the inner clutch discs (2), with the friction material,
for the following:
| • | Grooved or scored friction material |
- Inspect the outer clutch discs (3) steel plates for being
worn or warped.
- Replace the clutch discs if any of the above conditions are
found.
- Inspect the clutch backing plate (1) for wear.
- Replace the clutch backing plate if worn.
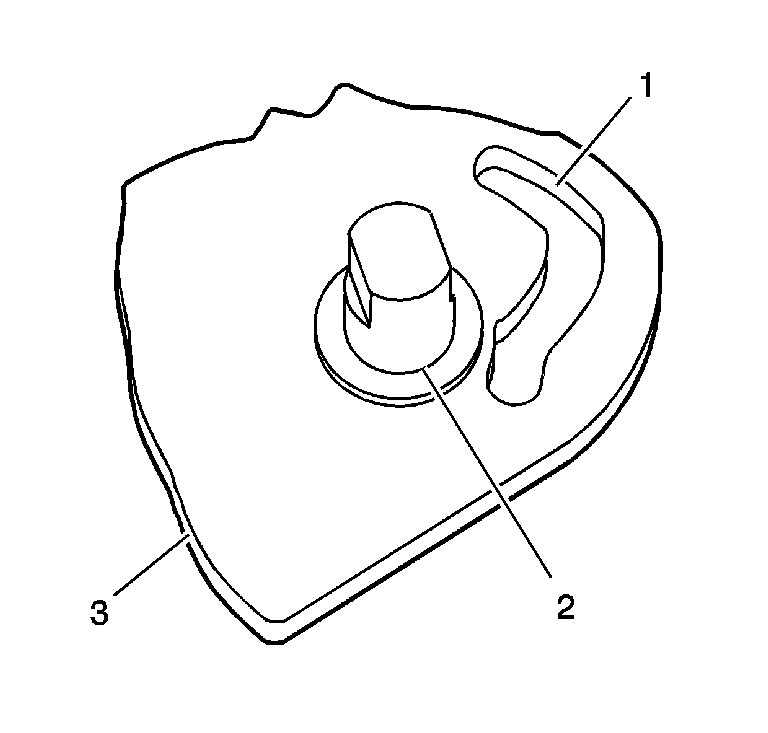
- Clean the clutch pressure
plate (3), the clutch pressure plate bearing (2) and the clutch
pressure plate hub (1) in cleaning solvent and air dry.
- Inspect the pressure plate bearing (2) for the following:
- Replace the pressure plate bearing if it is damaged or worn.
- Inspect the clutch pressure plate (1) for wear or damage.
- Replace a faulty clutch pressure plate.
- Inspect the clutch pressure plate bearing hub (1) for wear
or damage.
- Replace a faulty clutch pressure plate bearing hub.
- Inspect for a damaged clutch spring (4)
- Replace a faulty clutch spring.
- Clean the clutch housing,
with the bearing, in cleaning solvent.
- Air dry, and ensure all solvent is removed from the bearing.
- Inspect the bearing for wear or damage.
- Replace the clutch housing bearing if faulty. Refer to
Transfer Case Disassemble
and
Transfer Case Assemble
.
- Inspect the clutch housing disc teeth for excessive wear. Excessive
wear can be identified by the steps in the teeth, which prevents the clutch
disc from moving freely.
- Replace the clutch housing if the clutch disc teeth cannot be
deburred.
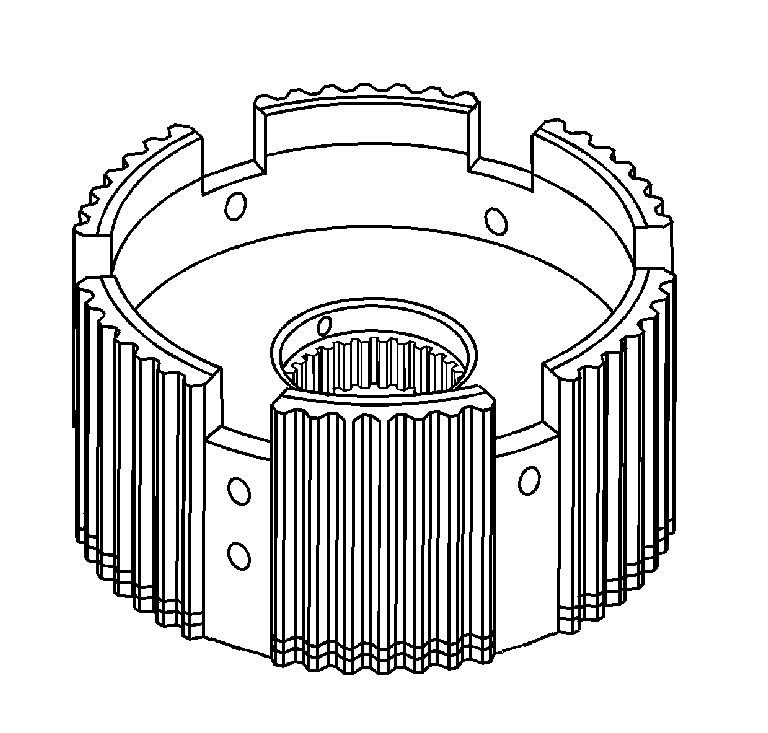
- Clean the clutch hub in
cleaning solvent and air dry.
- Inspect the inner splines of the clutch hub for wear or damage.
- Inspect the rear output shaft to the clutch inner hub splines
for excessive looseness.
- Inspect the clutch hub teeth for excessive wear. Excessive wear
can be identified by the steps in the teeth, which prevents the clutch disc
from moving freely.
- Replace the clutch hub if any of the above conditions are found.
High/Low Planetary Carrier
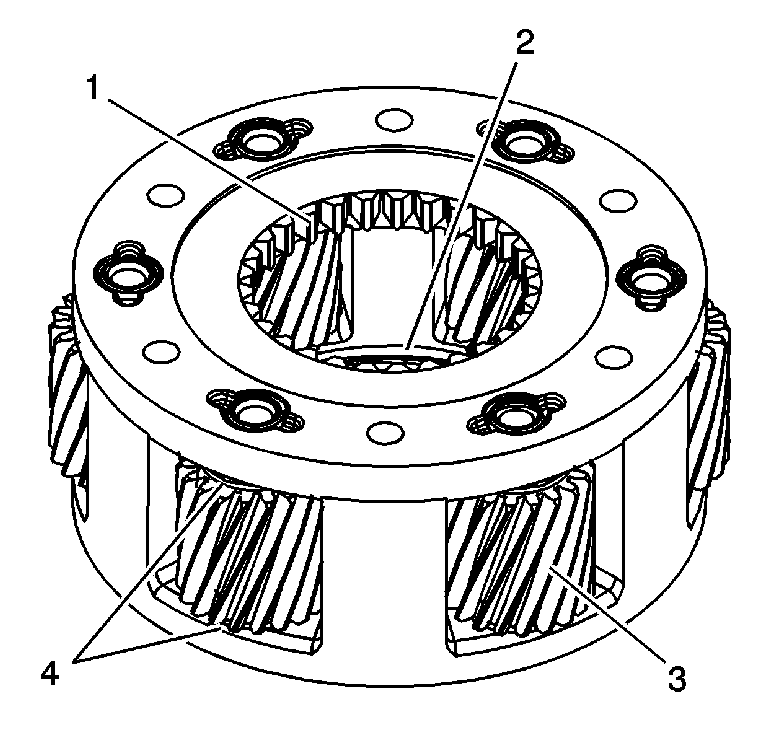
Important: Depending on the version of the NVG 246 transfer case, it may
have either a 4 pinion gear or 6 pinion gear planetary carrier
assembly. The 4 pinion gear planetary carrier is used with transmission
RPO M30 and the input gear splines are 27 teeth. The 6 pinion
gear planetary carrier is used with transmission RPO MT1 and MN8 and
the input gear splines are 32 teeth. The NVG 236 transfer case
uses a 4 pinion carrier assembly. The repair procedures are the same
for both planetary carriers.
- Clean the high/low planetary carrier in cleaning solvent. Do not disassemble
the planetary carrier.
- Air dry and ensure all cleaning solvent is removed from the bearings
in the planetary gears (3). Do not spin the planetary gears with
compressed air.
- Inspect the planetary gears for chipped teeth.
- Inspect the planetary gears for debris embedded in the root of
the teeth.
- Inspect for a washer (4) being on each side of the planetary
gears.
- Inspect the low range teeth (1) for damage or excessive
wear.
- Inspect the thrust washer surface (2) for scoring or excessive
wear.
- Replace the high/low planetary carrier if any of the above conditions
are found.
Drive Chain and Sprockets
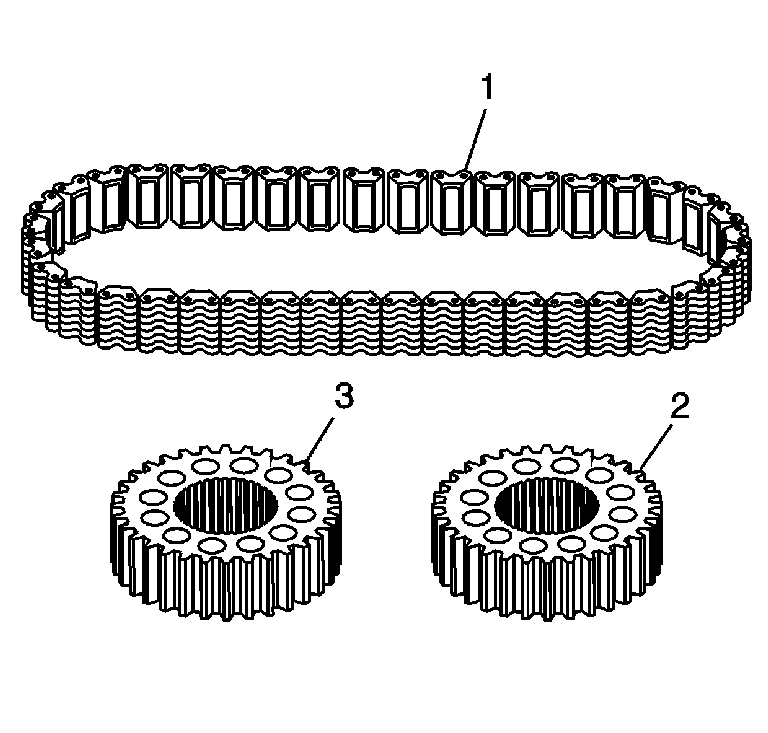
- Clean the drive chain (1),
drive sprocket (3), and driven sprocket (2) in cleaning solvent
and air dry.
- Inspect the drive chain (1) for the following:
| • | Debris embedded in the links |
- Replace the chain if any of the above conditions are found.
- Inspect the driven sprocket (2) and the drive sprocket (3)
for the following:
| • | Excessive worn gear surfaces, slight wear marks are normal |
| • | Debris embedded in the root of the teeth |
- Replace the sprocket if any of the above conditions are found.
The chain and sprockets may be replaced separately.
Front Output Shaft - NVG 246
- Clean the front output
shaft in cleaning solvent and air dry.
- Inspect the teeth on the speed sensor reluctor wheel (3)
for damage.
- Replace the speed sensor reluctor wheel if it is damaged. Refer
to
Transfer Case Disassemble
and
Transfer Case Assemble
.
- Inspect the front output shaft rear bearing race (1) for
the following:
- Inspect the front output shaft splines (2) for damage.
- Replace the front output shaft if it is damaged.
Front Output Shaft - NVG 236

- Clean the front output
shaft in cleaning solvent and air dry.
- Inspect the teeth on the speed sensor reluctor wheel (2)
for damage.
- Replace the speed sensor reluctor wheel if it is damaged. Refer
to
Transfer Case Disassemble
and
Transfer Case Assemble
.
- Inspect the front output shaft rear bearing race (1) for
the following:
- Inspect the front output shaft splines (3) for damage.
- Inspect the front output shaft seal surface (4) for wear
or roughness.
- Replace the front output shaft if any of the above conditions
are found.
Input Gear
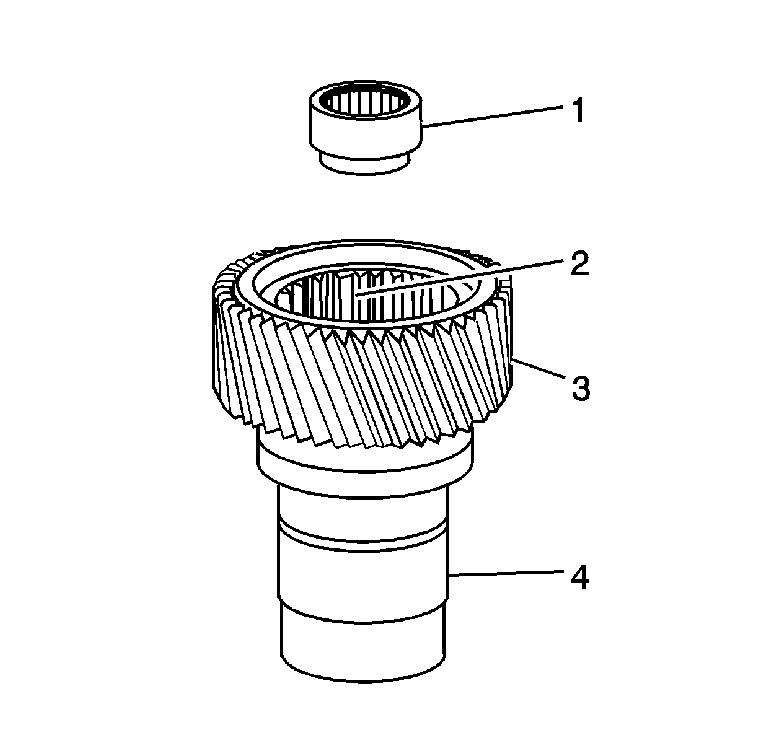
- Clean the input gear,
with pilot bearing, in cleaning solvent.
- Air dry, and ensure all solvent is removed from the pilot bearing.
- Inspect the pilot bearing (1) for the following:
- Replace the input gear pilot bearing if any of the above conditions
are found. Refer to
Transfer Case Disassemble
and
Transfer Case Assemble
.
- Inspect the input gear engagement teeth (2) for chips.
- Inspect the input gear for broken or damaged planetary teeth (3).
- Inspect the input gear for debris embedded in the root of the
teeth.
- Inspect the input gear seal surface for pitting or excessive wear.
- Replace the input gear if any of the above conditions are found.
Shift System Components
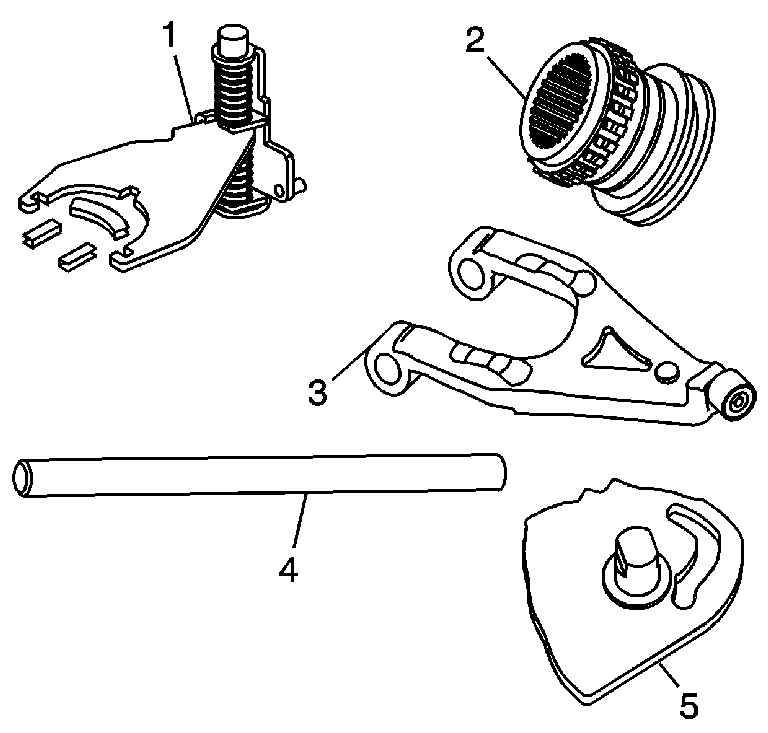
- Clean the following shift
system components in cleaning solvent and air dry:
| • | The high/low shift fork (1) |
| • | The shift fork shaft (4) |
| • | The control actuator lever shaft (5) |
- Inspect the shift fork shaft for straightness (4).
- Replace the shift fork shaft if it is not straight.
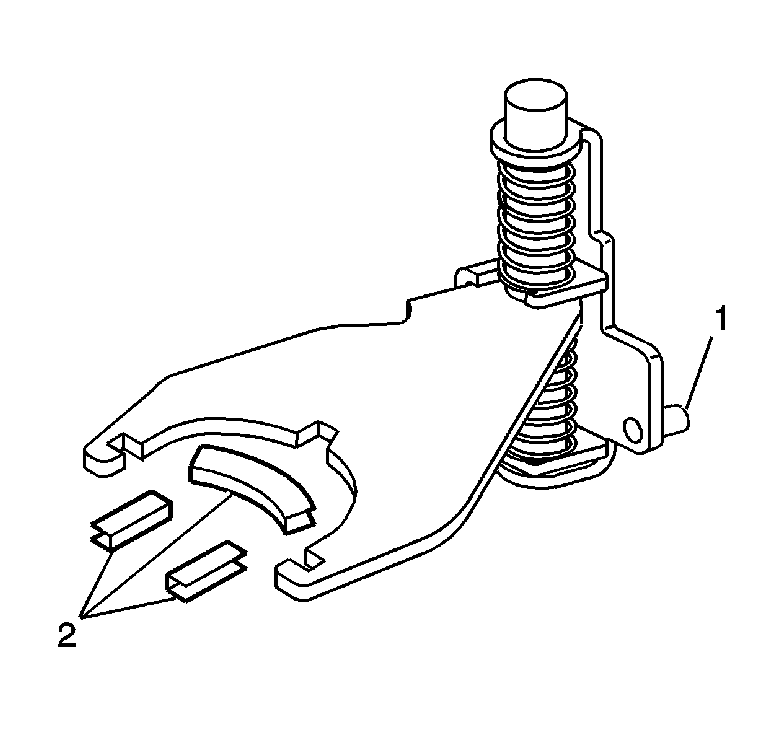
- Inspect the pads (2)
on the shift fork for wear.
- Replace the worn pads .
- Inspect the roller (1) on the shift fork for wear.
- Replace the shift fork if the roller is worn.
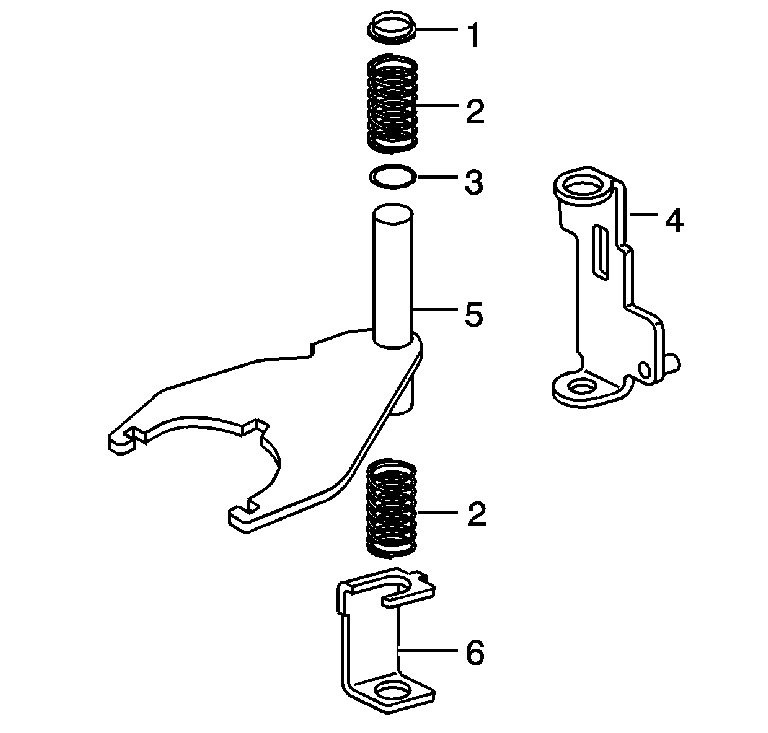
Important: Only disassemble the shift fork assembly if replacing a faulty component.
- Inspect the following components of the shift fork assembly for wear
or damage:

- Inspect the clutch lever
roller (2) for the following:
- Inspect the clutch lever for worn wear pads (1).
- Inspect the clutch lever for wear at the pivot pin holes (3).
- Replace the clutch lever if the above conditions are found.
- Inspect the range sleeve
for chipped or excessive worn teeth (1).
- Inspect the shift fork collar (2) on the range sleeve
for wear.
- Inspect the inner splines (3) of the range sleeve for excessive
looseness on the input shaft.
- Replace the range sleeve if the above conditions are found.
- Inspect the shift fork
roller slot (1) on the control actuator lever shaft for wear or roughness.
- Inspect the bearing (2) and the seal surface on the control
actuator lever shaft for the following:
- Inspect the clutch lever cam lobes (3) on the control actuator
lever shaft for wear or roughness.
- Replace the control actuator lever shaft if any of the above conditions
are found.
