For 1990-2009 cars only
Removal Procedure
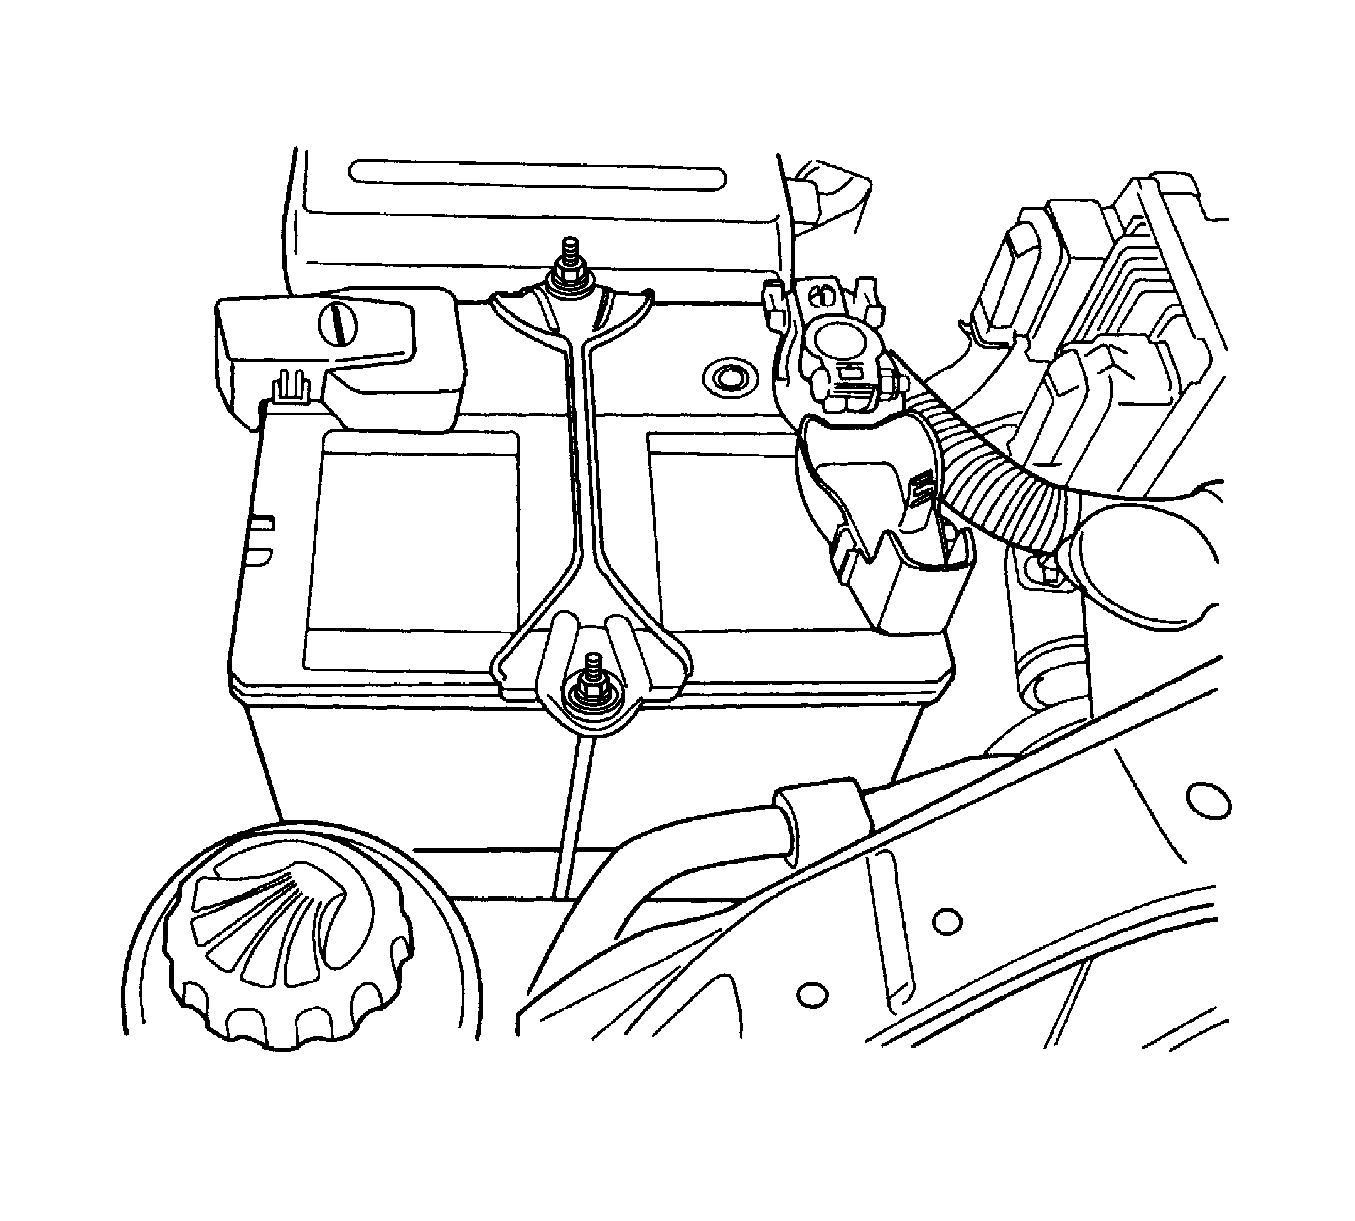
- Disconnect the negative battery cable.
- Discharge and recover the refrigerant. Refer to Refrigerant Recovery and Recharging .
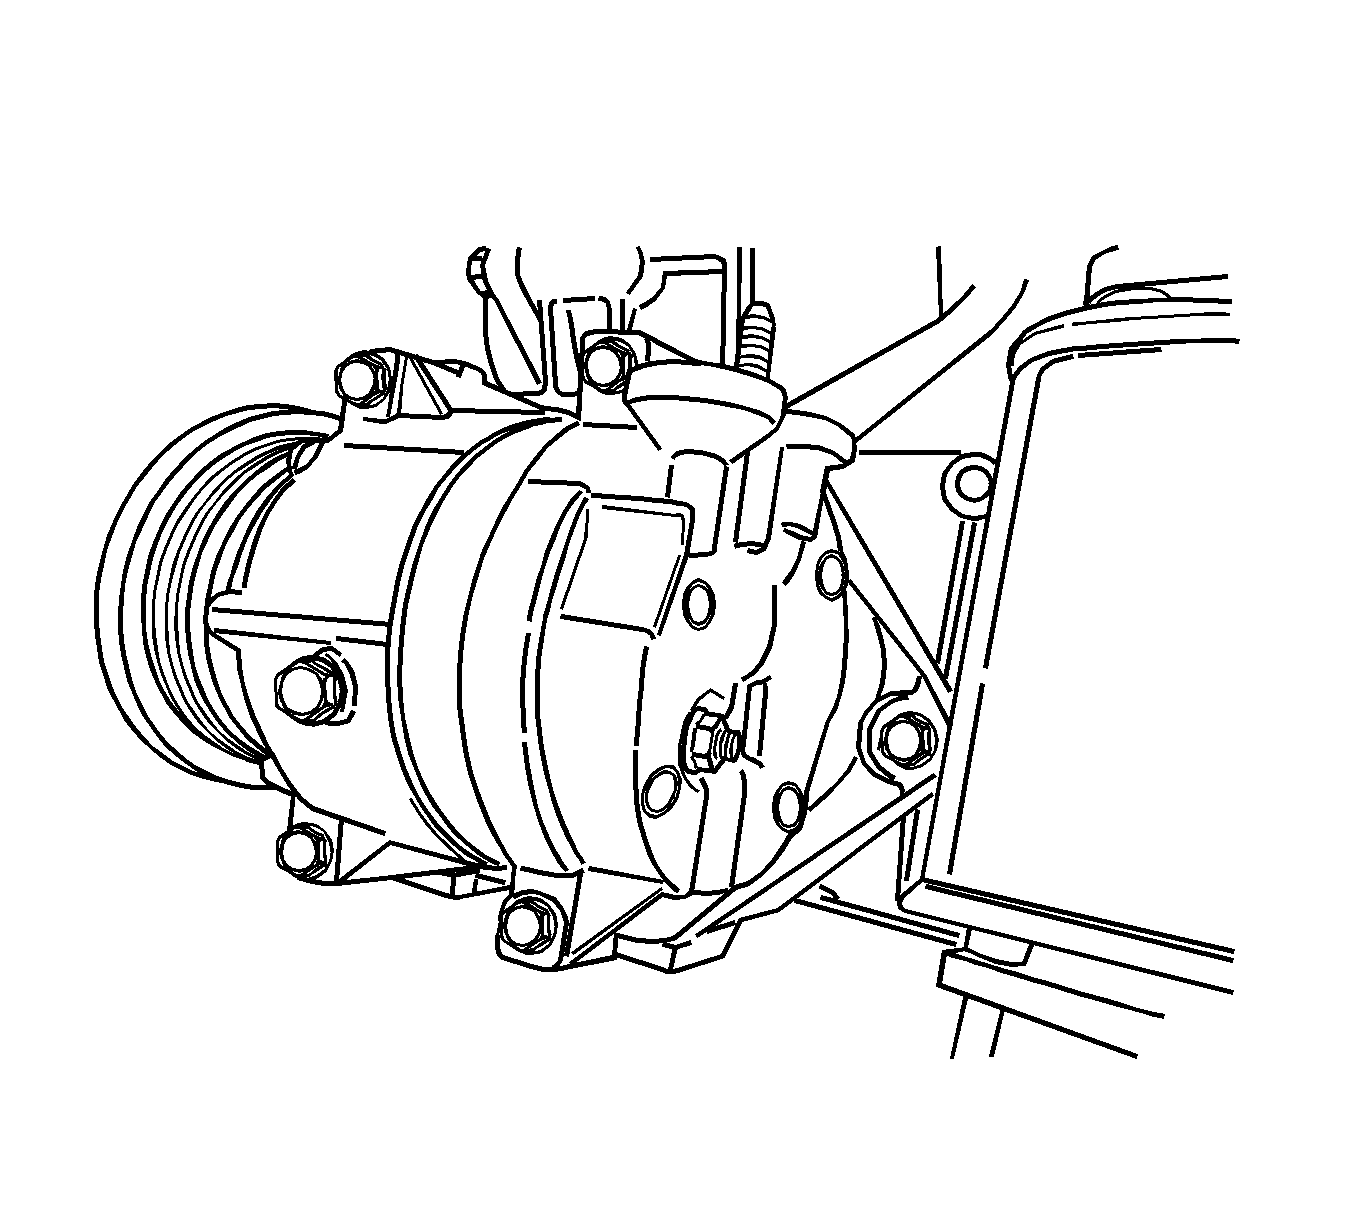
- Remove the compressor A/C hose assembly connector block fitting nut.
- Raise and suitably support the vehicle. Refer to Lifting and Jacking the Vehicle .
- Disconnect the electrical connector at the compressor.
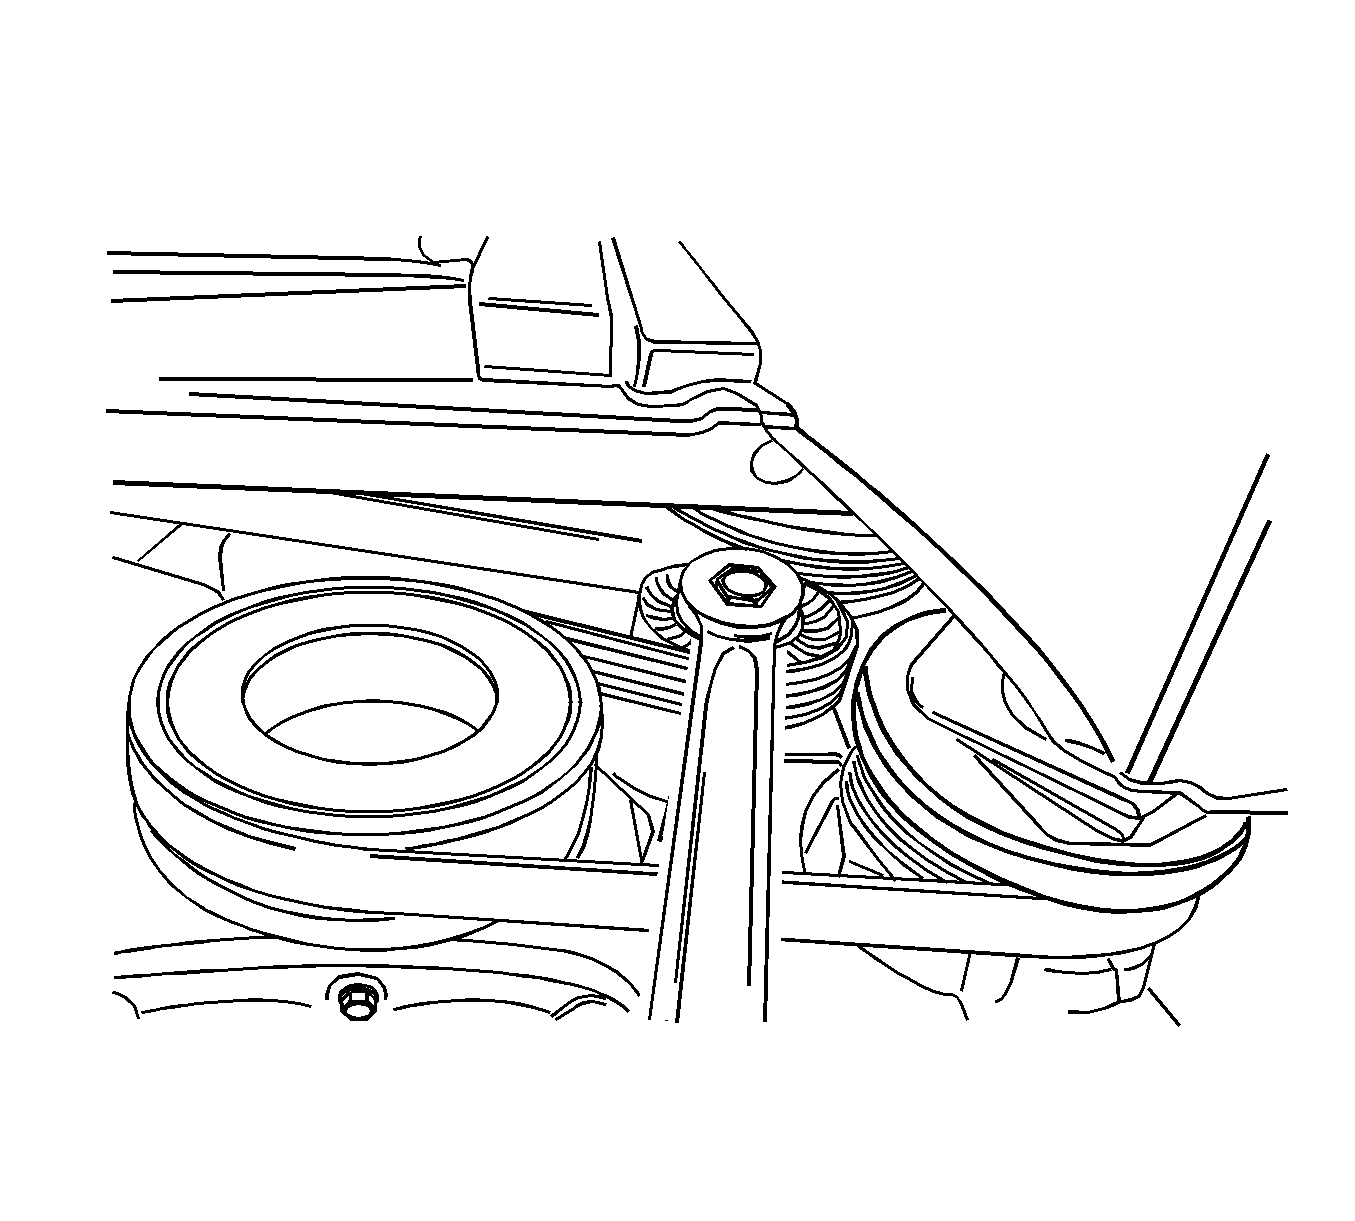
- Remove serpentine accessory drive belt.
- Remove the A/C compressor-to-bracket bolts.
- Remove the compressor.
- Drain the oil from the compressor into a container. Measure the amount of oil drained and then discard the used oil.
Caution: Refer to Battery Disconnect Caution in the Preface section.

Installation Procedure
- Add oil to the new compressor. Use the exact amount of oil that you drained from the old compressor.
- Install the compressor.
- Install the compressor-to-bracket mounting bolts.
- Install the serpentine accessory drive bolt.
- Lower the vehicle.
- Install new O-ring to the A/C hose assembly connector block fitting.
- Install the compressor hose assembly connector block fitting and tighten the retaining nut.
- Connect the electrical connector at the compressor.
- Connect the negative battery cable.
- Evacuate and recharge the A/C system. Refer to Refrigerant Recovery and Recharging .
Notice: Refer to Fastener Notice in the Preface section.
Tighten
Tighten the compressor bracket bolt to 27 N·m (20 lb ft).
Tighten
Tighten the A/C system hose connector retaining nut to 33 N·m (24 lb ft).