Removal Procedure
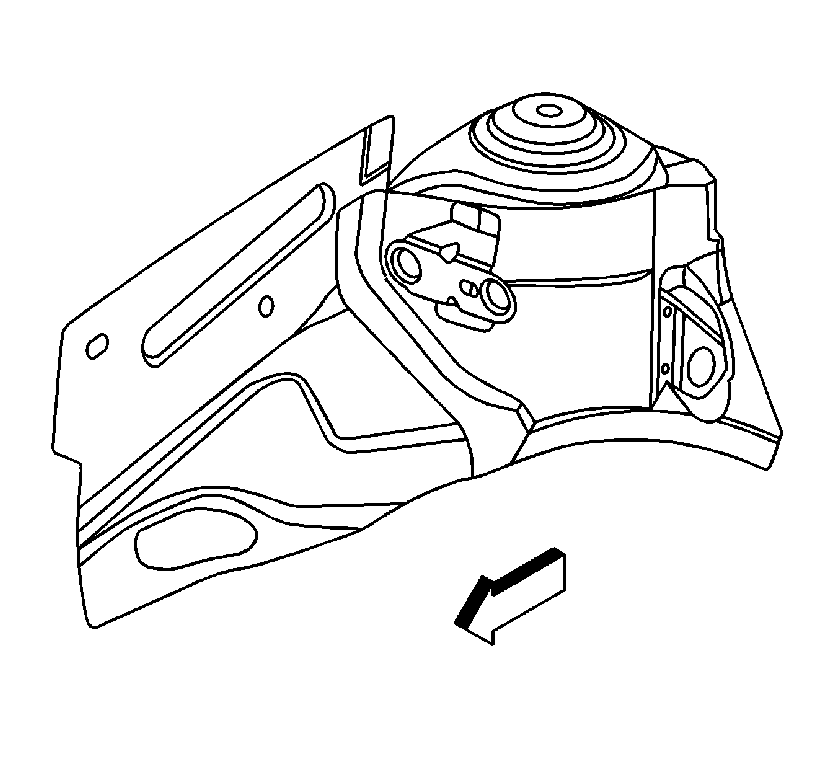
Important: The front wheelhouse component is constructed as a unit with the shock absorber tower panel. Therefore, replacement of the component affects the front wheel alignment. When assembling it, either use a jig or follow dimensions on the body repair chart for positioning. It must be welded carefully.
- Disable the SIR system. Refer to SIR Disabling and Enabling .
- Disconnect the negative battery cable.
- Remove the sealers and anti-corrosion materials from the repair area, as necessary. Refer to Anti-Corrosion Treatment and Repair .
- Visually inspect the damaged area. Repair as much of the damage as possible. Refer to Dimensions - Body .
- Locate and drill out all factory welds.
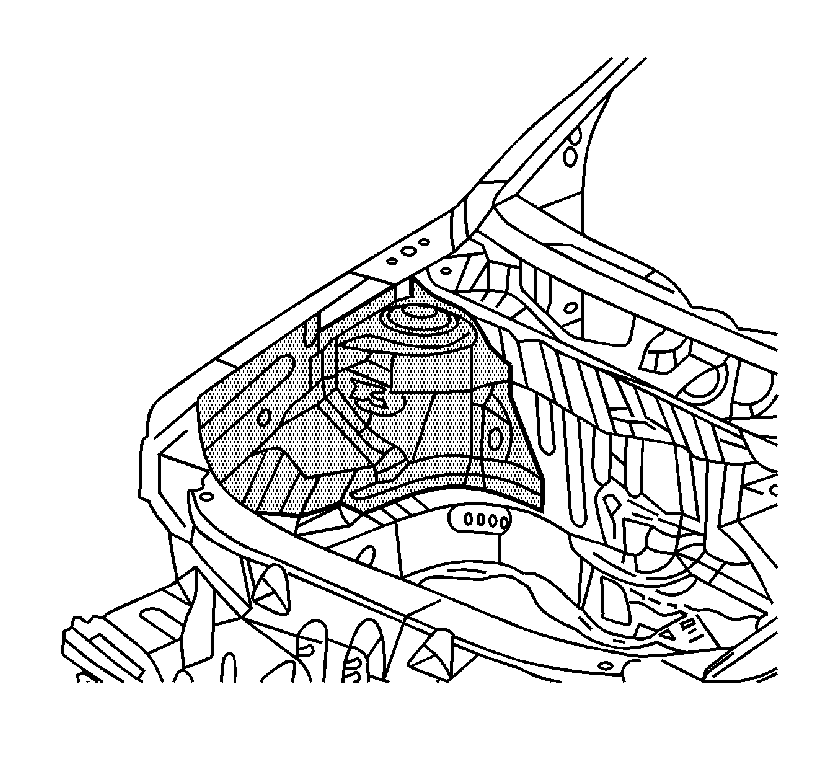
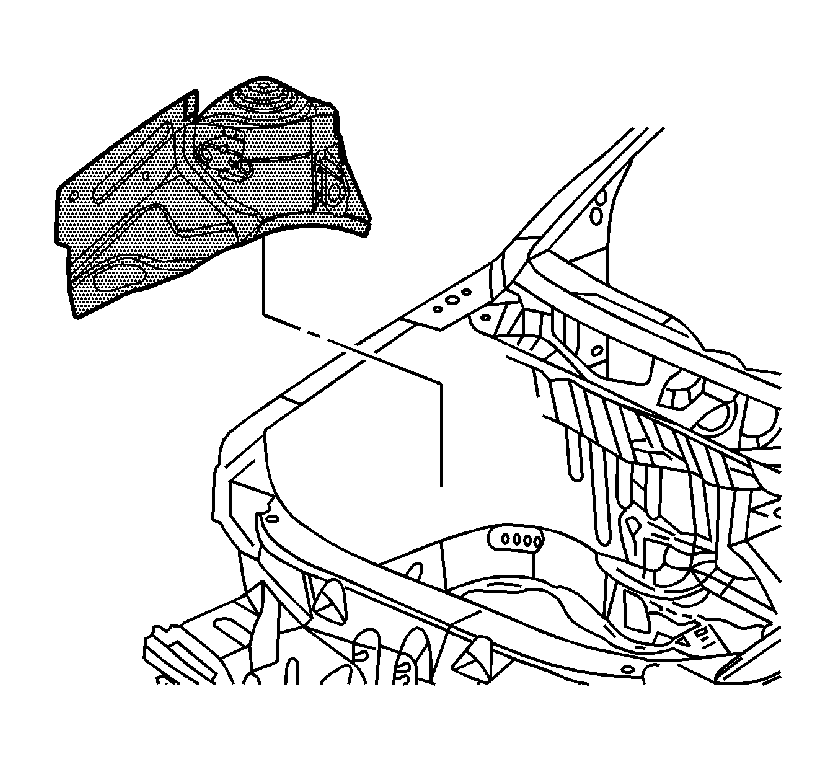
- Remove the front wheelhouse from the vehicle.
Caution: Refer to Approved Equipment for Collision Repair Caution in the Preface section.
Important: The upper strut mounting surface is a dimensionally critical area, and 3-dimensional measuring equipment should be used to locate the front wheelhouse assembly. The front wheelhouse can be serviced as a complete assembly for both the left and right wheelhouses. A wheelhouse front panel is also available to service separately on the left or the right sides.
Important: Be sure to inspect the front of the cowl and dash panel for damage. If the metal surface is damaged, the cowl panel must be repaired to restore the structural integrity of the vehicle.
Important: Note the number and location of welds for installation of the front wheelhouse
Installation Procedure
- Drill 8 mm (5/16 in) plug weld holes as necessary in the locations noted from the original assembly.
- Prepare the mating surfaces as necessary.
- Apply 3M Weld-Thru Coating P/N 05916 or equivalent to all mating surfaces.
- Position the front wheelhouse in the vehicle using 3-dimensional measuring equipment. Clamp the wheelhouse in place.
- Plug weld accordingly.
- Clean and prepare all of the welded surfaces.
- Install all related panels and components.
- Apply the sealers and anti-corrosion materials to the repair area, as necessary. Refer to Anti-Corrosion Treatment and Repair .
- Paint the repaired area. Refer to Basecoat/Clearcoat Paint Systems .
- Connect the negative battery cable.
- Enable the SIR system. Refer to SIR Disabling and Enabling .
Important: If the location of the original plug weld holes can not be determined, space the plug weld holes every 40 mm (1 1/2 in) apart.
