For 1990-2009 cars only
Removal Procedure
- Remove the exhaust manifold heat shield bolts.
- Remove the exhaust manifold heat shield.
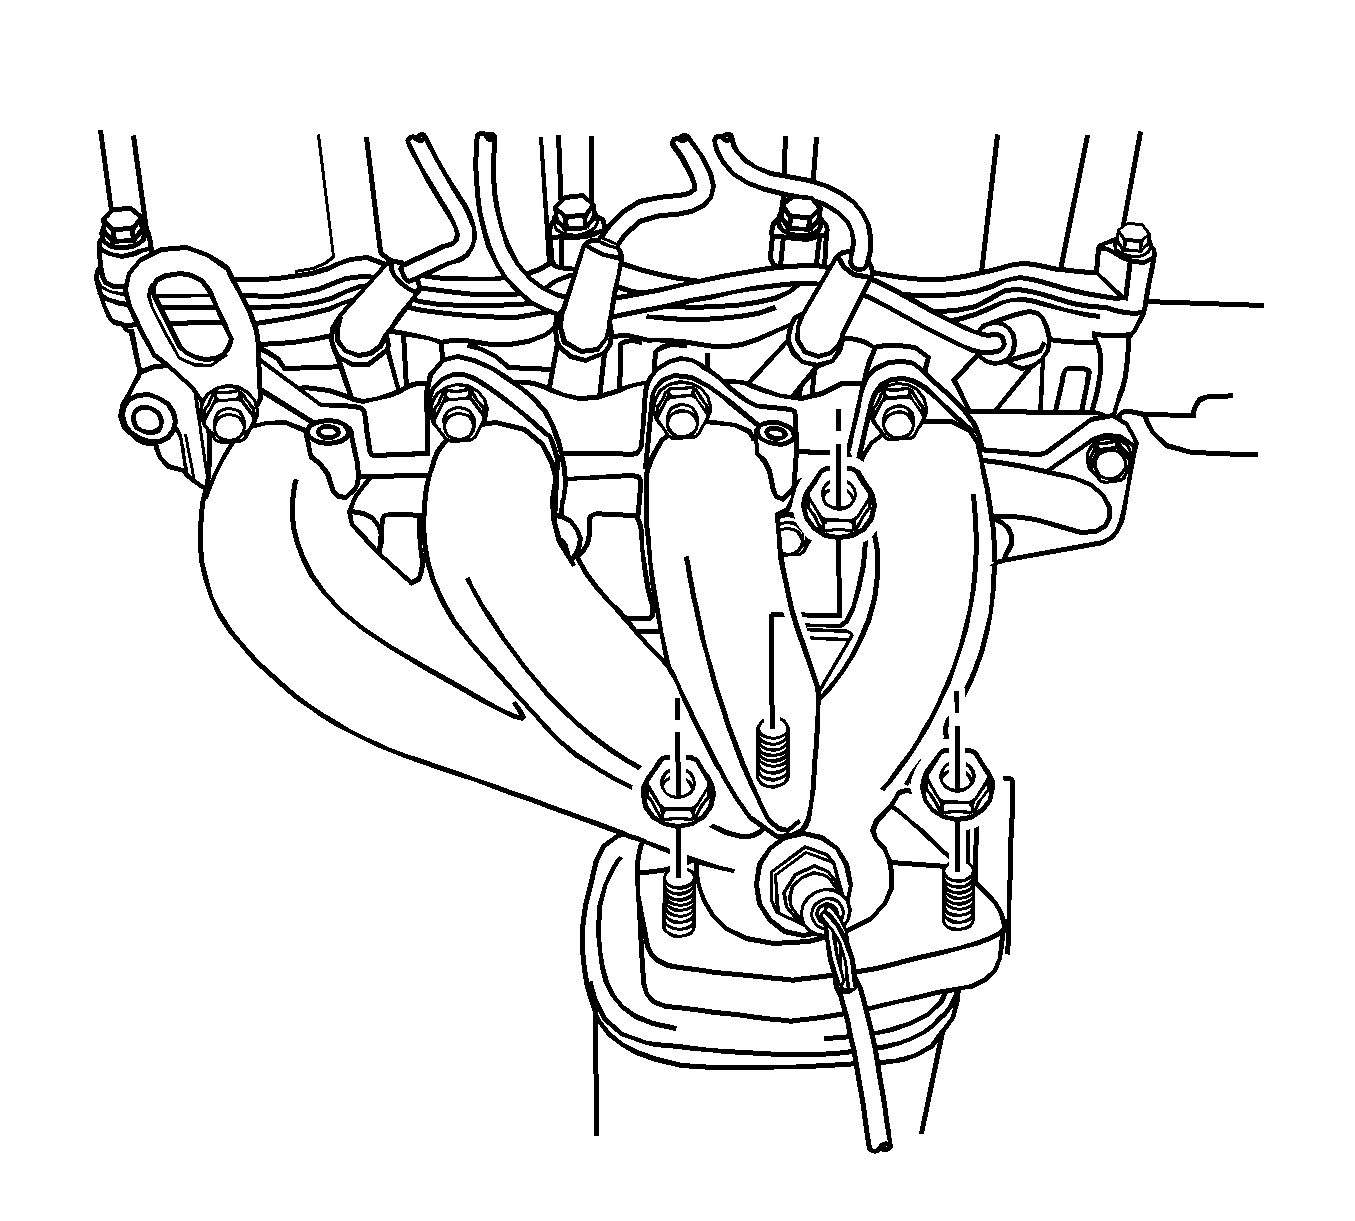
- Disconnect the oxygen sensor electrical connector.
- Remove the exhaust manifold lower flange nuts.
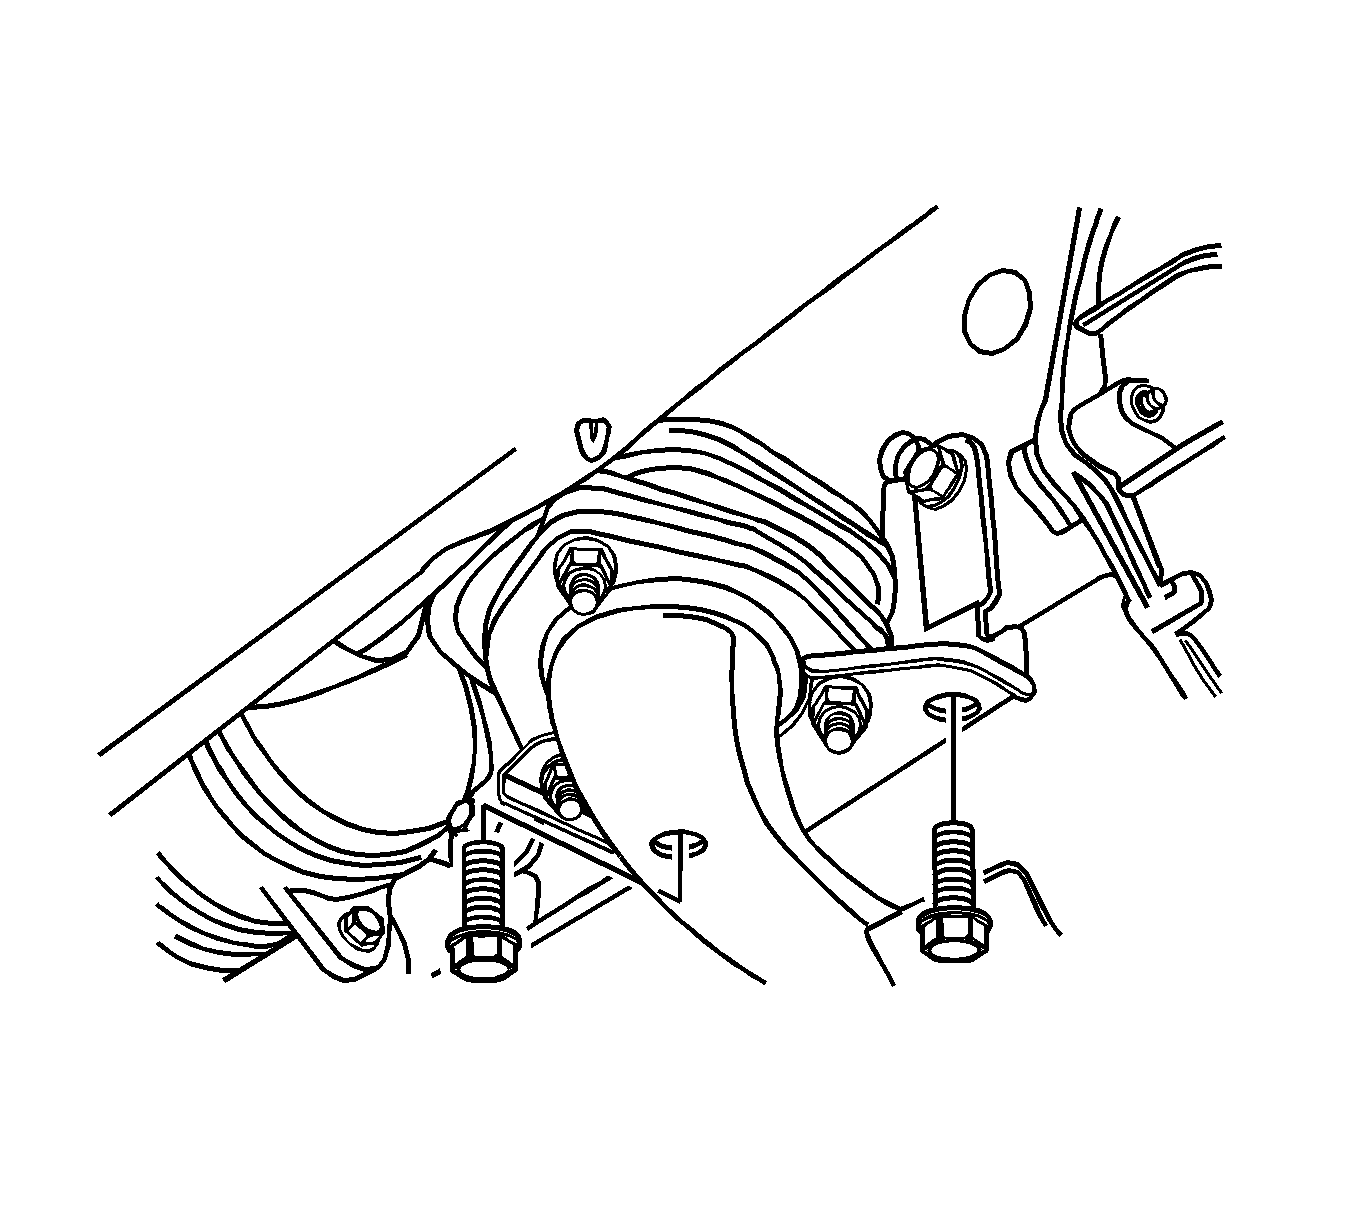
- Remove the front exhaust pipe bracket bolts.
- Remove the oxygen sensor. Refer to Oxygen Sensor Replacement or Heated Oxygen Sensor 1 Replacement .
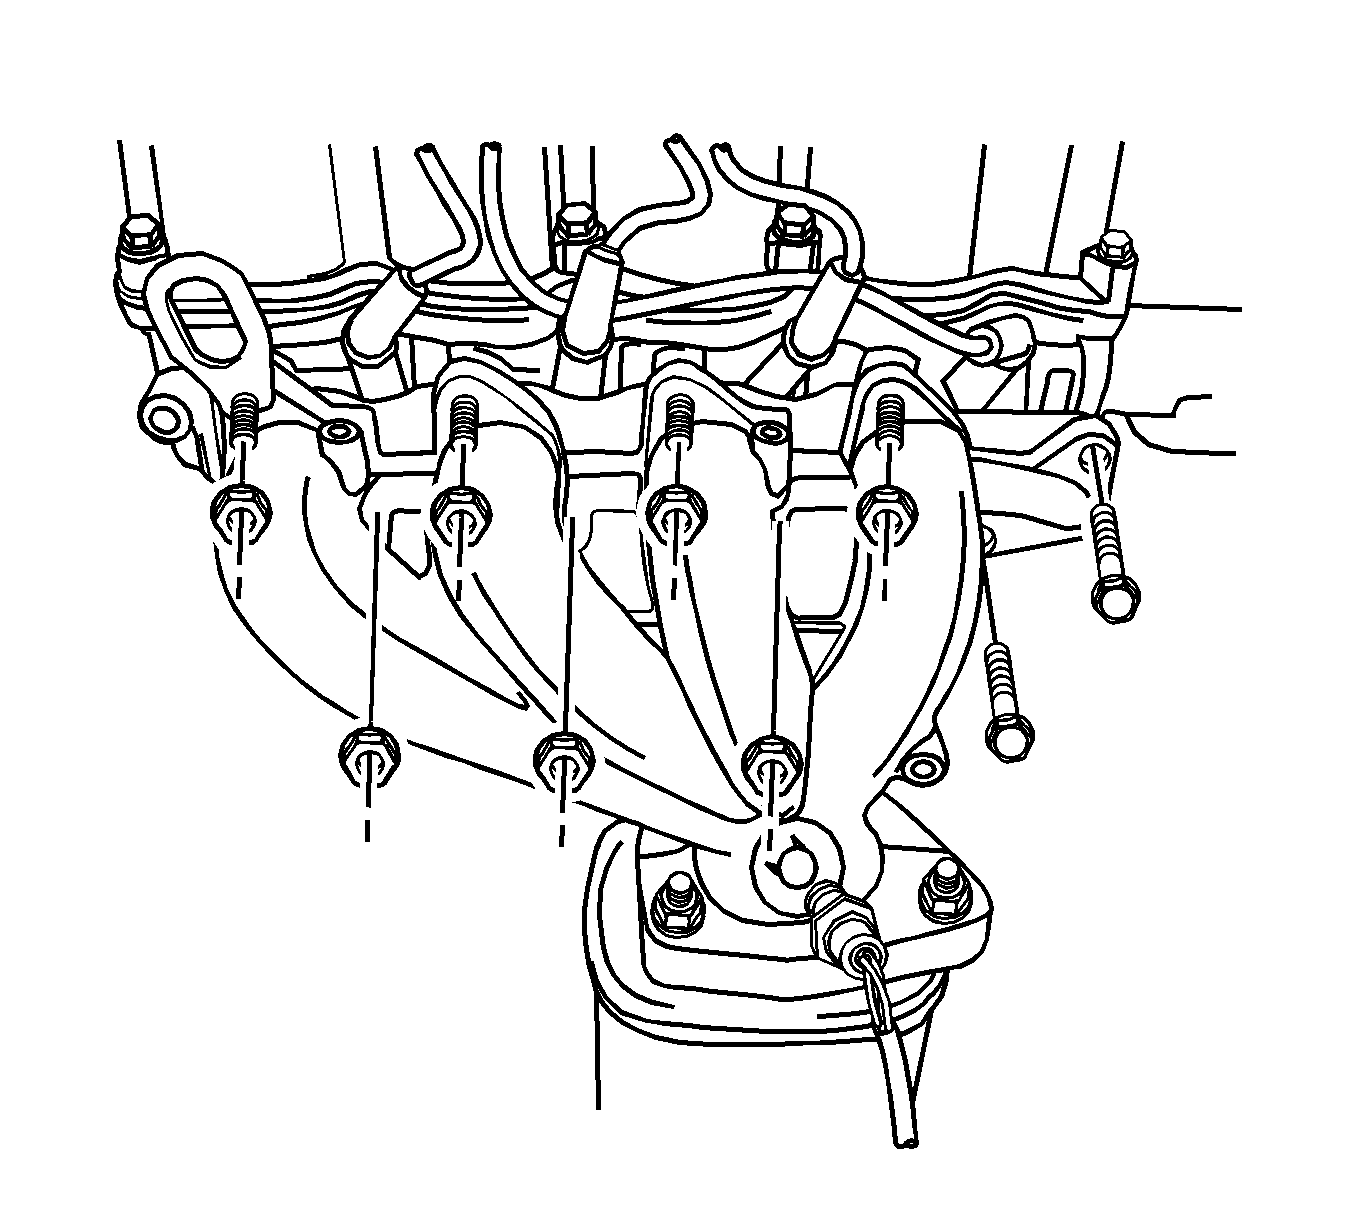
- Remove the exhaust manifold nuts and the bolts.
- Remove the exhaust manifold.
- Remove the exhaust manifold gasket.
- Clean the sealing surfaces of the exhaust manifold and cylinder head.
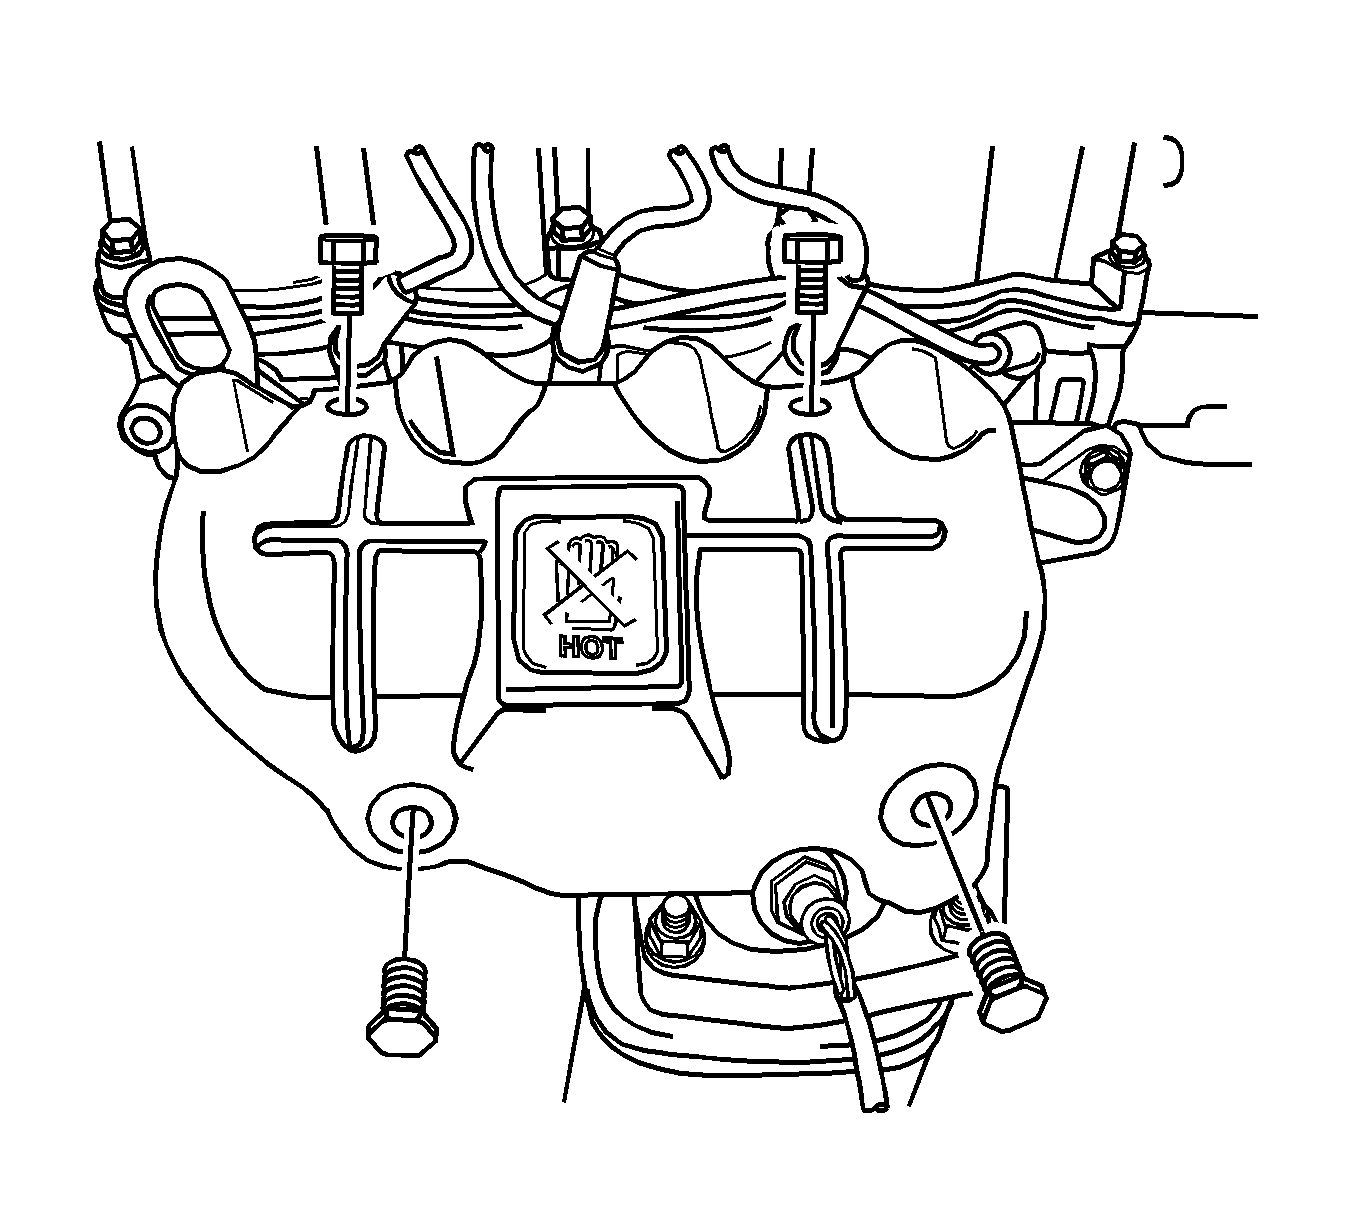
Caution: In order to avoid being burned, do not service the exhaust system while it is still hot. Service the system when it is cool.
Caution: Wear safety glasses in order to avoid eye damage.
Installation Procedure
- Install the exhaust manifold gasket.
- Install the exhaust manifold.
- Install the exhaust manifold bolts and the nuts.
- Install the front exhaust pipe bracket bolts and catalytic converter lower flange nuts.
- Install the oxygen sensor connector.
- Install the oxygen sensor. Refer to Oxygen Sensor Replacement or Heated Oxygen Sensor 1 Replacement .
- Install the heat shield.
- Install the heat shield bolts.
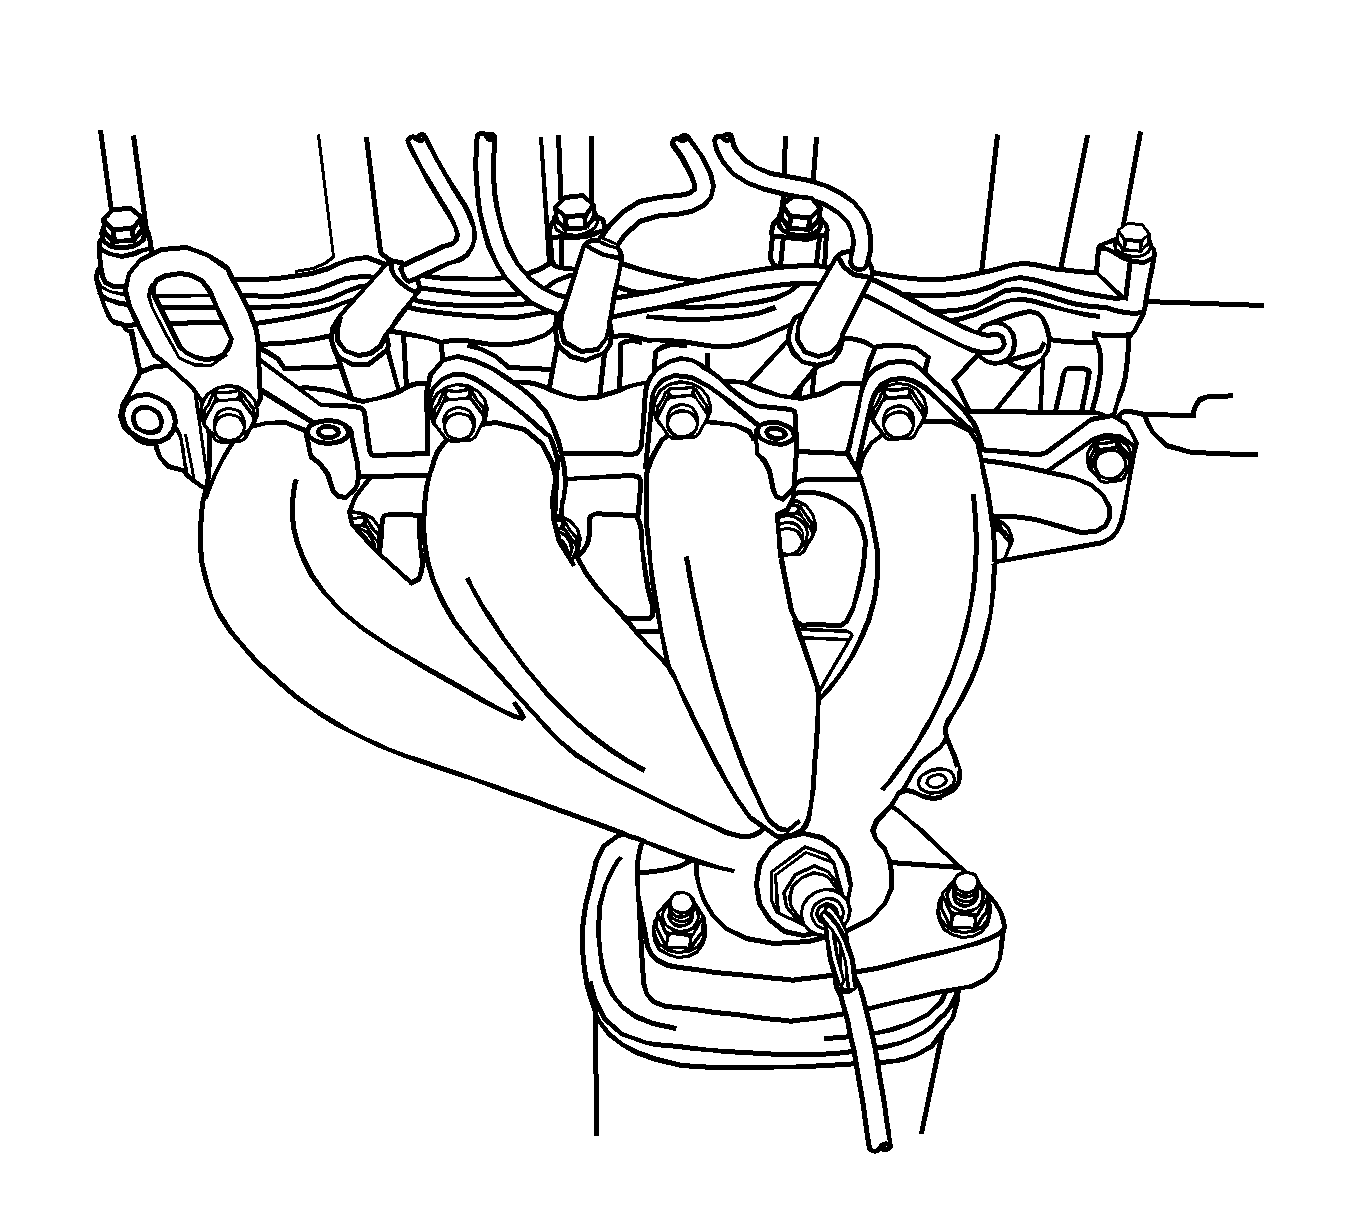
Notice: Refer to Fastener Notice in the Preface section.
Tighten
Tighten the exhaust manifold bolts and the nuts to 22 N·m (16 lb ft).
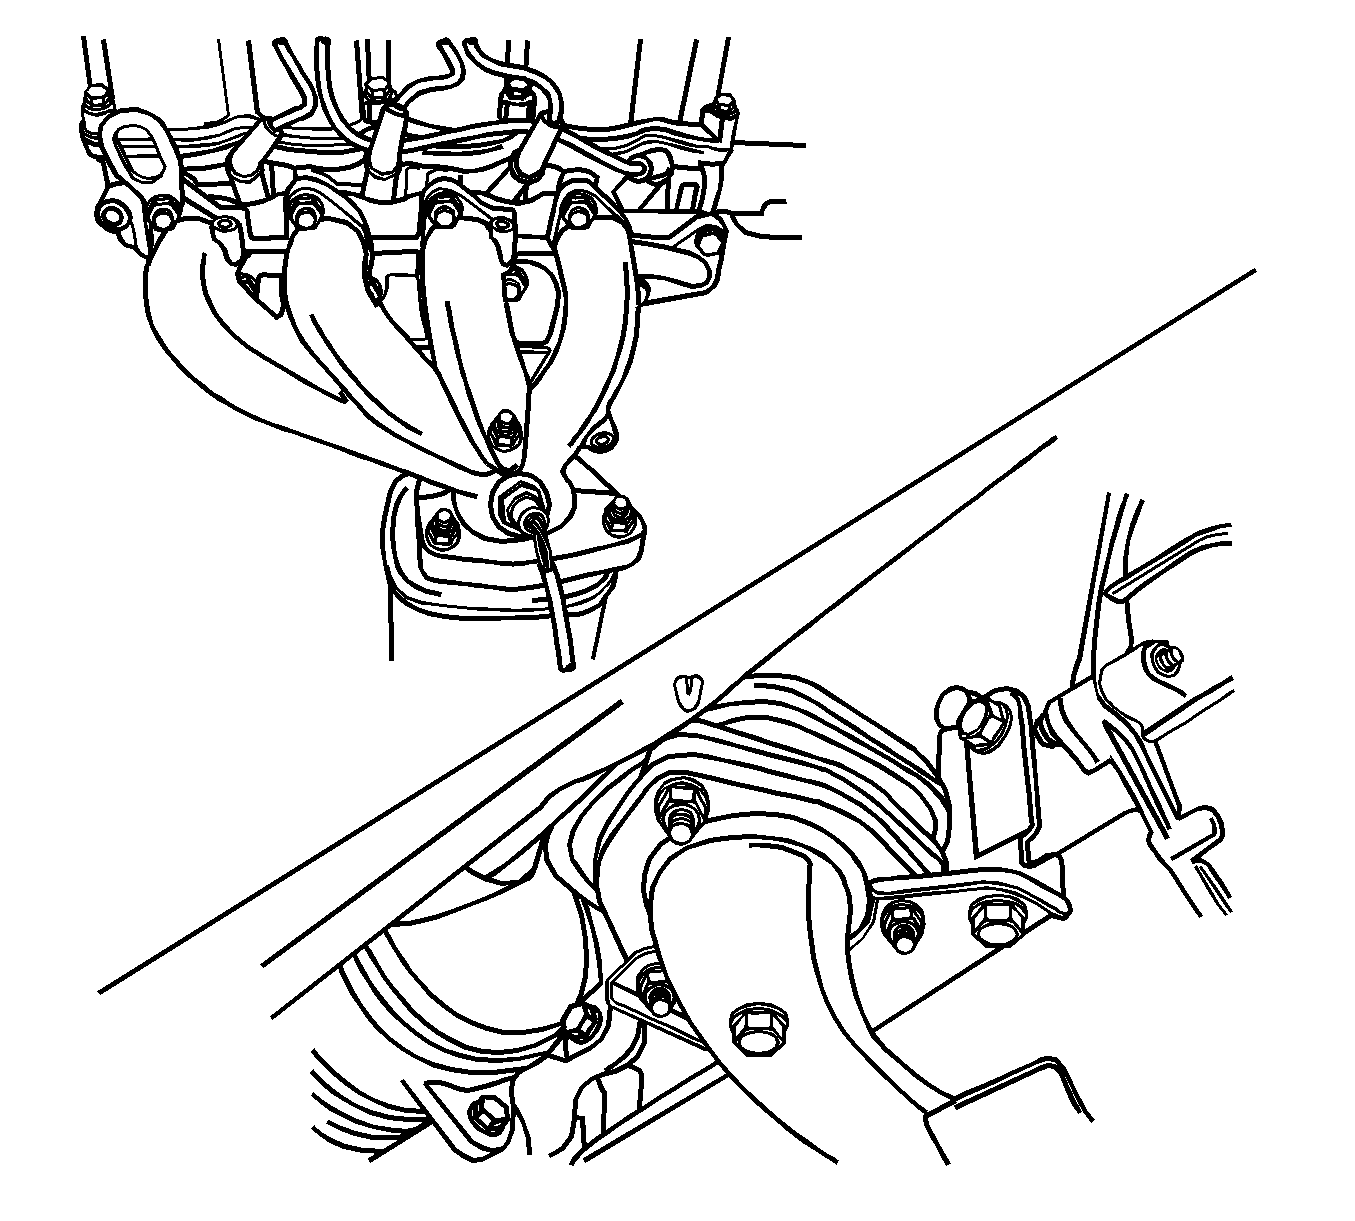
Tighten
| • | Tighten the front exhaust pipe bracket bolts to 40 N·m (30 lb ft). |
| • | Tighten the catalytic converter lower flange nuts to 40 N·m (30 lb ft). |
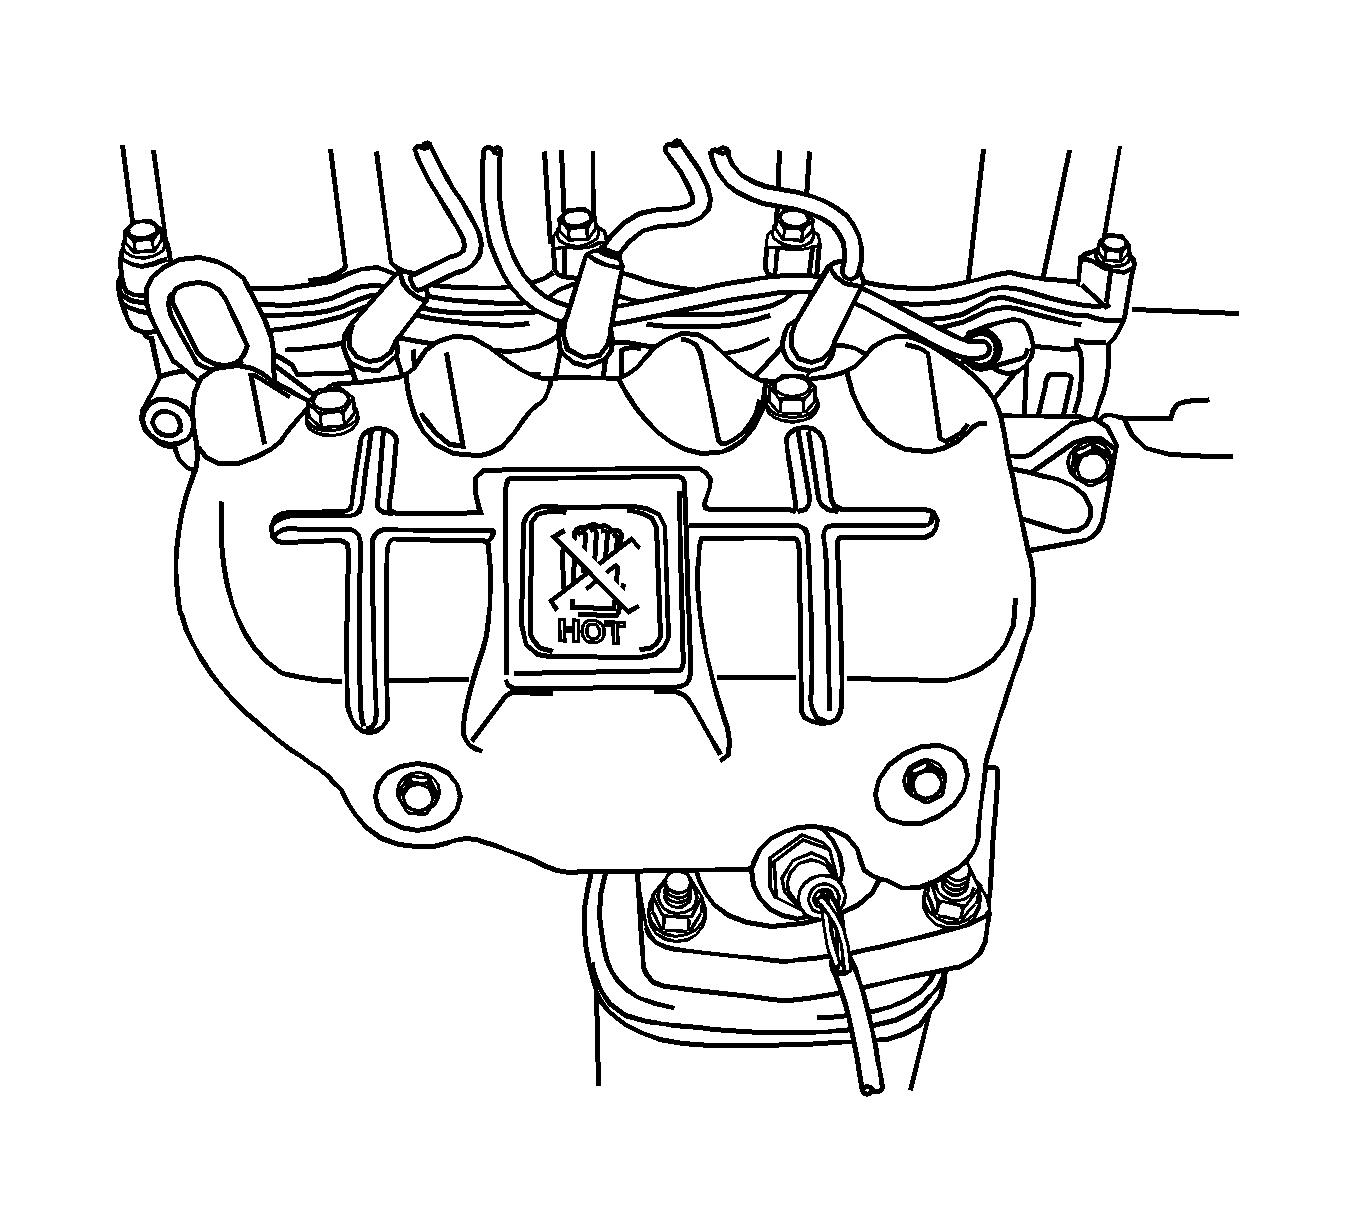
Tighten
Tighten the exhaust manifold heat shield bolts to 10 N·m (89 lb in).
