GM Service Manual Online
For 1990-2009 cars only

Front Fender Center Rear Upper Molding Insert Replacement Escalade PLATINUM HyBrid
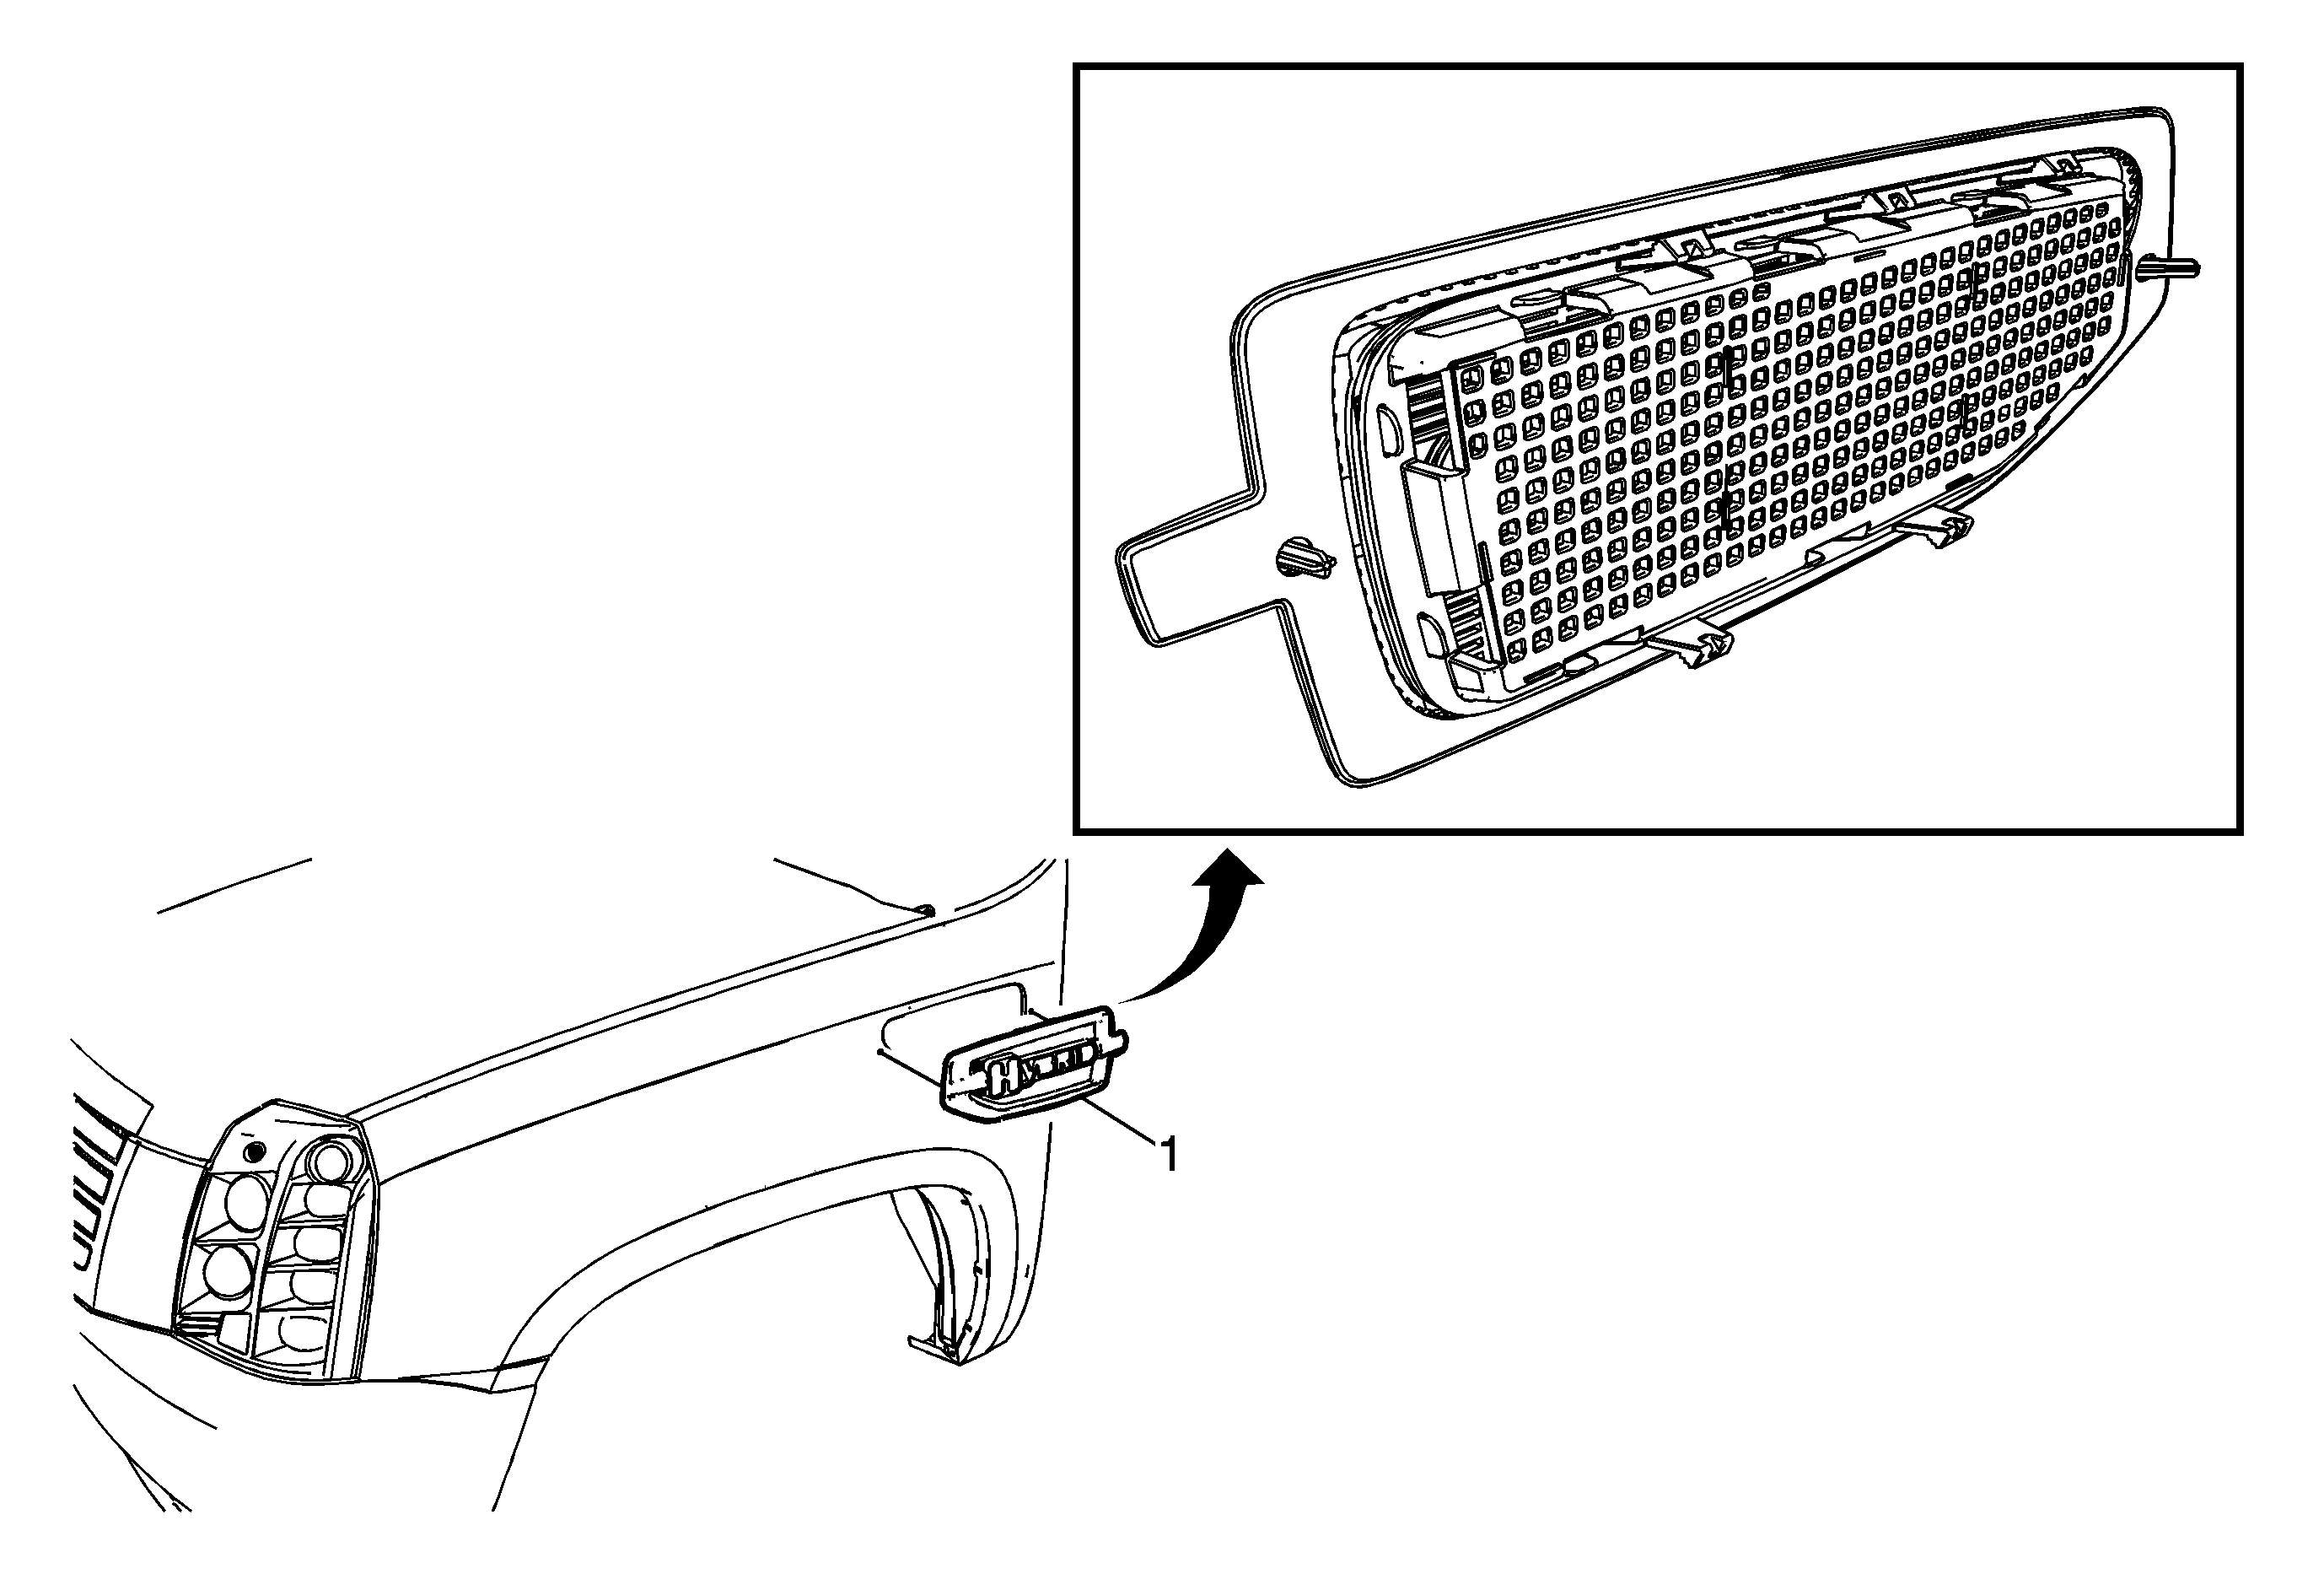

Object Number: 2074447  Size: MF

Callout

Component Name

Preliminary Procedures

  1. Apply two layers of wide masking tape just under the bottom edge of the fender ornament to protect the body panel paint surface.
  2. Caution: Refer to Exterior Trim Emblem Removal Caution in the Preface section.

  3. Insert plastic pry tool to the gap between vent and fender panel.
  4. Disengage the two bottom retainer tabs.
  5. Release the adhesive tape from each end of the center bar on the molding.
  6. If either of the retainer tabs fails to release, cut or snip the retainers from the front side of the fender, if the retainers are cut a new ornament will be required.
  7. If retainers fail to the chrome bezel, a new ornament will to be required.
  8. Using a mixture of 50/50 isopropyl alcohol and clean drinkable water, remove any adhesive residue prior to installing the new fender molding insert.
  9. Dry the fender panel opening with a clean dry lint-free towel.

1

Front Center Rear Upper Fender Molding Insert

Procedure

  1. The part and surface should be 21°C (70°F) prior to installation. The vehicle should remain 21°C (70°F) for one hour after assembly to allow adhesive to develop sufficient bond strength.
  2. Peel the adhesive tape backing from the ornament.
  3. Position the rear pin on the molding insert to the round hole in the fender panel first followed by the front pin.
  4. Press the molding into the fender panel opening in order to secure the 5 integral tabs and the adhesive tape to the fender panel opening.

Front Fender Center Rear Upper Molding Insert Replacement Escalade PLATINUM
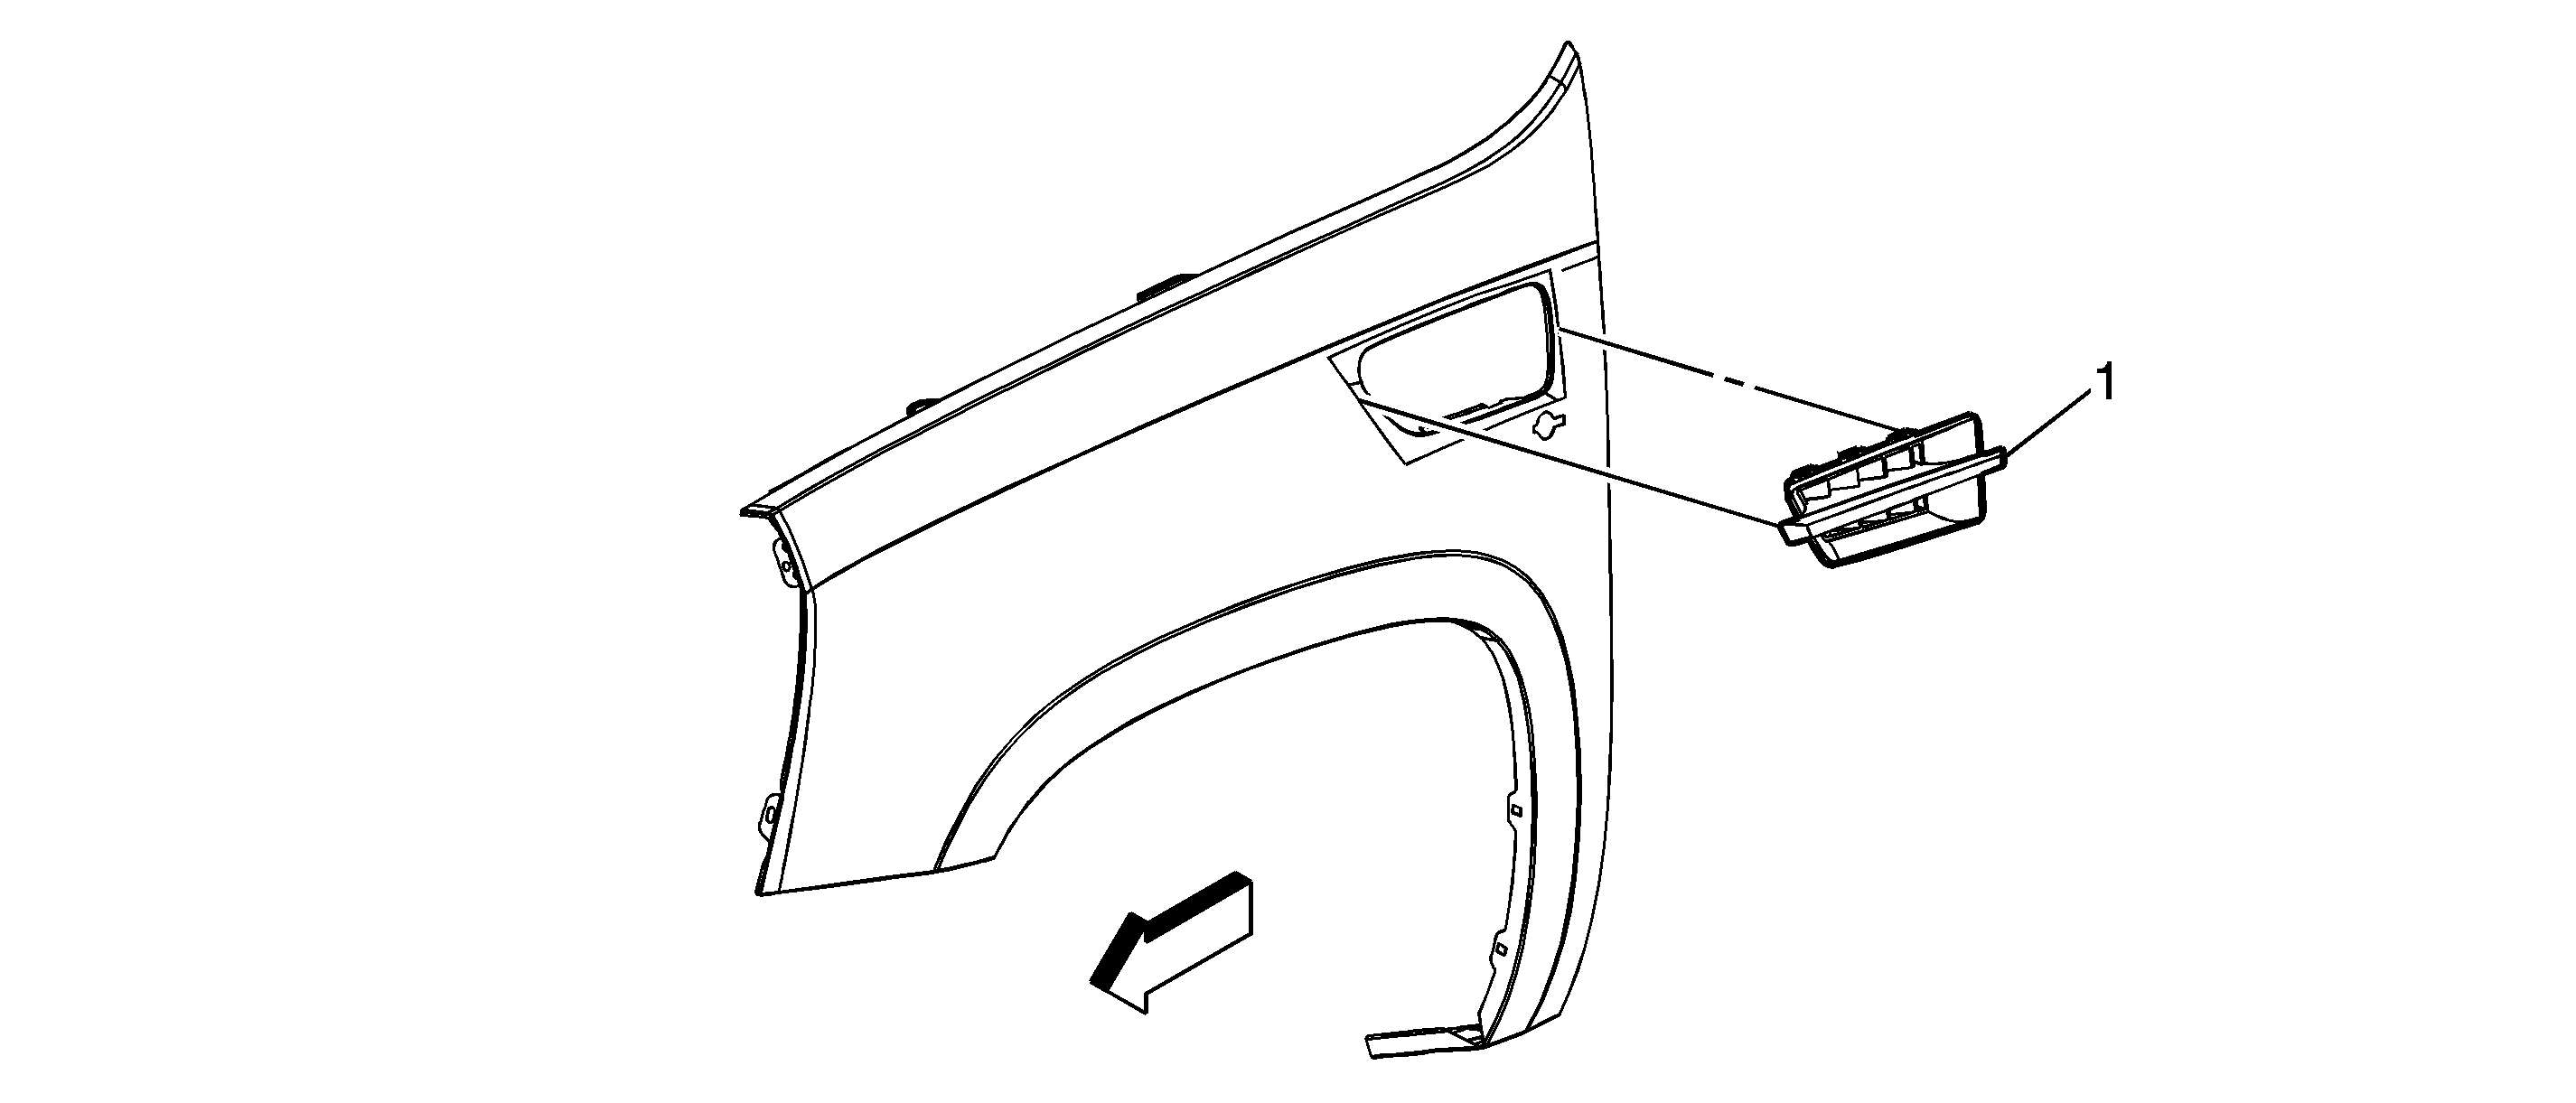

Object Number: 1669834  Size: SF

Callout

Component Name

Preliminary Procedures

  1. Apply two layers of wide masking tape just under the bottom edge of the fender ornament to protect the body panel paint surface.
  2. Caution: Refer to Exterior Trim Emblem Removal Caution in the Preface section.

  3. Insert plastic pry tool to the gap between vent and fender panel.
  4. Disengage the two bottom retainers.
  5. Release the adhesive tape from each end of the center bar on the molding.
  6. If either of the retainers fails to release, cut or snip the retainers from the front side of the fender, if the retainers are cut a new ornament will be required.
  7. If retainers fail to the chrome bezel, a new ornament will to be required.
  8. Using a mixture of 50/50 isopropyl alcohol and clean drinkable water, remove any adhesive residue prior to installing the new fender molding insert.
  9. Dry the fender panel opening with a clean dry lint-free towel.

1

Front Center Rear Upper Fender Molding Insert

Procedure

  1. The part and surface should be 21°C (70°F) prior to installation. The vehicle should remain 21°C (70°F) for one hour after assembly to allow adhesive to develop sufficient bond strength.
  2. Peel the adhesive tape backing from the ornament.
  3. Press the molding into the fender panel opening in order to secure the 5 integral retainers and the adhesive tape to the fender panel.