For 1990-2009 cars only
Removal Procedure
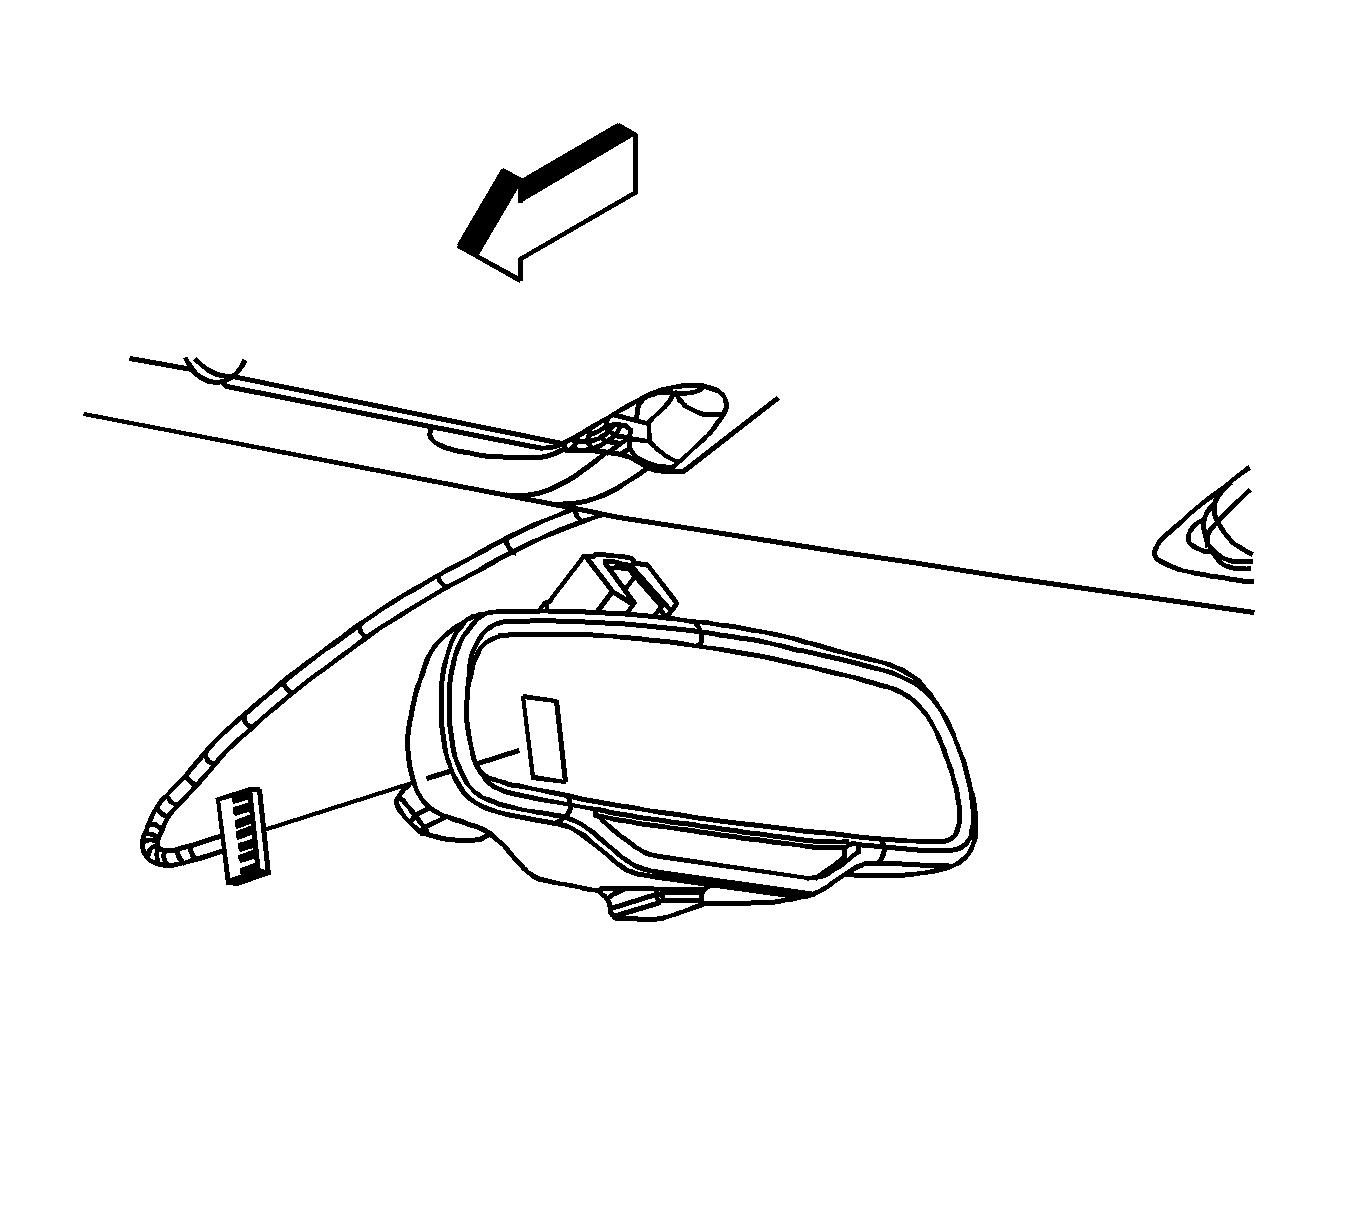
- Disconnect the electrical connector from the back of the mirror.
- Remove the wire cover.
- Adjust the mirror to the full upward position.
- Remove the base trim cover.
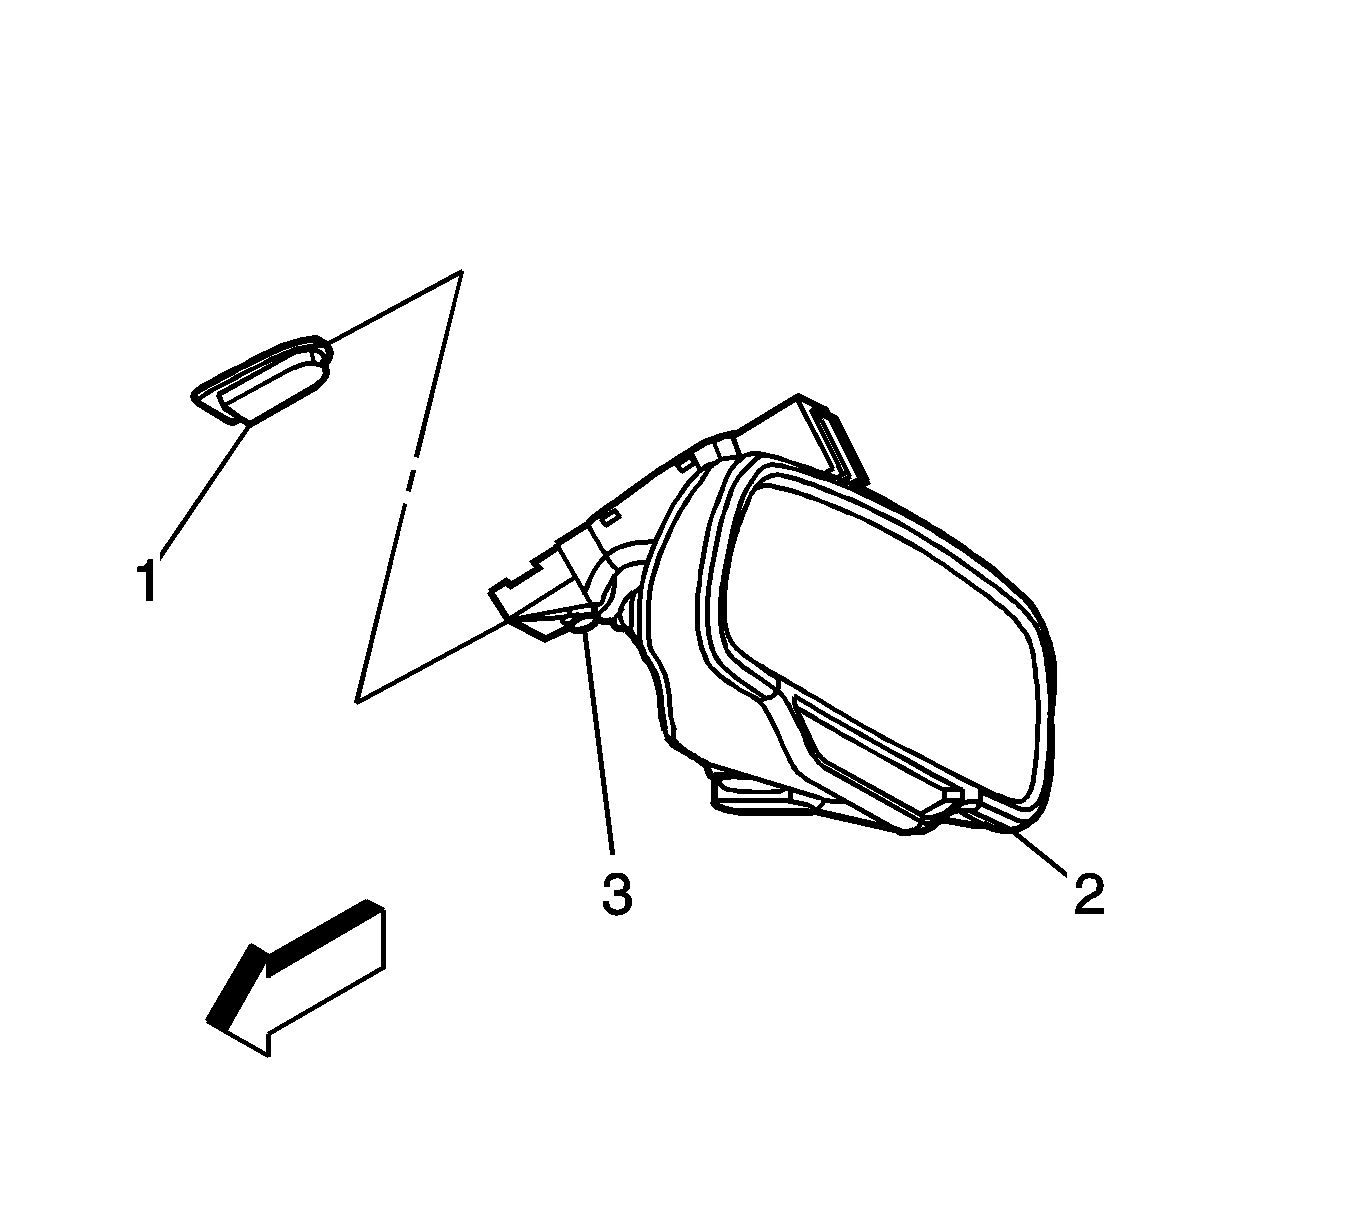
- Loosen the screw (3) in order to remove the mirror (2) from the button assembly (1).
- Slide the mirror assembly in an upward motion in order to remove.
Notice: When servicing electrochromic glass that is broken, or if glass breaks during servicing, be cautious not to spill electrochromic fluid onto vehicle. Doing so will cause damage to the vehicle.
Installation Procedure
- Position the center bottom of the mirror mount against the windshield at the top of the support button (1).
- Slide the base of the mirror onto the button.
- Make sure the mirror is firmly seated on the windshield button by pushing down on the base of the mirror.
- Install the base trim cover.
- Connect the electrical connector.
- Install the wire cover.
- Reposition the mirror assembly.
- Refer to Control Module References for programming and setup information.
Notice: Refer to Fastener Notice in the Preface section.
Tighten
Tighten the screw (3) to 1.8 N·m (16 lb in) in order to secure the mirror base to the button.
