For 1990-2009 cars only
Removal Procedure
- Drain the cooling system. Refer to Cooling System Draining and Filling .
- Before removing the quick connect fitting from the vehicle, clean area and remove any loose dirt or debris.
- Remove the fitting from the tube by squeezing the retainer clip legs together and pulling the fitting from the tube.
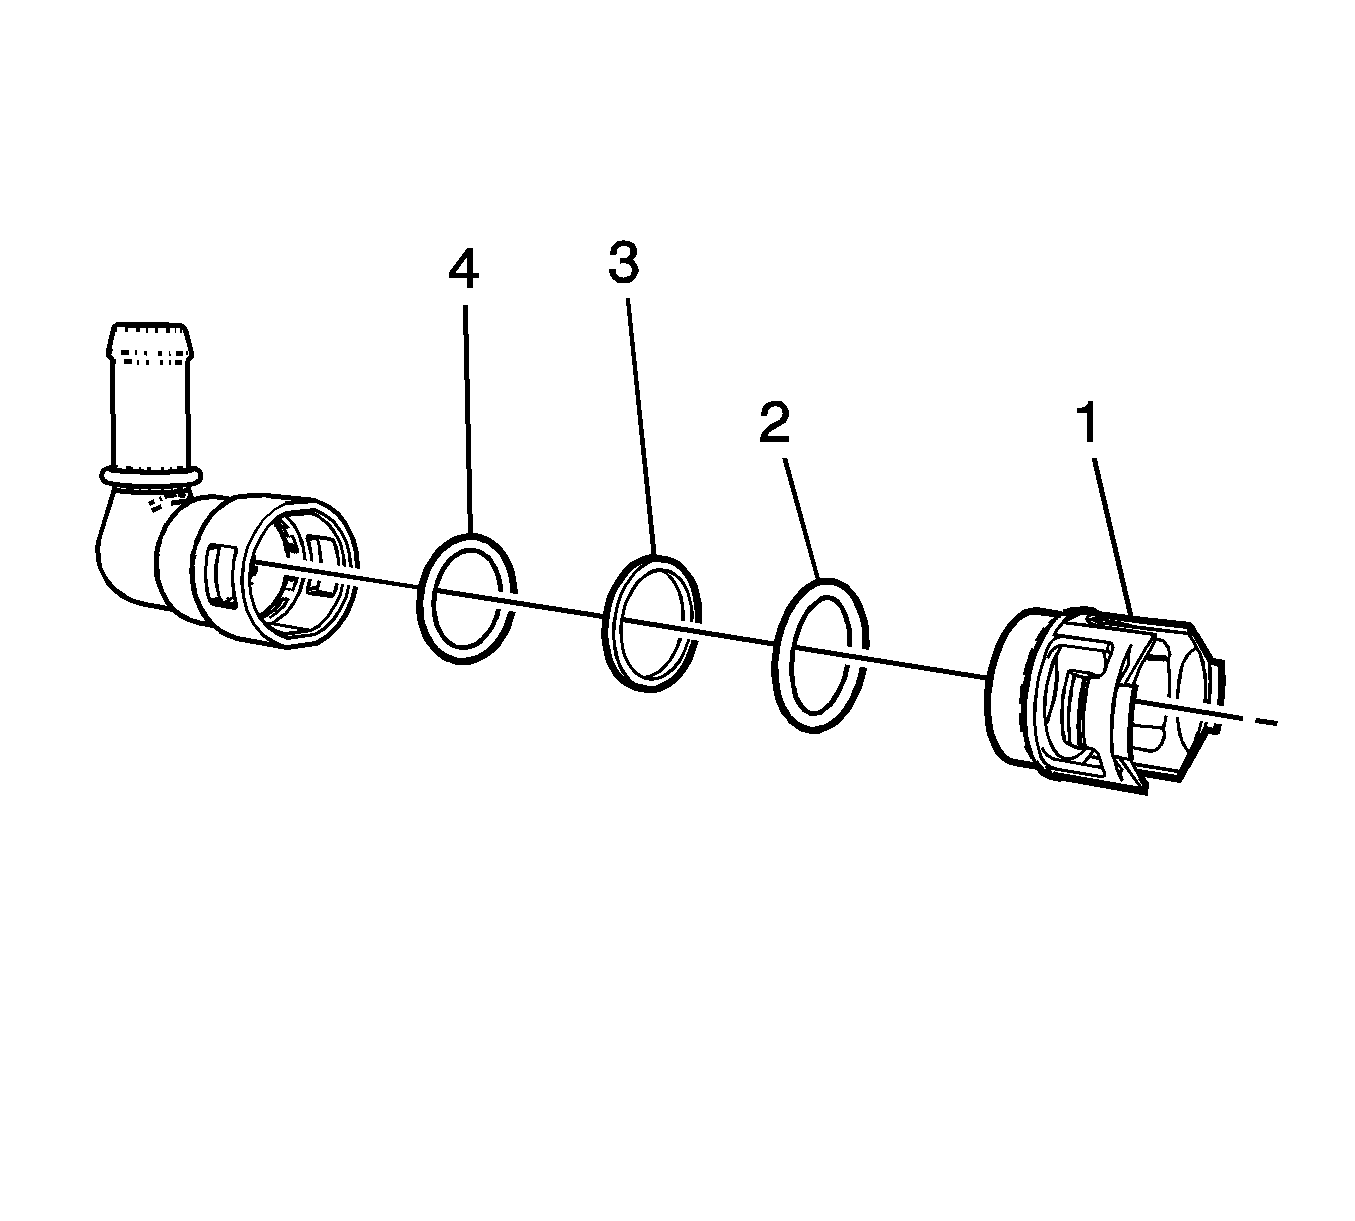
- Remove the retainer from the tube by folding the legs back on themselves and sliding the retainer clip out of the tube (1).
- Place a flat-blade tool through the window of the quick connect fitting to just below the outer bushing and above the top O-ring (2).
- Remove the outer bushing with a gentle prying motion. Discard the outer bushing.
- Remove other components and discard.
- Thoroughly clean and inspect the inside surface of the fitting for nicks, scratches or cracks.
Notice: Do NOT damage the fitting while removing the outer bushing. Damage may affect the seal integrity and cause a coolant leak.
Remove any dirt or debris using water and a lint free cloth.
Installation Procedure
- Lubricate O-rings with coolant.
- Install the first O-ring and gently push down into the O-ring pocket (4).
- Install the midspacer and gently push down to first O-ring (3).
- Install the second O-ring and gently push down to the top of midspacer (2).
- Install the retainer clip by lining up the retainer legs with windows on the fitting housing (1).
- Clean and inspect the pipe end for any nicks, scratches or cracks.
- Install the fitting to the vehicle by pushing the fitting onto the tube until an audible click is heard. Pull back to verify the connection is secure.
- Fill the cooling system. Refer to Cooling System Draining and Filling .
Push the retainer clip down until the retainer clip legs are engaged into the windows.
