Removal Procedure
- Disable the inflatable restraint steering wheel module. Refer to SIR Disabling and Enabling in SIR.
- Disconnect the battery negative cable. Refer to Battery Negative Cable Disconnection and Connection in Engine Electrical.
- Remove the steering wheel from the column. Refer to Steering Wheel Replacement.
- Remove the gap hider. Refer to Instrument Cluster Replacement in Instrument Panel, Gages, and Console.
- If tilt column, remove the tilt lever from the lower trim cover. Refer to Tilt Lever Replacement.
- If necessary, remove the 2 pan head tapping screws (1,2) from the lower trim cover (3). Remove the lower trim cover (3).
- Gently unsnap the lower trim cover from the upper trim cover.
- If necessary, remove 1 TORX® head screw (1) from the upper trim cover (2).
Caution: Refer to SIR Caution in the Preface section.
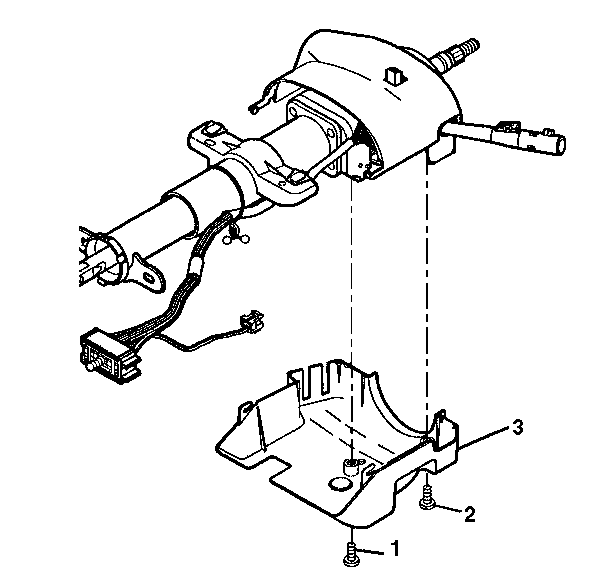
Important: You must check for 2 pan head tapping screws (1,2) in the lower trim cover before removal.
If screws are not present in the lower trim cover, proceed to the next step.
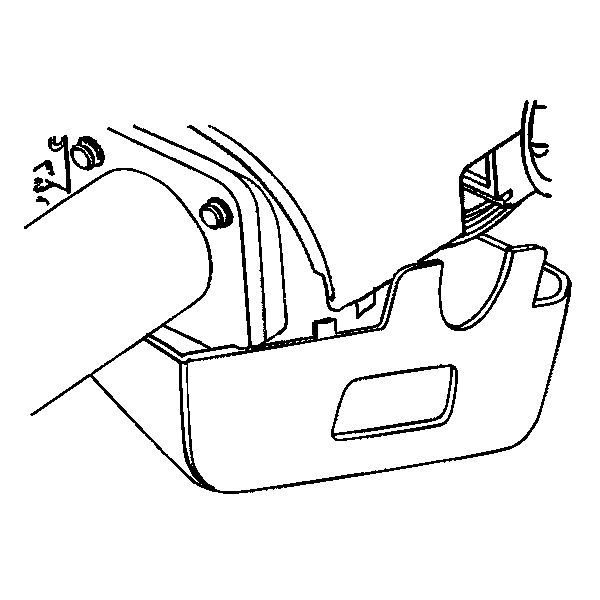

Important: You must check for 1 TORX® head screw (1) in the upper trim cover (2) before removal.
If a screw is not present, remove the upper trim cover (2).
Installation Procedure
- Install the upper trim cover (2) onto the steering column. Install 1 TORX® head screw (1) into the upper trim cover (2).
- Slide the shift lever seal down the shift lever.
- Gently snap the lower trim cover to the upper trim cover.
- If screws were not used in the installation procedure, proceed to step 6.
- Screw the 2 pan head tapping screws (1, 2) into the lower trim cover.
- If tilt column, install the tilt lever into the lower trim cover. Refer to Tilt Lever Replacement.
- Install the gap hider. Refer to Instrument Cluster Replacement In Instrument Panel, Gages, and Console.
- Install the steering wheel onto the steering column. Refer to Steering Wheel Replacement
- Connect the battery negative cable. Refer to Battery Negative Cable Disconnection and Connection in Engine Electrical.
- Enable the inflatable restraint steering wheel module. Refer to SIR Disabling and Enabling in SIR.
Notice: Refer to Fastener Notice in the Preface section.
Important: If the snap on/off feature on the trim covers was damaged during the removal procedure, you MUST use screws for the installation procedure. If screws were present in the trim covers before the removal procedure, you MUST use the screws during the installation procedure.
If there was not any damage done to the trim covers during the removal procedure and no screws were present, proceed to step 2.Tighten
Tighten the screw to 1.5 N·m (13 lb in).
Important: If column shift, the shift lever seal must be seated in the trim covers.
Tighten
Tighten the 2 pan head tapping screws to 3.5 N·m (31 lb in).
