Coolant Heater Replacement Dealer Installation - 6.0L Engine
Dealer Installation Only
- Drain the cooling system/engine block. Refer to Cooling System Draining and Filling .
- Raise and suitably support the vehicle. Refer to Lifting and Jacking the Vehicle in General Information.
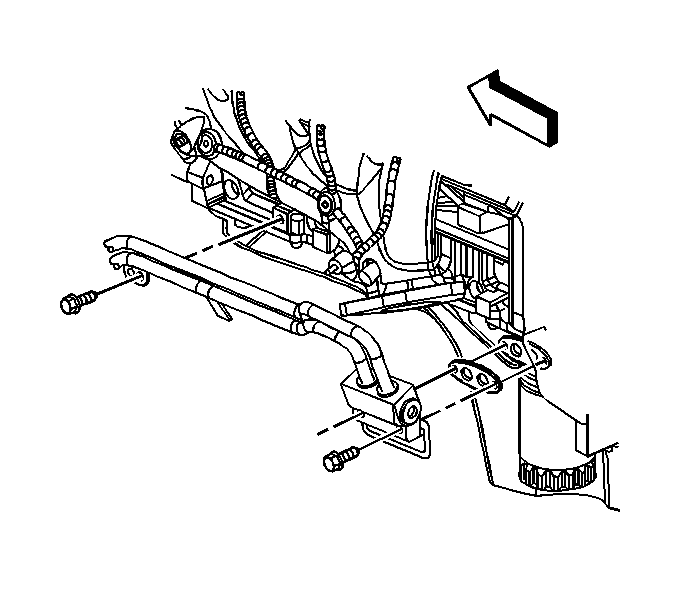
- Remove the oil pan skid plate bolts and plate.
- Remove the oil cooler hose bracket bolt.
- Remove the oil cooler hose adapter bolts.
- Remove and discard the oil cooler hose adapter gasket.
- Position the oil cooler hose adapter end out of the way.
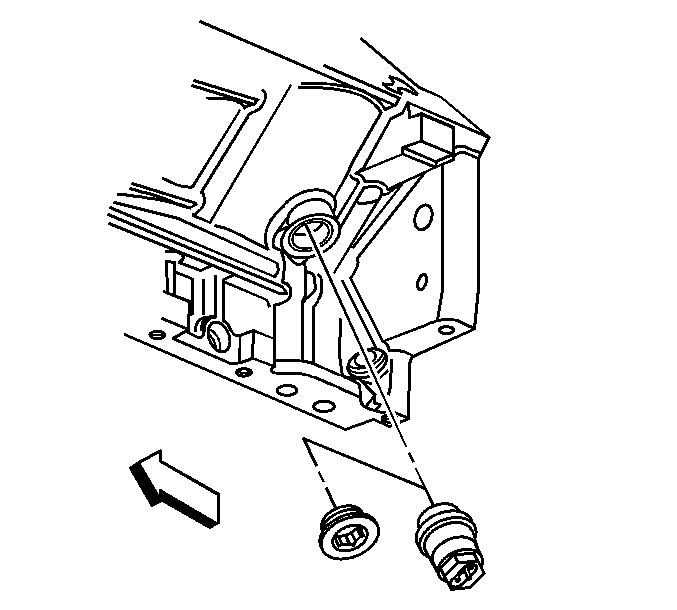
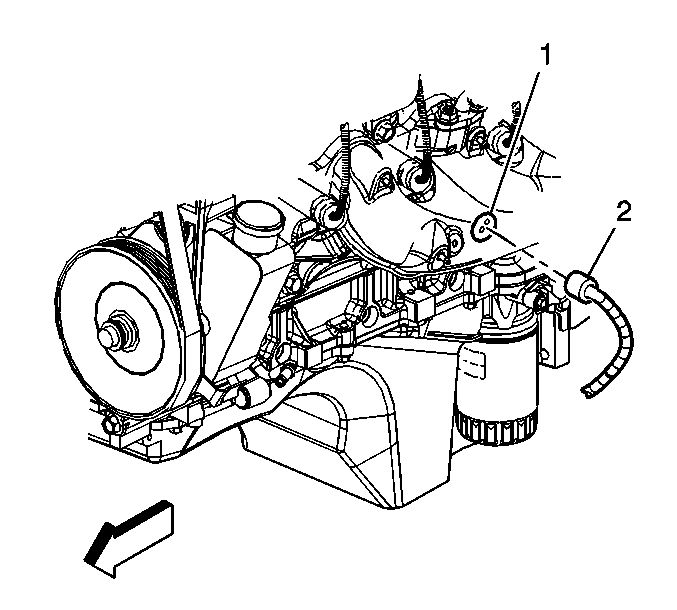
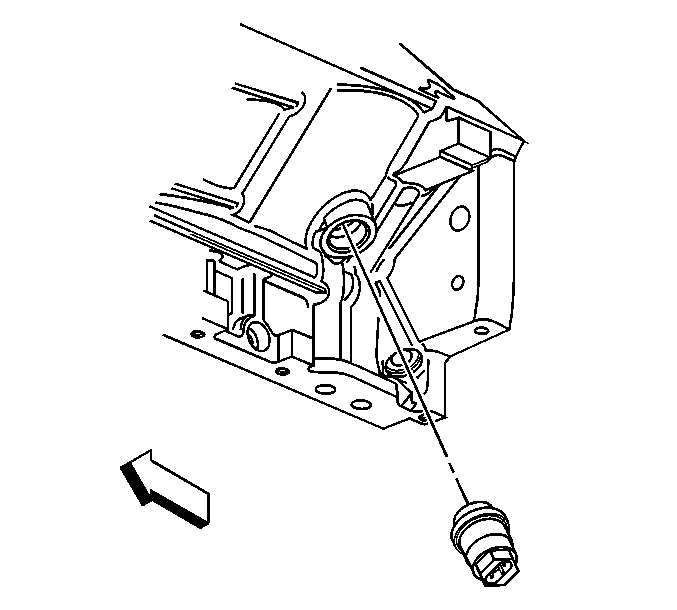
- Install the coolant heater in place of the drain plug.
- Push the engine coolant heater cord electrical connector (2) firmly into the coolant heater (1).
- Place the cord into position.
- Install the heater cord bolt and retainer.
- Position the oil cooler hose adapter.
- Install a NEW oil cooler hose adapter gasket.
- Install the oil cooler hose adapter bolts.
- Install the oil cooler hose bracket bolt.
- Install the oil pan skid plate and bolts.
- Lower the vehicle.
- Fill the cooling system/engine block. Refer to Cooling System Draining and Filling .

Notice: Use the correct fastener in the correct location. Replacement fasteners must be the correct part number for that application. Fasteners requiring replacement or fasteners requiring the use of thread locking compound or sealant are identified in the service procedure. Do not use paints, lubricants, or corrosion inhibitors on fasteners or fastener joint surfaces unless specified. These coatings affect fastener torque and joint clamping force and may damage the fastener. Use the correct tightening sequence and specifications when installing fasteners in order to avoid damage to parts and systems.
Tighten
Tighten the coolant heater to 50 N·m (37 lb ft).
Important: The engine coolant heater cord must not touch the engine, hot pipes, manifold, or any moving parts. Always keep the electrical cord neatly rolled up with the end of the cord tucked in the center of the coil and secured in place.
Tighten
Tighten the bolt to 8 N·m (71 lb in).
Tighten
Tighten the bolts to 12 N·m (106 lb in).
Tighten
Tighten the bolt to 25 N·m (18 lb ft).
Tighten
Tighten the bolts to 20 N·m (15 lb ft).
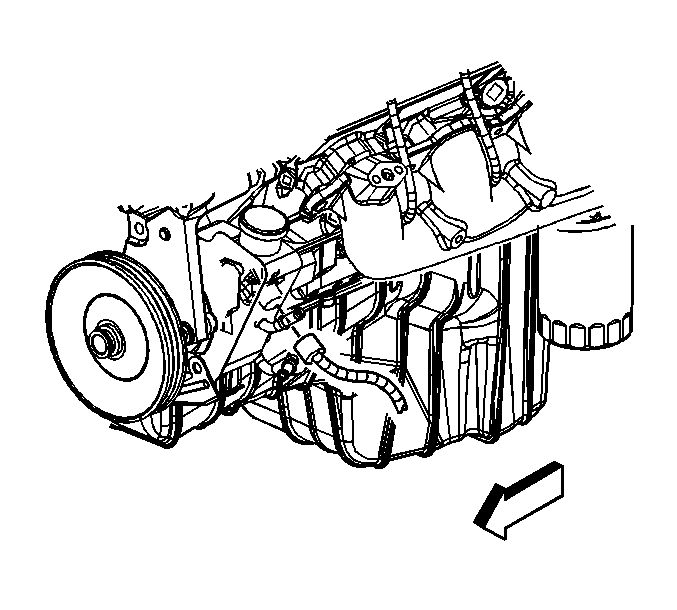
Coolant Heater Replacement 4.8L, 5.3L (except RPO L33),6.0L
Removal Procedure
- Drain the cooling system/engine block. Refer to Cooling System Draining and Filling .
- Raise and suitably support the vehicle. Refer to Lifting and Jacking the Vehicle in General Information.
- Remove the oil pan skid plate bolts and plate.
- Remove the oil cooler hose bracket bolt.
- Remove the oil cooler hose adapter bolts.
- Remove and discard the oil cooler hose adapter gasket.
- Position the oil cooler hose adapter end out of the way.
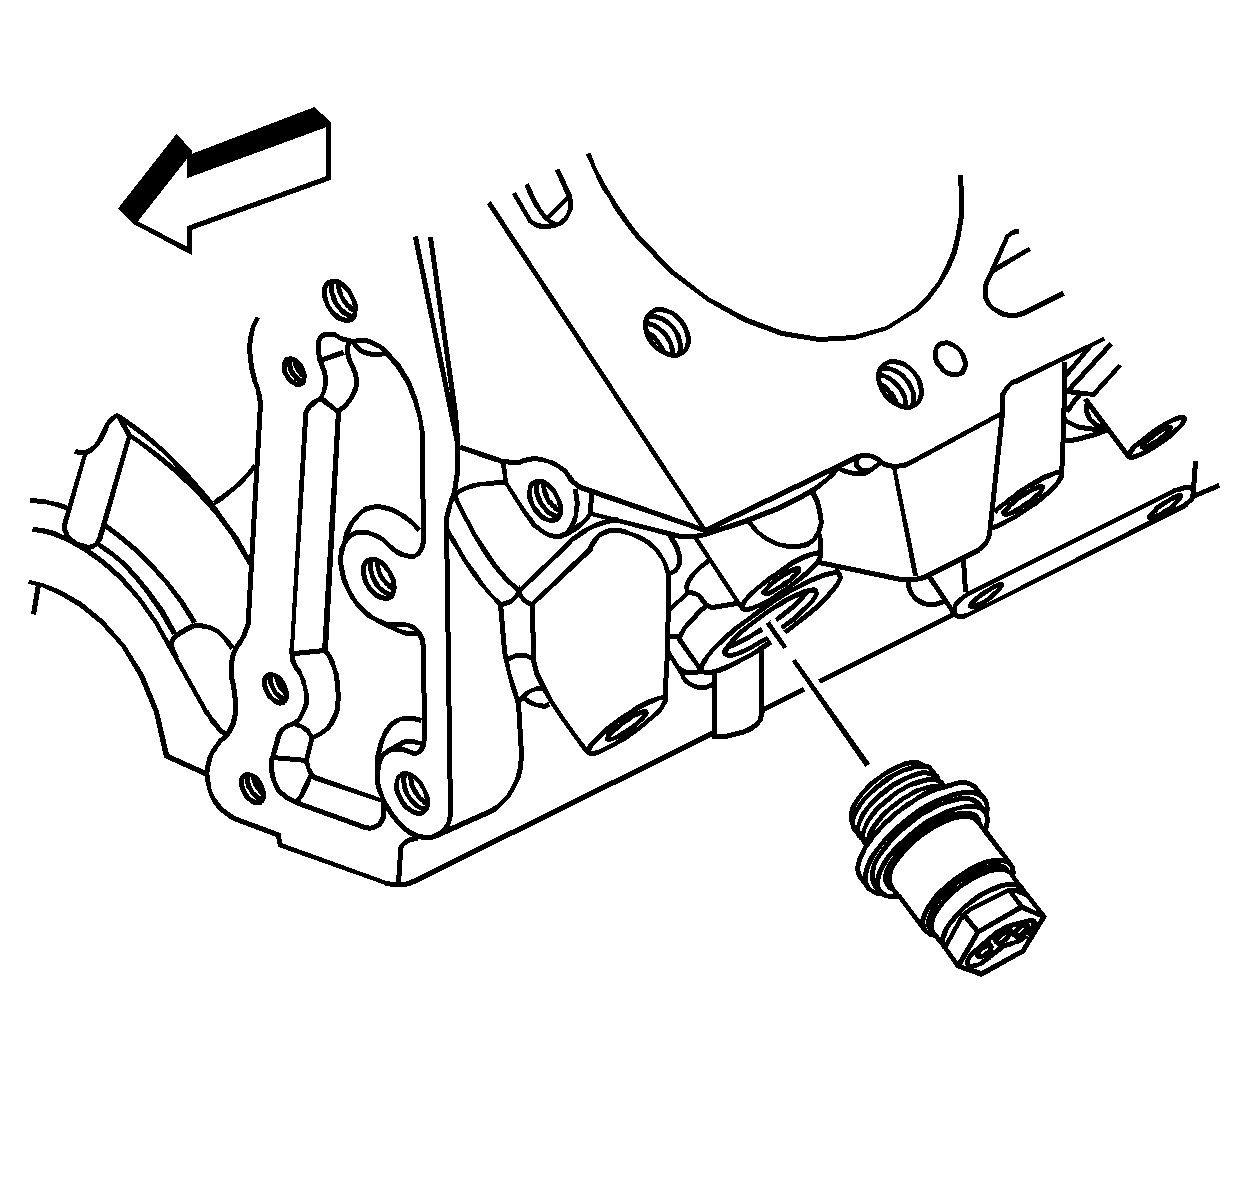
- Disconnect the coolant heater electrical connector (2).
- Remove the coolant heater from the engine block.
- Remove any burrs, sealer, or other rough spots.
Important: Do not score the surface of the engine block hole when removing the coolant heater.
Installation Procedure
- If reusing the old coolant heater, apply thread sealant GM P/N 12346004 (Canadian P/N 10953480), or equivalent to the threads.
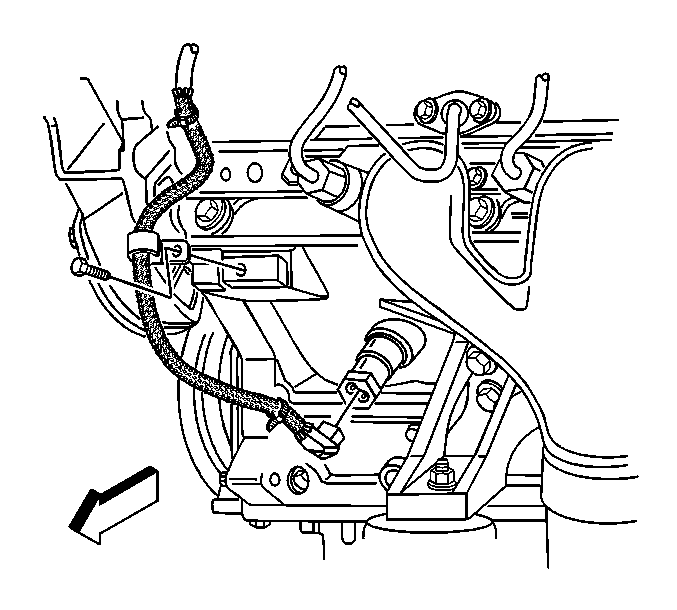
- Install the coolant heater to the engine block.
- Connect the coolant heater electrical connector (2).
- Position the oil cooler hose adapter end.
- Install a NEW oil cooler hose adapter gasket.
- Install the oil cooler hose adapter bolts.
- Install the oil cooler hose bracket bolt.
- Install the oil pan skid plate and bolts.
- Lower the vehicle.
- Fill the cooling system/engine block. Refer to Cooling System Draining and Filling .
Notice: Use the correct fastener in the correct location. Replacement fasteners must be the correct part number for that application. Fasteners requiring replacement or fasteners requiring the use of thread locking compound or sealant are identified in the service procedure. Do not use paints, lubricants, or corrosion inhibitors on fasteners or fastener joint surfaces unless specified. These coatings affect fastener torque and joint clamping force and may damage the fastener. Use the correct tightening sequence and specifications when installing fasteners in order to avoid damage to parts and systems.
Tighten
Tighten the coolant heater to 50 N·m (37 lb ft).
Tighten
Tighten the bolts to 12 N·m (106 lb in).
Tighten
Tighten the bolt to 25 N·m (18 lb ft).
Tighten
Tighten the bolts to 20 N·m (15 lb ft).
Coolant Heater Replacement 8.1L
Removal Procedure
- Drain the cooling system/engine block. Refer to Cooling System Draining and Filling .
- Raise and suitably support the vehicle. Refer to Lifting and Jacking the Vehicle in General Information.
- Remove the oil pan skid plate bolts and plate.
- Disconnect the coolant heater electrical connector.
- Remove the coolant heater from the engine block.
Installation Procedure
- If reusing the old coolant heater, apply sealant GM P/N 12346004, (Canadian P/N 10953480), or equivalent to the threads.
- Install the coolant heater into the engine block.
- Connect the coolant heater electrical connector.
- Fill the cooling system/engine block. Refer to Cooling System Draining and Filling .
Notice: Use the correct fastener in the correct location. Replacement fasteners must be the correct part number for that application. Fasteners requiring replacement or fasteners requiring the use of thread locking compound or sealant are identified in the service procedure. Do not use paints, lubricants, or corrosion inhibitors on fasteners or fastener joint surfaces unless specified. These coatings affect fastener torque and joint clamping force and may damage the fastener. Use the correct tightening sequence and specifications when installing fasteners in order to avoid damage to parts and systems.
Tighten
Tighten the coolant heater to 60 N·m (40 lb ft).
Notice: The heater cord must not touch the engine, hot pipes, manifold, or any moving parts. Route the cord to the left front of the engine compartment securing with tie straps as necessary to prevent damage.
Coolant Heater Replacement 5.3L (w/RPO L33)
Removal Procedure
- Remove the engine protection shield. Refer to Engine Protection Shield Replacement .
- Remove the front drive axle shield. Refer to Shield Replacement .
- Drain the cooling system. Refer to Cooling System Draining and Filling .
- Raise and support the vehicle. Refer to Lifting and Jacking the Vehicle .
- Disconnect the coolant heater electrical connector.
- Remove the coolant heater from the engine block.
- Remove any burrs, sealer, paint or other rough spots.
Important: Do not score the surface of the engine block hole when removing the coolant heater.
Installation Procedure
- If reusing the old coolant heater, apply thread sealant to the to the threads. Refer to Adhesives, Fluids, Lubricants, and Sealers for the correct part number.
- Install the coolant heater to the engine block.
- Connect the coolant heater electrical connector.
- Lower the vehicle.
- Fill the cooling system. Refer to Cooling System Draining and Filling .
- Install the front drive axle shield. Refer to Shield Replacement .
- Install the engine protection shield. Refer to Engine Protection Shield Replacement .
Notice: Refer to Fastener Notice in the Preface section.
Tighten
Tighten the coolant heater to 50 N·m (37 lb ft).
Notice: The heater cord must not touch the engine, hot pipes, manifold, or any moving parts. Route the cord to the left front of the engine compartment securing with tie straps as necessary to prevent damage.
