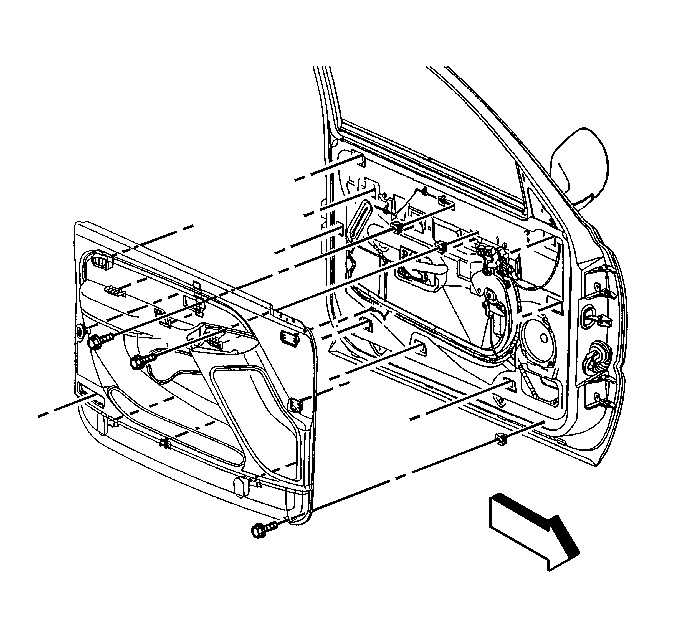
For 1990-2009 cars only
Removal Procedure
- Remove the door handle bezel. Refer to Door Inside Handle Bezel Replacement .
- Remove the window handle, if equipped. Refer to Door Window Regulator Handle Replacement .
- Remove the power accessory switch panel. Refer to Power Accessory Switch Panel Replacement .
- Remove the upper extension of the trim panel. Refer to Upper Extension Trim Panel Replacement .
- Remove the manual lock lever from the trim panel using a flat bladed tool.
- Remove the trim panel screws.
- Remove the courtesy lamp, if equipped. Refer to Door Courtesy Lamp and Reflector Replacement .
- Remove the trim panel from the door. Carefully slide the trim panel up in order to release the retainers from the door.
- Disconnect the electrical connectors.

Installation Procedure
- Connect the electrical connectors.
- Install the courtesy lamp, if equipped. Refer to Door Courtesy Lamp and Reflector Replacement .
- Carefully align the panel, and slide the panel into the retainer slots in order to install the trim panel to the door.
- Install the window handle, if equipped. Refer to Door Window Regulator Handle Replacement .
- Install the power accessory switch panel. Refer to Power Accessory Switch Panel Replacement .
- Install the trim panel screws.
- Install the manual lock lever to the trim panel.
- Install the upper extension of the trim panel. Refer to Upper Extension Trim Panel Replacement .
- Install the door handle bezel. Refer to Door Inside Handle Bezel Replacement .

Notice: Refer to Fastener Notice in the Preface section.
Tighten
Tighten the trim panel screws to 2 N·m (18 lb in).
