Removal Procedure
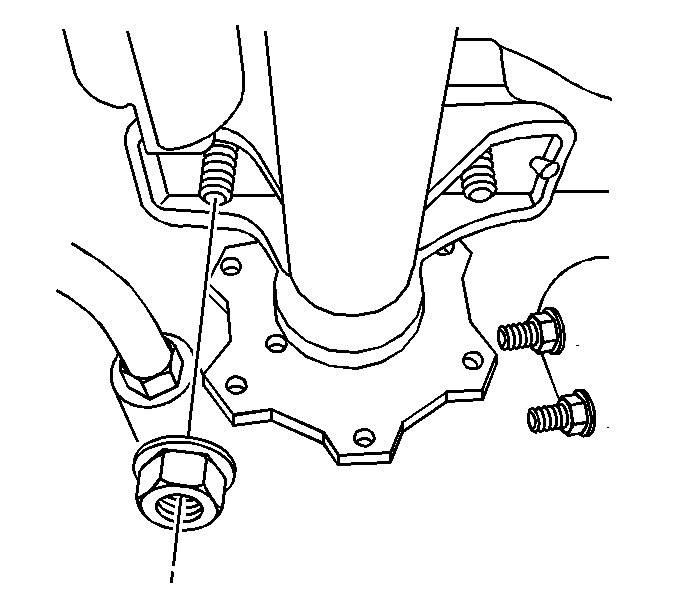
- If equipped with four wheel drive (4WD), remove the inner axle housing nuts and washers from the bracket.
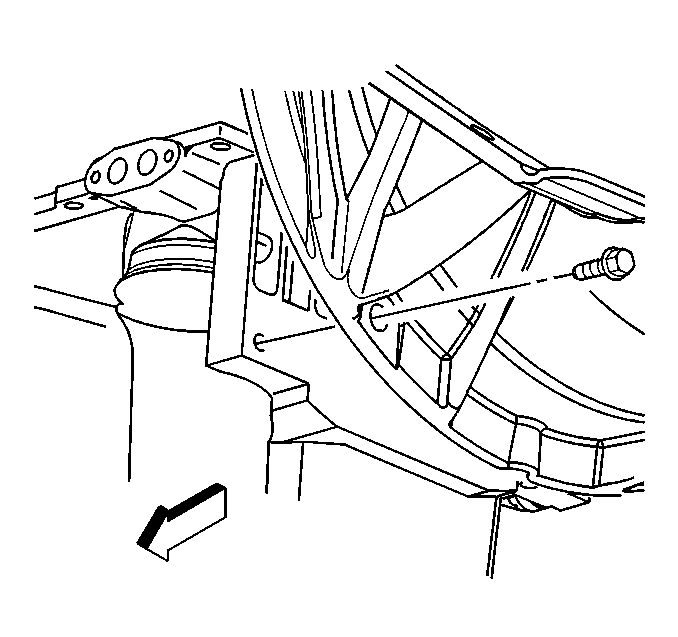
- Support the front drive axle with a suitable jack.
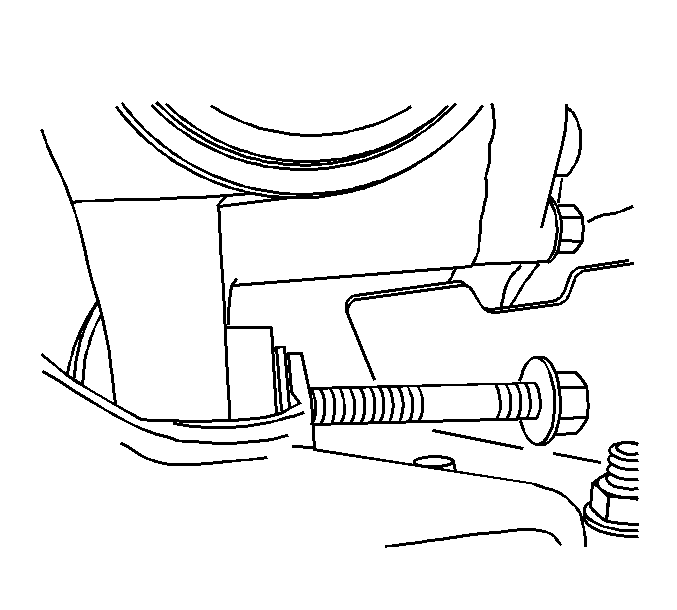
- If equipped, with 4WD, remove the differential carrier lower mounting bolt and nut.
- If equipped with 4WD, remove the differential carrier upper mounting bolt and nut.
- Lower the front drive axle.
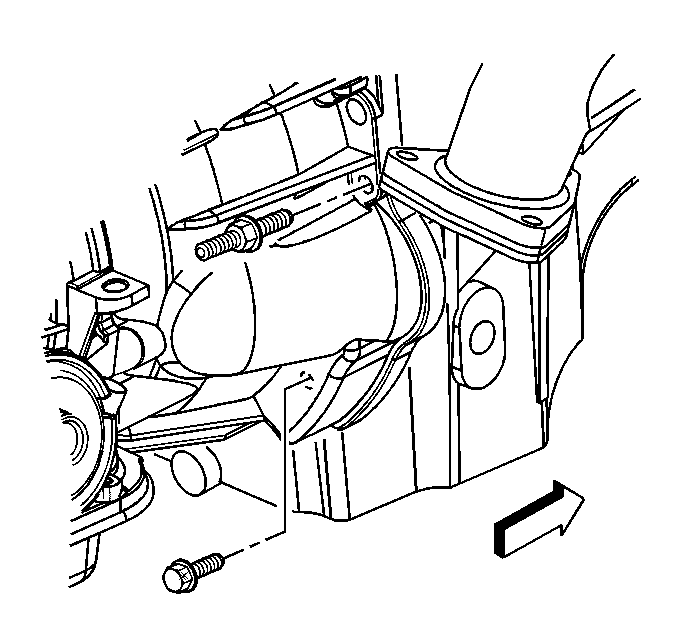
- Remove the transmission cover bolt.
- If equipped, remove the oil pan skid plate bolts.
- Remove the oil pan skid plate.
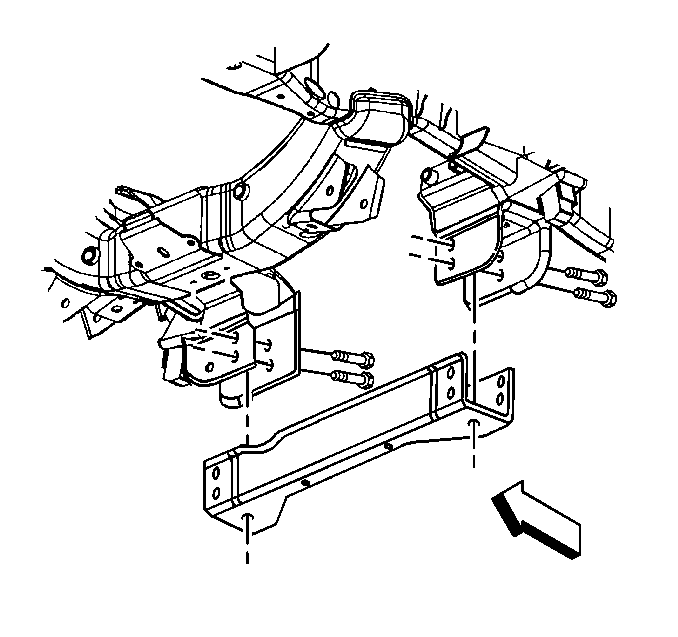
- Remove the crossbar bolts.
- Remove the crossbar.
- Remove the transmission cover bolt and cover.
- Drain the engine oil and remove the engine oil filter.
- Re-install the drain plug and oil filter until snug.
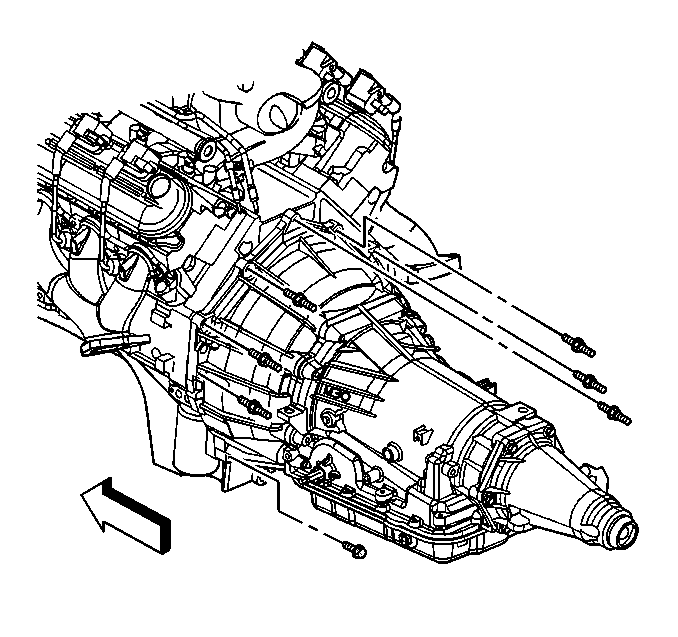
- If equipped with the 4L60-E automatic transmission, remove the transmission bolt and stud on the right side.
- Remove the bottom bolt on the left side.
- If equipped with the 4L80-E automatic transmission, remove the transmission converter cover bolts.
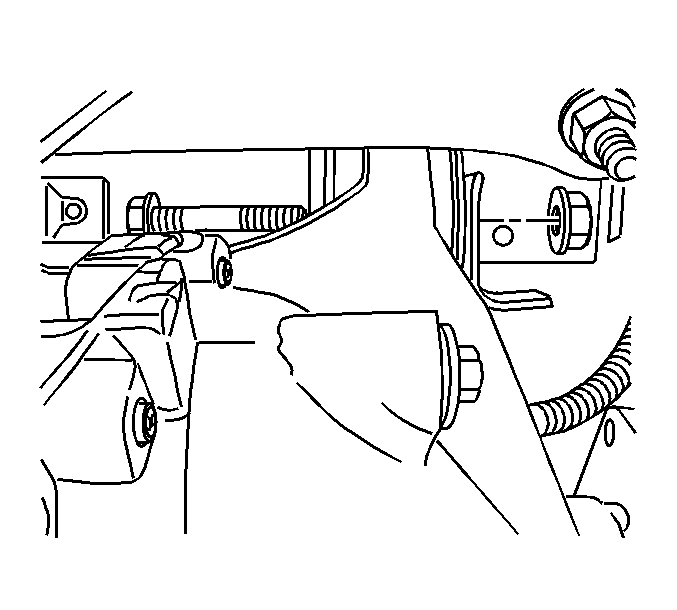
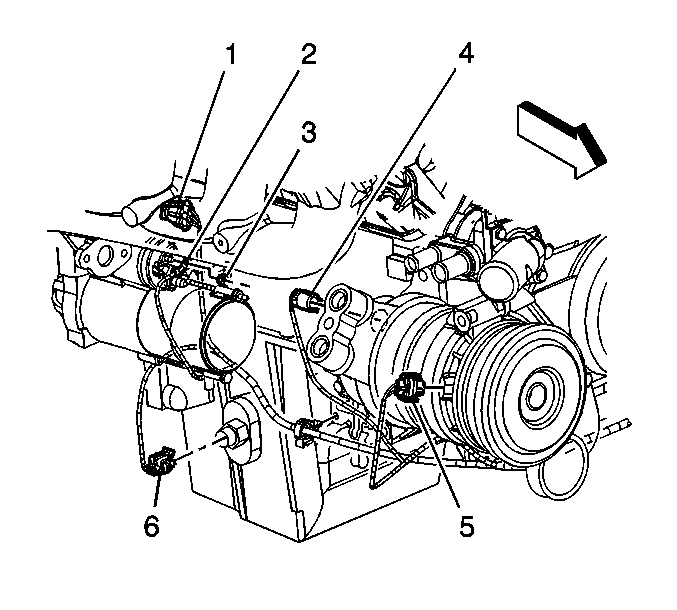
- Disconnect the oil level sensor electrical connector (6).
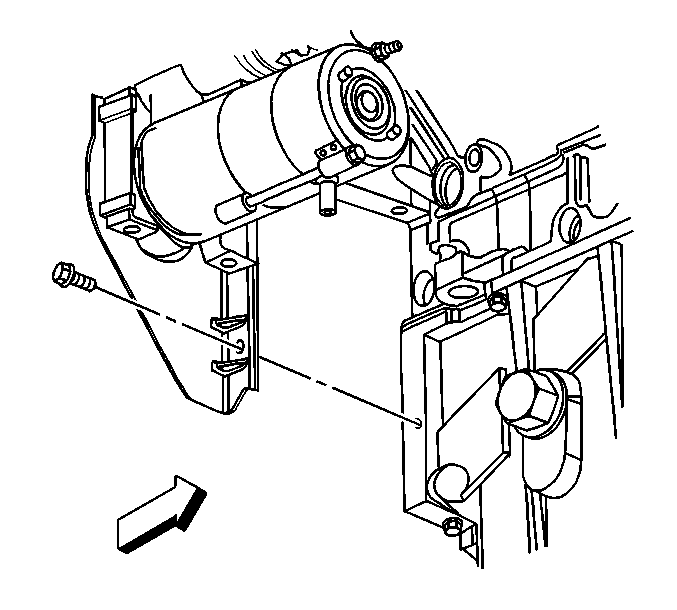
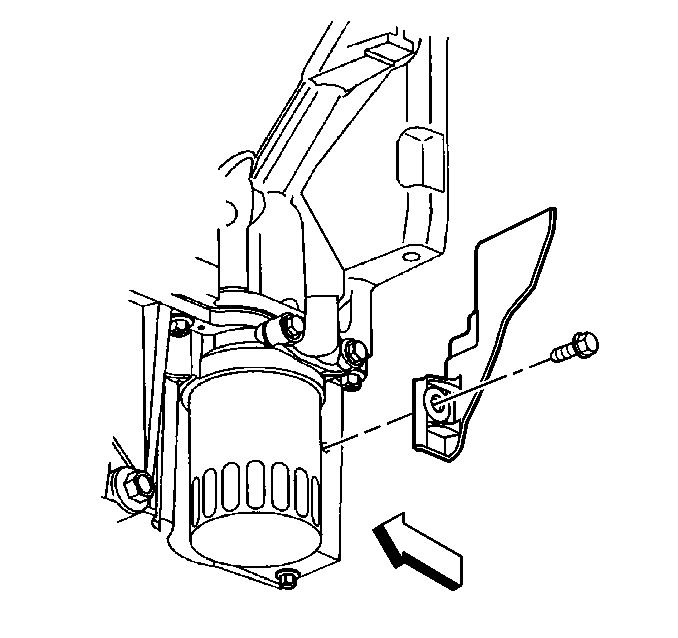
- Remove the battery cable channel bolt.
- Slide the channel pin out of the oil pan tab.
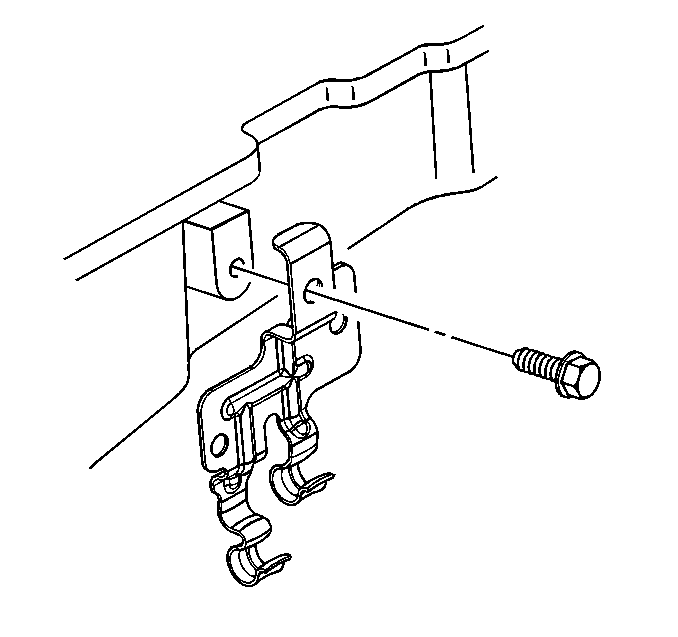
- Remove the positive battery cable clip bolt and clip.
- Remove the oil pan bolts.
- Remove the oil pan.
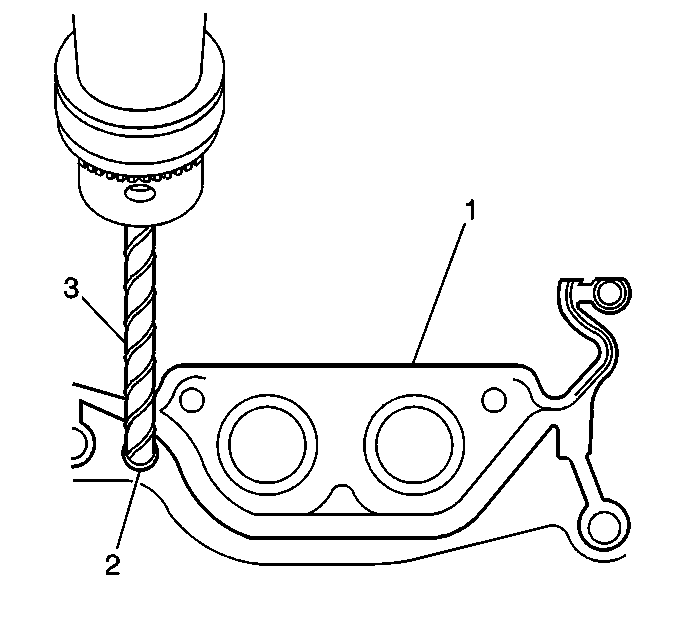
- Drill (3) out the oil pan gasket retaining rivets (2), if required.
- Remove the gasket (1) from the pan.
- Discard the gasket and rivets.
- Clean and inspect the engine oil pan. Refer to Oil Pan Cleaning and Inspection in Engine Mechanical - 4.8L, 5.3L, and 6.0L Unit Repair.


Important: DO NOT allow foreign material to enter the oil passages of the oil pan, cap or cover the openings as required.
Installation Procedure
Important:
• The alignment of the structural oil pan is critical. The rear bolt
hole locations of the oil pan provide mounting points for the transmission
bellhousing. To ensure the rigidity of the powertrain and correct
transmission alignment, it is important that the rear of the block
and the rear of the oil pan must NEVER protrude beyond the engine
block and transmission bellhousing plane. • Do not reuse the oil pan gasket. • It is not necessary to rivet the NEW gasket to the oil pan.
- Apply a 5 mm (0.20 in) bead of sealant GM P/N United states 12378190, or equivalent 20 mm (0.80 in) long to the engine block. Apply the sealant directly onto the tabs of the front cover gasket that protrudes into the oil pan surface.
- Apply a 5 mm (0.20 in) bead of sealant GM P/N United States 12378190, or equivalent 20 mm (0.8 in) long to the engine block. Apply the sealant directly onto the tabs of the rear cover gasket that protrudes into the oil pan surface.
- Pre-assemble the oil pan gasket to the pan.
- Install the oil pan, gasket and bolts to the engine block.
- Tighten the oil pan bolts until snug. Do not overtighten.
- Install the transmission converter cover bolts until snug, if equipped with the 4L80-E automatic transmission.
- Install the transmission bolt and stud on the right side until snug, If equipped with the 4L60-E automatic transmission.
- Install the bottom bolt on the left side until snug.
- Tighten the oil pan-to-front cover bolts to 25 N·m (18 lb ft).
- Tighten the oil pan-to-rear cover bolts to 12 N·m (106 lb in).
- Tighten the converter cover, and transmission bolts/stud to 50 N·m (37 lb ft).
- Install the positive battery cable clip and bolt to the oil pan.
- Slide the channel pin in to the oil pan tab.
- Install the battery cable channel bolt.
- Connect the oil level sensor electrical connector (6).
- Install the transmission cover and bolt.
- Install the crossbar.
- Install the crossbar bolts.
- If equipped, install the oil pan skid plate.
- Install the oil pan skid plate bolts.
- Install the transmission cover bolt.
- Raise the front drive axle into position.
- If equipped with 4WD, install the differential carrier upper mounting bolt and nut until snug. Do not tighten at this time.
- If equipped, with 4WD, install the differential carrier lower mounting bolt and nut.
- If equipped with 4WD, install the inner axle housing nuts and washers to the bracket.
- Remove the front drive axle support.
- Install new engine oil and a new oil filter. Refer to Engine Oil and Oil Filter Replacement .
Important: Be sure to align the oil gallery passages in the oil pan and engine block properly with the oil pan gasket.
| • | Install the gasket onto the pan. |
| • | Install the oil pan bolts to the pan and through the gasket. |
Notice: Use the correct fastener in the correct location. Replacement fasteners must be the correct part number for that application. Fasteners requiring replacement or fasteners requiring the use of thread locking compound or sealant are identified in the service procedure. Do not use paints, lubricants, or corrosion inhibitors on fasteners or fastener joint surfaces unless specified. These coatings affect fastener torque and joint clamping force and may damage the fastener. Use the correct tightening sequence and specifications when installing fasteners in order to avoid damage to parts and systems.
Tighten
Tighten
Tighten the positive battery cable clip bolt to 9 N·m (80 lb in).
Tighten
Tighten the battery cable channel bolt to 12 N·m (106 lb in).
Tighten
Tighten the transmission cover bolt to 12 N·m (106 lb in).
Tighten
Tighten the crossbar bolts to 100 N·m (74 lb ft).
Tighten
Tighten the oil pan skid plate bolts to 20 N·m (15 lb ft).
Tighten
Tighten the transmission cover bolt to 12 N·m (106 lb in).
Tighten
Tighten the bolts to 100 N·m (75 lb ft).
Tighten
Tighten the nuts to 100 N·m (75 lb ft).
