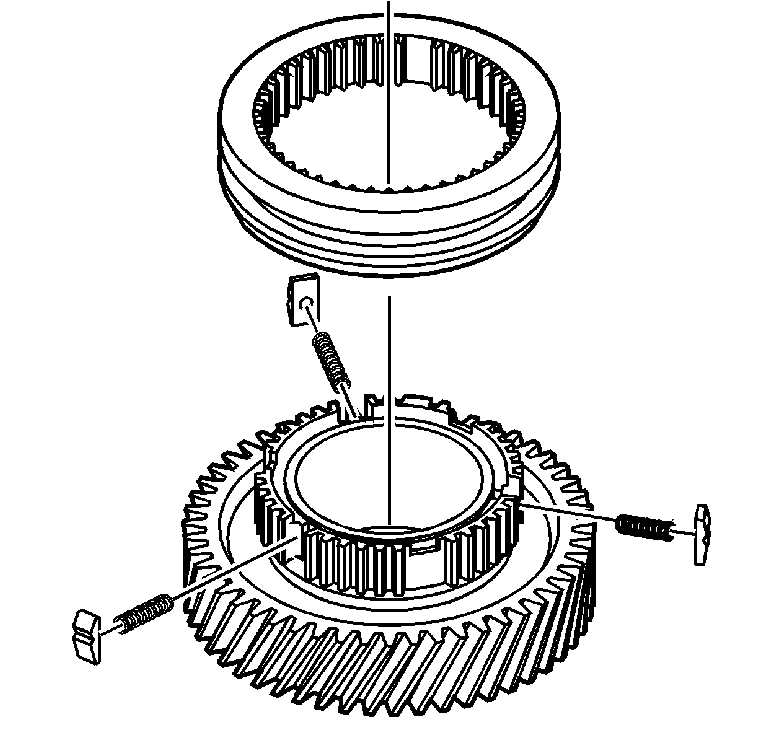
Synchronizers Assemble 3rd/4th Speed Gear
Important:
| • | Only disassemble the synchronizer sleeve from the synchronizer
hub if there is a suspected gear shift concern. |
| • | For installation alignment, scribe an alignment mark on the synchronizer
hubs and synchronizer sleeves before disassembling. |
| • | Mark the synchronizers clutch gears and the blocking rings with
the corresponding gear, for correct diagnostic inspections. |
| • | Install the synchronizer components in the same location, if reusing. |
- Lay the synchronizer hub on the 3rd speed gear synchronizer blocking
ring and clutch gear. The ring and gear will hold the hub up.
- Slide the synchronizer sleeve on the synchronizer hub.
| • | Align the large tooth with the large slot in the sleeve. |
| • | The sleeve can go either direction, if it is not marked. |
- Using a small screwdriver, install the 3 springs and the
3 inserts.
- Move the sleeve to the neutral position, to hold the springs and
inserts in position.
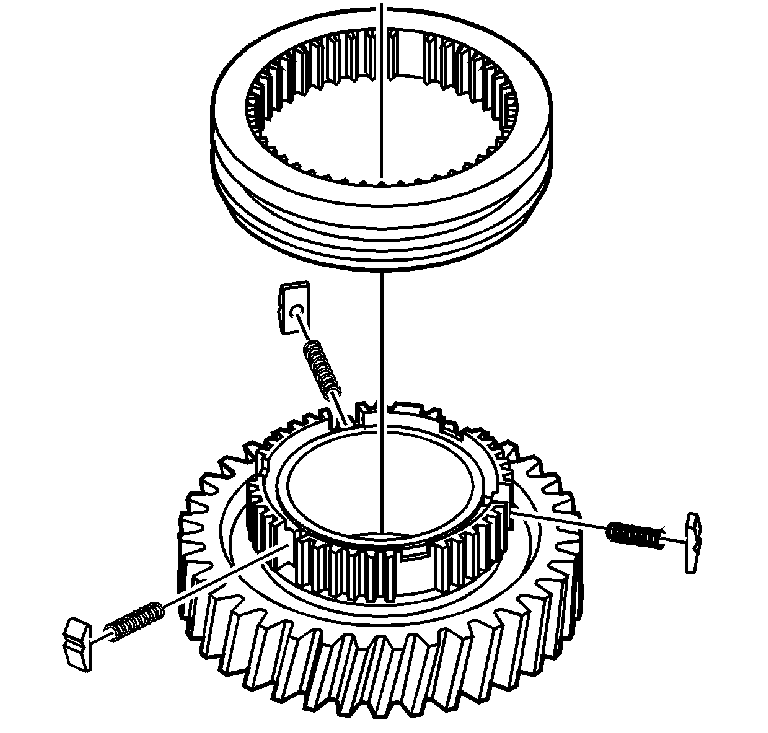
Synchronizers Assemble 5th/Overdrive Speed Gear
Important:
| • | Only disassemble the synchronizer sleeve from the synchronizer
hub if there is a suspected gear shift concern. |
| • | For installation alignment, scribe an alignment mark on the synchronizer
hubs and synchronizer sleeves before disassembling. |
| • | Mark the synchronizers clutch gears and the blocking rings with
the corresponding gear, for correct diagnostic inspections. |
| • | Install the synchronizer components in the same location, if reusing. |
- Lay the 5th speed gear assembly, with the gear side down, on the workbench.
- Slide the synchronizer sleeve on the synchronizer hub, with the
tapered side of the sleeve towards the gear.
- Using a small screwdriver, install the 3 springs and the
3 inserts.
- Move the sleeve to the neutral position, to hold the springs and
inserts in position.
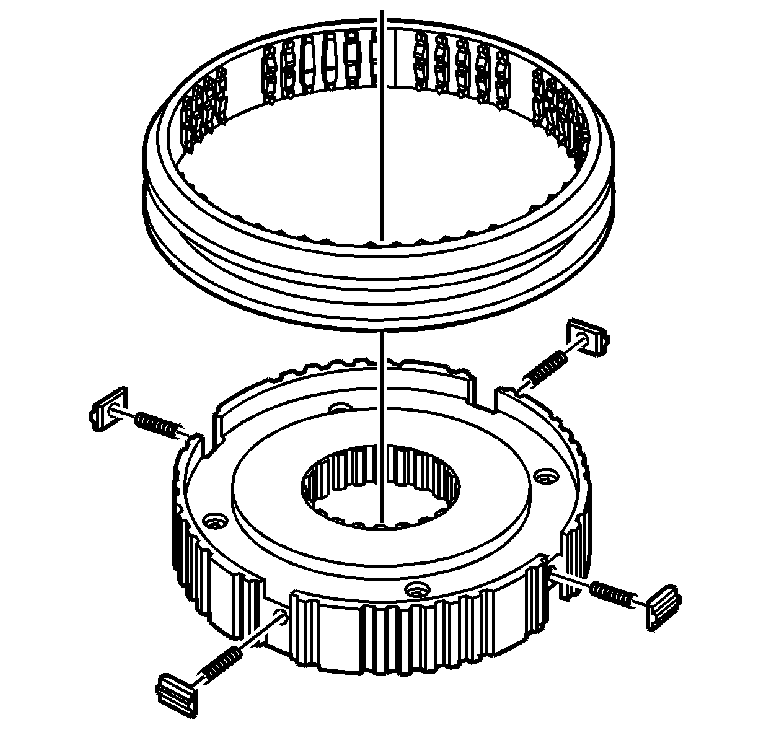
Synchronizers Assemble 1st/2nd Speed Gear
Important:
| • | Only disassemble the synchronizer sleeve from the synchronizer
hub if there is a suspected gear shift concern. |
| • | For installation alignment, scribe an alignment mark on the synchronizer
hubs and synchronizer sleeves before disassembling. |
| • | Mark the synchronizers clutch gears and the blocking rings with
the corresponding gear, for correct diagnostic inspections. |
| • | Install the synchronizer components in the same location, if reusing. |
- Lay the 1st/2nd speed gear assembly on the 1st speed gear synchronizer
inner and middle rings. The rings will hold the hub up.
- Slide the synchronizer sleeve on the synchronizer hub.
| • | Align the sleeve to the hub. |
| • | The sleeve will fit in only one direction on the hub. |
| • | The tapered side of the sleeve faces up, or toward second gear. |
- Using a small screwdriver, install the 4 springs and the
4 inserts.
- Move the sleeve to the neutral position, to hold the springs and
inserts in position.
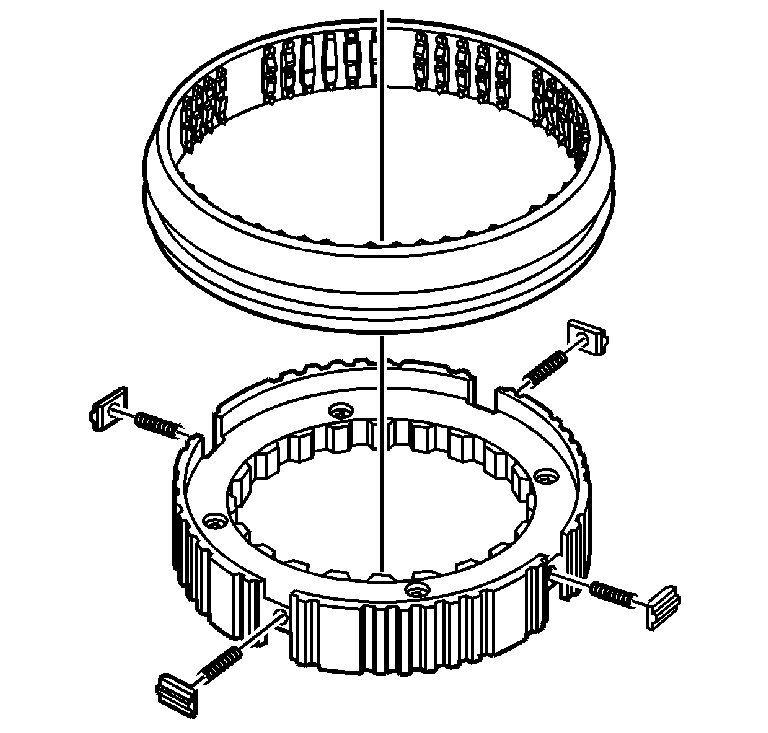
Synchronizers Assemble Reverse Speed Gear
Important:
| • | Only disassemble the synchronizer sleeve from the synchronizer
hub if there is a suspected gear shift concern. |
| • | For installation alignment, scribe an alignment mark on the synchronizer
hubs and synchronizer sleeves before disassembling. |
| • | Mark the synchronizers clutch gears and the blocking rings with
the corresponding gear, for correct diagnostic inspections. |
| • | Install the synchronizer components in the same location, if reusing. |
- Lay the reverse speed gear assembly, with the reverse gear down, on
the workbench.
- Slide the synchronizer sleeve on the synchronizer hub.
| • | Align the sleeve to the hub. |
| • | The sleeve will fit in only one direction on the hub. |
| • | The tapered side of the sleeve faces toward reverse gear. |
- Using a small screwdriver, install the 3 springs and the
3 inserts.
- Move the sleeve to the neutral position, to hold the springs and
inserts in position.
