Tools Required
J 23028-A Coil Spring Remover and Installer
Removal Procedure
- Raise the vehicle. Refer to Lifting and Jacking the Vehicle in General Information.
- Remove the shock absorber. Refer to Shock Absorber Replacement .
- Secure the J 23028-A to a suitable jack . Position the J 23028-A so the tool cradles the inner bushings.
- Remove the stabilizer shaft link. Refer to Stabilizer Shaft Link Replacement .
- Raise the jack, under the J 23028-A in order to relieve tension from the lower control arm bolts.
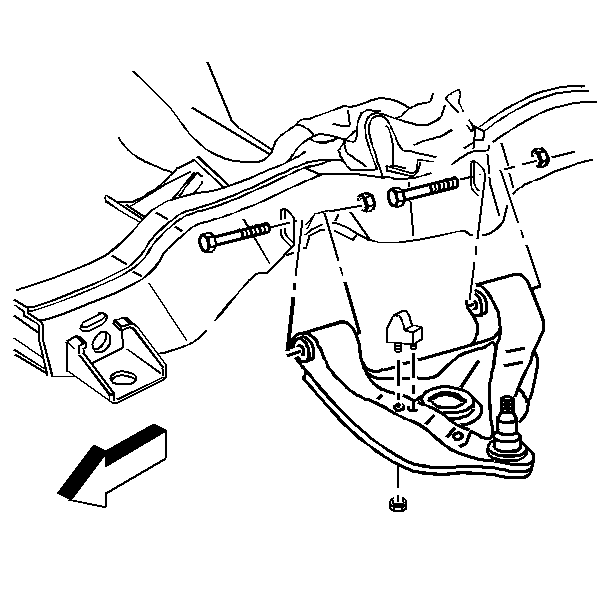
- Remove the lower control arm bolts and the nuts. Remove the rear bolt and the rear nut first.
- Lower the lower control arm by lowering the jack slowly to relieve the tension of the coil spring.
- After all compression is removed from the coil spring, remove the coil spring and coil spring insulators from the vehicle.
Notice: Use care when handling the coil springs in order to avoid chipping or scratching the coating. Damage to the coating will result in premature failure of the coil springs.
The lower control arms must hang free.
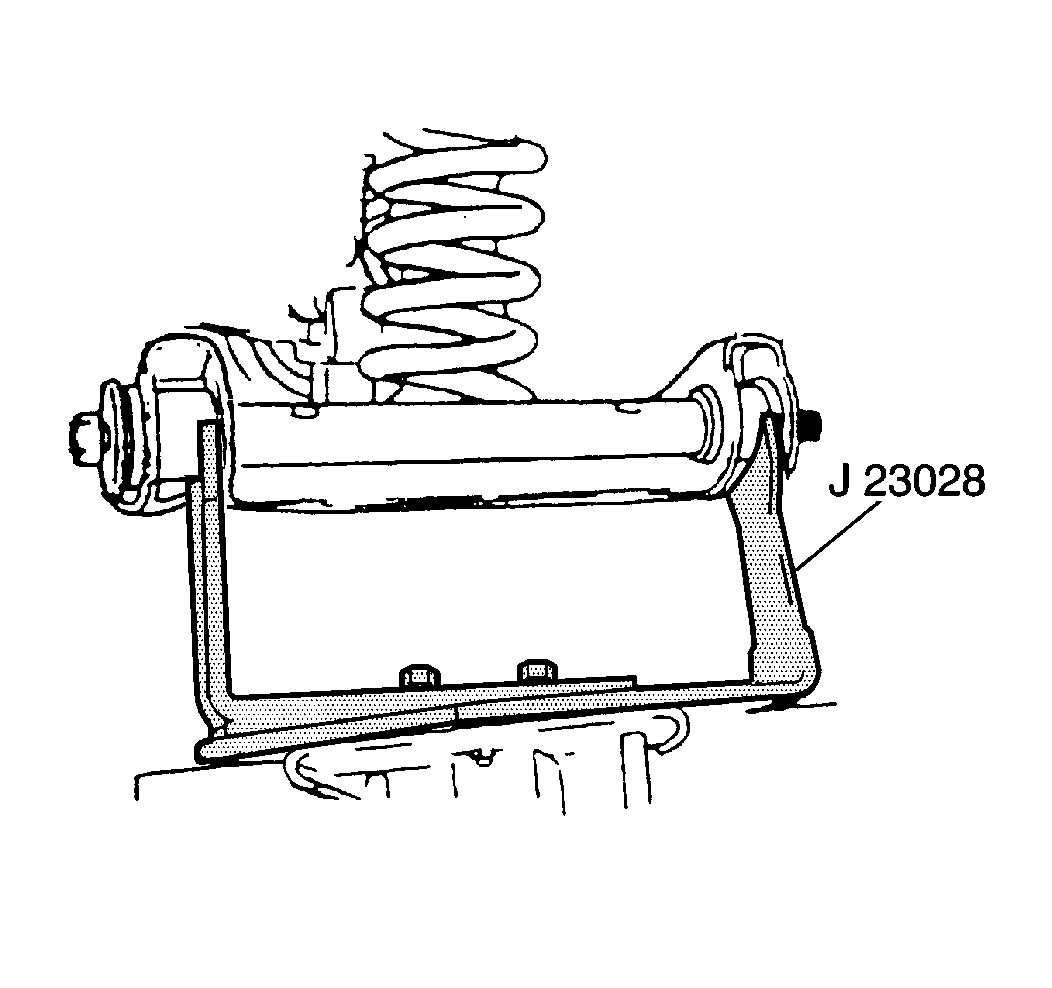
Caution: Tool J 23028-01 should be secured to a suitable jack or personal injury could result.
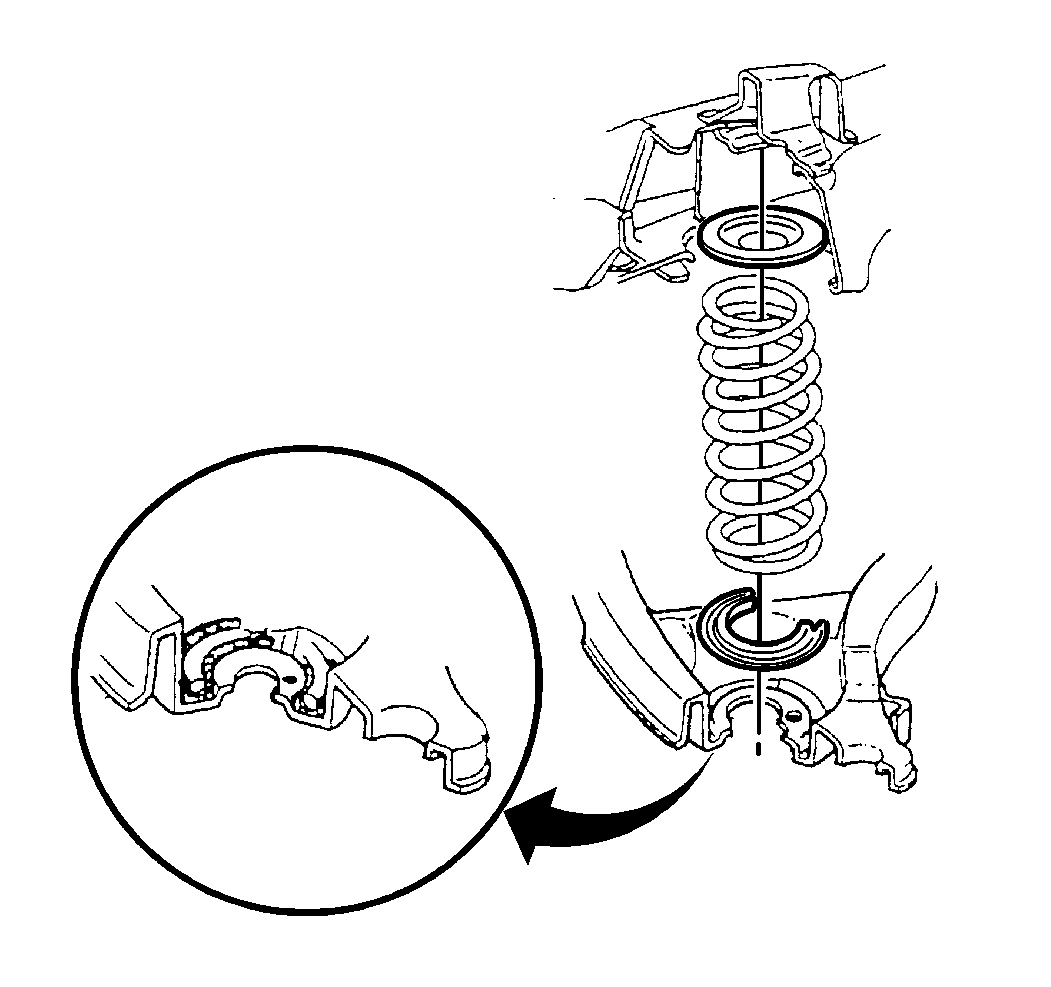
Important: Do not apply force on the lower control arm or the lower ball joint in order to remove the coil spring. Proper maneuvering of the coil spring will allow for easy removal.
Installation Procedure
- Install the coil spring and the coil spring insulators to the lower control arm.
- Support the lower control arm with J 23028-A .
- Raise the jack to install the lower control arm so that the bushings match up to the proper holes in the frame.
- Install the lower control arm bolts and nuts.
- Remove the J 23028-A from the vehicle.
- Install the stabilizer shaft link. Refer to Stabilizer Shaft Link Replacement .
- Install the shock absorber. Refer to Shock Absorber Replacement .
- Lower the vehicle.
- Tighten the lower control arm front nut to 118 N·m (87 lb ft), with the vehicle weight on the wheels.
- Tighten the lower control arm rear nut to 118 N·m (87 lb ft), with the vehicle weight on the wheels.
- Check the front wheel alignment. Refer to Wheel Alignment Measurement in Wheel Alignment.
| • | The insulators must be in place on the top and bottom of the coil spring. |
| • | Install the coil spring with the identification tape towards the lower control arm. |
| • | Align the edge of the coil spring with the edge of the insulator. Align the insulator and the drain hole. |
| • | The end of the lower spring coil must cover all or part of one inspection drain hole. The other drain hole must be partially exposed or completely uncovered. |
Caution: Tool J 23028-01 should be secured to a suitable jack or personal injury could result.
Insure that the coil spring is properly seated in the upper control arm.
| 4.1. | Install the front bolt first, then the rear bolt. |
| 4.2. | Install the bolts in the proper direction. |
| 4.3. | Tighten the nuts, but do not torque. |
Notice: Refer to Fastener Notice in the Preface section.
Tighten
