Catalytic Converter Replacement RWD
Removal Procedure
Caution: Always wear protective goggles and gloves when removing exhaust parts as falling rust and sharp edges from worn exhaust components could result in serious personal injury.
Caution: In order to avoid being burned, do not service the exhaust system while it is still hot. Service the system when it is cool.
An accumulation of dirt and corrosion may make removing exhaust components difficult. Applying a penetrating oil on the threads of the bolts may assist in the removal of these components.
- Raise the vehicle. Refer to Lifting and Jacking the Vehicle in General Information.
- Support the catalytic converter assembly.
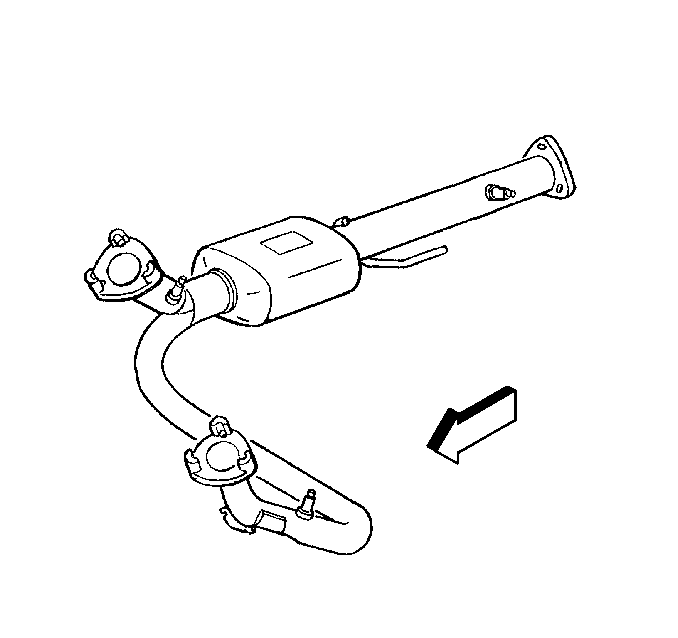
- Remove the 3 oxygen sensor electrical connections and clips.
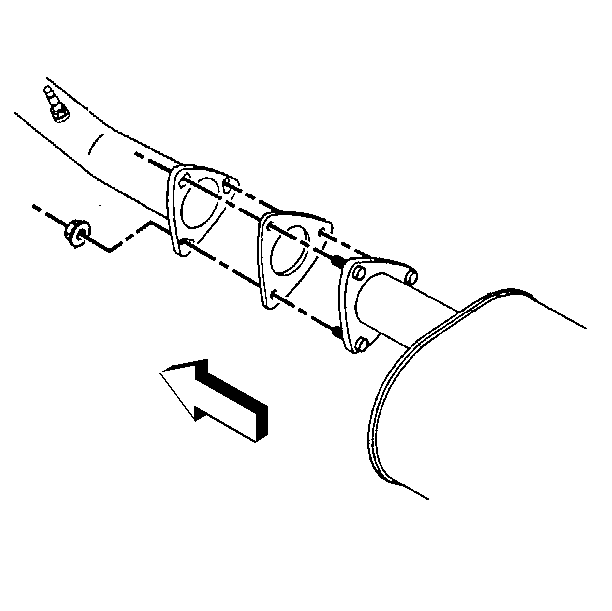
- Remove the nuts from the muffler flange bolts.
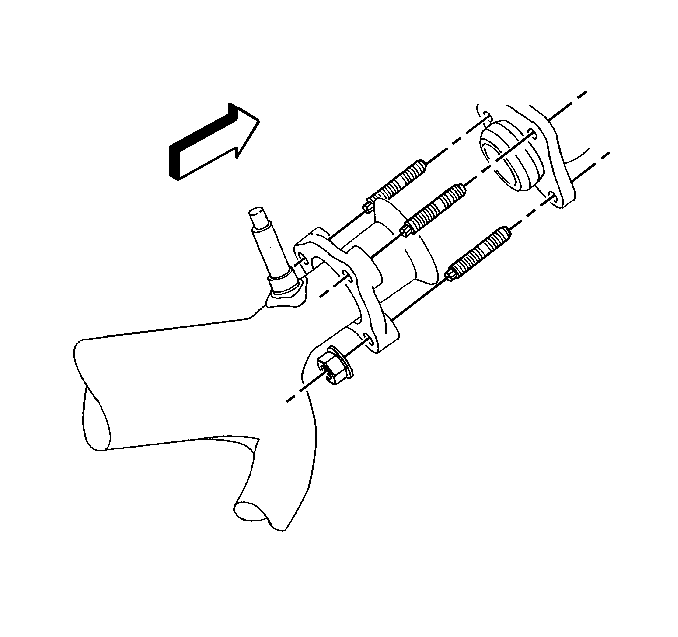
- Remove the nuts from the exhaust manifold studs (right side).
- Disconnect the collars from the exhaust manifold studs (right side).
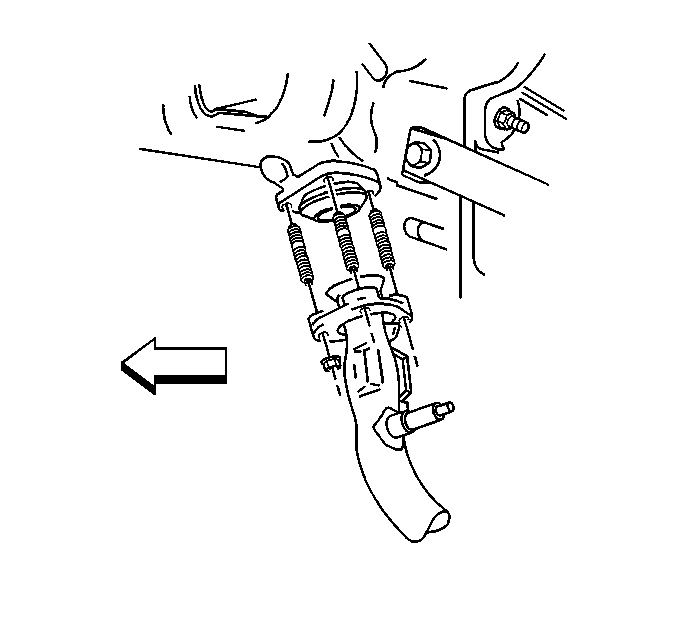
- Remove the nuts from the exhaust manifold studs (left side).
- Disconnect the collars from the exhaust manifold studs (left side).
- Remove the catalytic converter assembly from the muffler assembly.
- Remove the catalytic converter assembly from the exhaust manifolds.
- Lower the front of the catalytic converter assembly.
- Remove the catalytic converter assembly from the hanger.
- Remove the catalytic converter assembly from the vehicle by rotating the assembly over the rear of the transmission crossmember.
- Remove the 3 oxygen sensors.

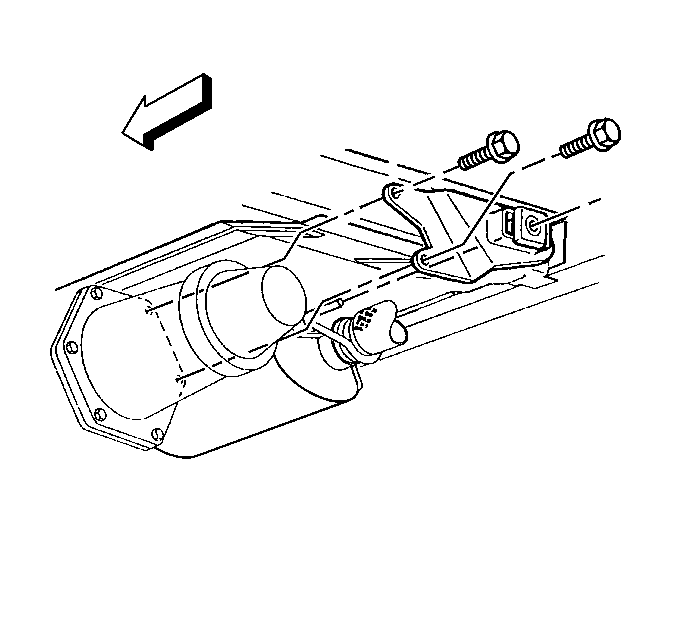
Notice: Do not damage the oxygen sensors when removing the catalytic converter.
Installation Procedure
When installing exhaust components, inspect the exhaust system for proper alignment. Misaligned components commonly cause rattles, noise and vibrations in the exhaust system. During system alignment, leave all of the bolts or nuts loose, until all of the parts are properly aligned. After properly aligning the parts, tighten the bolts or nuts from the front to the rear.
In order to maintain the alignment of the exhaust system, replace any damaged exhaust system hangers, hanger brackets, and clamps.
Important:
• Replacement of exhaust system parts must be OEM standard to ensure
that the vehicle operates as designed. • When exhaust system service requires removing and replacing an
oxygen sensor, refer to the applicable service procedure. • Always use new nuts when installing the exhaust pipe to the exhaust
manifold. • Before installing the new nuts, clean the exhaust manifold stud
threads with a wire brush.
- Install the 3 oxygen sensors to the catalytic converter assembly.
- Install the catalytic converter assembly to the hanger.
- Install the collars on the catalytic converter assembly to the exhaust manifold studs (left side).
- Loosely install the nuts onto the exhaust manifold studs (left side).
- Install the collars on the catalytic converter assembly to the exhaust manifold studs (right side).
- Loosely install the nuts onto the exhaust manifold studs (right side).
- Connect the catalytic converter assembly and the gasket to the muffler assembly.
- Loosely install the nuts.
- Tighten the exhaust manifold nuts in proper sequence (1-6).
- Install the three oxygen sensor electrical connections and clips.
- Remove the support from the catalytic converter assembly.
- Lower the vehicle.


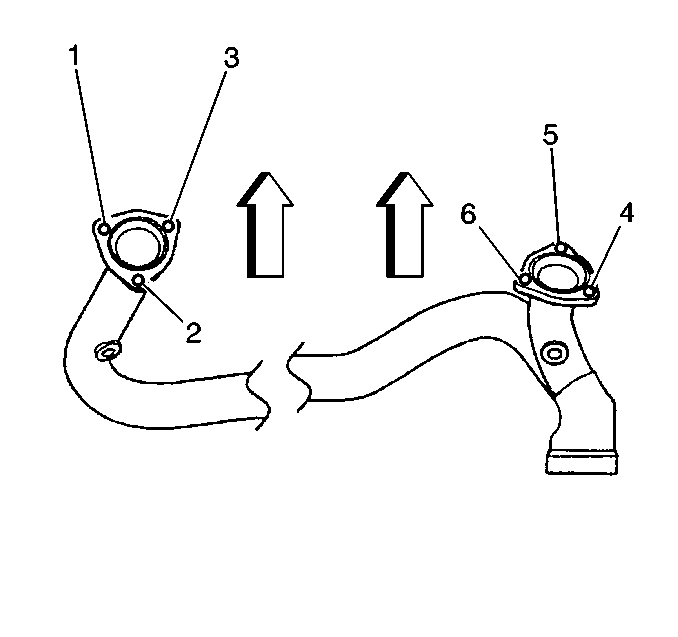
Notice: Use the correct fastener in the correct location. Replacement fasteners must be the correct part number for that application. Fasteners requiring replacement or fasteners requiring the use of thread locking compound or sealant are identified in the service procedure. Do not use paints, lubricants, or corrosion inhibitors on fasteners or fastener joint surfaces unless specified. These coatings affect fastener torque and joint clamping force and may damage the fastener. Use the correct tightening sequence and specifications when installing fasteners in order to avoid damage to parts and systems.
Tighten
| • | Tighten the catalytic converter assembly-to-exhaust manifold nuts to 53 N·m (39 lb ft). |
| • | Tighten the catalytic converter assembly-to-muffler assembly nuts to 40 N·m (30 lb ft). |

Catalytic Converter Replacement A4WD
Removal Procedure
Caution: Always wear protective goggles and gloves when removing exhaust parts as falling rust and sharp edges from worn exhaust components could result in serious personal injury.
Caution: In order to avoid being burned, do not service the exhaust system while it is still hot. Service the system when it is cool.
An accumulation of dirt and corrosion may make removing exhaust components difficult. Applying a penetrating oil on the threads of the bolts may assist in the removal of these components.
- Raise the vehicle. Refer to Lifting and Jacking the Vehicle in General Information.
- Support the catalytic converter assembly.
- Remove the 3 oxygen sensor electrical connections and clips.
- Remove the nuts from the muffler flange bolts.
- Remove the nuts from the exhaust manifold studs (right side).
- Disconnect the collars from the exhaust manifold studs (right side).
- Remove the nuts from the exhaust manifold studs (left hand).
- Disconnect the collars from the exhaust manifold studs (left side).
- Remove the catalytic converter assembly hanger from the transfer case.
- Remove the catalytic converter assembly hanger from the catalytic converter.
- Separate the catalytic converter assembly from the muffler assembly.
- Separate the catalytic converter assembly from the exhaust manifolds.
- Remove the catalytic converter assembly from the vehicle by doing the following:
- Remove the oxygen sensors from the catalytic converter assembly.


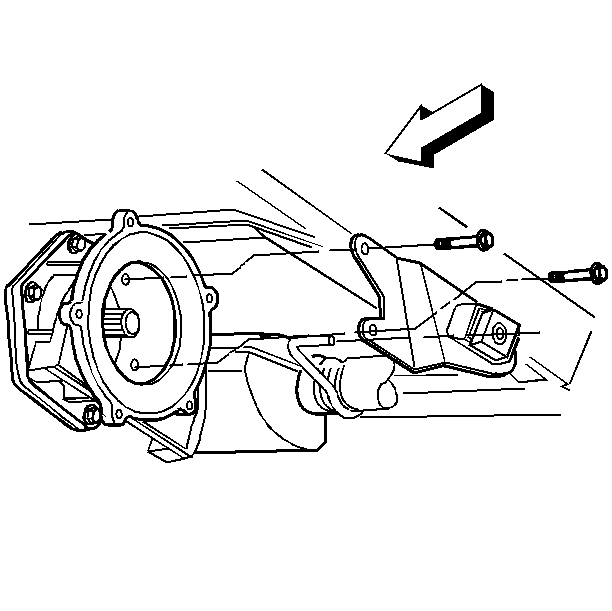
Notice: Do not damage the oxygen sensors when removing the catalytic converter.
| 13.1. | Lower the rear of the catalytic converter assembly. |
| 13.2. | Move the catalytic converter assembly toward the rear of the vehicle. |
| 13.3. | Rotate and lower the catalytic converter assembly behind the transfer case support crossmember. |
Installation Procedure
Notice: Replacement of exhaust system parts must be OEM standard to ensure that the vehicle operates as designed.
When installing exhaust components, inspect the exhaust system for proper alignment. Misaligned components commonly cause rattles, noise and vibrations in the exhaust system. During system alignment, leave all of the bolts or nuts loose, until all of the parts are properly aligned. After properly aligning the parts, tighten the bolts or nuts from the front to the rear.
In order to maintain the alignment of the exhaust system, replace any damaged exhaust system hangers, hanger brackets, and clamps.
Important:
• Replacement of exhaust system parts must be OEM standard to ensure
that the vehicle operates as designed. • When exhaust system service requires removing and replacing an
oxygen sensor, refer to the applicable service procedure. • Always use new nuts when installing the exhaust pipe to the exhaust
manifold. • Before installing the new nuts, clean the exhaust manifold stud
threads with a wire brush.
- Install the oxygen sensors to the catalytic converter assembly.
- Install the catalytic converter assembly by doing the following:
- Install the collars on the catalytic converter assembly to the exhaust manifold studs (left side). Loosely install the nuts onto the exhaust manifold studs (left side).
- Install the collars on the catalytic converter assembly to the exhaust manifold studs (right side). Loosely install the nuts onto the exhaust manifold studs (right side).
- Connect the catalytic converter assembly and gasket to the muffler assembly.
- Loosely install the nuts.
- Connect the catalytic converter assembly hanger to the catalytic converter assembly.
- Loosely install the catalytic converter assembly hanger to the transfer case.
- Tighten the exhaust manifold nuts in proper sequence (1-6).
- Install the 3 oxygen sensor electrical connections and the clips.
- Remove the support from the catalytic converter assembly.
- Lower the vehicle.
| 2.1. | Raise the catalytic converter assembly into the vehicle, from behind the transfer case support crossmember. |
| 2.2. | Rotate the catalytic converter assembly, while directing the left exhaust pipe between the torsion bar and the transmission. |
| 2.3. | Move the catalytic converter assembly toward the front of the vehicle. |


Notice: Use the correct fastener in the correct location. Replacement fasteners must be the correct part number for that application. Fasteners requiring replacement or fasteners requiring the use of thread locking compound or sealant are identified in the service procedure. Do not use paints, lubricants, or corrosion inhibitors on fasteners or fastener joint surfaces unless specified. These coatings affect fastener torque and joint clamping force and may damage the fastener. Use the correct tightening sequence and specifications when installing fasteners in order to avoid damage to parts and systems.
Tighten
| • | Tighten the catalytic converter assembly-to-exhaust manifold nuts to 53 N·m (39 lb ft). |
| • | Tighten the catalytic converter assembly hanger-to-transfer case bolts to 55 N·m (41 lb ft). |
| • | Tighten the catalytic converter assembly-to-muffler assembly nuts to 40 N·m (30 lb ft). |

