Shock Absorber Replacement AWD
Removal Procedure
- Raise the vehicle. Refer to Lifting and Jacking the Vehicle in General Information.
- Support the lower control arm.
- Remove the tire and wheel. Refer to Tire and Wheel Removal and Installation in Tires and Wheels.
- Remove the wheelhouse splash shield. Refer to Wheelhouse Splash Shield Replacement in Body Front End.
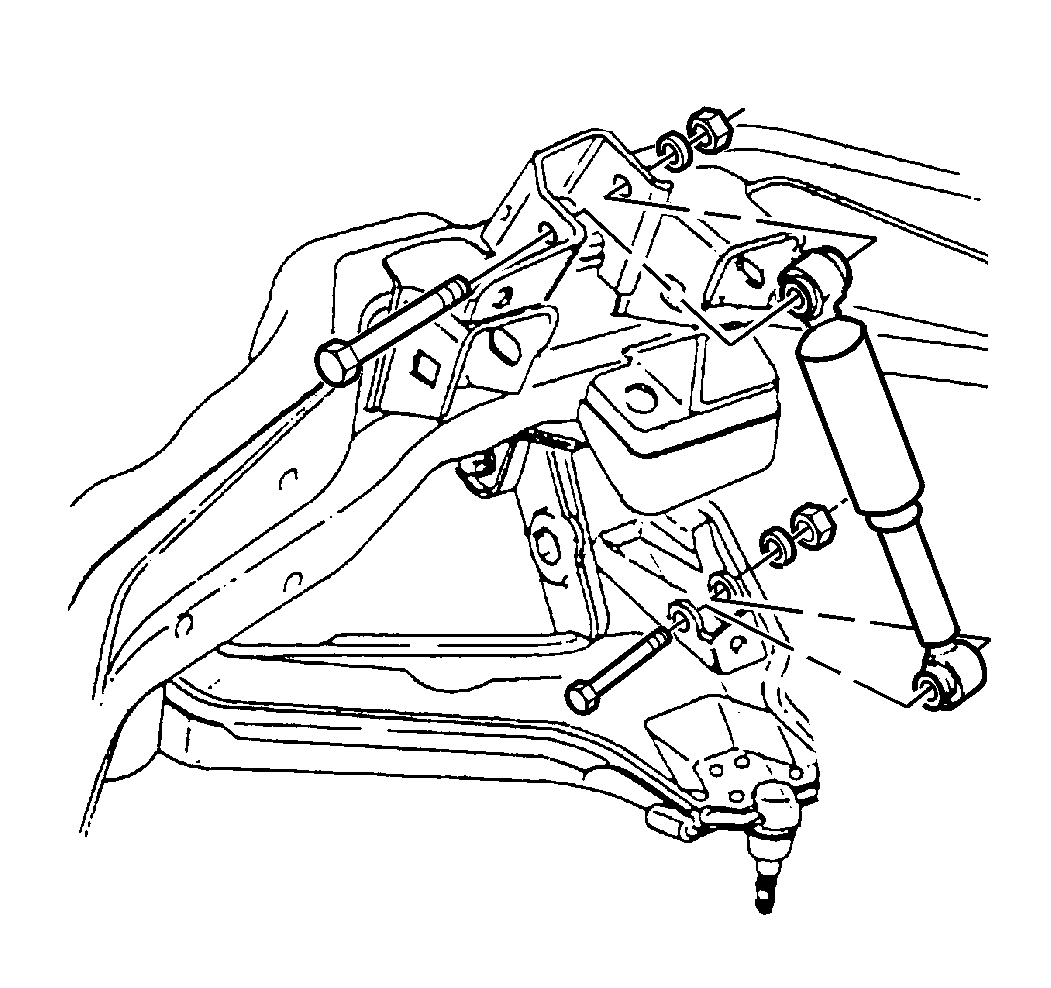
- Remove the shock absorber lower mounting nut, the washer, and the bolt.
- Remove the shock absorber upper mounting nut, the washer, and the bolt.
- Remove the shock absorber.

Installation Procedure
- Install the shock absorber to the vehicle.
- Install the shock absorber mounting bolts.
- Install the new shock absorber mounting nuts and the washers.
- Install the wheelhouse splash shield. Refer to Wheelhouse Splash Shield Replacement in Body Front End.
- Install the tire and wheel. Refer to Tire and Wheel Removal and Installation in Tires and Wheels.
- Lower the vehicle.
- Dispose of the shock absorber. Refer to Shock Absorber Disposal .

Important: Position the bolts in the same direction that they removed or suspension clearance may be affected.
Notice: Use the correct fastener in the correct location. Replacement fasteners must be the correct part number for that application. Fasteners requiring replacement or fasteners requiring the use of thread locking compound or sealant are identified in the service procedure. Do not use paints, lubricants, or corrosion inhibitors on fasteners or fastener joint surfaces unless specified. These coatings affect fastener torque and joint clamping force and may damage the fastener. Use the correct tightening sequence and specifications when installing fasteners in order to avoid damage to parts and systems.
Tighten
Tighten the shock absorber mounting nuts to 62 N·m (46 lb ft).
Shock Absorber Replacement RWD
Removal Procedure
- Raise the vehicle. Refer to Lifting and Jacking the Vehicle in General Information.
- Remove the tire and wheel. Refer to Tire and Wheel Removal and Installation in Tires and Wheels.
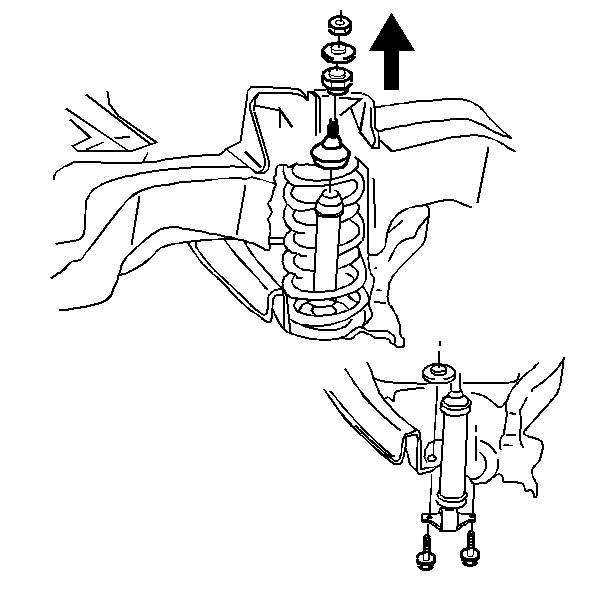
- Remove the shock absorber mounting nut, the retainer, and the insulator. Hold the shock absorber upper stem in order to keep the stem from turning. A hex is provided on the end of the stem for this purpose.
- Remove the shock absorber mounting screws. The nuts will remain attached to the lower control arm.
- Pull the shock absorber out through the hole in the lower control arm.

Installation Procedure
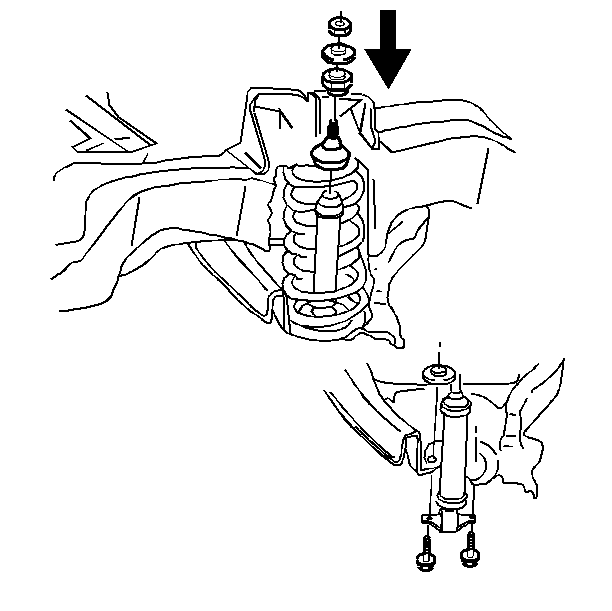
- Install the shock absorber, fully extended, up through the hole in the lower control arm.
- Install the upper insulator, the retainer, and the shock absorber mounting nut over the shock absorber upper stem.
- Install the shock absorber mounting screws through the holes in the lower control arm.
- Make sure the nuts are aligned properly.
- Tighten the shock absorber mounting nut to 20 N·m (15 lb ft), while holding the upper stem of the shock absorber.
- Tighten the shock absorber mounting screws to 25 N·m (18 lb ft).
- Install the tire and wheel. Refer to Tire and Wheel Removal and Installation in Tires and Wheels.
- Lower the vehicle.
- Dispose of the shock absorber. Refer to Shock Absorber Disposal .

| • | The lower retainer and the insulator must be attached to the shock absorber upper stem before positioning the shock absorber. |
| • | The shock absorber upper stem will pass through the mounting hole in the upper control arm frame bracket. |
Notice: Use the correct fastener in the correct location. Replacement fasteners must be the correct part number for that application. Fasteners requiring replacement or fasteners requiring the use of thread locking compound or sealant are identified in the service procedure. Do not use paints, lubricants, or corrosion inhibitors on fasteners or fastener joint surfaces unless specified. These coatings affect fastener torque and joint clamping force and may damage the fastener. Use the correct tightening sequence and specifications when installing fasteners in order to avoid damage to parts and systems.
Tighten
