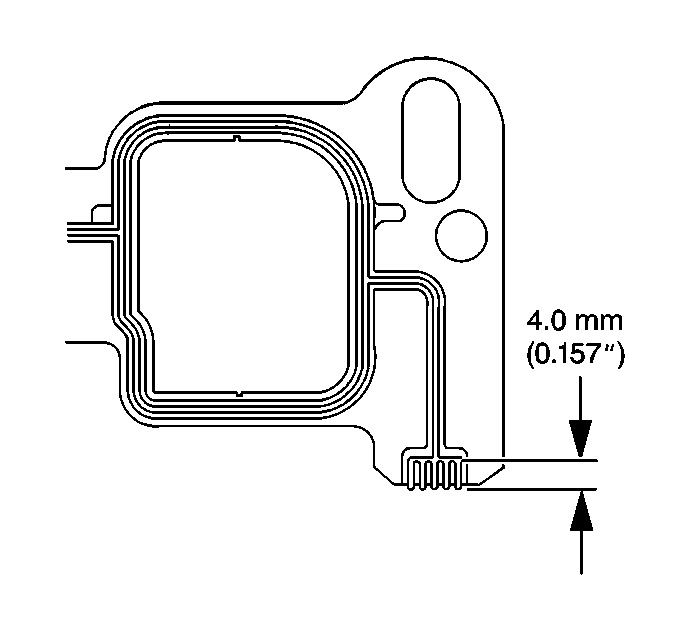
- Apply a 4.0 mm (0.157 in) patch of adhesive GM P/N 12346141 (Canadian P/N 10953433) or equivalent, to the cylinder head side of the lower intake manifold gasket at each end.
- Install the lower intake manifold gasket onto the cylinder head.
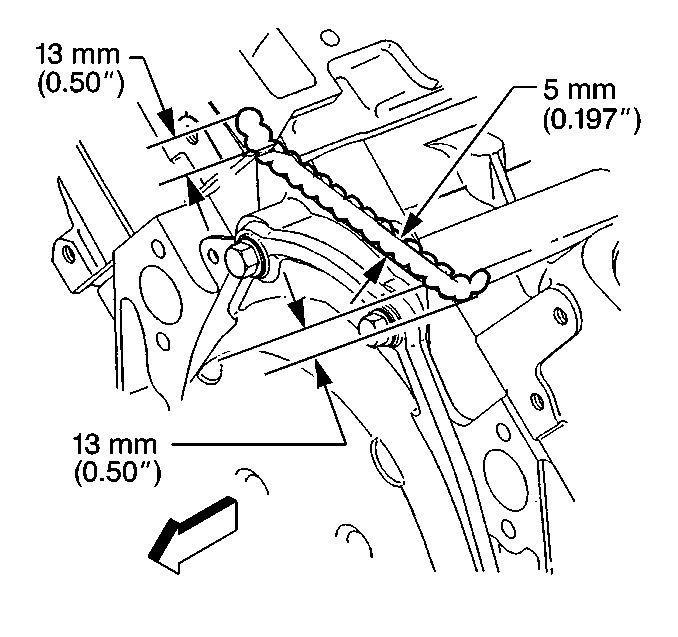
- Apply a 5 mm (0.197 in) bead of adhesive GM P/N 12346141 (Canadian P/N 10953433) or equivalent, to the front top of the engine block.
- Extend the adhesive bead 13 mm (0.50 in) onto each lower intake manifold gasket.
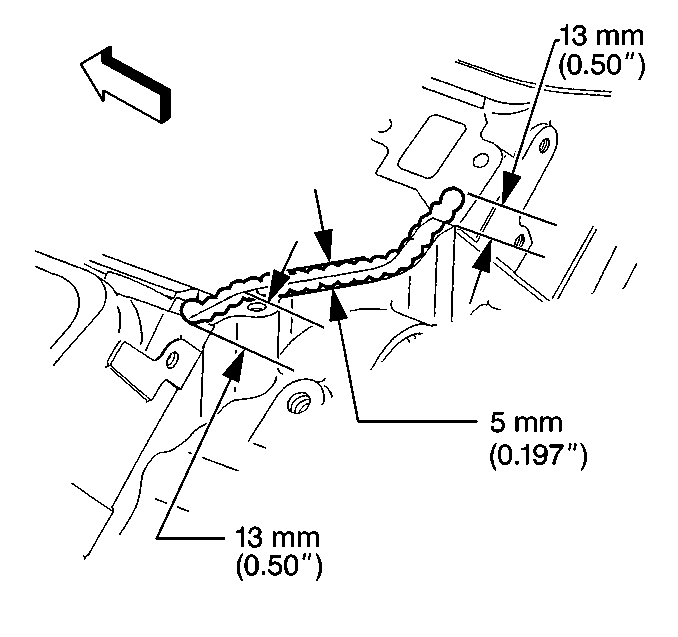
- Apply a 5 mm (0.197 in) bead of adhesive GM P/N 12346141 (Canadian P/N 10953433) or equivalent, to the rear top of the engine block.
- Extend the adhesive bead 13 mm (0.50 in) onto each lower intake manifold gasket.
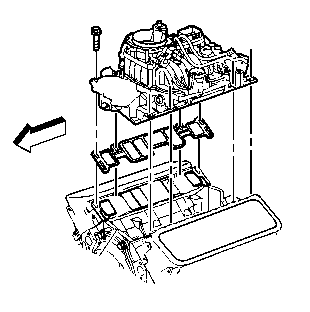
- Install the lower intake manifold onto the engine block.
- If reusing the fasteners, apply threadlock GM P/N 12345382 (Canadian P/N 10953489) or equivalent, to the threads of the lower intake manifold bolts.
- Install the lower intake manifold bolts.
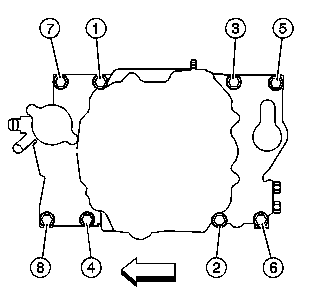
- Tighten the lower intake manifold bolts.
- Tighten the bolts on the first pass in sequence (1-8) to 3 N·m (27 lb in).
- Tighten the bolts on the second pass in sequence (1-8) to 12 N·m (106 lb in).
- Tighten the bolts on the final pass in sequence (1-8) to 15 N·m (11 lb ft).
- Connect the evaporative emission (EVAP) canister solenoid valve harness.
Notice: Apply the proper amount of the sealant when assembling this component. Excessive use of the sealant can prohibit the component from sealing properly. A component that is not sealed properly can leak leading to extensive engine damage.
Important: The lower intake manifold gasket must be installed while the adhesive is still wet to the touch.
Use the gasket locator pins in order to properly seat the lower intake manifold gasket on the cylinder head.
Important: The lower intake manifold must be installed and the fasteners tightened while the adhesive is still wet to the touch.
Notice: Proper lower intake manifold fastener tightening sequence and torque is critical. Always follow the tightening sequence, and torque the intake manifold bolts using the 3 step method. Failing to do so may distort the crankshaft bearing bore alignment and cause damage to the crankshaft bearings.
Notice: Use the correct fastener in the correct location. Replacement fasteners must be the correct part number for that application. Fasteners requiring replacement or fasteners requiring the use of thread locking compound or sealant are identified in the service procedure. Do not use paints, lubricants, or corrosion inhibitors on fasteners or fastener joint surfaces unless specified. These coatings affect fastener torque and joint clamping force and may damage the fastener. Use the correct tightening sequence and specifications when installing fasteners in order to avoid damage to parts and systems.
Tighten
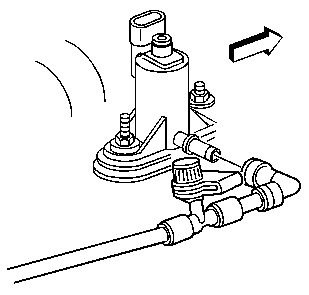
| 11.1. | Push the elbow inward until the quick connect snaps into place. |
| 11.2. | Pull the elbow outward in order to ensure proper connection. |
