Removal Procedure
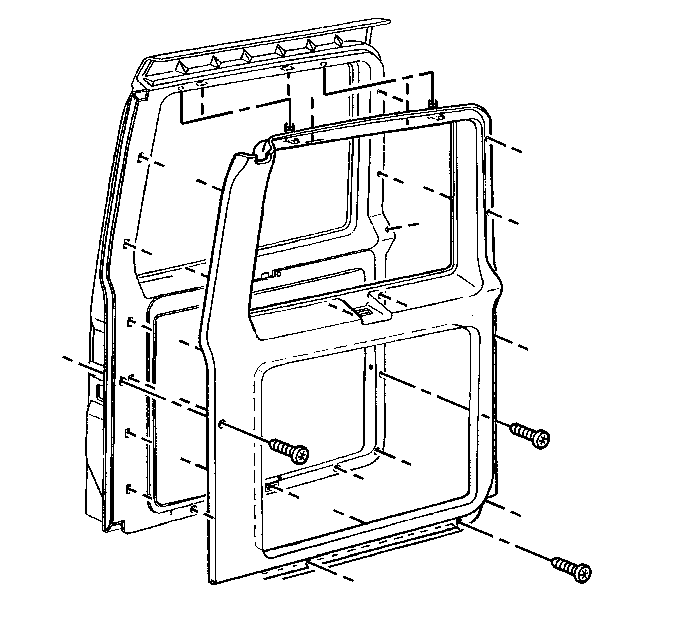
- Remove the swing-out window latch. Refer to Swing Out Window Replacement in Stationary Windows.
- Remove the screws that retain the right molding on the sides and the bottom.
- Remove the screws that retain the left molding on the sides and the bottom.
- Remove the molding from the door in the area of the retainers.
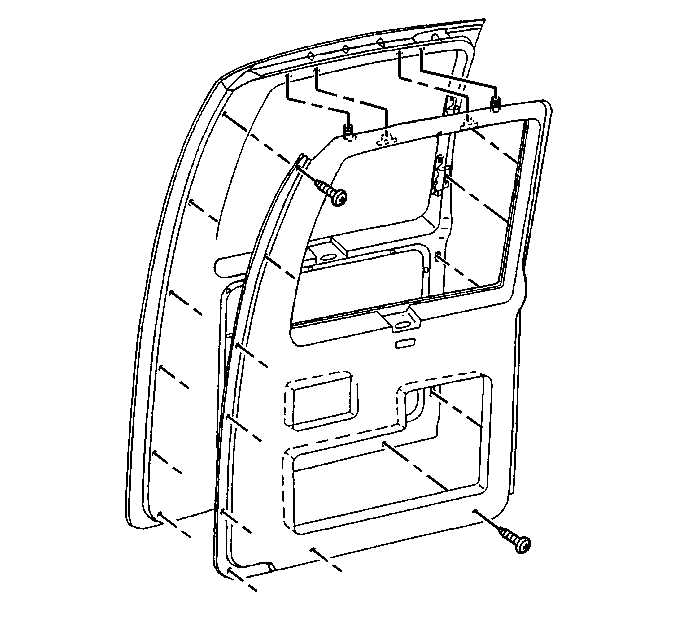
There are two retainers on top, one in the center of the panel, and six around the outside edge.
Installation Procedure
- Install the left molding to the door:
- Install the right molding to the door:
- Install the screws that retain the panel to the door.
- Install the swing-out window latch. Refer to Swing Out Window Replacement in Stationary Windows.
- Ensure that the weatherstrip fits into the corner and matches the corner of the radius of the body flange.
- Ensure that the weatherstrip is seated completely onto the flange in all areas, resulting in a smooth, vinyl trim around the entire door opening.
- Ensure that there is no distortion or excessive spreading of the carrier as a result of hitting the carrier improperly with the rubber mallet.
- Lubricate the weatherstrip with GM Weatherstrip Silicone Lubricant P/N 12345579 or equivalent.
| 1.1. | Place the retainers into the holes. |
| 1.2. | Press on the panel at the retainer locations until the retainers are fully seated. |
| 2.1. | Place the retainers into the holes. |
| 2.2. | Press on the panel at the retainer locations until the retainers are fully seated. |
Notice: Use the correct fastener in the correct location. Replacement fasteners must be the correct part number for that application. Fasteners requiring replacement or fasteners requiring the use of thread locking compound or sealant are identified in the service procedure. Do not use paints, lubricants, or corrosion inhibitors on fasteners or fastener joint surfaces unless specified. These coatings affect fastener torque and joint clamping force and may damage the fastener. Use the correct tightening sequence and specifications when installing fasteners in order to avoid damage to parts and systems.
Tighten
Tighten the screws that retain the panel to the door to 2 N·m
(18 lb in).
Important: When using the rubber mallet, the weatherstrip must be hit square to the flange. Otherwise, an undesirable spreading of the carrier will occur, resulting in reduced retention.
