For 1990-2009 cars only
Removal Procedure
- Disable the SIR system. Refer to SIR Disabling and Enabling.
- Disconnect the battery ground cable. Refer to Battery Negative Cable Disconnection and Connection.
- Remove the console assembly. Refer to Console Replacement.
- Remove the radio. Refer to Radio Replacement.
- Remove the closeout/insulator panels. Refer to Instrument Panel Insulator Panel Replacement - Right Side and to Instrument Panel Insulator Panel Replacement - Left Side.
- Remove the instrument panel (I/P) compartment. Refer to Instrument Panel Compartment Replacement.
- Remove the I/P compartment trim bezel. Refer to Instrument Panel Compartment Trim Bezel Replacement.
- Remove the knee bolster trim panel. Refer to Driver Knee Bolster Panel Replacement.
- Remove the left knee bolster bracket. Refer to Driver Knee Bolster Bracket Replacement.
- Remove the right and the left I/P trim panels. Refer to Instrument Panel Trim Panel Replacement - Left Side and to Instrument Panel Trim Panel Replacement - Right Side.
- Remove the right and the left hinge pillar trim. Refer to Body Hinge Pillar Trim Panel Replacement.
- Remove the windshield side garnish moldings. Refer to Windshield Side Garnish Molding Replacement.
- Remove the right and the left I/P end caps. Pull outward to disengage the caps from the I/P.
- Remove the I/P trim pad. Refer to Instrument Panel Trim Pad Replacement.
- Remove the I/P cluster (IPC). Refer to Instrument Cluster Replacement.
- Remove the speakers from the I/P. Refer to Radio Front Speaker Replacement.
- Remove the sensing and diagnostic module (SDM) and the YAW sensors from the I/P carrier.
- Remove the global positioning system (GPS) antenna from the I/P carrier. Refer to Electronic Navigation Antenna Replacement.
- Remove the remote control door lock receiver. Refer to Remote Control Door Lock Receiver Replacement.
- Remove the steering wheel from the steering column. Refer to Steering Wheel Replacement.
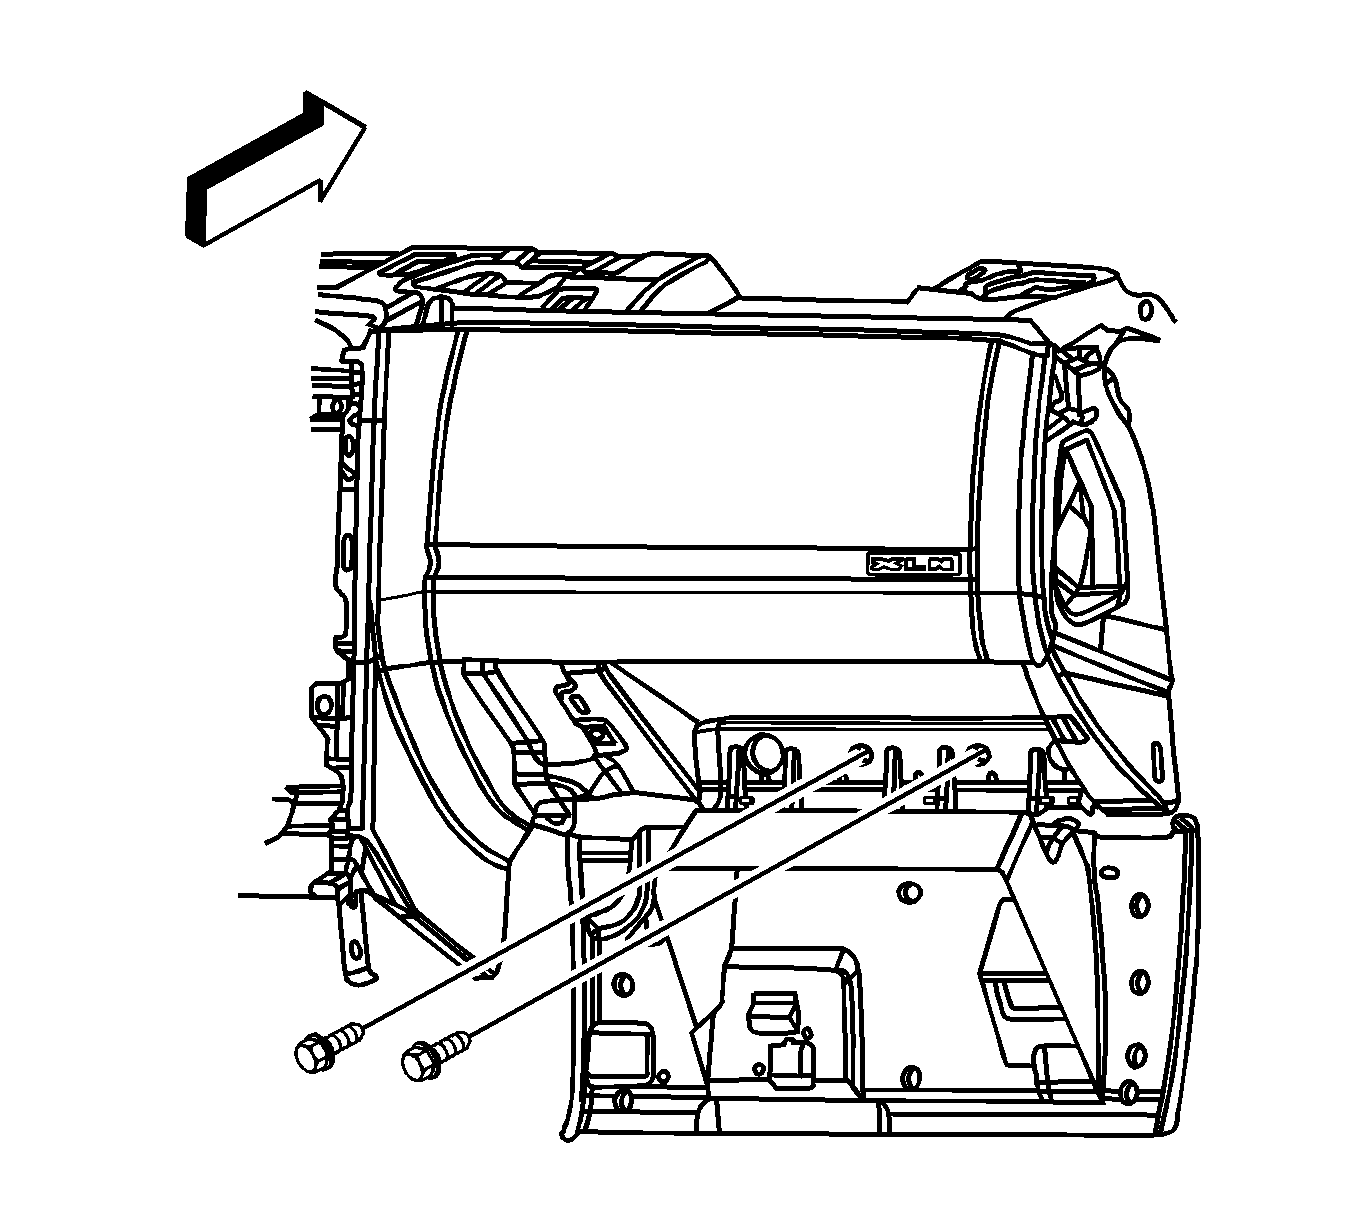
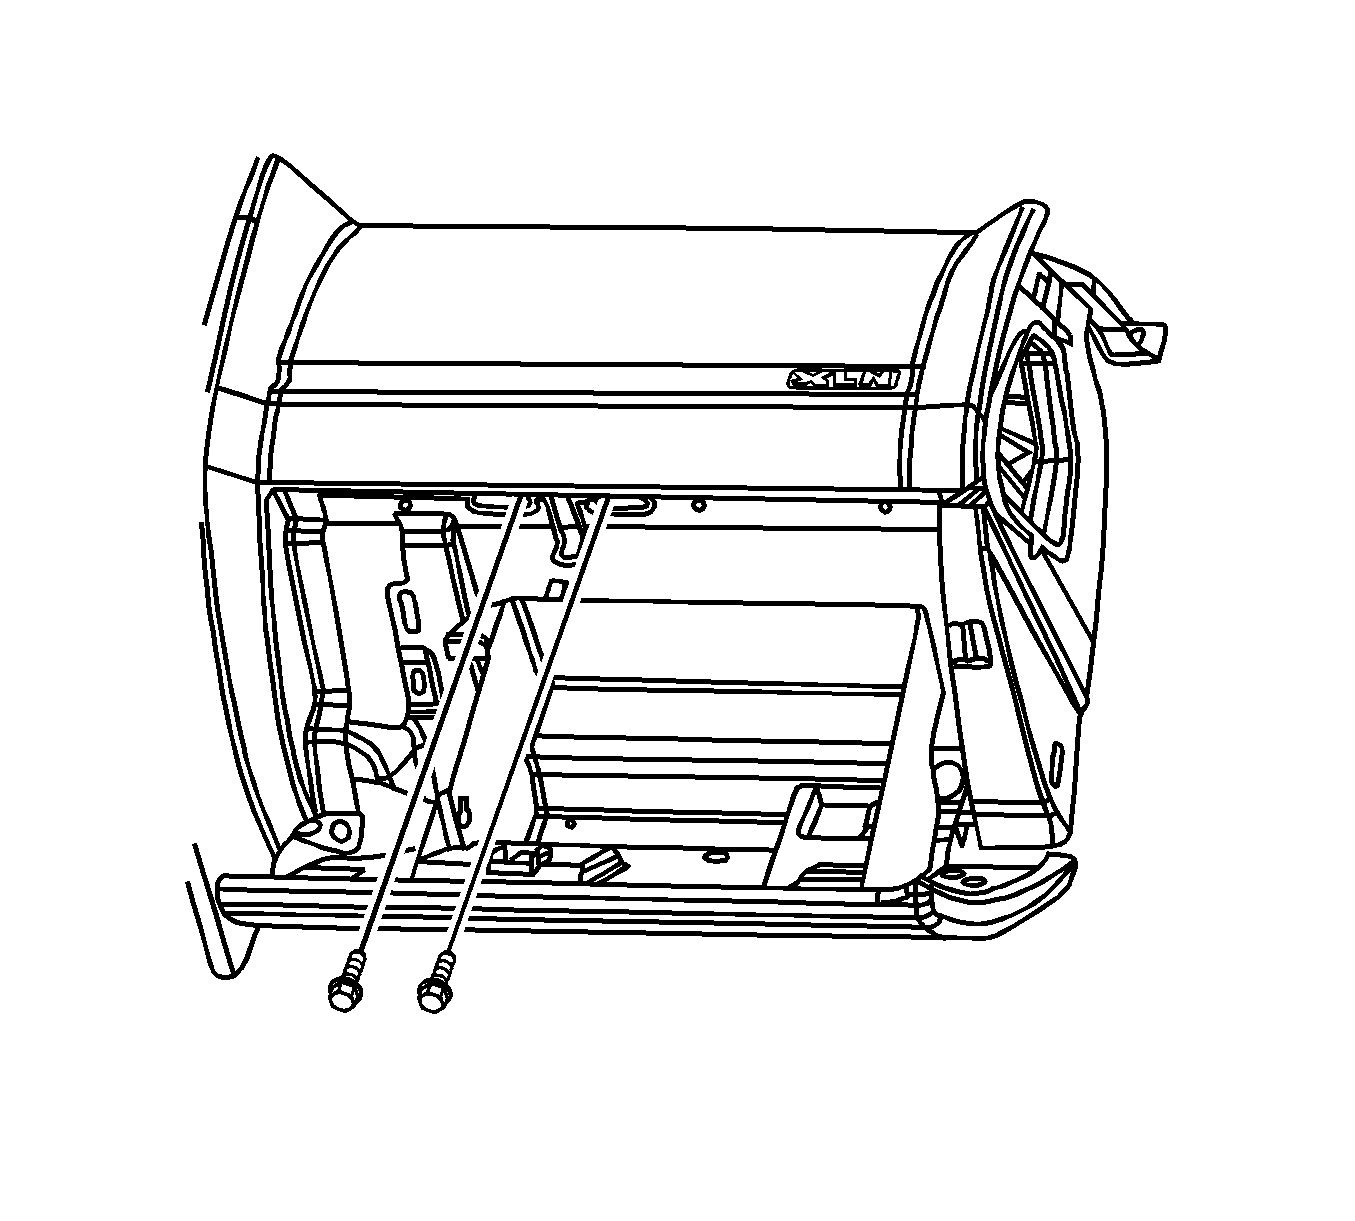
- Remove the retaining bolts and nuts from the I/P carrier.
- Remove the retaining bolts from the lower beam behind the I/P compartment door.
- Remove the I/P compartment striker from the I/P carrier.
- Remove the I/P carrier from the mounting and slowly route all of the wiring from the I/P carrier.
- Remove the I/P carrier from the vehicle.
Warning: Refer to SIR Warning in the Preface section.
Warning: Refer to Battery Disconnect Warning in the Preface section.

Installation Procedure
- Position the I/P carrier to the lower and the upper I/P beams.
- Route the I/P wiring harness.
- Install the retaining bolts and nuts to the I/P carrier and tighten to 10 N·m (89 lb in).
- Install the I/P compartment striker and tighten to 1.9 N·m (17 lb in).
- Install the I/P retaining bolt at the lower beam behind the I/P compartment door and tighten to 10 N·m (89 lb in).
- Install the steering wheel to the steering column. Refer to Steering Wheel Replacement.
- Install the remote control door lock receiver. Refer to Remote Control Door Lock Receiver Replacement.
- Install the GPS antenna to the I/P carrier. Refer to Electronic Navigation Antenna Replacement.
- Install the SDM and the YAW sensors to the I/P carrier.
- Install the speakers to the I/P. Refer to Radio Front Speaker Replacement.
- Install the I/P cluster (IPC). Refer to Instrument Cluster Replacement.
- Install the I/P trim pad. Refer to Instrument Panel Trim Pad Replacement.
- Install the right and the left I/P end caps.
- Install the windshield side garnish moldings. Refer to Windshield Side Garnish Molding Replacement.
- Install the right and the left hinge pillar trim. Refer to Body Hinge Pillar Trim Panel Replacement.
- Install the right and the left I/P trim panels. Refer to Instrument Panel Trim Panel Replacement - Left Side and to Instrument Panel Trim Panel Replacement - Right Side.
- Install the left knee bolster bracket. Refer to Driver Knee Bolster Bracket Replacement.
- Install the I/P compartment trim bezel. Refer to Instrument Panel Compartment Trim Bezel Replacement.
- Install the I/P compartment. Refer to Instrument Panel Compartment Replacement.
- Install the closeout/insulator panels. Refer to Instrument Panel Insulator Panel Replacement - Right Side and to Instrument Panel Insulator Panel Replacement - Left Side.
- Install the radio. Refer to Radio Replacement.
- Install the console assembly. Refer to Console Replacement.
- Connect the battery ground cable. Refer to Battery Negative Cable Disconnection and Connection.
- Enable the SIR system. Refer to SIR Disabling and Enabling.
Caution: Refer to Fastener Caution in the Preface section.
Warning: Refer to Battery Disconnect Warning in the Preface section.
Warning: Refer to SIR Warning in the Preface section.
