For 1990-2009 cars only
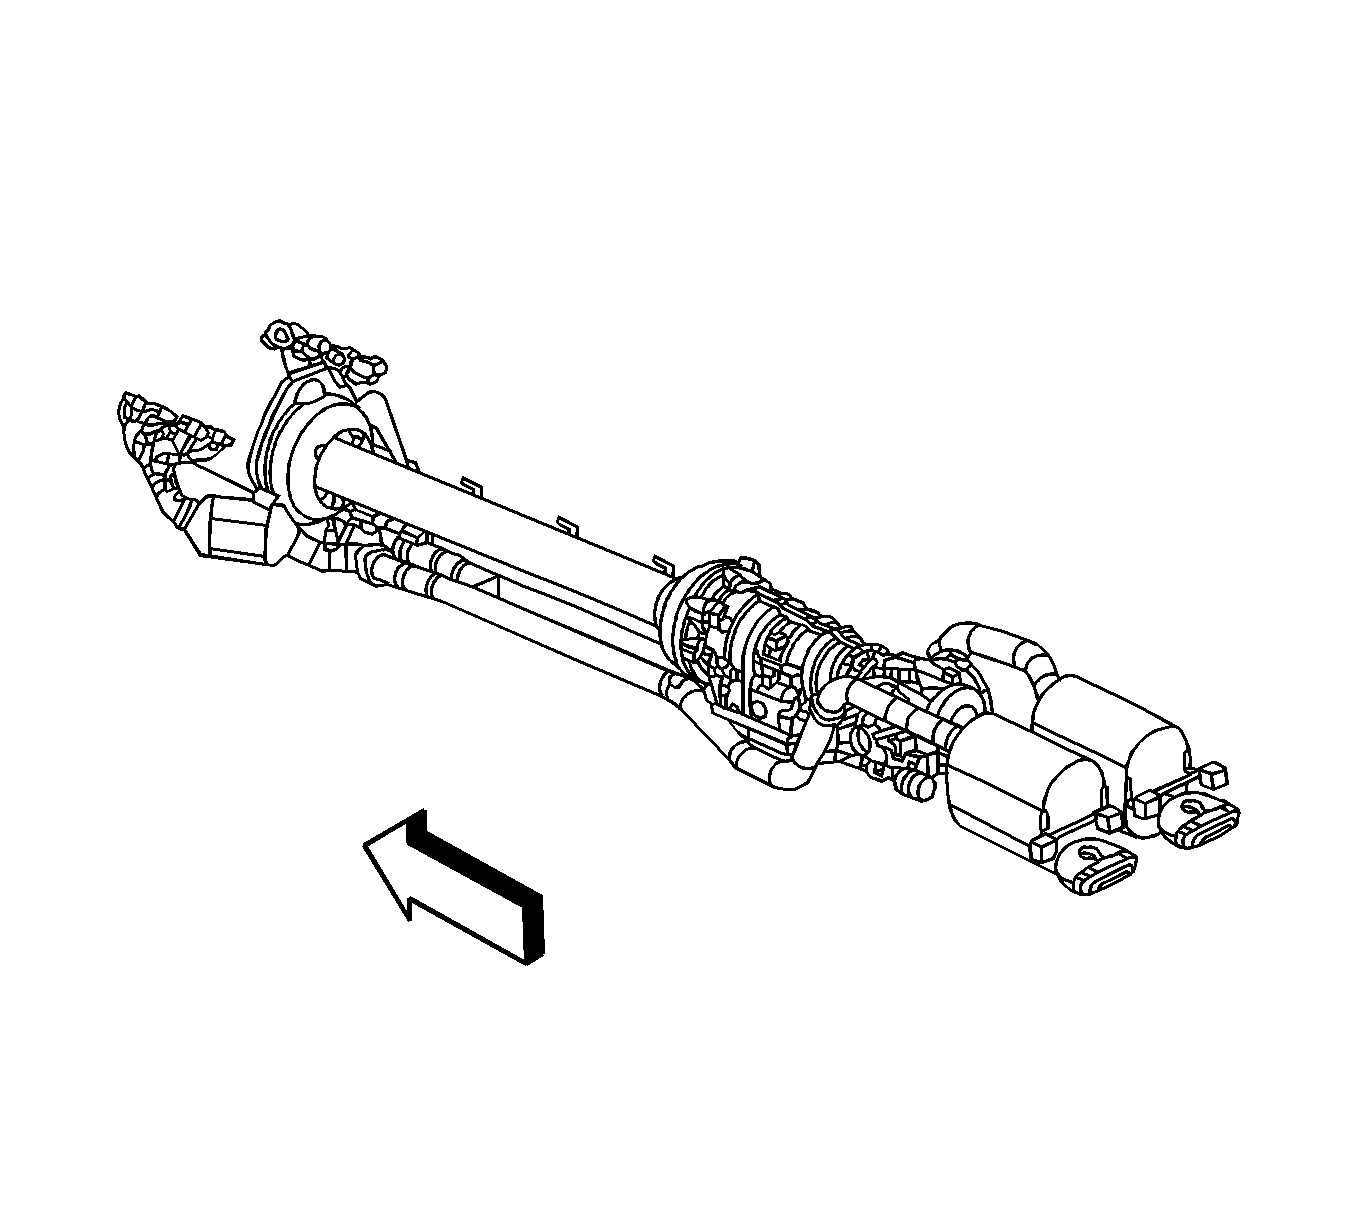
Removal Procedure
Warning: Refer to Exhaust Service Warning in the Preface section.
Warning: Refer to Protective Goggles and Glove Warning in the Preface section.
- Raise and suitably support the vehicle. Refer to Lifting and Jacking the Vehicle.
- Install adjustable jack stands under the front and rear of the intermediate pipe.
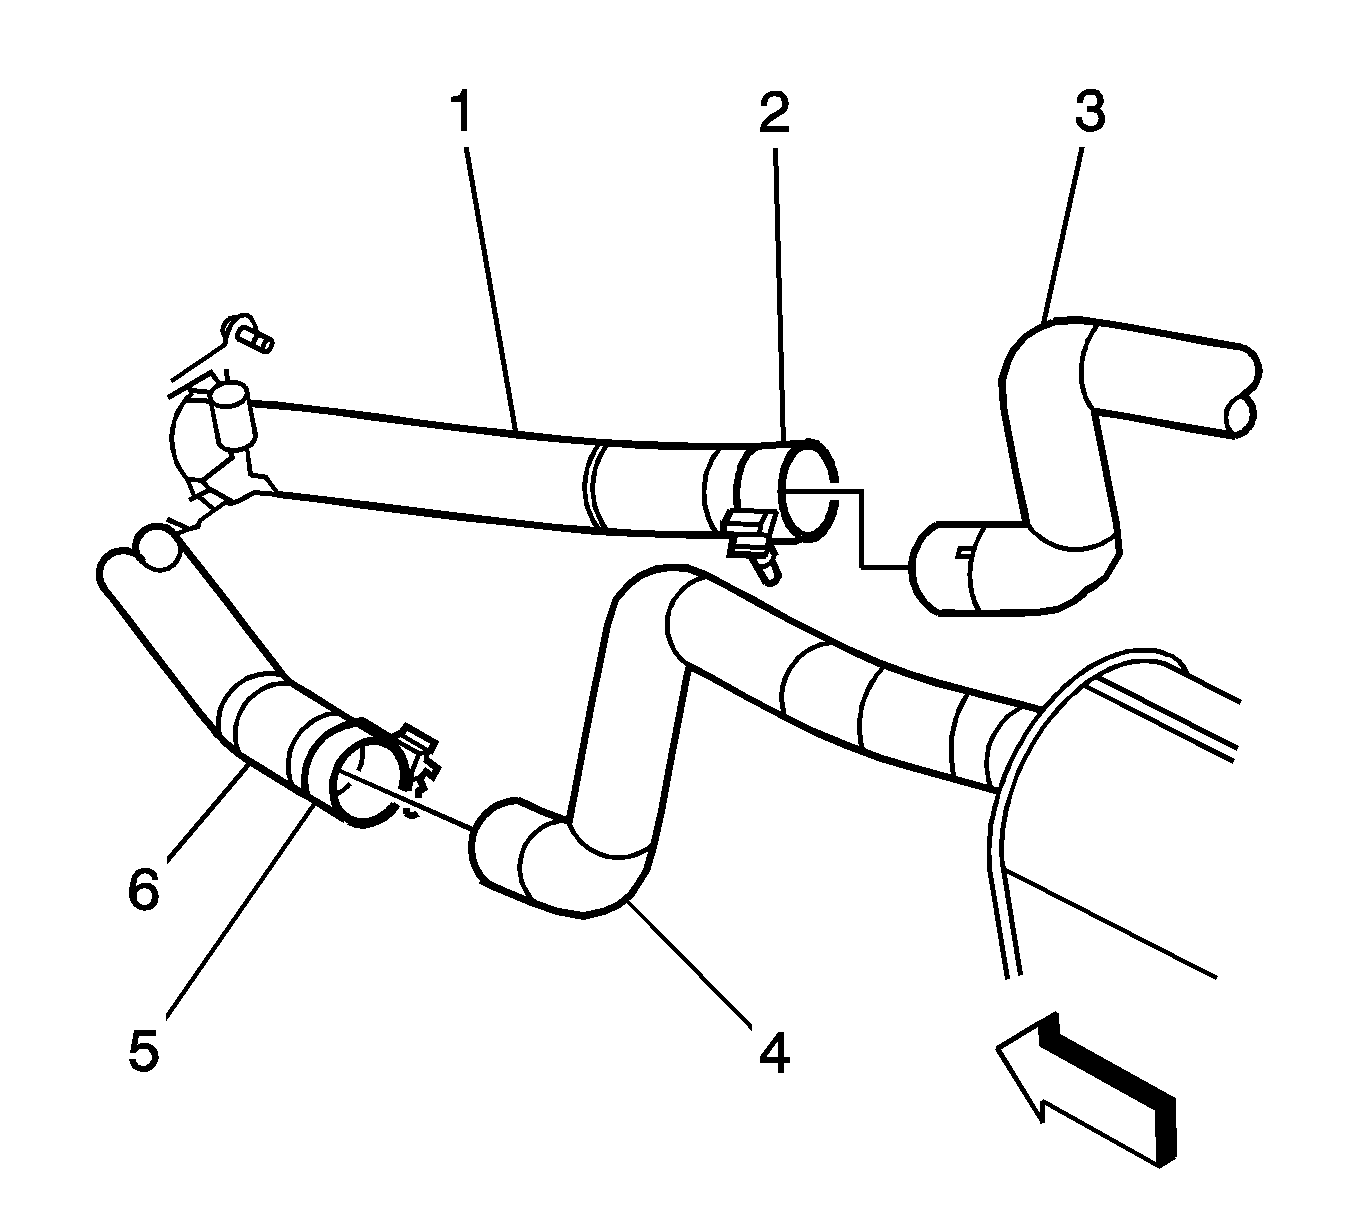
- Loosen the exhaust muffler band clamps (2, 5).
- Separate the left and right tailpipe/muffler assemblies from the intermediate pipe.
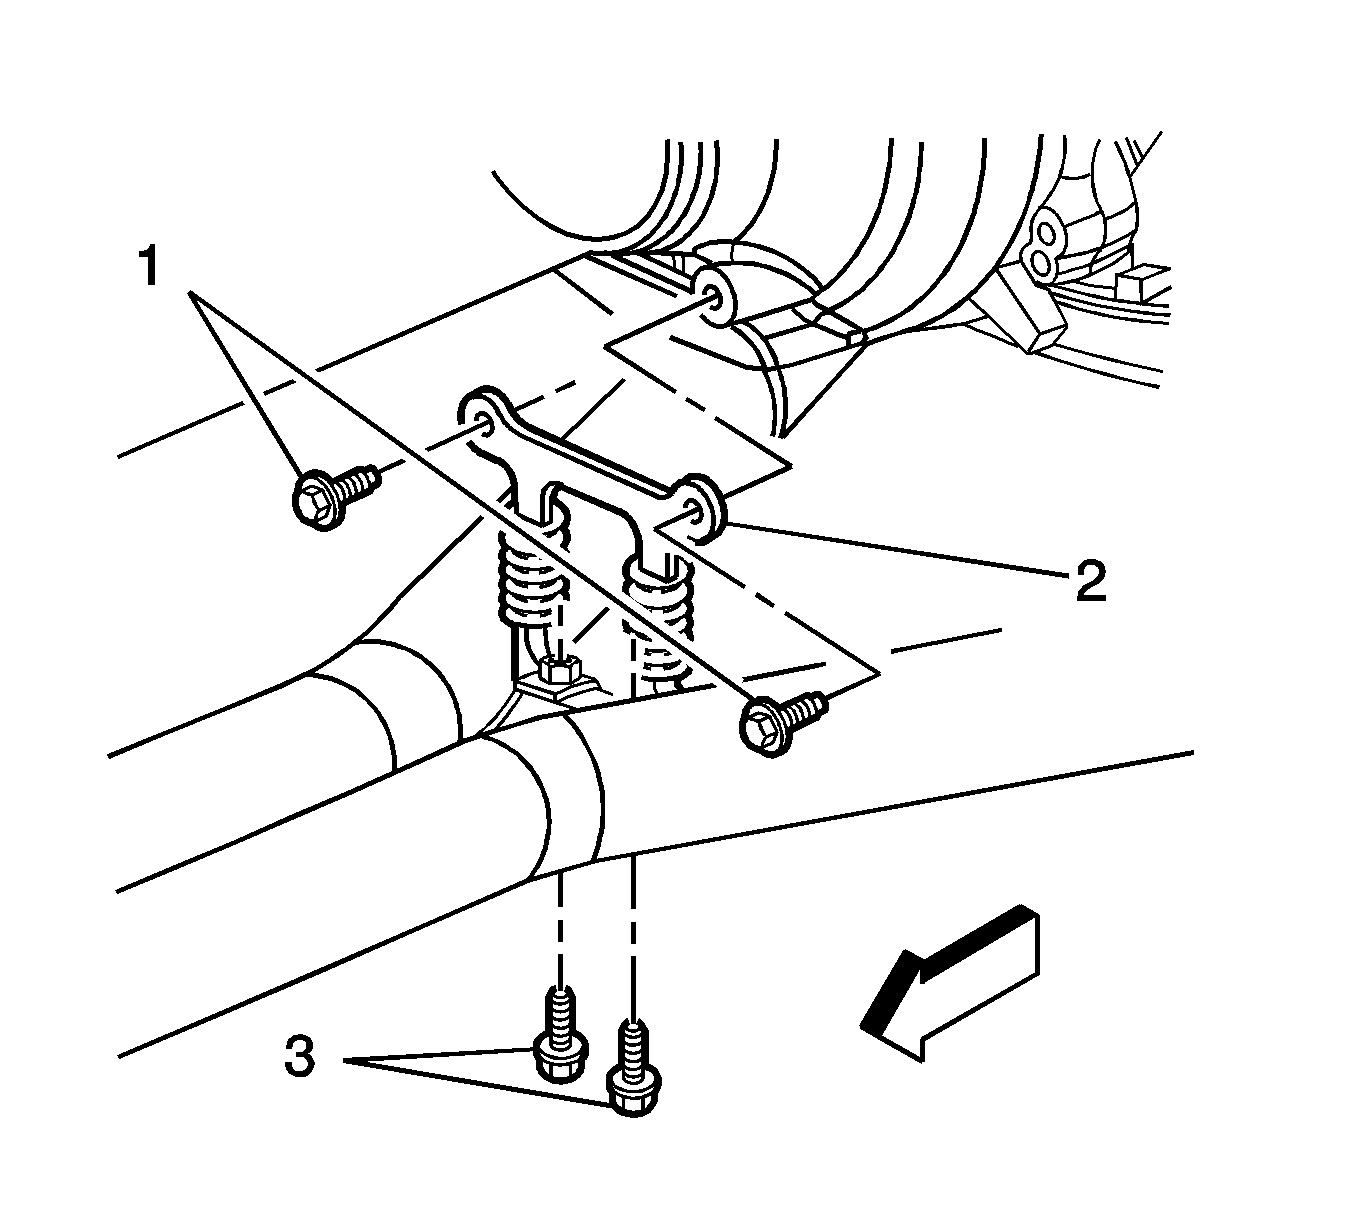
- Remove the exhaust pipe hanger lower bolts (3).
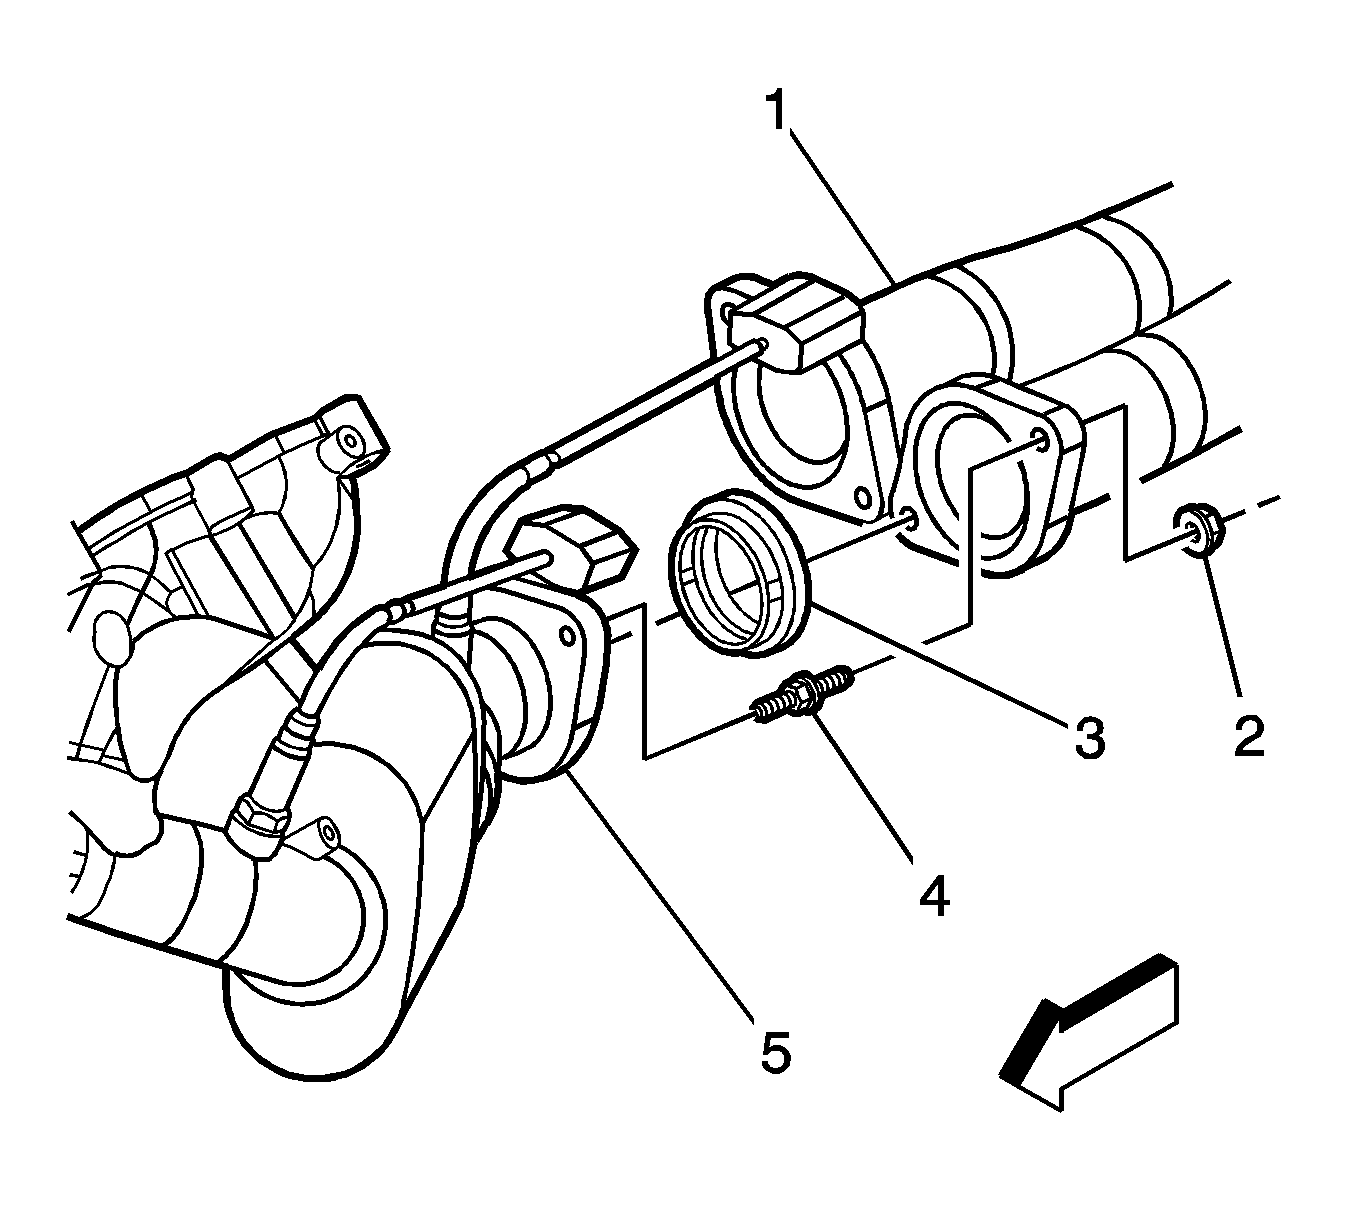
- Remove the exhaust manifold nuts (2).
- Lower the jack stands.
- Remove the intermediate pipe from the jack stands.
Installation Procedure
Caution: Refer to Exhaust System Inspection Caution in the Preface section.
Note: If reinstalling the original intermediate pipe, the tail pipe/muffler band clips must be replaced. Mark the position of the band clips on the intermediate exhaust pipe. Remove the band clips by grinding the welds. Install new band clips on the intermediate pipe. Position the new band clips using the alignment mark created previously.
- Install the intermediate pipe to the jack stands.
- Raise the jack stands in order to position the intermediate pipe.
- Install ALL exhaust clamps and bolts until snug to ensure correct alignment of the intermediate pipe.
- Remove the adjustable jack stands.
- Tighten the exhaust muffler clamps (2, 5) bolts to 44 N·m (32 lb ft).
- Tighten the exhaust manifold nuts (2) to 20 N·m (15 lb ft).
- Tighten the exhaust pipe hanger lower bolts (3) to 50 N·m (37 lb ft).
- Lower the vehicle.
Caution: Refer to Fastener Caution in the Preface section.
