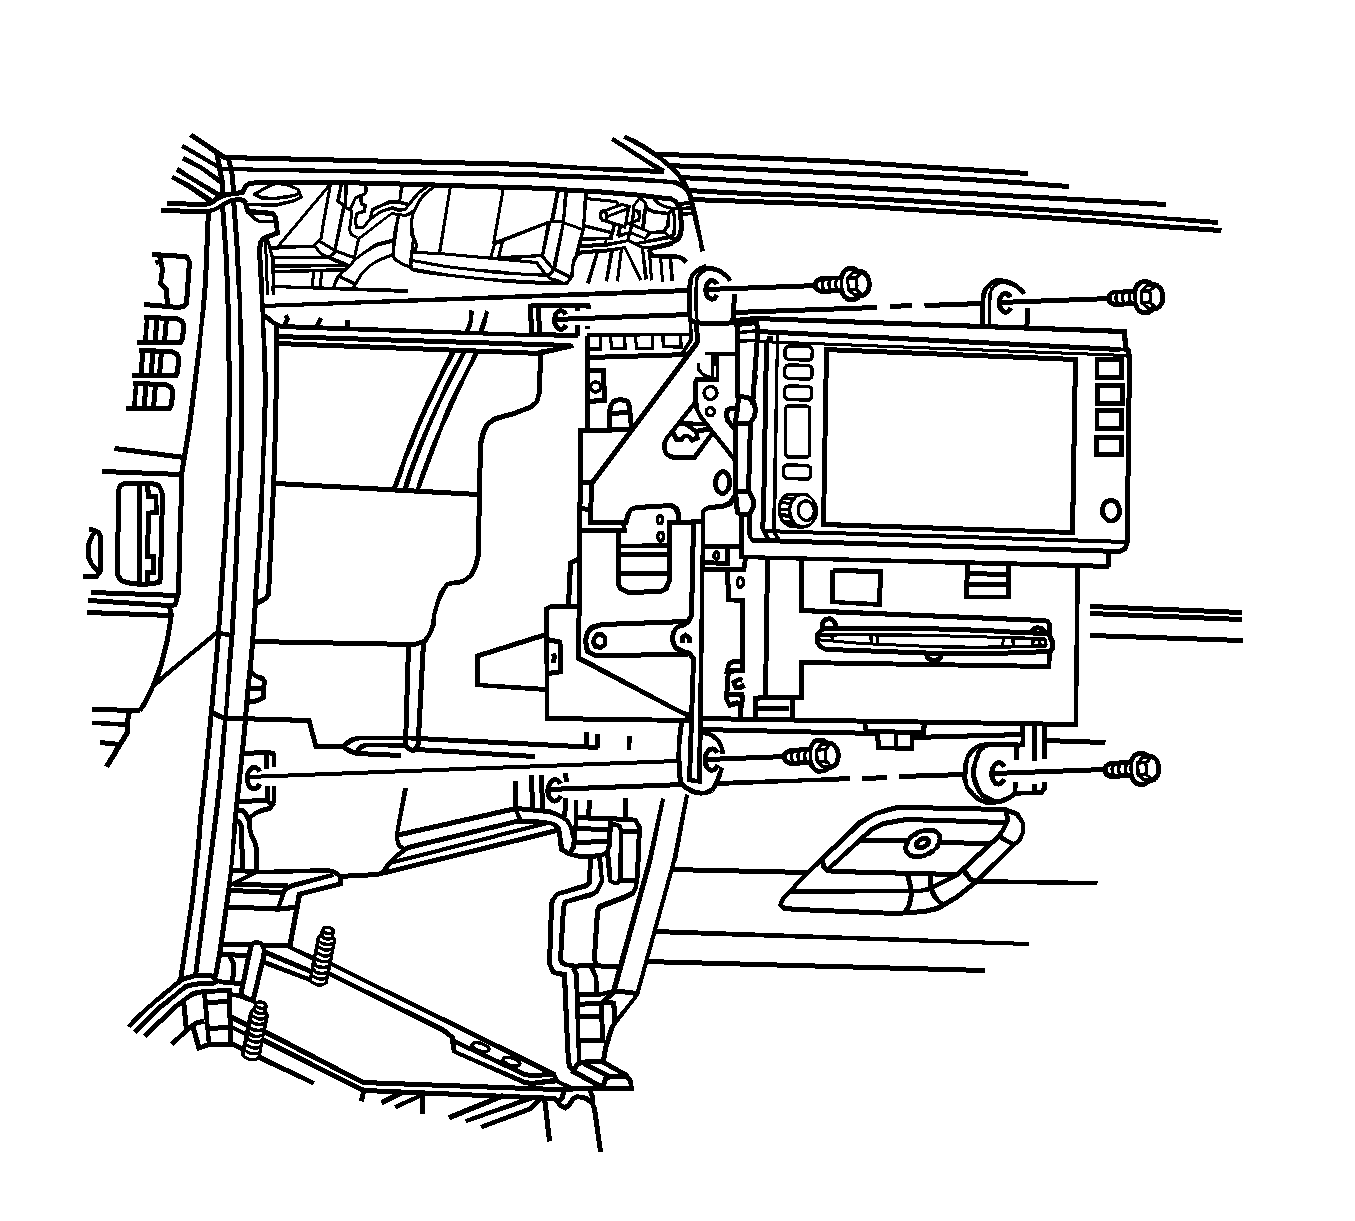
For 1990-2009 cars only
Removal Procedure
- Remove the cover from the instrument panel (I/P) electrical center.
- Remove the RDO/CD MiniFuse® #5 from the I/P electrical center.
- Remove the I/P accessory trim plate. Refer to Instrument Panel Accessory Trim Plate Replacement.
- Remove the screws retaining the radio control to the I/P center support bracket.
- Begin to remove the radio control from the center support bracket enough to access the connectors at rear of the radio control.
- Disconnect the electrical/audio and coaxial cable connectors from the radio control.
- Remove the radio control.
- Remove the retaining bolts from the radio mounting bracket. Remove the bracket from the radio.

Installation Procedure
- Position the remote CD changer with the shipping plug in the bottom position to the radio and connect the electrical lead.
- Install the mounting bracket to the radio and secure with the retaining bolts.
- Remove the shipping plug from the bottom of the CD changer and install to the radio being returned.
- Connect the electrical/audio and coaxial cable connectors to the radio control.
- Install the radio control into position in the I/P center support bracket.
- Install the radio control retaining screws.
- Install the I/P accessory trim plate. Refer to Instrument Panel Accessory Trim Plate Replacement.
- Install the RDO/CD MiniFuse® #5 to the I/P electrical center.
- Install the cover to the I/P electrical center.
- Refer to Control Module References for programming and setup information.
Notice: Refer to Fastener Notice in the Preface section.
Tighten
Tighten the bolts to 2.5 N·m (22 lb in).
Align the radio control locator tab into the center support bracket locator hole.

Tighten
Tighten the screws to 2.5 N·m (22 lb in).
