Removal Procedure
- Disable the SIR system. Refer to SIR Disabling and Enabling .
- Disconnect the negative battery cable.
- Remove the console. Refer to Console Replacement .
- Remove the instrument panel (I/P) carrier. Refer to Instrument Panel Carrier Replacement .
- Tilt the steering wheel to the lowest position.
- Remove the upper and lower nuts retaining the steering column to the steering column bracket. Carefully rest the steering column on the I/P lower support beam. Refer to Steering Column Replacement .
- Remove the left windshield side garnish molding. Refer to Windshield Side Garnish Molding Replacement .
- Remove the accelerator pedal assembly with the accelerator pedal position sensor. Refer to Accelerator Pedal Position Sensor Replacement .
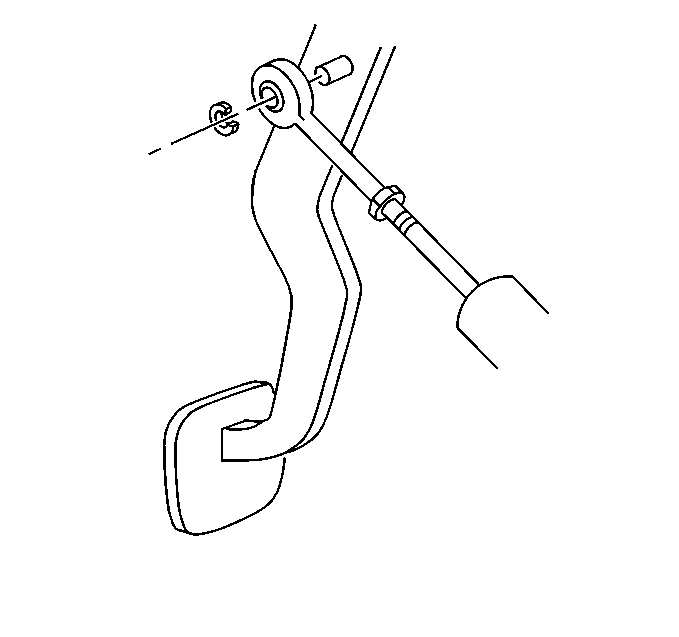
- Disconnect the brake master cylinder push rod from the brake pedal.
- Remove the brake booster mounting nuts.
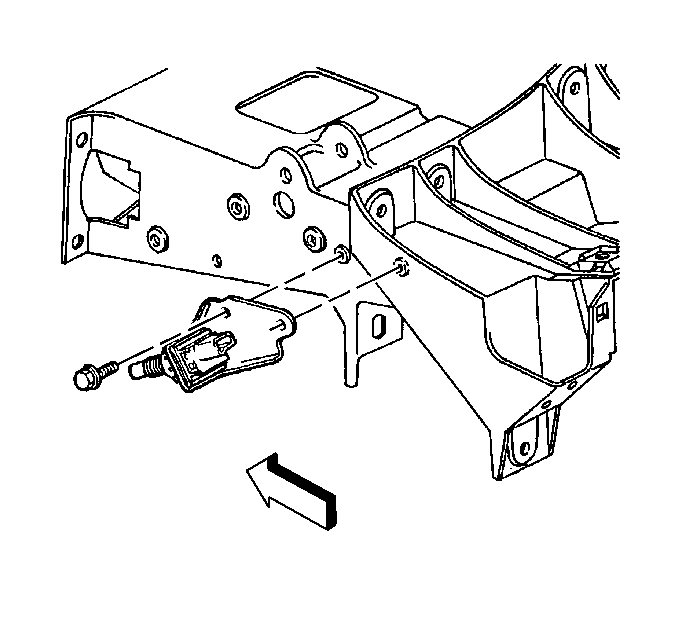
- Remove the mounting bolts from the cruise control release switch bracket.
- Reposition the cruise control release switch and the bracket.
- Disconnect the master cylinder push rod from the clutch pedal.
- Mark the location of the steering column bracket.
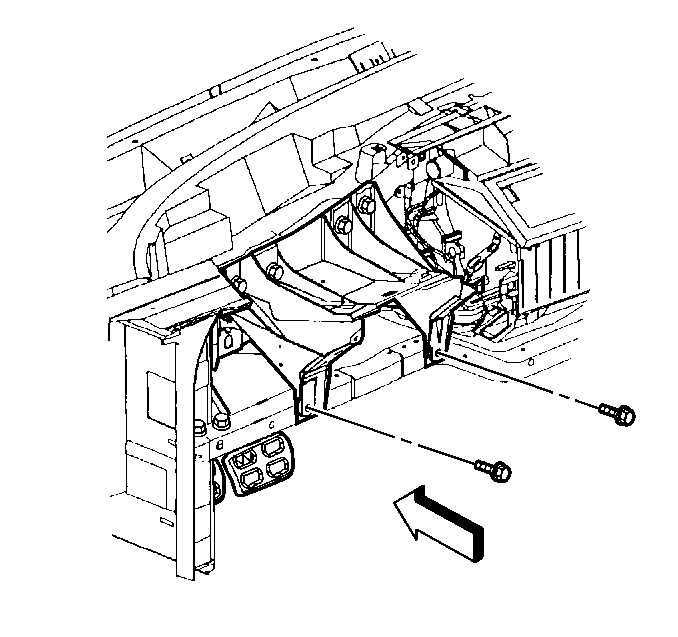
- Remove the bolts which secure the steering column bracket to the I/P lower support beam.
- Remove the bolts which secure the steering column bracket to the I/P upper support beam.
- Remove the steering column bracket.
Caution: Unless directed otherwise, the ignition and start switch must be in the OFF or LOCK position, and all electrical loads must be OFF before servicing any electrical component. Disconnect the negative battery cable to prevent an electrical spark should a tool or equipment come in contact with an exposed electrical terminal. Failure to follow these precautions may result in personal injury and/or damage to the vehicle or its components.

Important: The following step assures proper trim fit during installation.
Installation Procedure
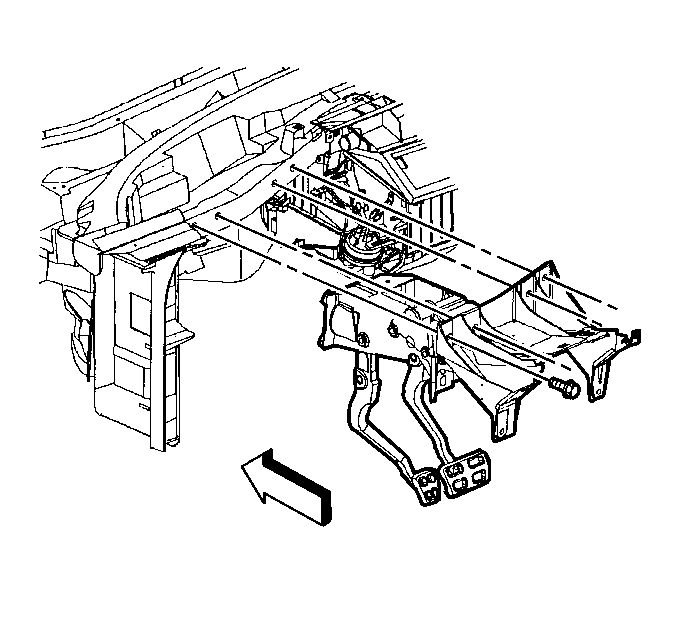
- Install the steering column bracket into position as marked prior to removal.
- Install the bolts which secure the steering column bracket to the I/P upper support beam. Do NOT tighten the bolts.
- Install the bolts which secure the steering column bracket to the I/P lower support beam.
- Connect the master cylinder push rod to the clutch pedal.
- Position the cruise control release switch and bracket to the steering column bracket.
- Install the bracket bolts to the cruise control release switch.
- Install the brake booster nuts.
- Connect the master cylinder push rod to the brake pedal.
- Install the accelerator pedal assembly with accelerator pedal position sensor. Refer to Accelerator Pedal Position Sensor Replacement .
- Install the left windshield side garnish molding. Refer to Windshield Side Garnish Molding Replacement .
- Install the steering column to the steering column bracket. Refer to Steering Column Replacement .
- Install the console. Refer to Console Replacement .
- Install the I/P carrier. Refer to Instrument Panel Carrier Replacement .
- Connect the negative battery cable and install the cable bolt.
- Enable the SIR system. Refer to SIR Disabling and Enabling .
Notice: Refer to Fastener Notice in the Preface section.
Tighten
Tighten all of the bolts to 10 N·m (89 lb in).
Tighten
Tighten the bracket bolts to 12 N·m (106 lb in).
Tighten
Tighten the nuts to 29 N·m (21 lb ft).
Tighten
Tighten the bolt to 15 N·m (11 lb ft).
