For 1990-2009 cars only
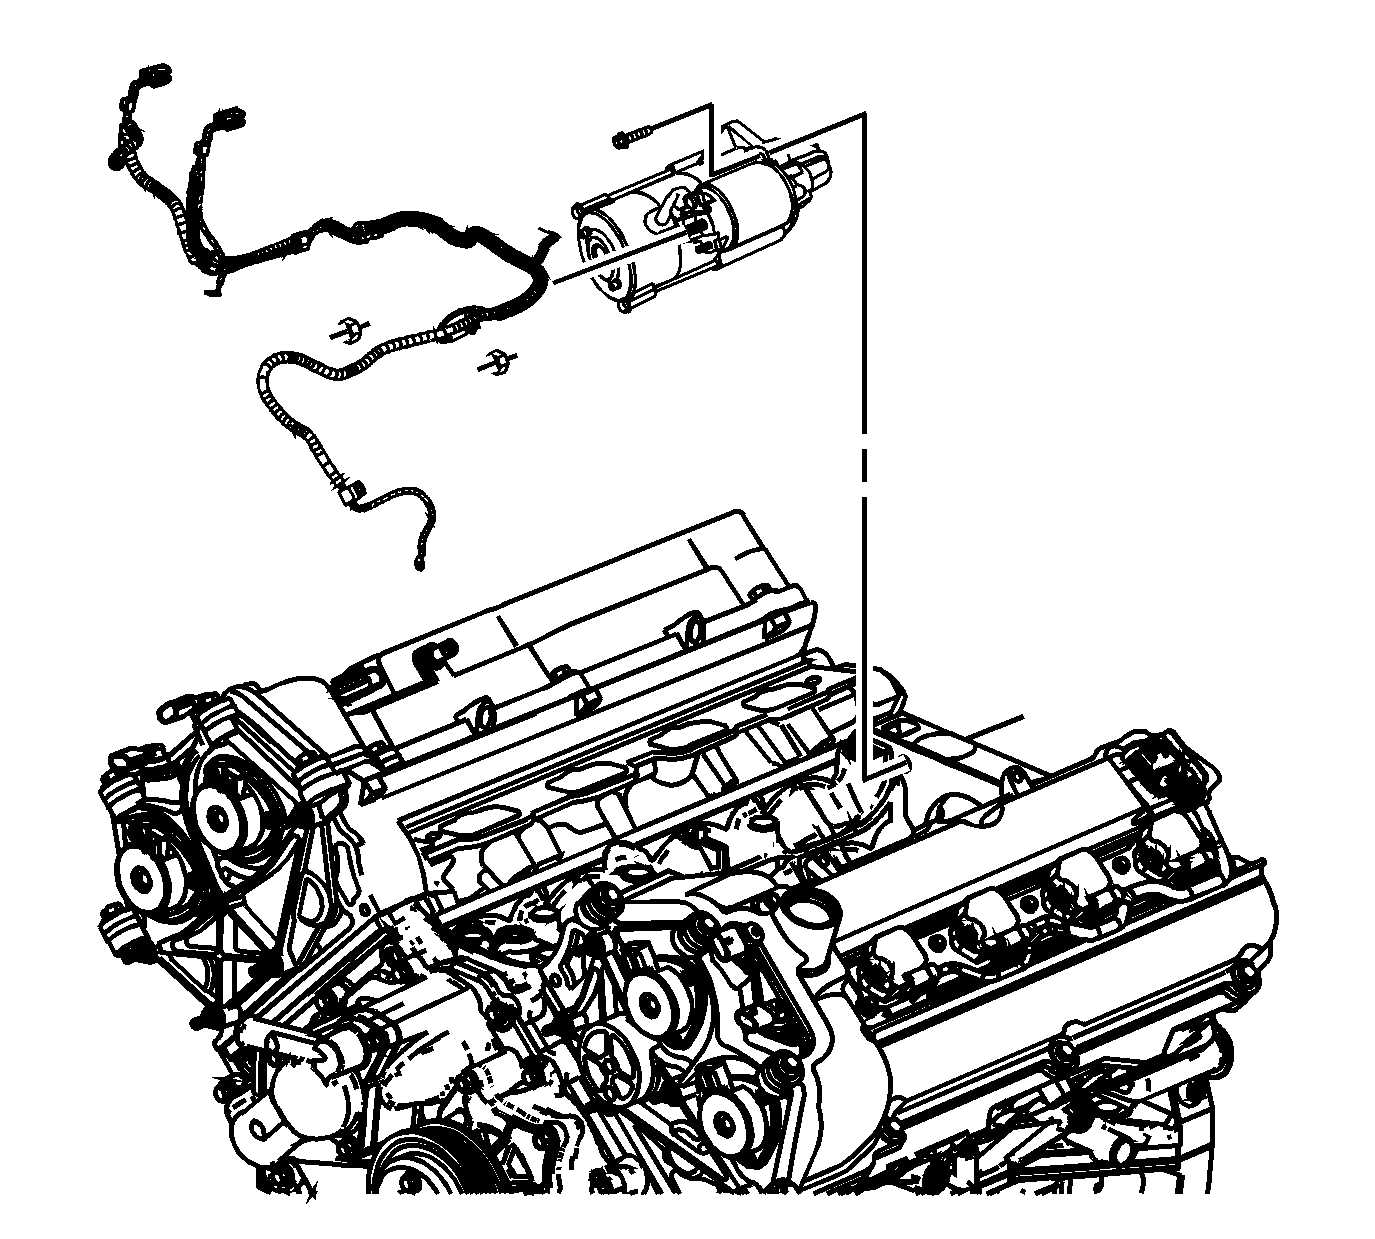
- If installing a NEW starter motor, transfer the cables from the old starter motor.
- Install the positive battery cable to the starter motor stud.
- Install the starter motor stud nut.
- Install the solenoid wiring harness to the starter solenoid stud.
- Install the starter solenoid stud nut.
- Position the starter motor in position.
- Install the starter motor bolts.
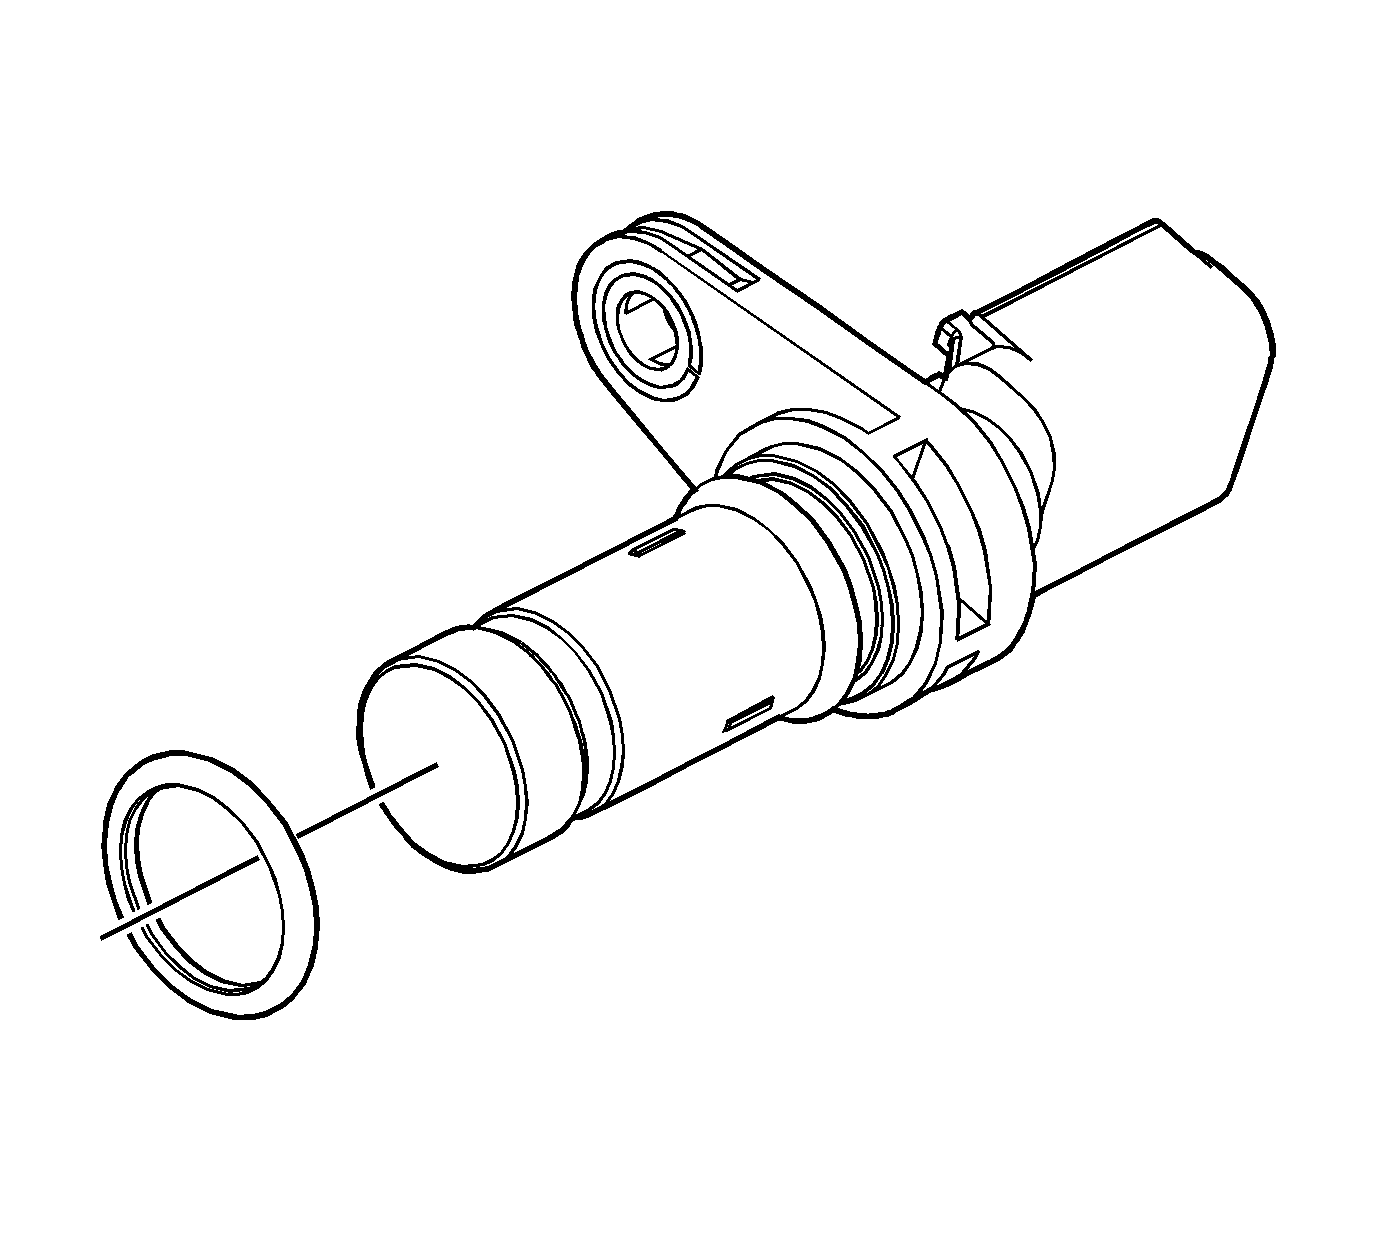
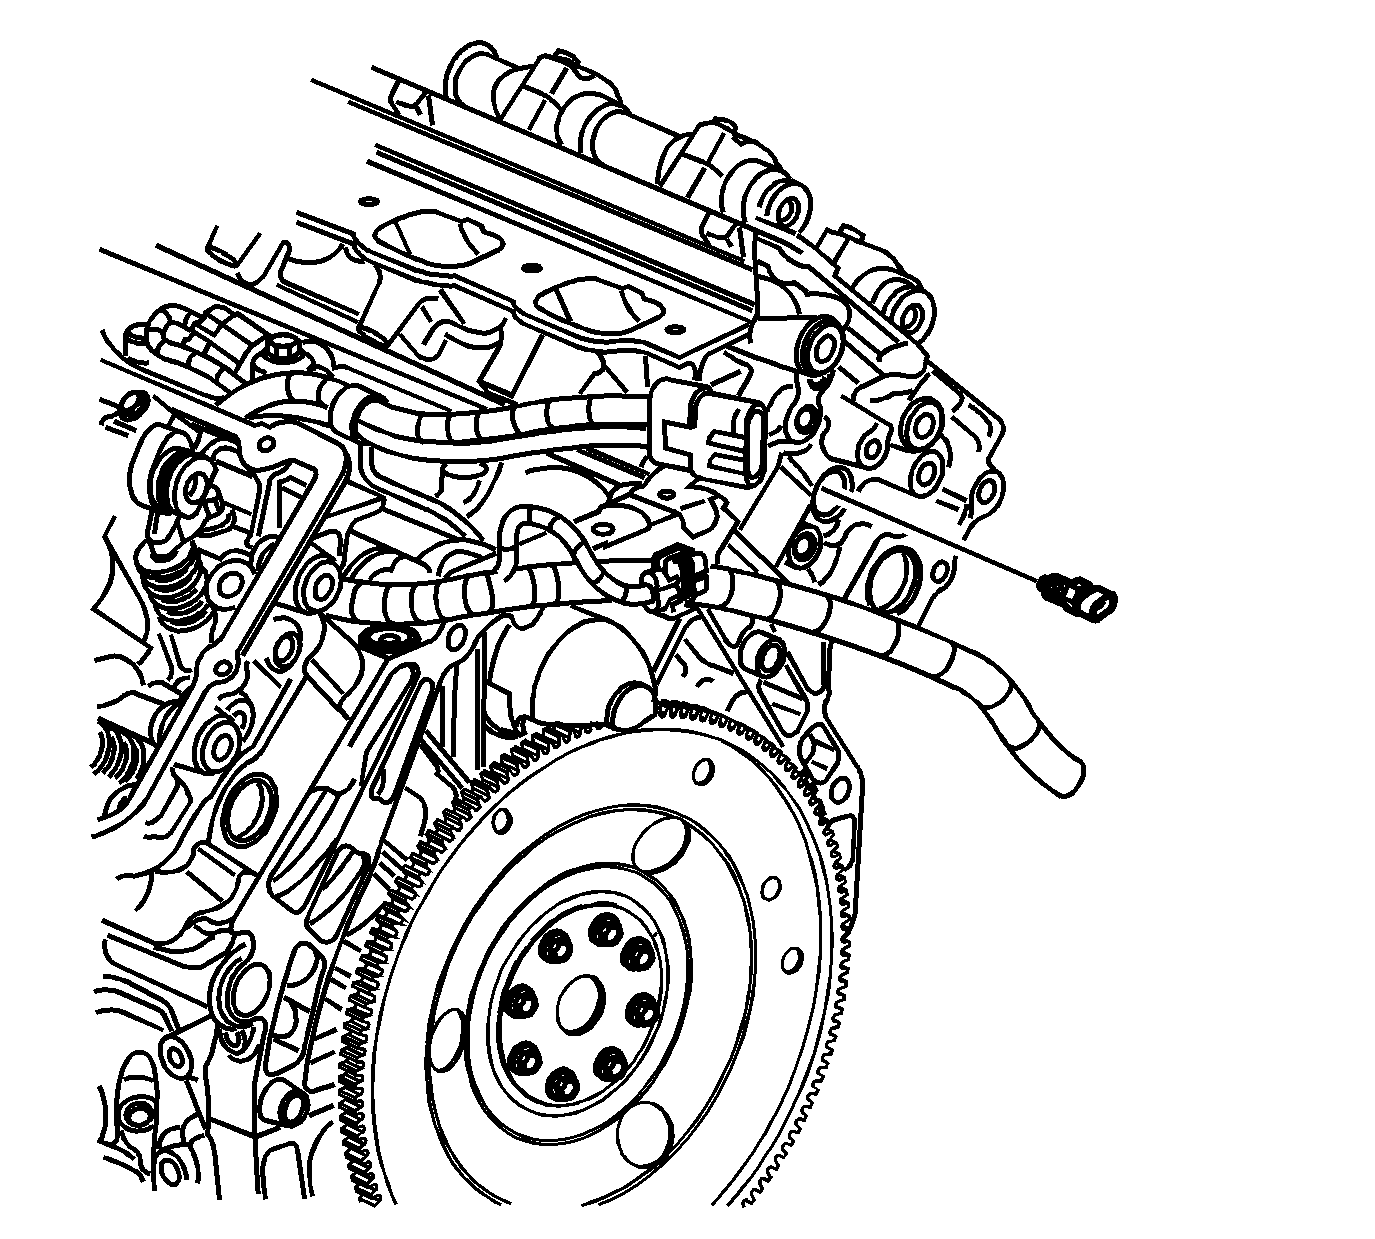
- Install a NEW O-ring on the crankshaft position sensor.
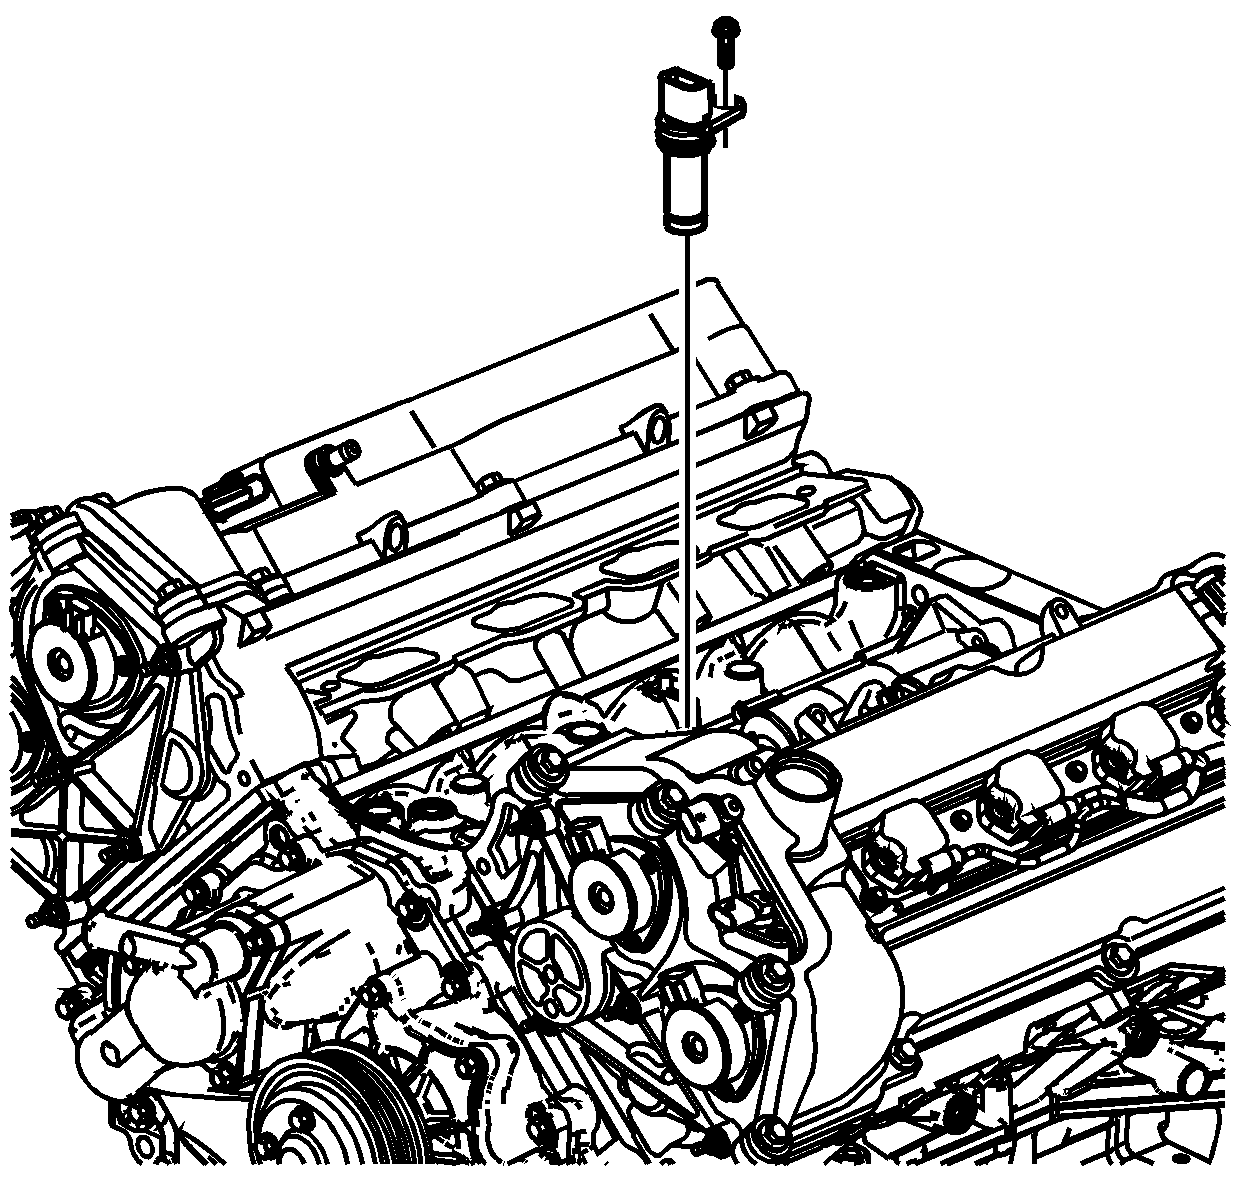
- Install the crankshaft position sensor.
- Install the crankshaft position sensor bolt.
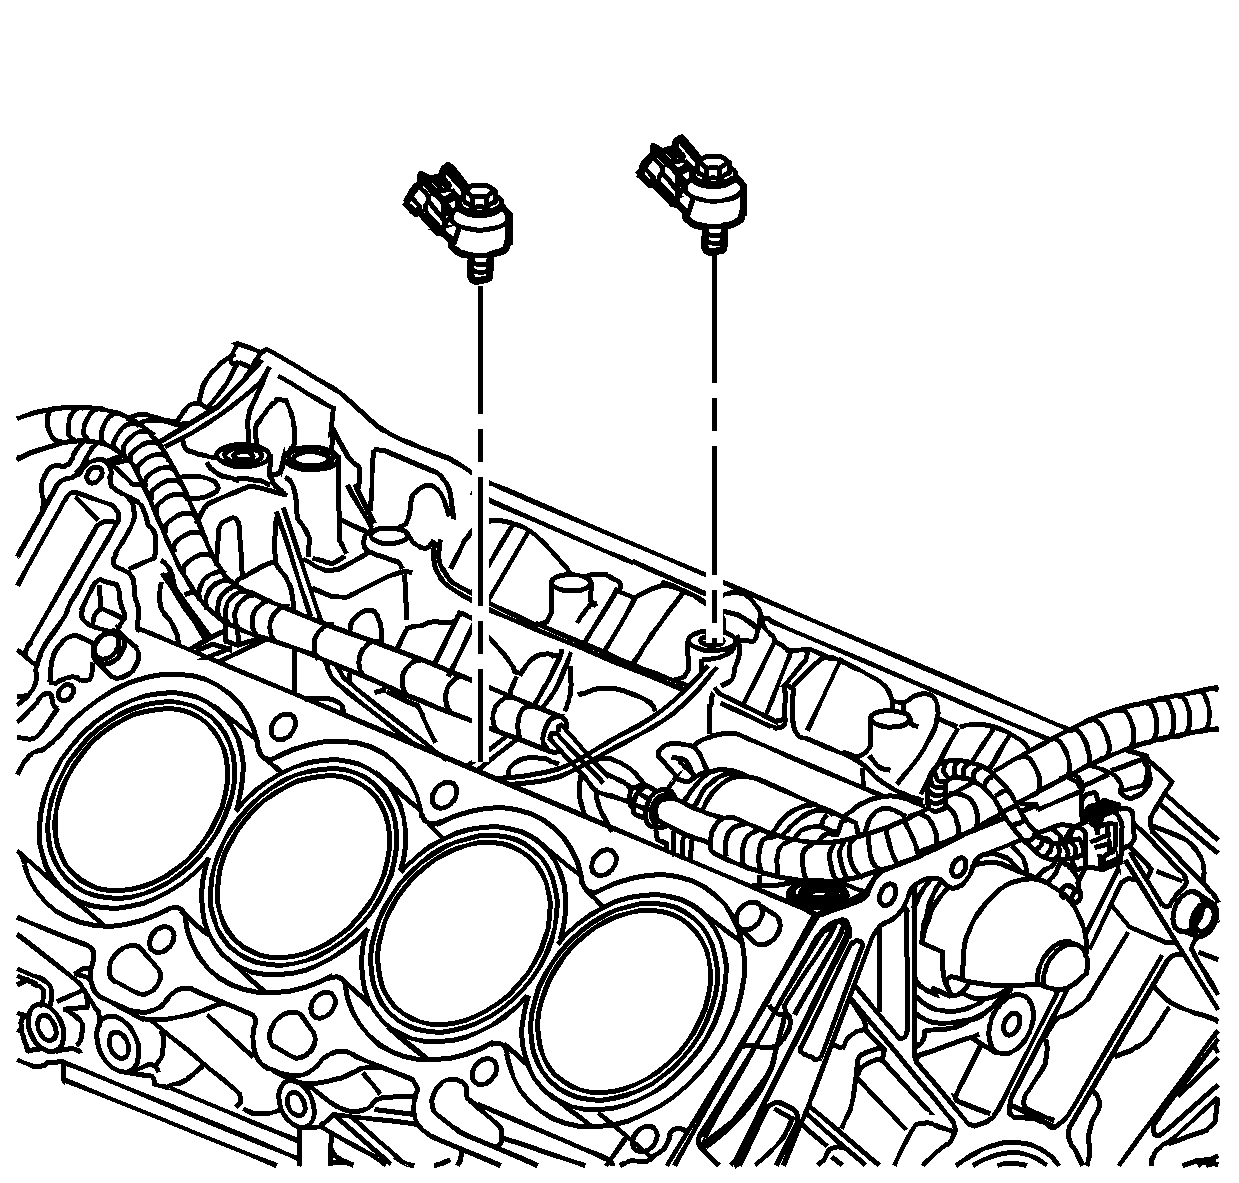
- Install the knock sensors.
- Install the knock sensor bolts.
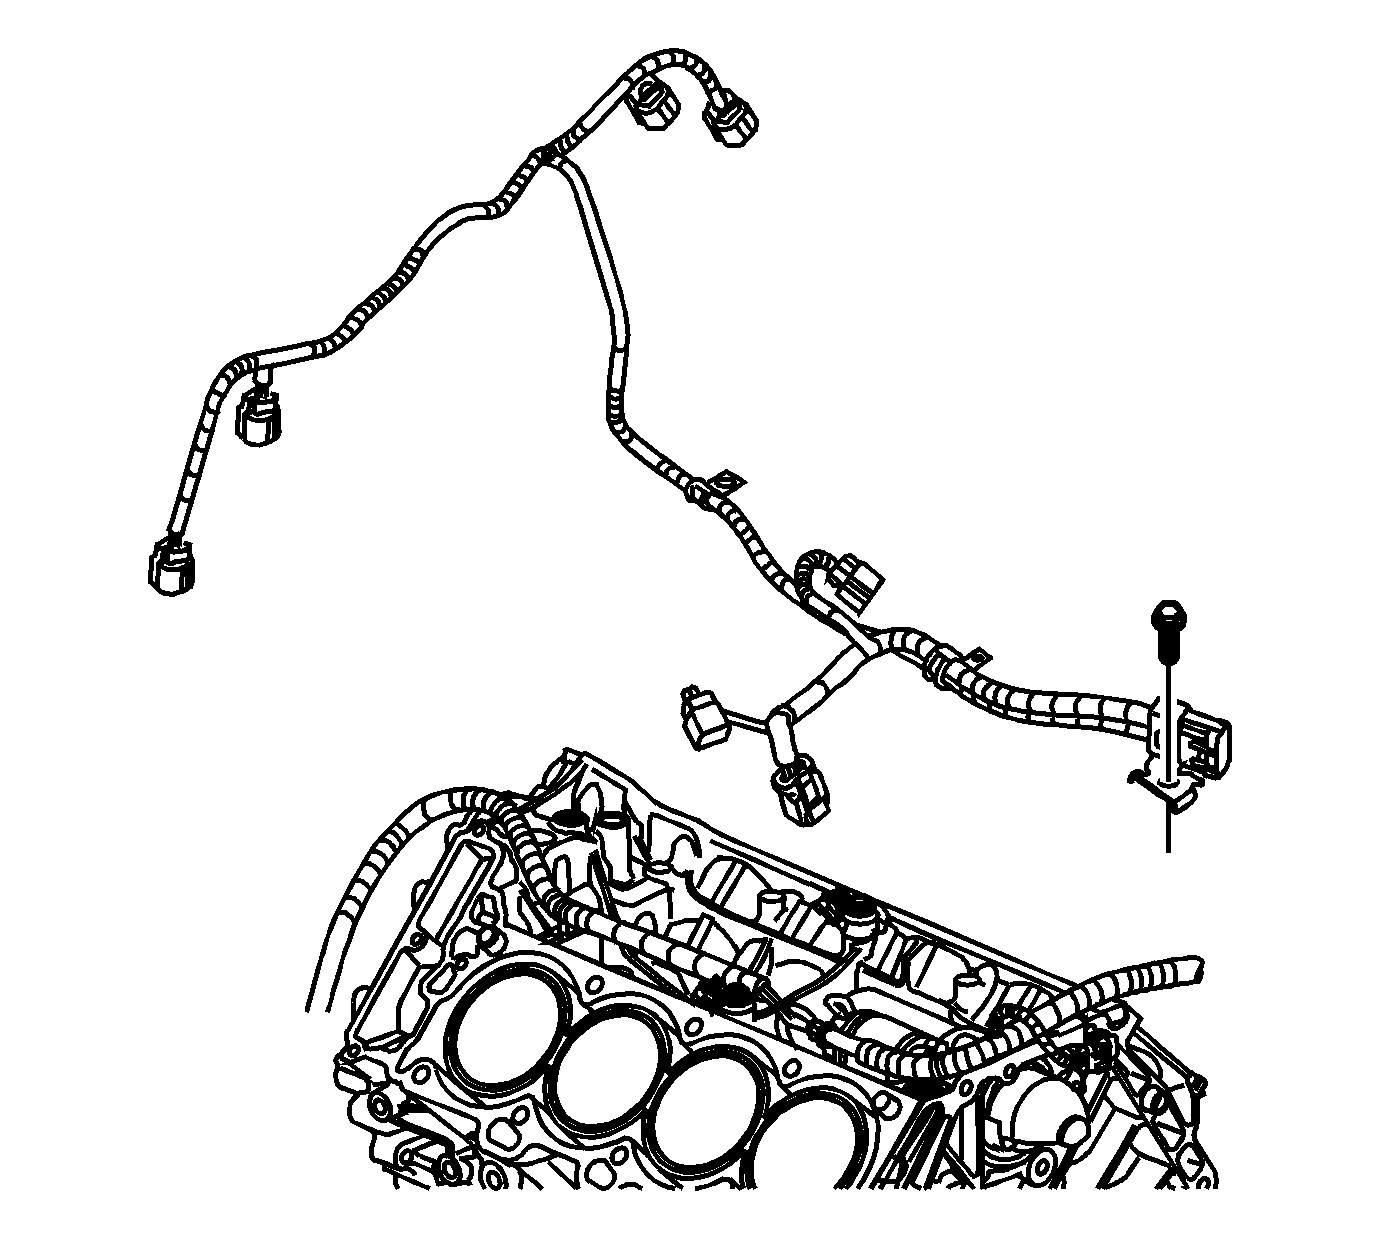
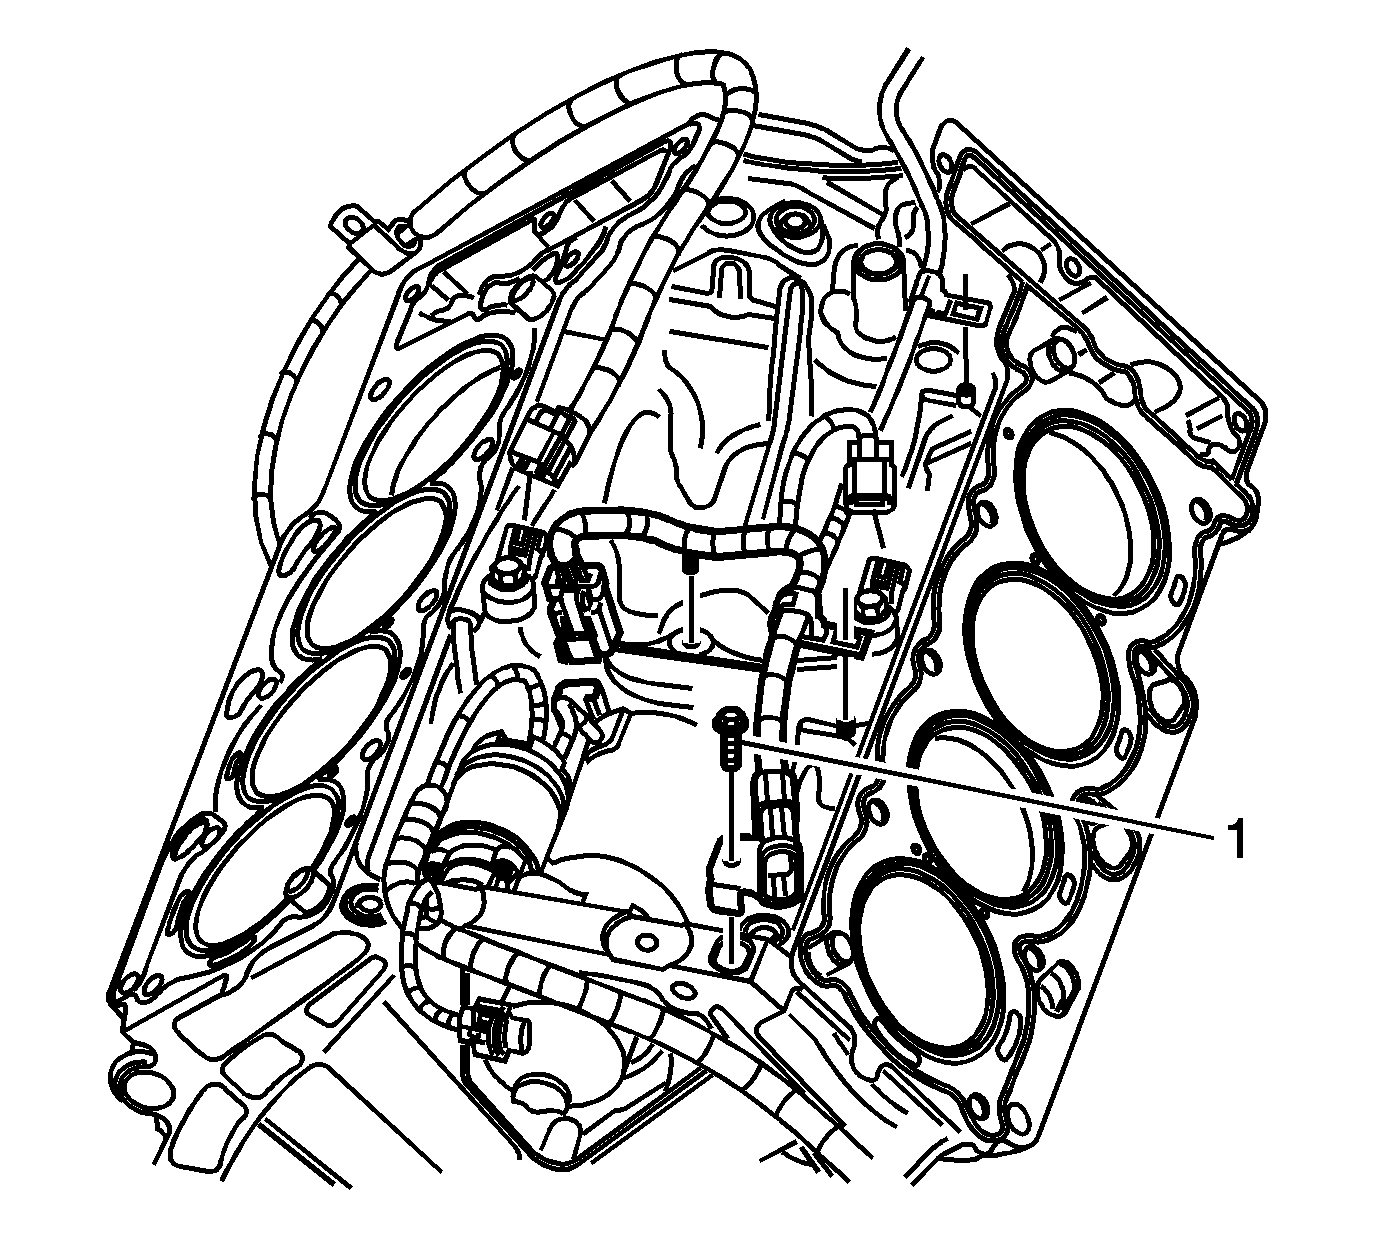
- Install the knock and crankshaft position sensor wiring harness.
- Connect the knock and crankshaft position sensor wiring harness brackets to the center, back and front of the block valley.
- Connect the knock and crankshaft position sensor wiring harness to the knock sensors and crankshaft position sensor.
- Install the knock and crankshaft position sensor wiring harness bolt (1).
- Install the ECT sensor to the right cylinder head.
Notice: Refer to Fastener Notice in the Preface section.
Tighten
Tighten the starter motor stud nut to 9.5 N·m (84 lb in).
Tighten
Tighten the starter solenoid stud nut to 3.4 N·m (30 lb in).
Tighten
Tighten the starter motor bolt to 30 N·m (22 lb ft).
Tighten
Tighten the crankshaft position sensor bolt to 10 N·m (89 lb in).
Tighten
Tighten the knock sensor bolts to 10 N·m (89 lb in).
Tighten
Tighten the knock and crankshaft position sensor wiring harness bolt to 10 N·m (89 lb in).
Tighten
Tighten the ECT sensor to 20 N·m (15 lb ft).
