For 1990-2009 cars only
Removal Procedure
- Place the folding top in the down position.
- Place a protective covering over the interior and the adjacent body panels.
- Remove the windshield garnish molding. Refer to Windshield Garnish Molding Replacement in Interior Trim.
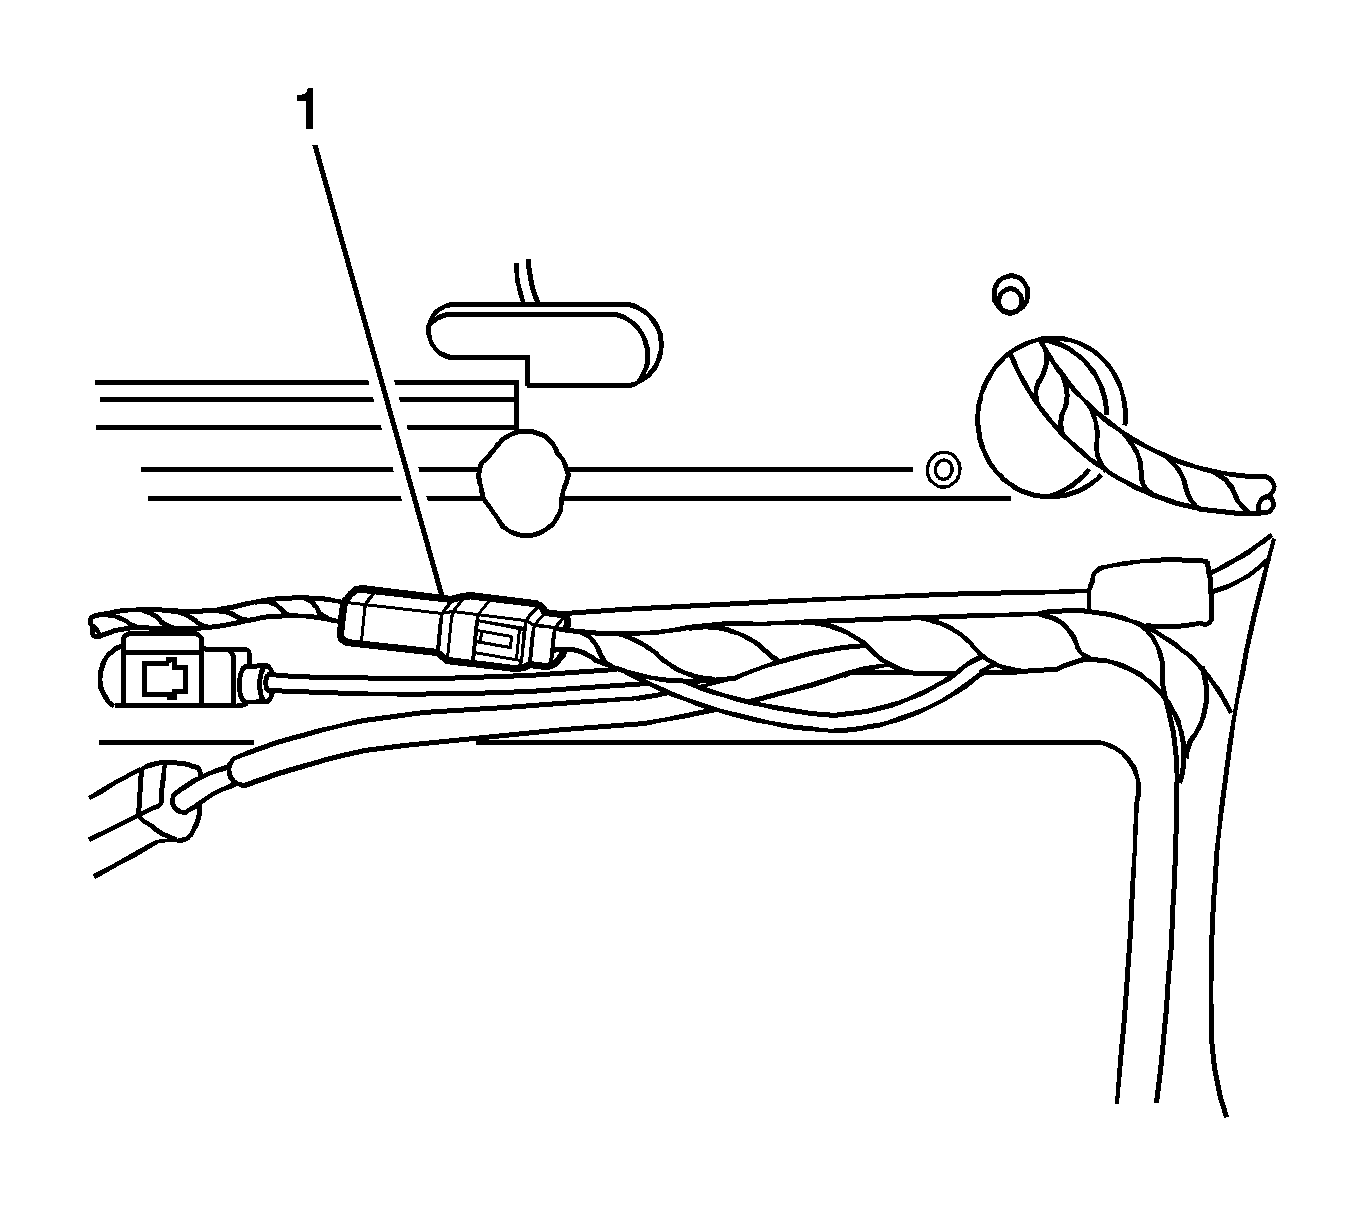
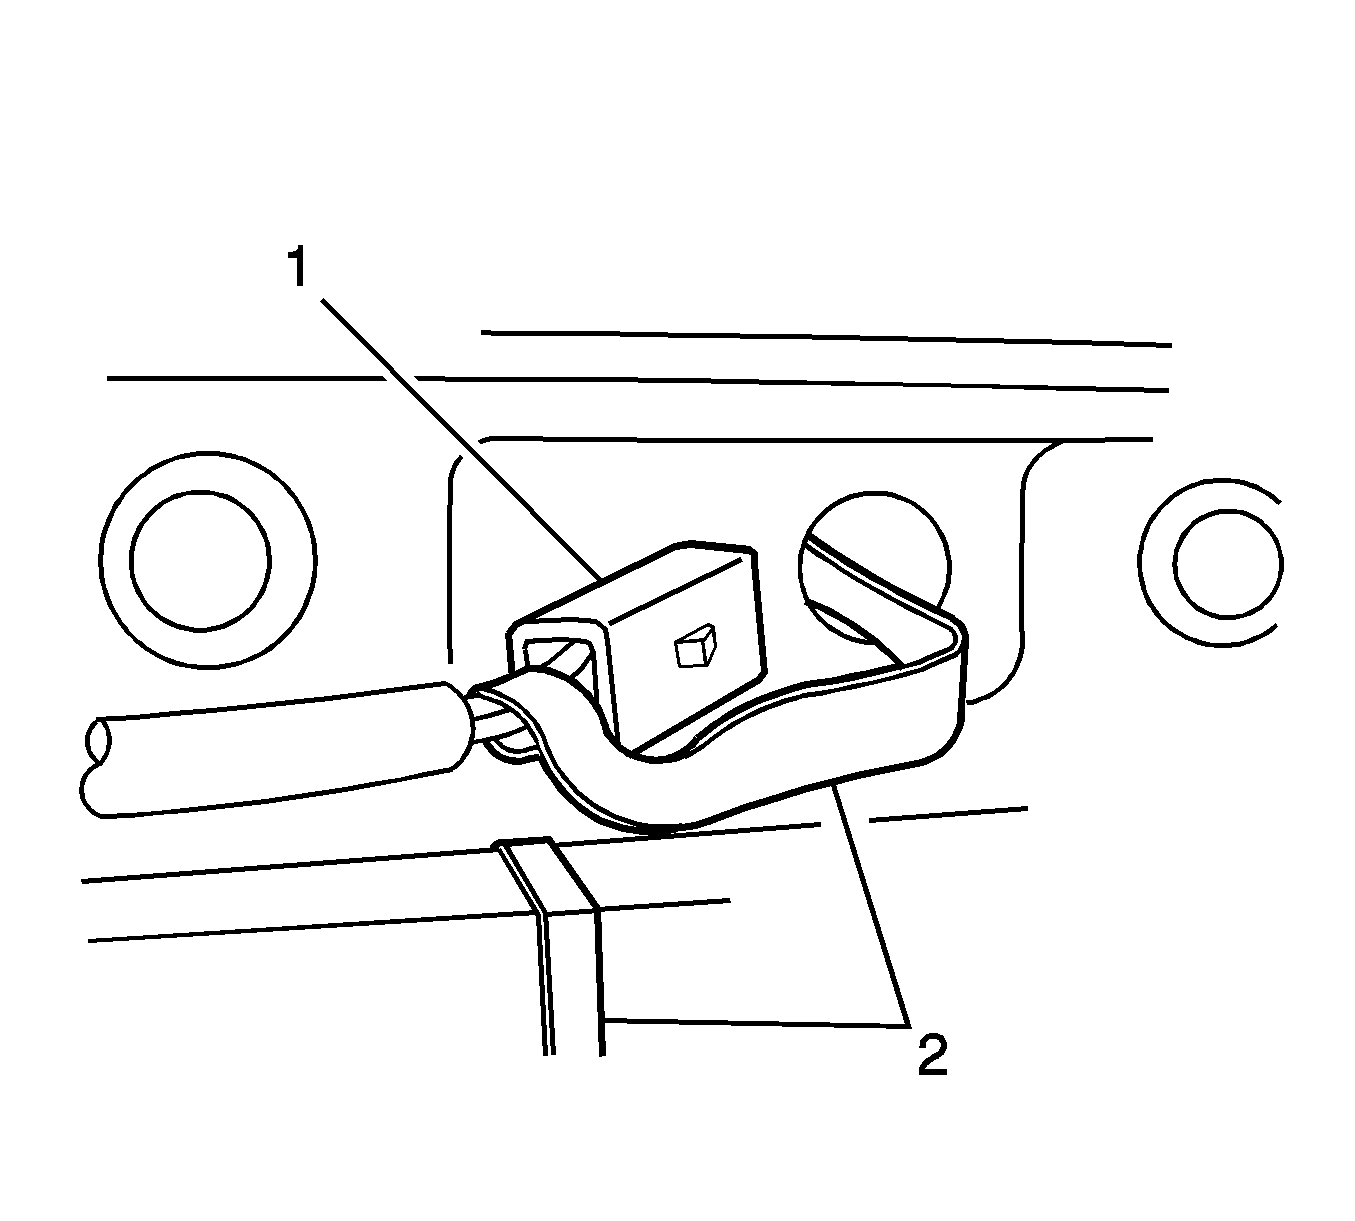
- On the right side only, locate the electrical connector (1) for the position sensor switch.
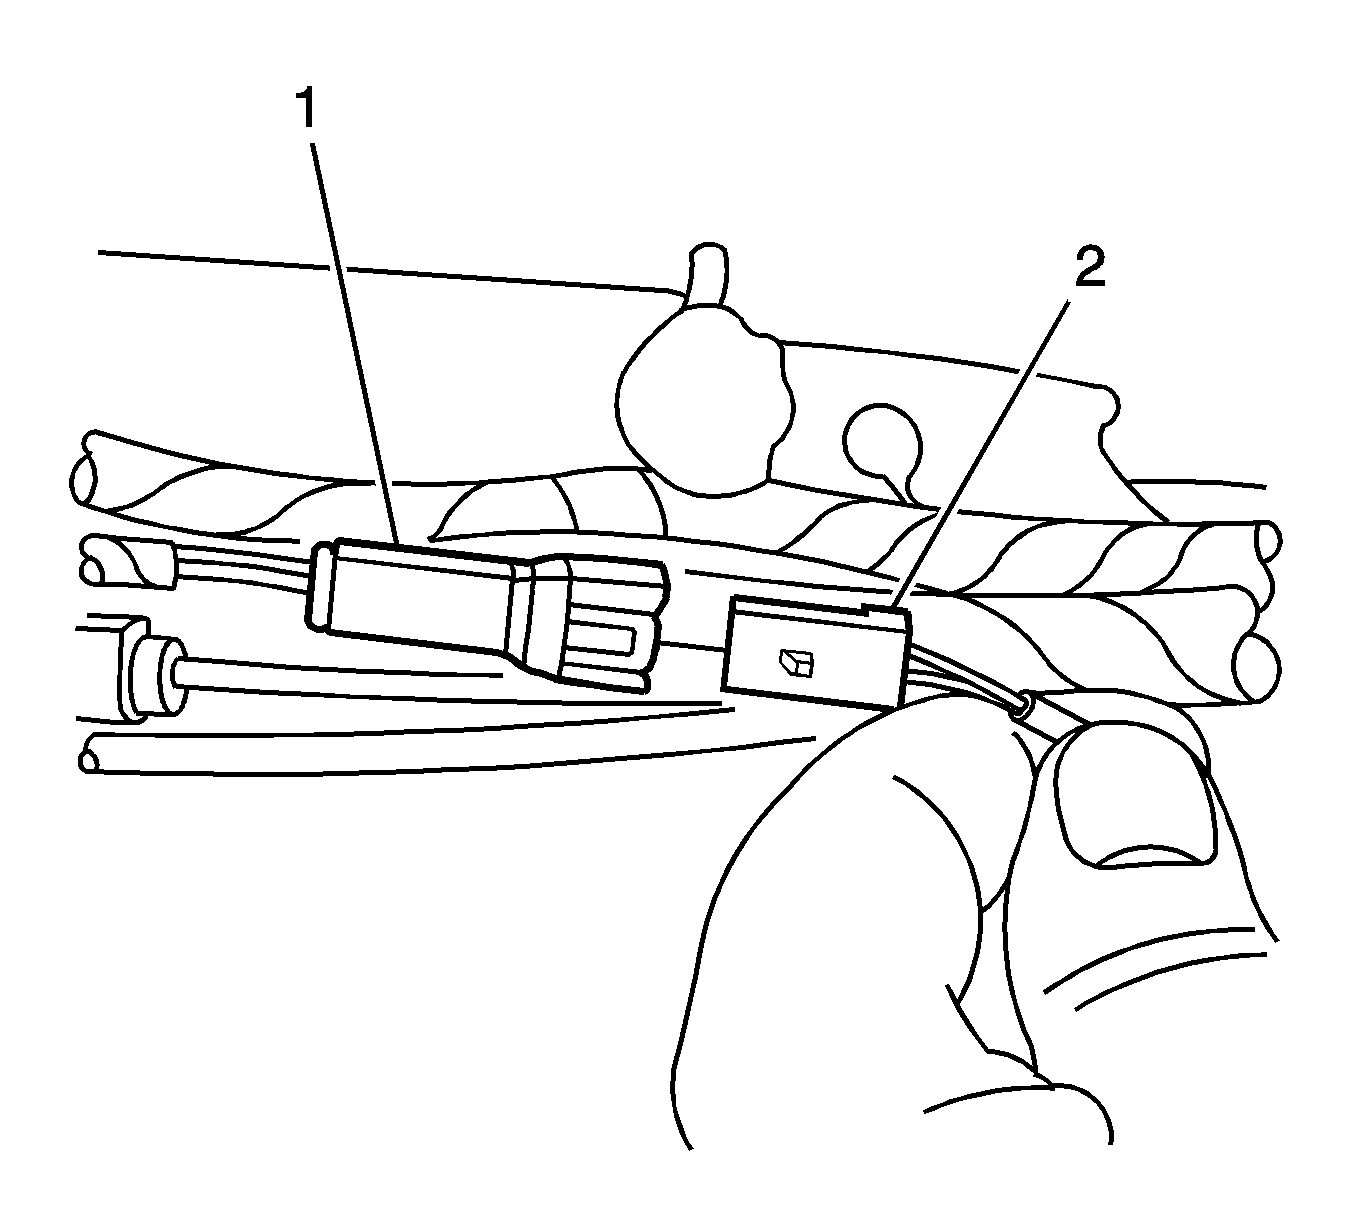
- On the right side only, disconnect the electrical connector (1) from the position sensor switch (1).
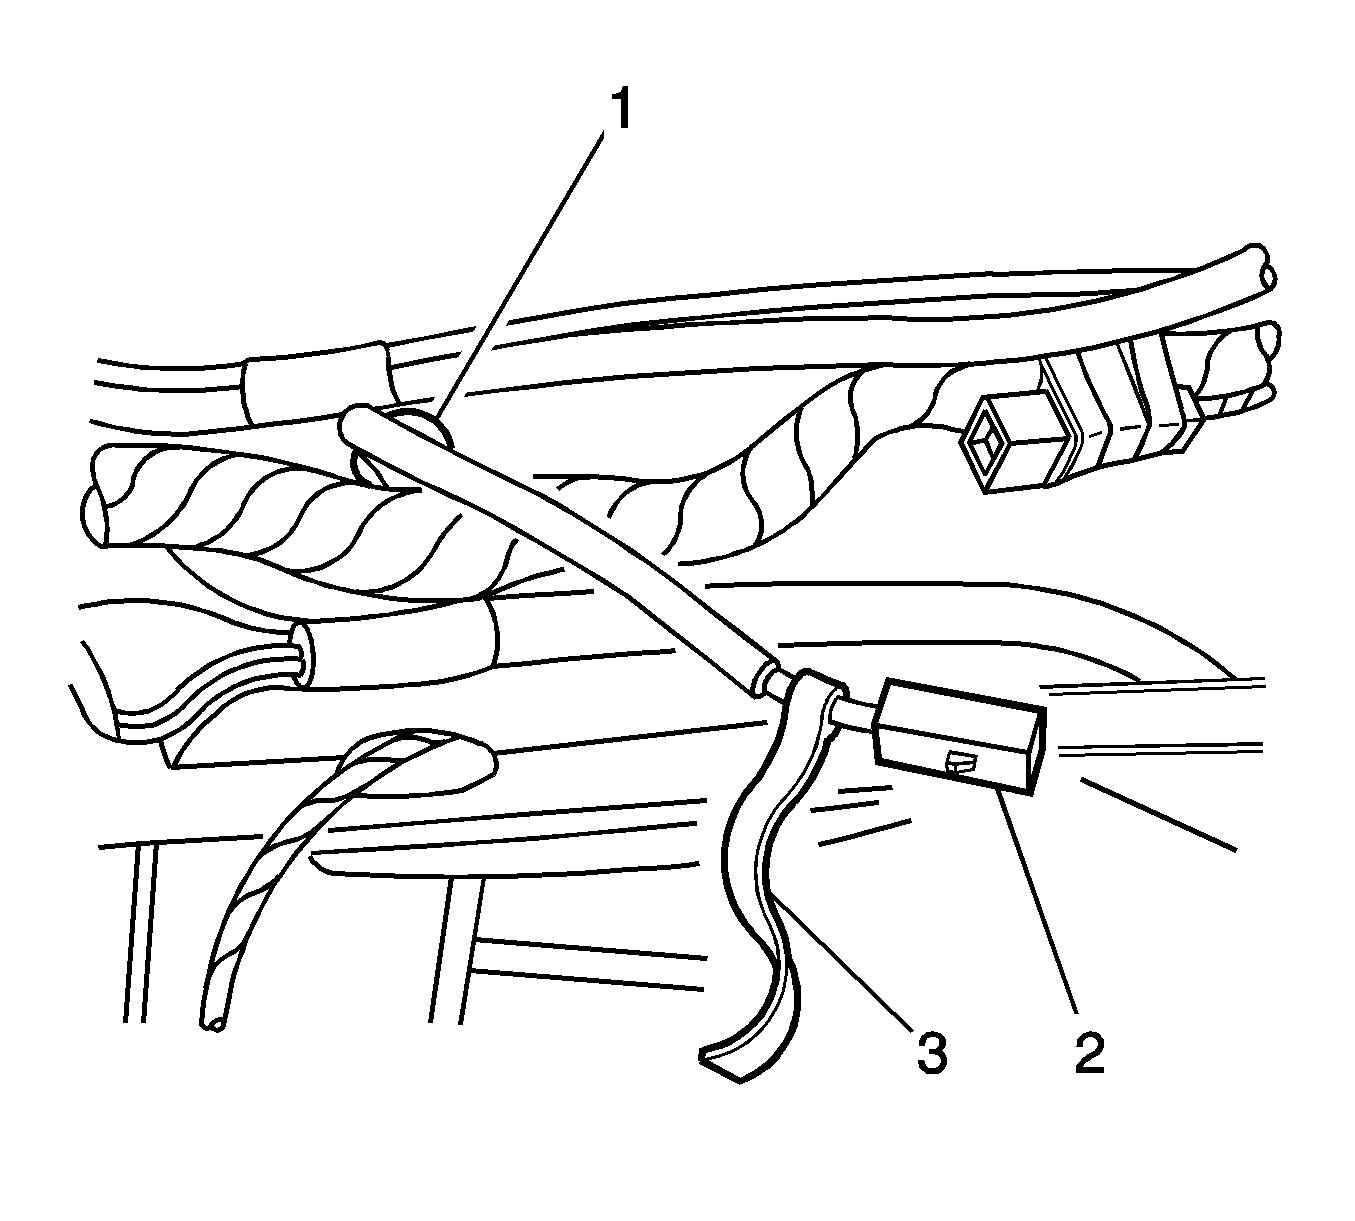
- On the right side only, attach a piece of string (3) to the electrical connector (2) to aid in routing the wire through the windshield header.
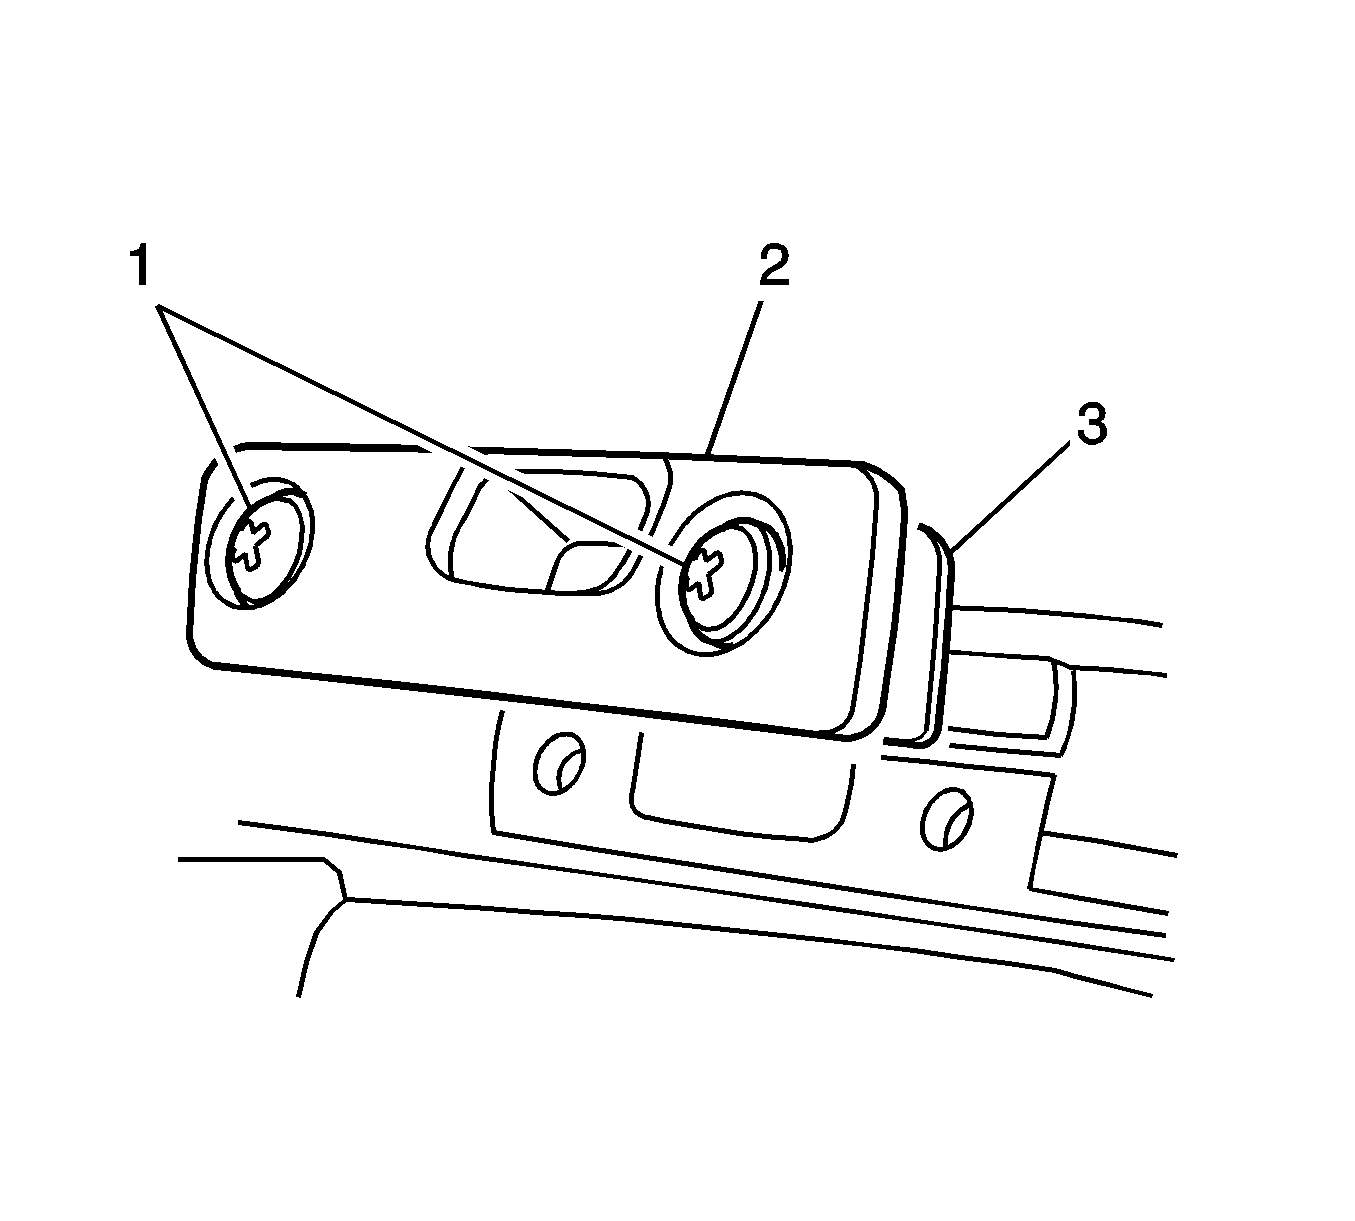
- Remove the locating pin receiver bolts (1).
- Remove the locating pin receiver (2) from the windshield header.
- Note the location and quantity of any shims (3) that may be present.
- Remove the locating pin receiver from the vehicle.
- On the right side only, do NOT pull the string (2) through the windshield header. Remove the string from the electrical connector (1) and tape the string to the windshield header.
Installation Procedure
- On the right side only, attach the string (2) to the electrical connector (1) to aid in routing the wire through the windshield header.
- Position the locating pin receiver (2) to the windshield.
- On the right side only, pull the string to route the wire through the windshield header.
- Apply LOCTITE™ Blue, GM P/N 12345382 (Canadian P/N 10953489) or equivalent to the bolts.
- Install the locating pin receiver bolts (1) loosely so that the receiver can still be moved with slight effort.
- Install the same shims (3) in the original locations.
- On the right side only, connect the electrical connector (1) to the position sensor switch (2).
- Stand on the opposite side of the vehicle from where the locating pin receiver was replaced and manually close the folding top. Refer to Folding Top Manual Operation .
- Manually open the folding top as shown in the illustration. Refer to Folding Top Manual Operation .
- Tighten the locating pin receiver bolts. Do NOT move the position of the receiver.
- Remove the protective covering.
- Operate the folding top under power through one complete cycle in each direction.
- Inspect the folding top for proper operation. Refer to Power Folding Top Description and Operation .
- Verify that the folding top panel is properly aligned. Refer to Folding Top Clearance Gap Specifications .
- Adjust the locating pin receiver if necessary. Refer to Folding Top Front Locating Pin Guide Adjustment .
- Install the windshield garnish molding. Refer to Windshield Garnish Molding Replacement in Interior Trim.
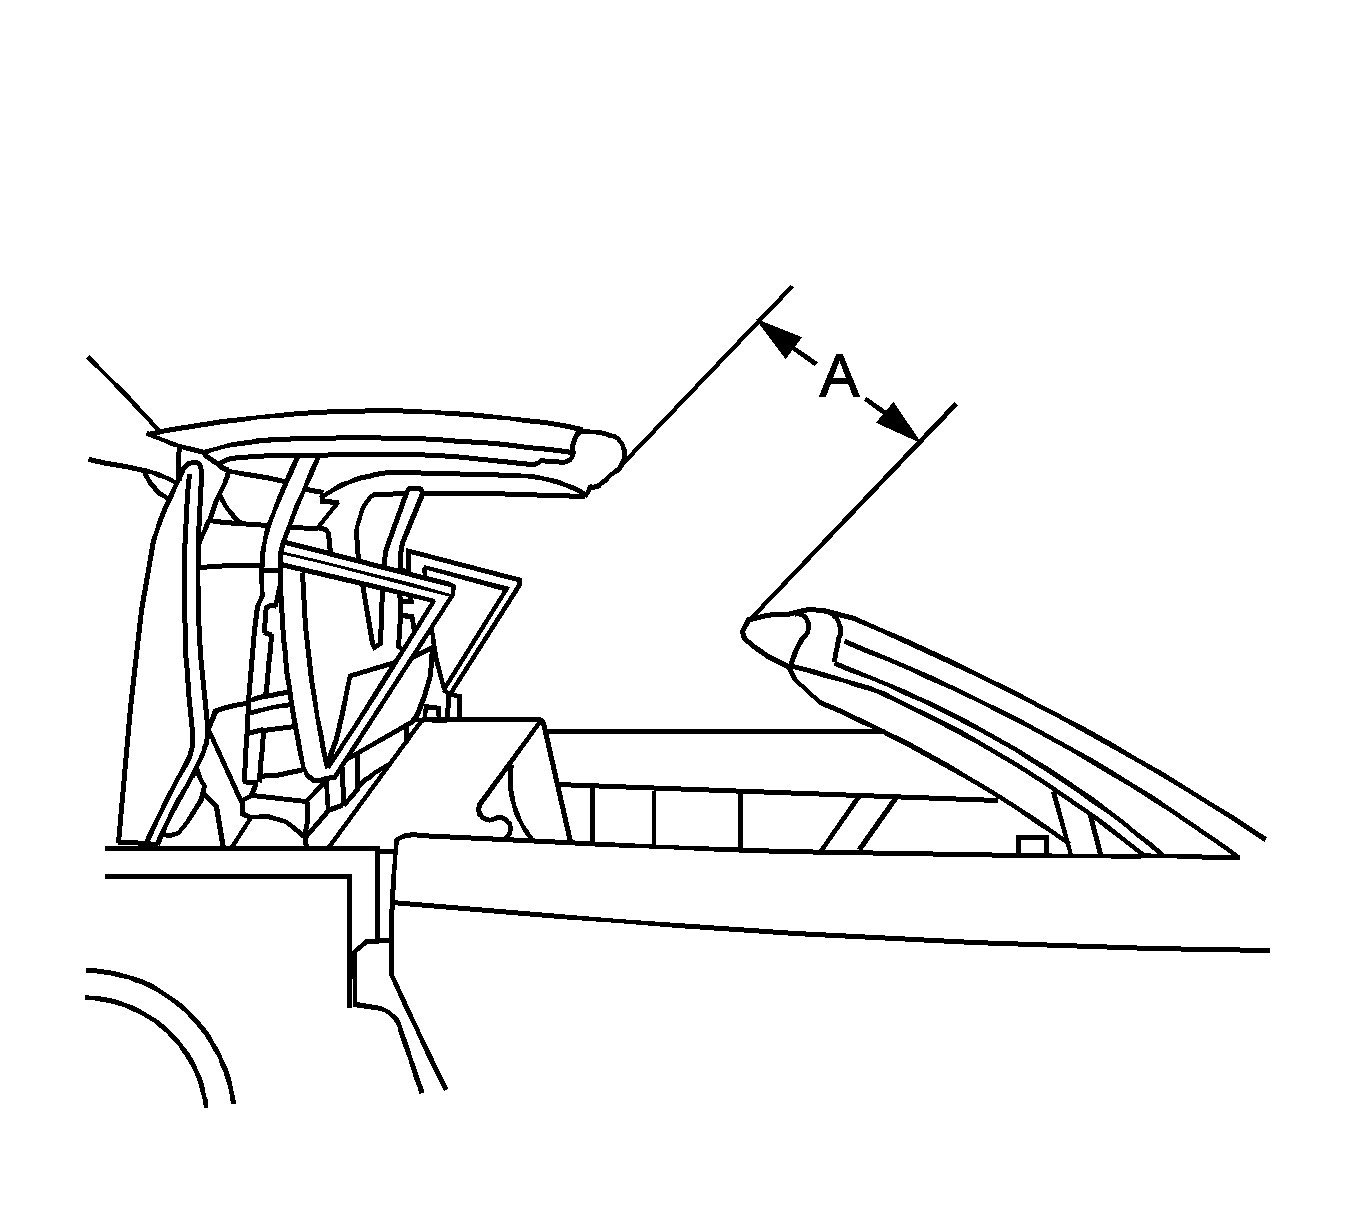
Dimension (A) is 400 mm (15.75 in) from the windshield header to the leading edge of the folding top panel.
Notice: Refer to Fastener Notice in the Preface section.
Tighten
Tighten the bolts to 10 N·m (89 lb in).
