For 1990-2009 cars only
Removal Procedure
- Place the folding top in the down position.
- Open the rear compartment.
- Place a protective covering over the interior of the vehicle and the adjacent body panels.
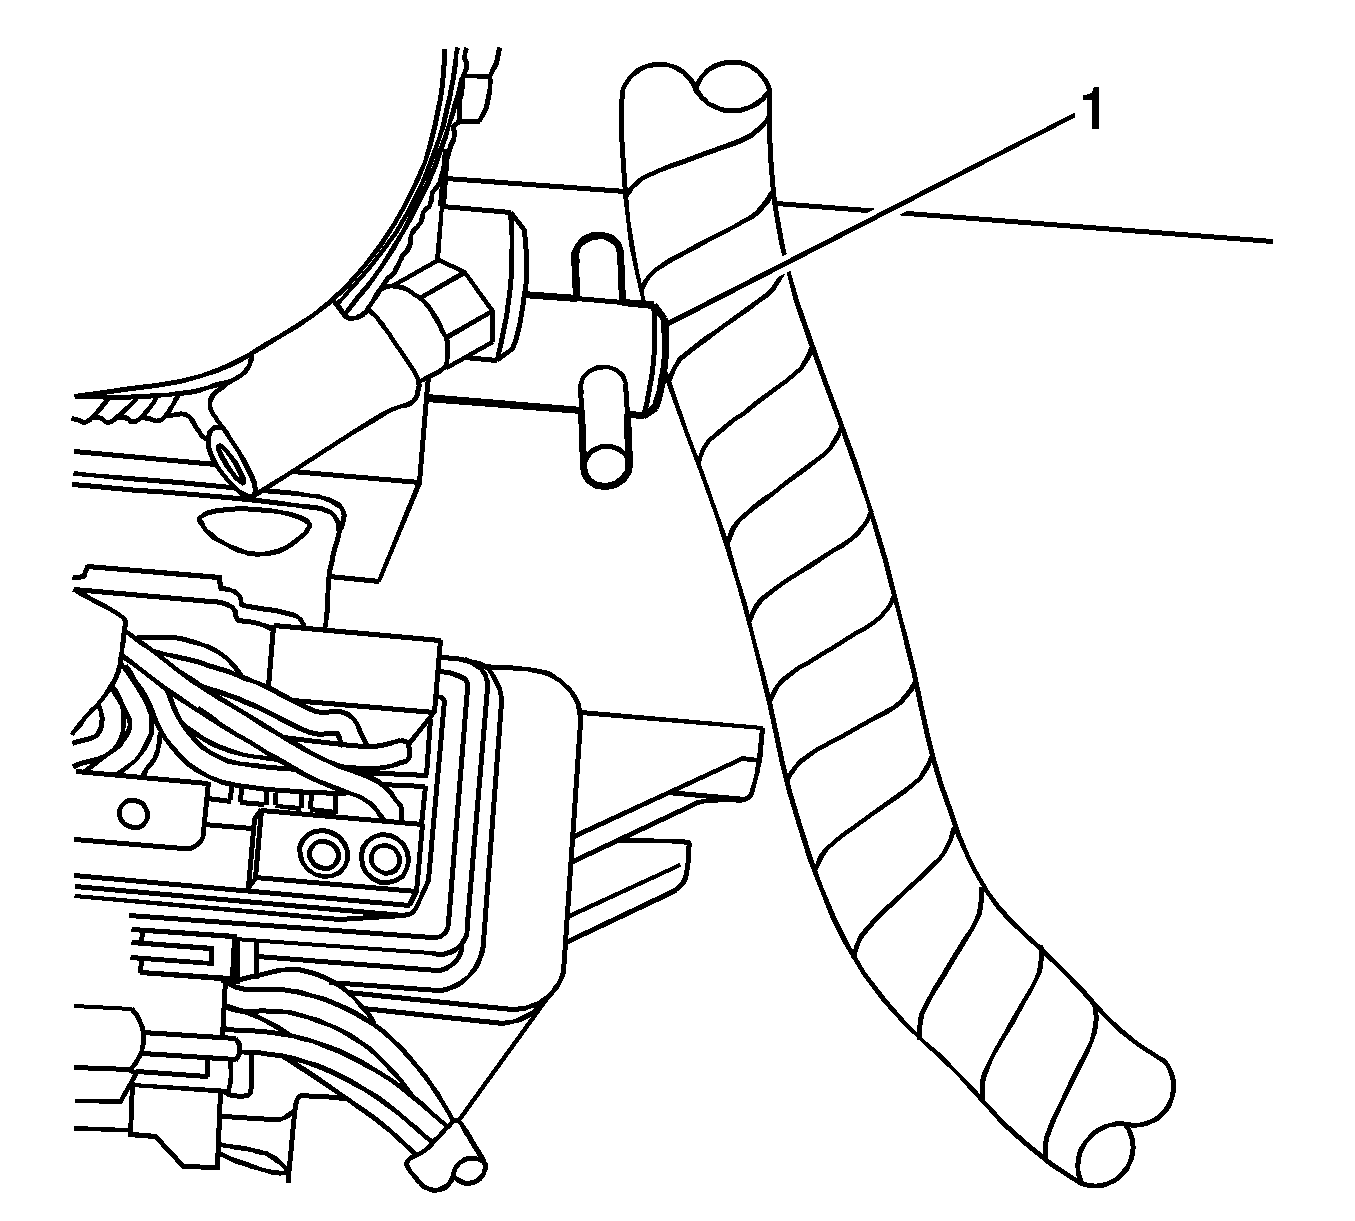
- Locate the hydraulic pump beneath the carpet in the storage compartment on the driver side of the trunk.
- Turn the pump bypass valve (1) counterclockwise until the valve stops.
- Remove the storage compartment. Refer to Body Rear Compartment Replacement in Interior Trim.
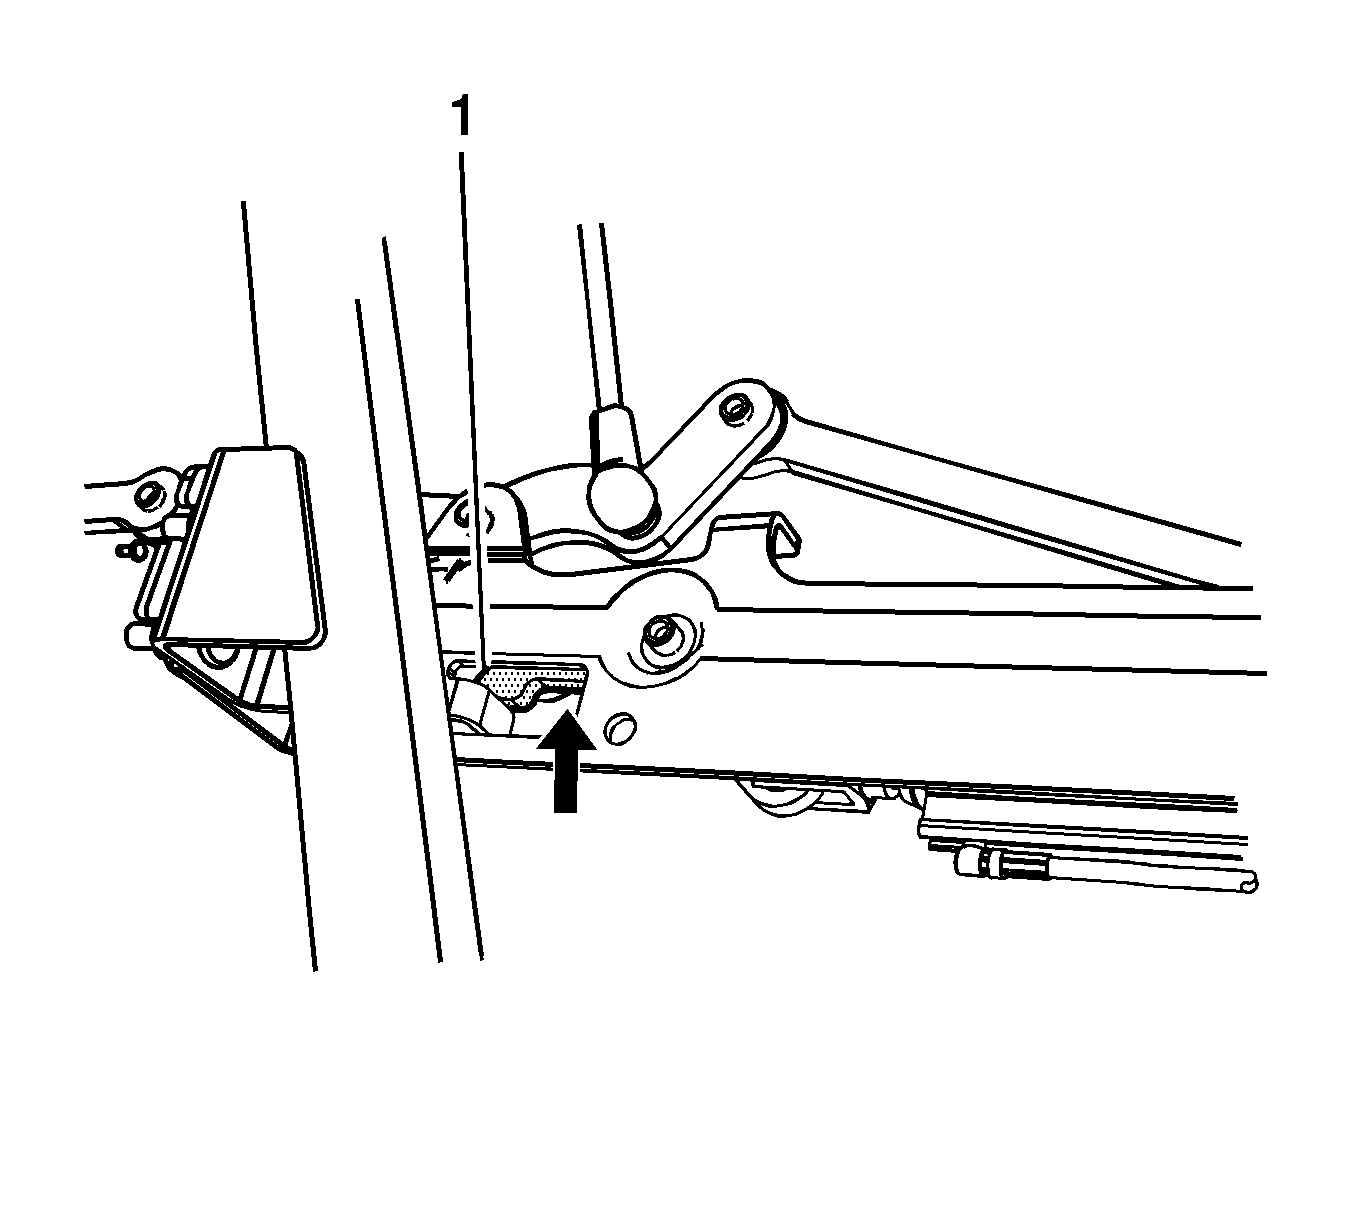
- Push up on the over center link (1) until the closeout panel starts to move.
- Grasp the compartment closeout panel and pull open with one hand. Use your other hand to assist one of the closeout outer panels to an open position.
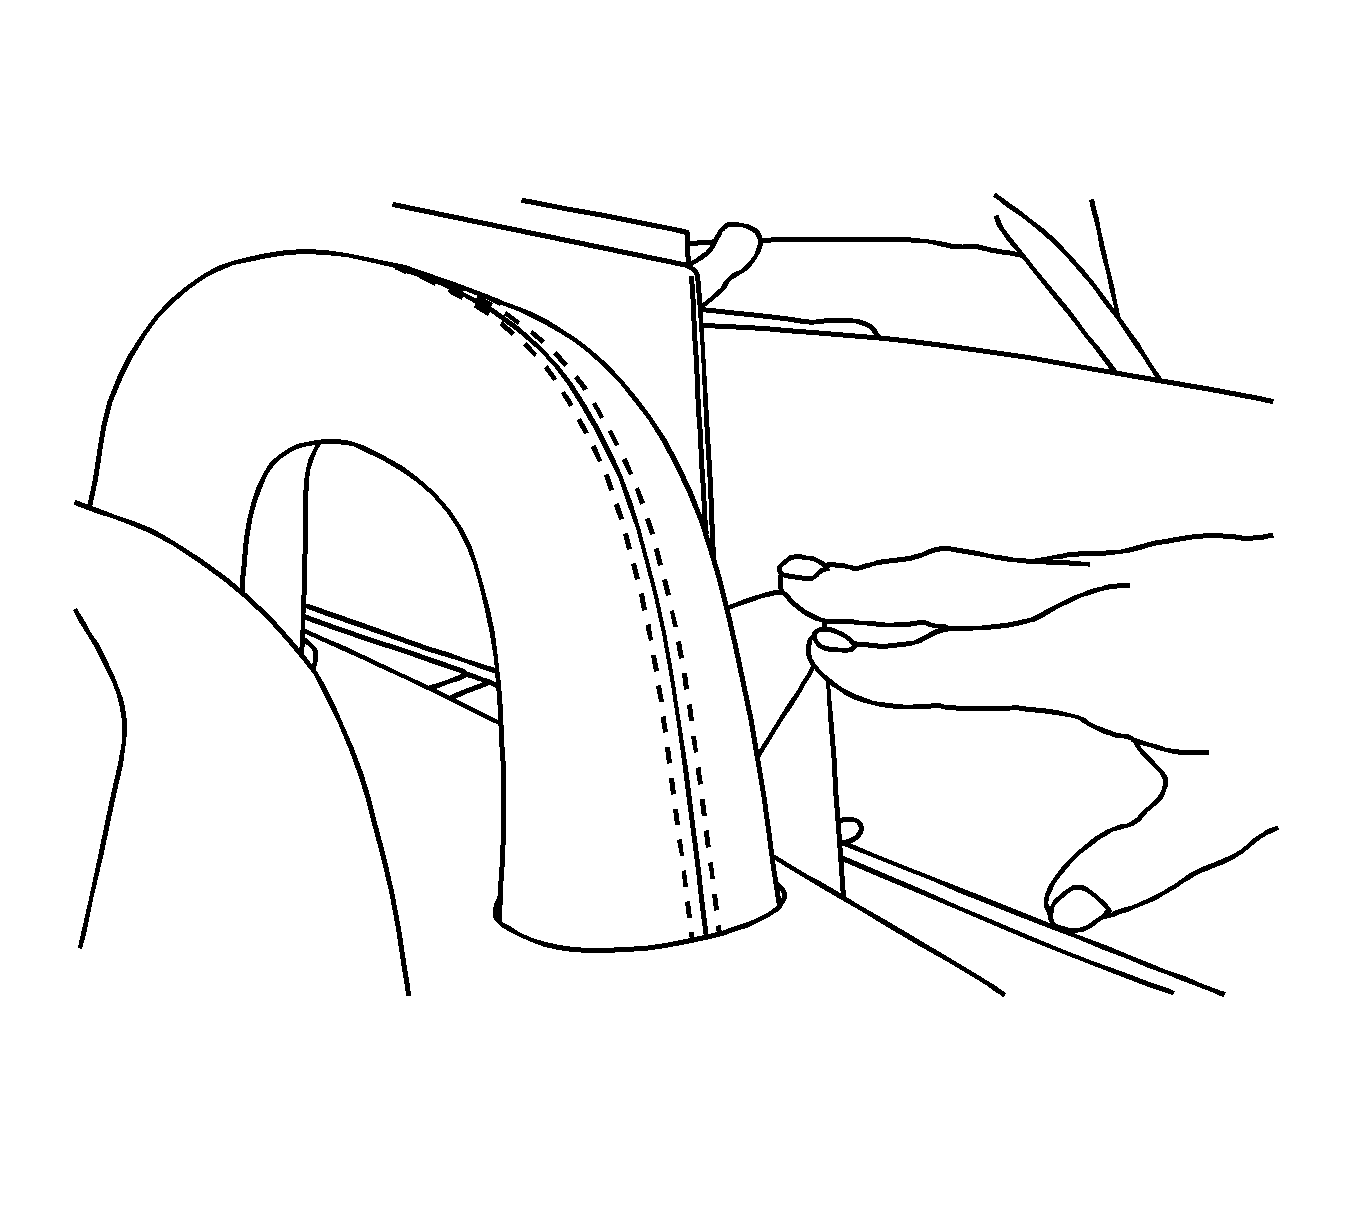
- Using a grease pencil, mark the location of the bolts (2) to the closeout panel hinge (3).
- Remove the closeout panel bolts.
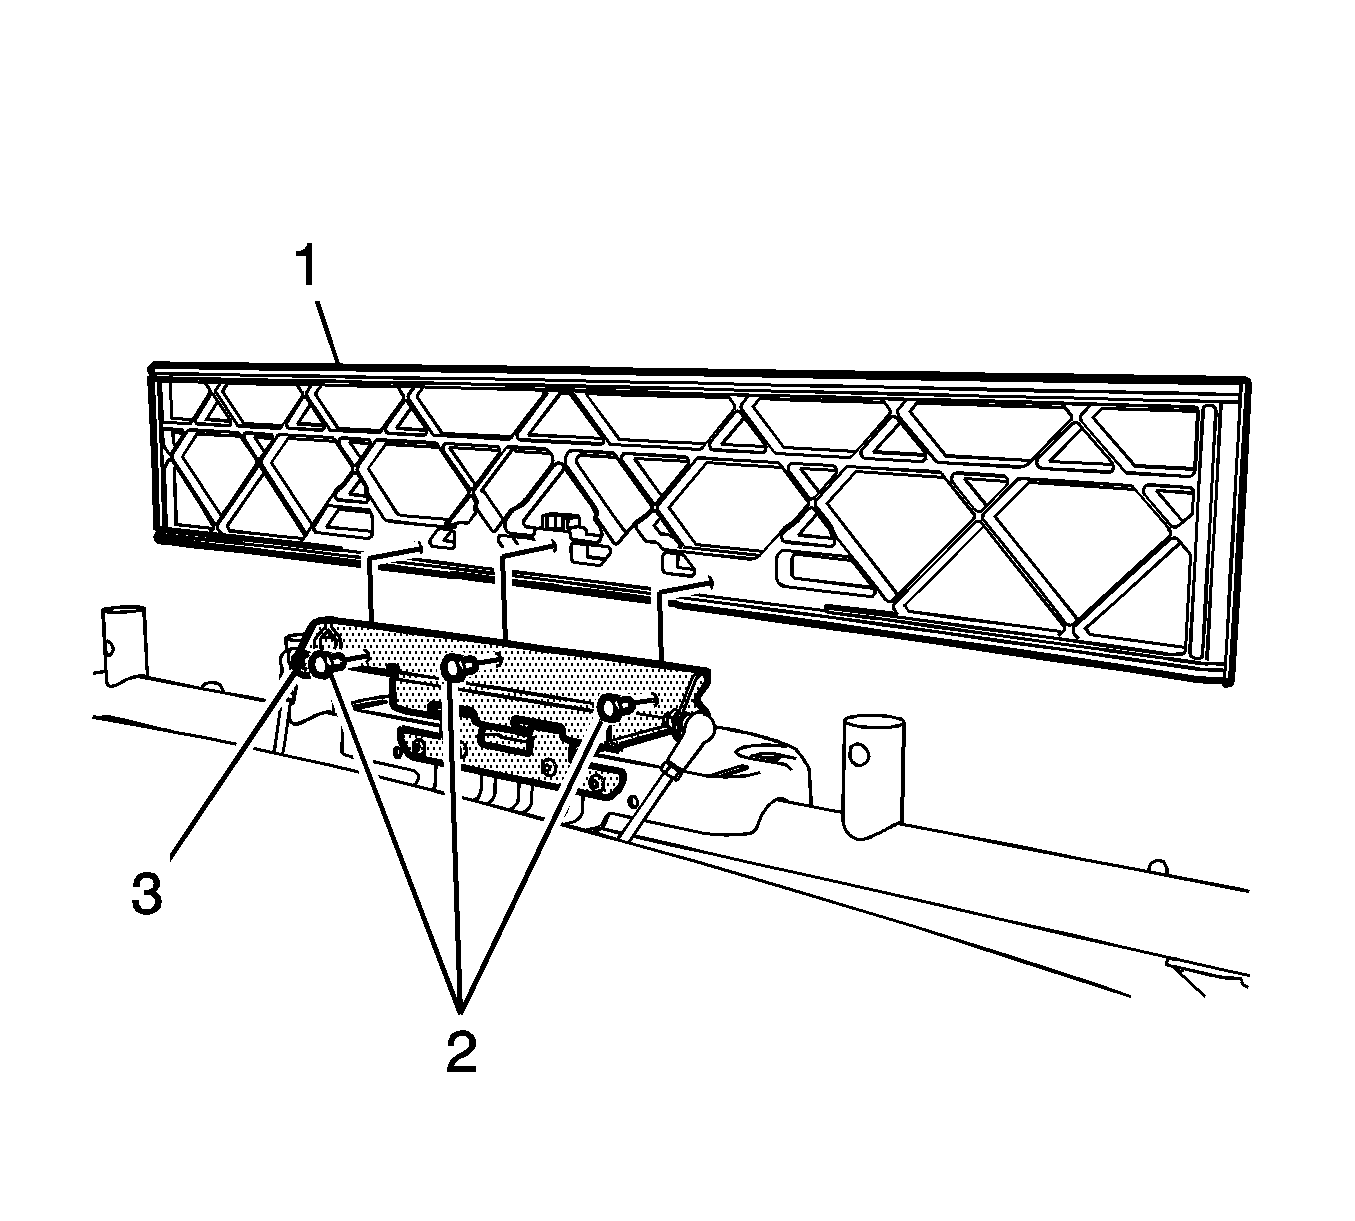
- Remove the closeout panel (1) from the vehicle.
Installation Procedure
- Position the closeout panel (3) in place.
- Apply LOCTITE™ Blue, GM P/N 12345382 (Canadian P/N 10953489) or equivalent to the bolts.
- Install the closeout panel bolts (2) by hand. Do NOT tighten.
- Align the bolts (2) to the marks on the closeout panel hinge (3).
- Grasp the compartment closeout panel and push closed with one hand. Use your other hand to assist one of the closeout outer panels to a closed position.
- Turn the pump bypass valve (1) clockwise until the valve stops.
- Close the rear compartment.
- Remove the protective covering.
- Install the support and the carpet over the hydraulic pump.
- Verify that the closeout panel is properly aligned. Refer to Folding Top Clearance Gap Specifications .
- Adjust the closeout panel, if necessary. Refer to Folding Top Storage Compartment Closeout Panel Adjustment - Front .
- Cycle the folding top under power through one complete cycle in both directions.
- Inspect the folding top for proper operation. Refer to Power Folding Top Description and Operation .
Notice: Refer to Title not found in the Preface section.
Tighten
Tighten the bolts to 8 N·m (71 lb in).
Important: Align the closeout panels evenly from front to rear. Gaps should exist between the 3 closeout panels.
