For 1990-2009 cars only
Generator Replacement LH2
Removal Procedure
Caution: Refer to Battery Disconnect Caution in the Preface section.
- Remove the drive belt. Refer to Drive Belt Replacement .
- Disconnect the negative battery cable. Refer to Battery Negative Cable Disconnection and Connection .
- Drain the cooling system. Refer to Cooling System Draining and Filling .
- Remove the front suspension crossmember. Refer to Front Suspension Crossmember Replacement .
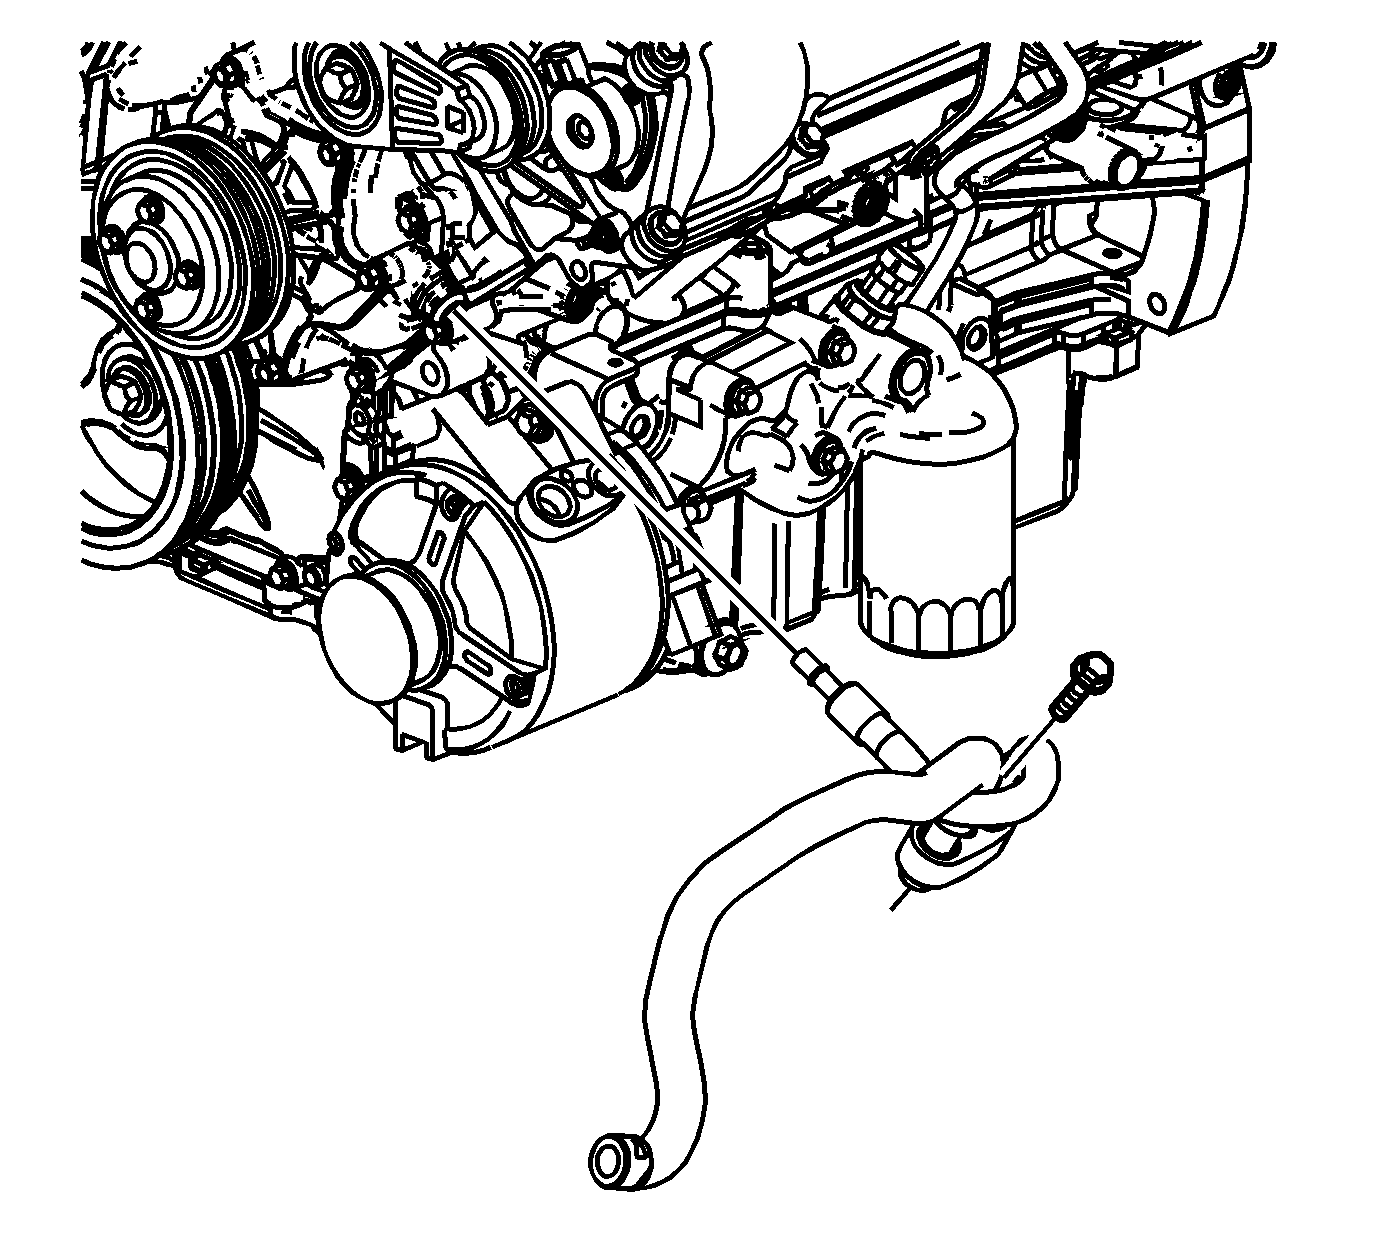
- Remove the bolt from the generator coolant hose assembly on the generator.
- Disconnect the generator coolant hose assembly from the generator port.
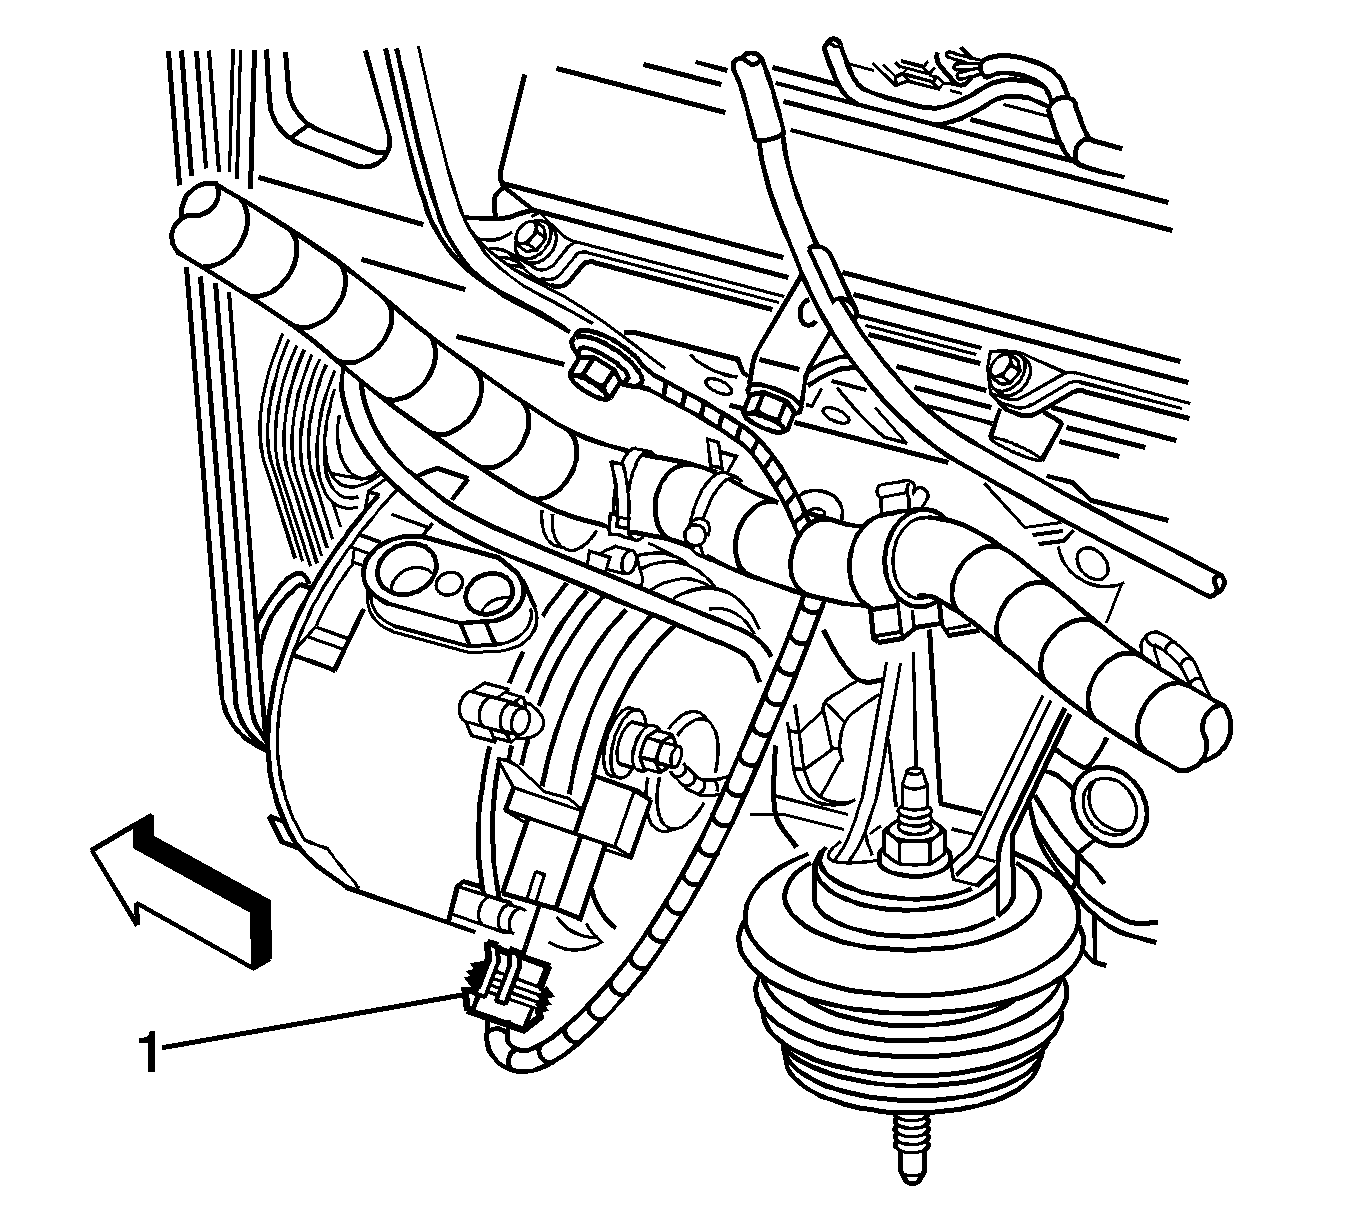
- Disconnect the generator electrical connector (1).
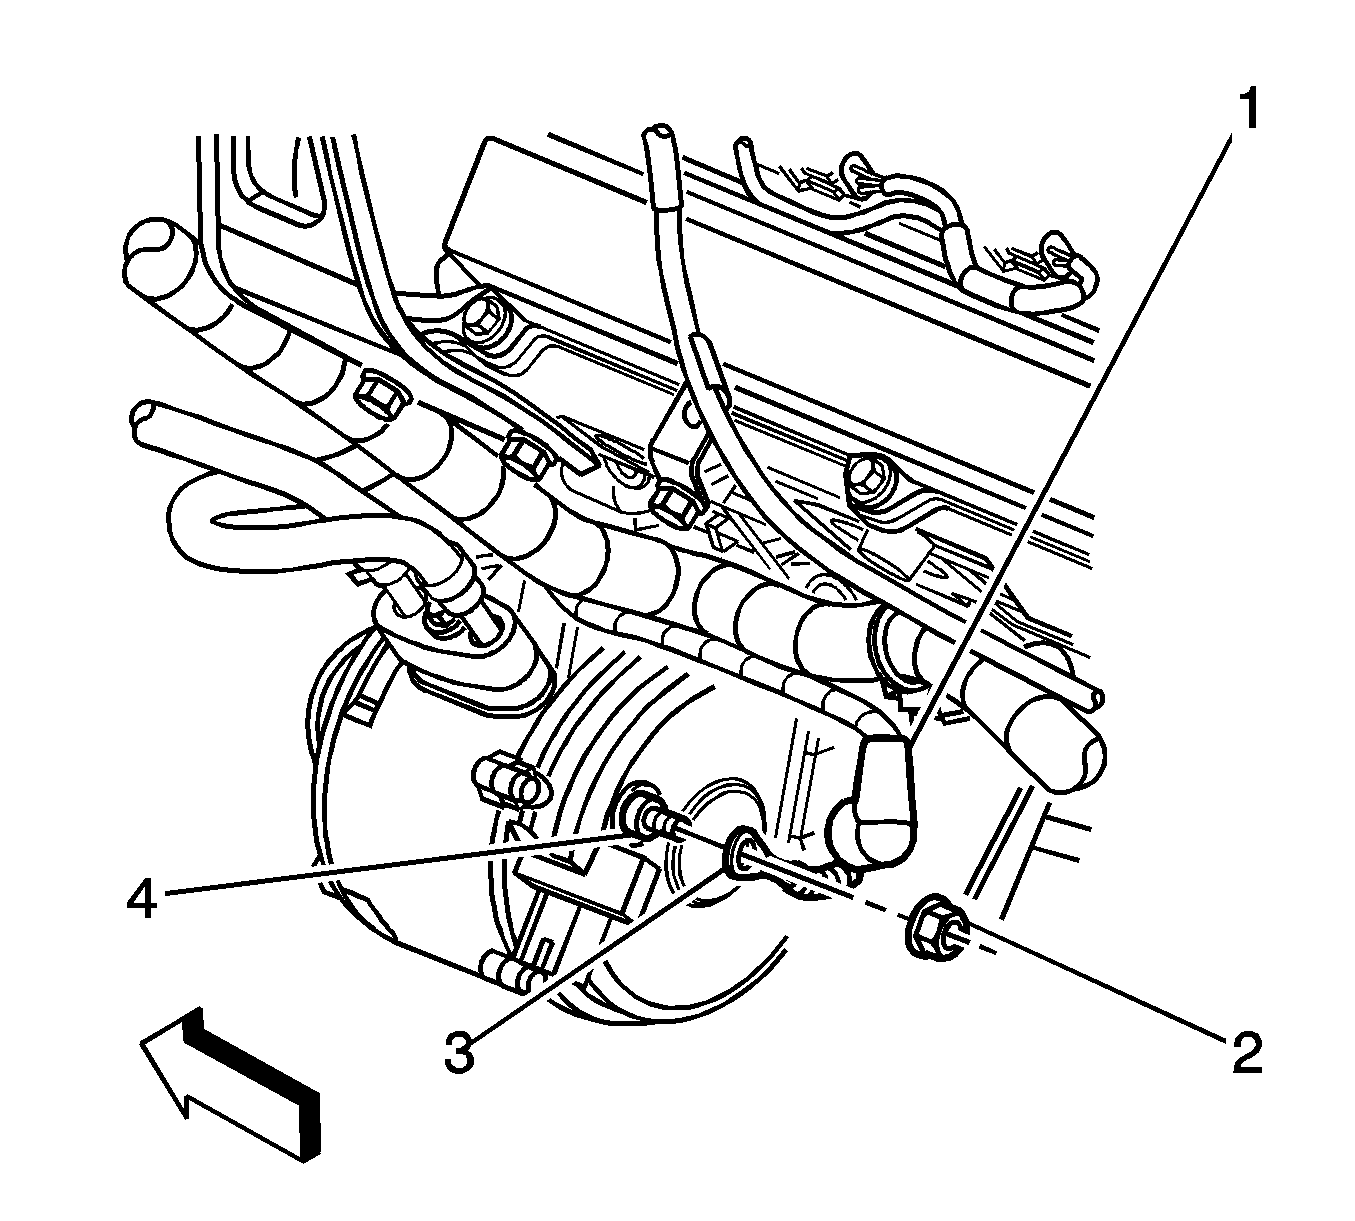
- Remove the starter cable terminal from the generator:
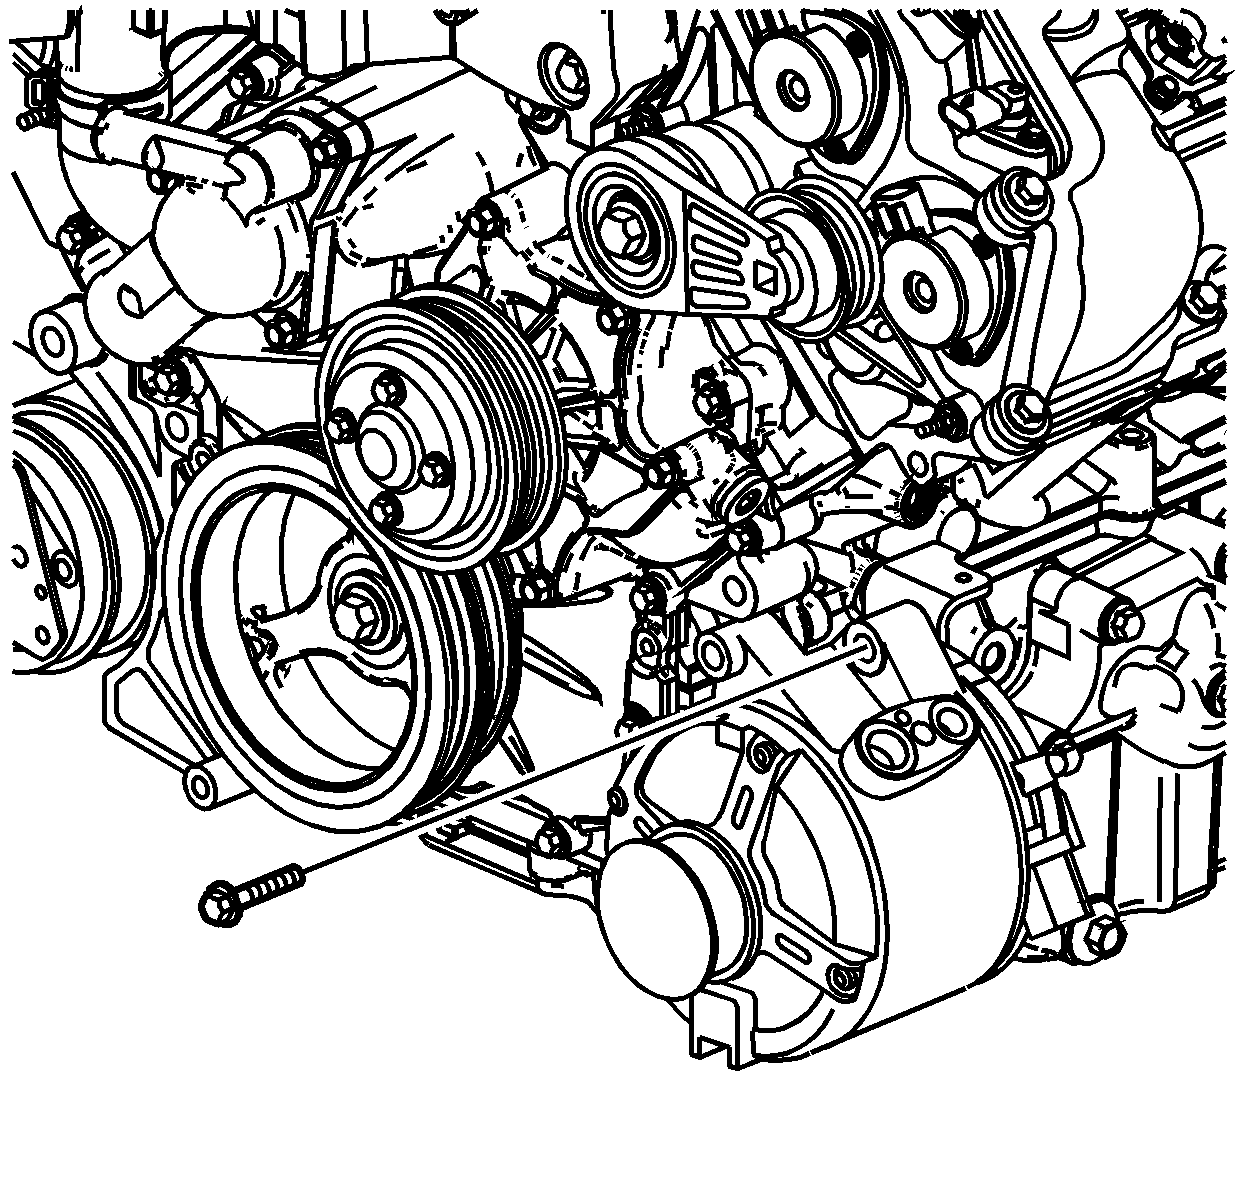
- Remove the upper generator bolt from the generator.
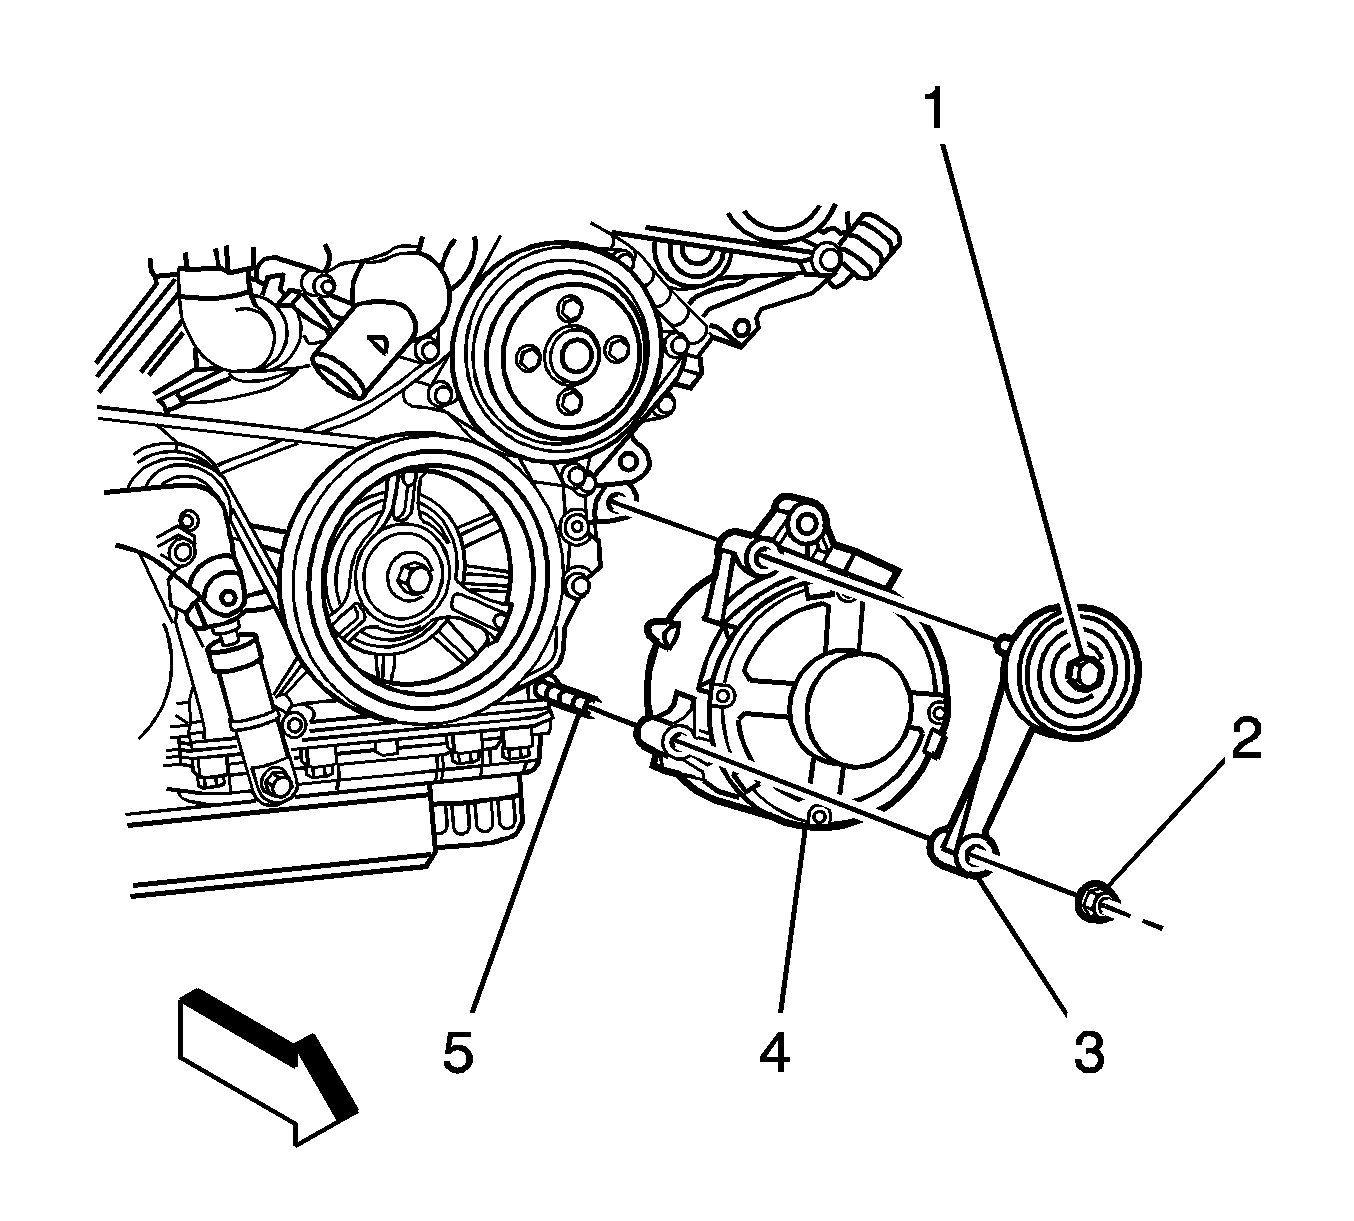
- Remove the idler pulley thru-bolt (1).
- Remove the idler pulley nut (2).
- Remove the idler pulley assembly (3).
- Remove the generator (4).
| 8.1. | Slide the boot (1) back along the cable. |
| 8.2. | Remove the starter cable nut (2). |
| 8.3. | Remove the starter cable terminal (3) from the stud (4). |
Installation Procedure
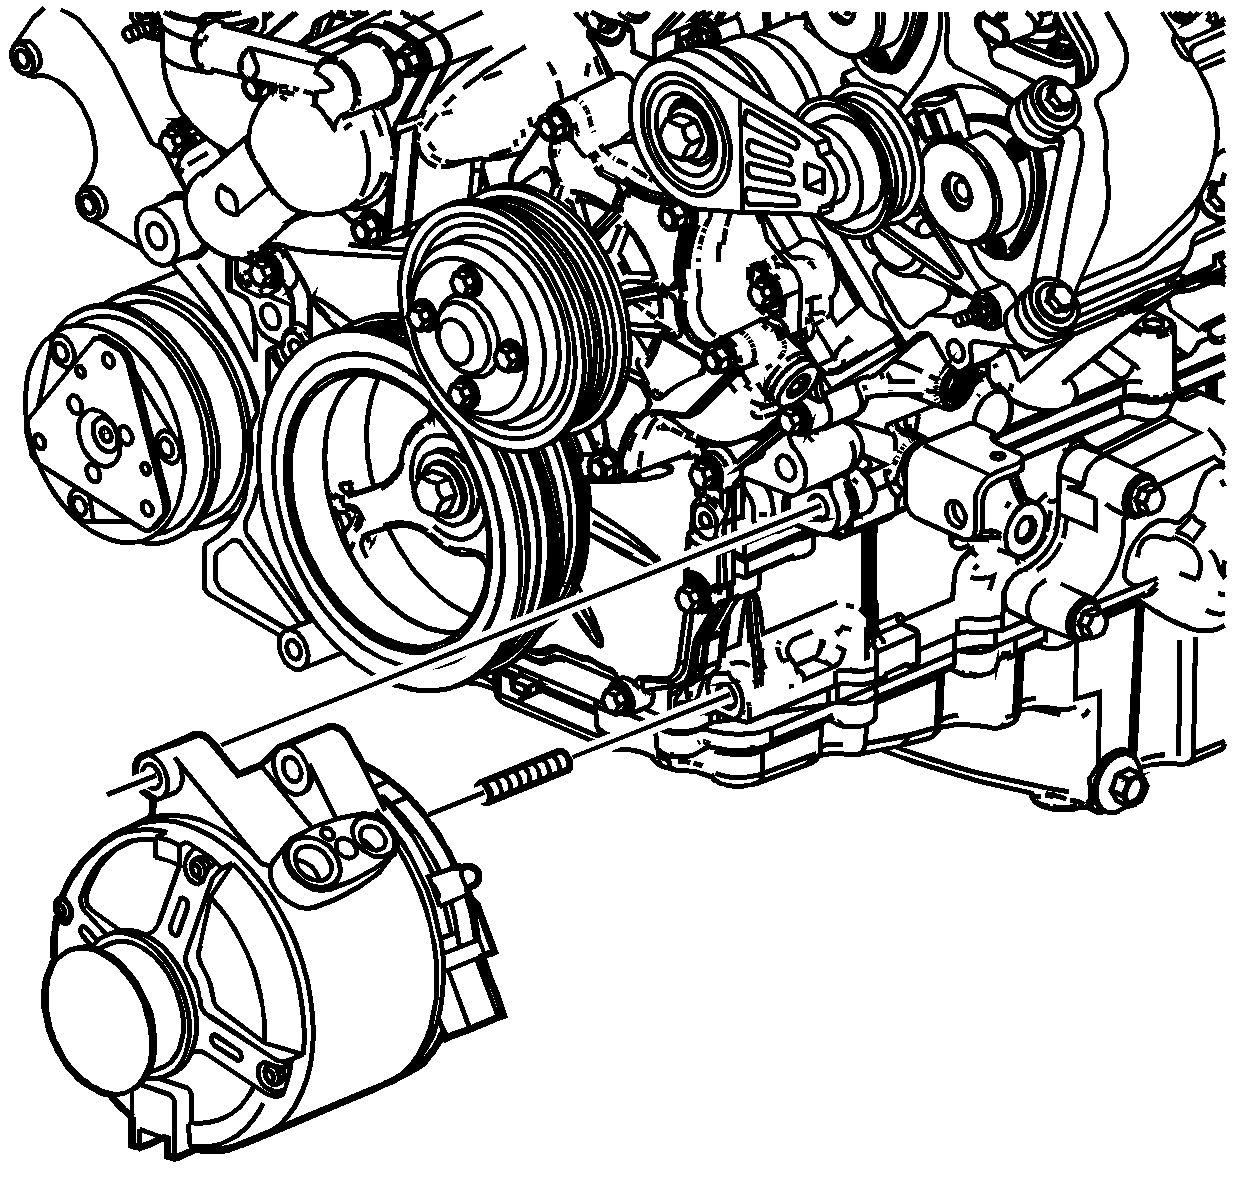
- Install the generator.
- Install the upper generator bolt.
- Install the idler pulley assembly (3) and bolt (1).
- Install the nut (2).
- Tighten the idler pulley bolt (1) to 50 N·m (37 lb ft).
- Tighten the idler pulley nut (2) to 50 N·m (37 lb ft).
- Install the starter cable terminal to the generator:
- Position the generator coolant hose assembly to the generator and secure with the bolt.
- Connect the generator electrical connector (1).
- Install the front suspension crossmember. Refer to Front Suspension Crossmember Replacement .
- Fill the cooling system. Refer to Cooling System Draining and Filling .
- Connect the negative battery cable. Refer to Battery Negative Cable Disconnection and Connection .
- Install the drive belt. Refer to Drive Belt Replacement .
Notice: Refer to Fastener Notice in the Preface section.

Tighten
Tighten the generator bolts to 50 N·m (37 lb ft).

Tighten the generator fasteners to the following torque values:
Tighten

| 5.1. | Install the starter cable terminal to the stud. |
| 5.2. | Install the starter cable nut (2). |
Tighten
Tighten the starter cable nut to 20 N·m (15 lb ft).
| 5.3. | Slide the boot (1) over the generator stud (4). |
Tighten
Tighten the bolt to 27 N·m (20 lb ft).

Generator Replacement LC3
Removal Procedure
Caution: Refer to Battery Disconnect Caution in the Preface section.
- Remove the generator drive belt. Refer to Water Pump and Generator Belt Replacement .
- Disconnect the negative battery cable. Refer to Battery Negative Cable Disconnection and Connection .
- Drain the cooling system. Refer to Cooling System Draining and Filling .
- Remove the front suspension crossmember. Refer to Front Suspension Crossmember Replacement .
- Remove the bolt from the generator coolant hose assembly on the generator.
- Disconnect the generator coolant hose assembly from the generator port.
- Disconnect the generator electrical connector (1).
- Remove the starter cable terminal from the generator:
- Remove the upper generator bolt from the generator.
- Remove the idler pulley thru-bolt (1).
- Remove the idler pulley nut (2).
- Remove the idler pulley assembly (3).
- Remove the generator (4).


| 8.1. | Slide the boot (1) back along the cable. |
| 8.2. | Remove the starter cable nut (2). |
| 8.3. | Remove the starter cable terminal (3) from the stud (4). |


Installation Procedure
- Install the generator.
- Install the upper generator bolt.
- Install the idler pulley assembly (3) and bolt (1).
- Install the nut (2).
- Tighten the idler pulley bolt (1) to 50 N·m (37 lb ft).
- Tighten the idler pulley nut (2) to 50 N·m (37 lb ft).
- Install the starter cable terminal to the generator:
- Position the generator coolant hose assembly to the generator and secure with the bolt.
- Connect the generator electrical connector (1).
- Install the front suspension crossmember. Refer to Front Suspension Crossmember Replacement .
- Fill the cooling system. Refer to Cooling System Draining and Filling .
- Connect the negative battery cable (2). Refer to Battery Negative Cable Disconnection and Connection .
- Install the generator drive belt. Refer to Water Pump and Generator Belt Replacement .

Notice: Refer to Fastener Notice in the Preface section.

Tighten
Tighten the generator bolts to 50 N·m (37 lb ft).

Tighten the generator fasteners to the following torque values:
Tighten

| 5.1. | Install the starter cable terminal to the stud. |
| 5.2. | Install the starter cable nut (2). |
Tighten
Tighten the starter cable nut to 20 N·m (15 lb ft).
| 5.3. | Slide the boot (1) over the generator stud (4). |
Tighten
Tighten the bolt to 27 N·m (20 lb ft).

