For 1990-2009 cars only
Removal Procedure
- Disable the SIR system. Refer to the following procedures in SIR:
- Remove the console. Refer to Console Replacement .
- Remove the I/P carrier. Refer to Instrument Panel Carrier Replacement .
- Remove the outlet duct from the right side window defogger.
- Release the I/P harness retainer from the passenger SIR bracket.
- Remove the connector position assurance (CPA) from the SIR module electrical connector.
- Release the electrical connector retainer from the SIR bracket.
- Disconnect the SIR module electrical connector.
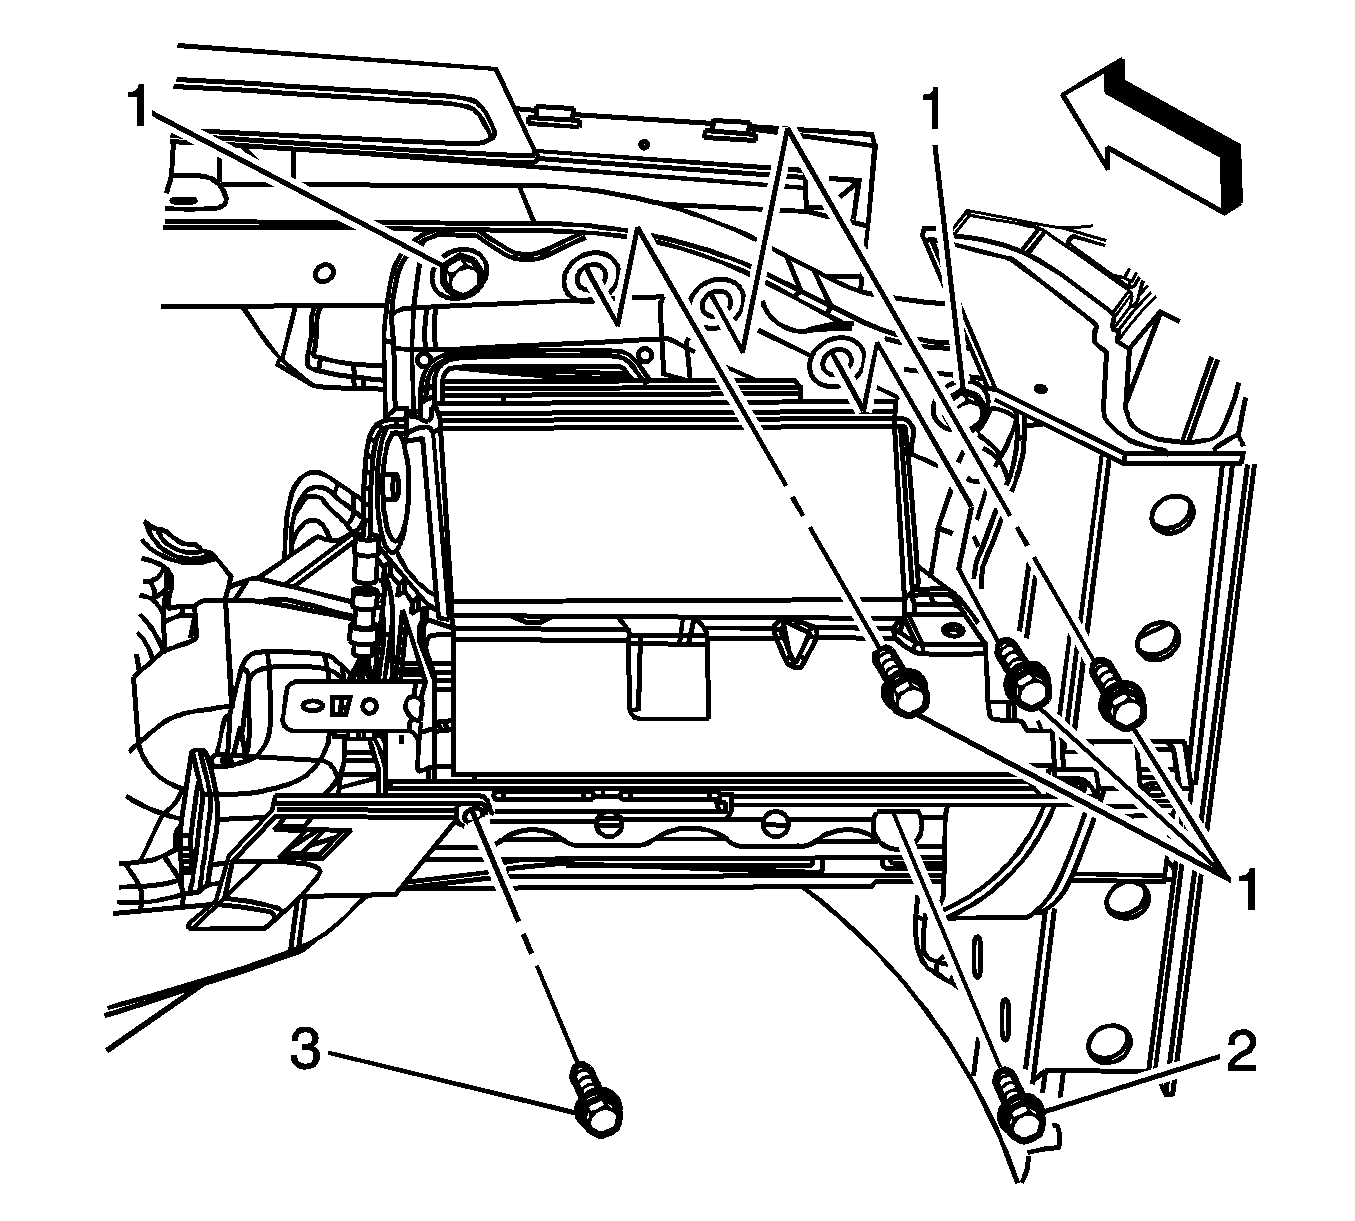
- Mark the location of the knee bolster bracket.
- Remove the bolts (3) retaining the knee bolster bracket to the center support bracket.
- Mark the location of the SIR bracket.
- Remove the bolts (2) mounting the SIR bracket to the I/P lower support beam.
- Remove the bolts (1) mounting the SIR bracket to the I/P upper support beam.
- Remove the SIR bracket.
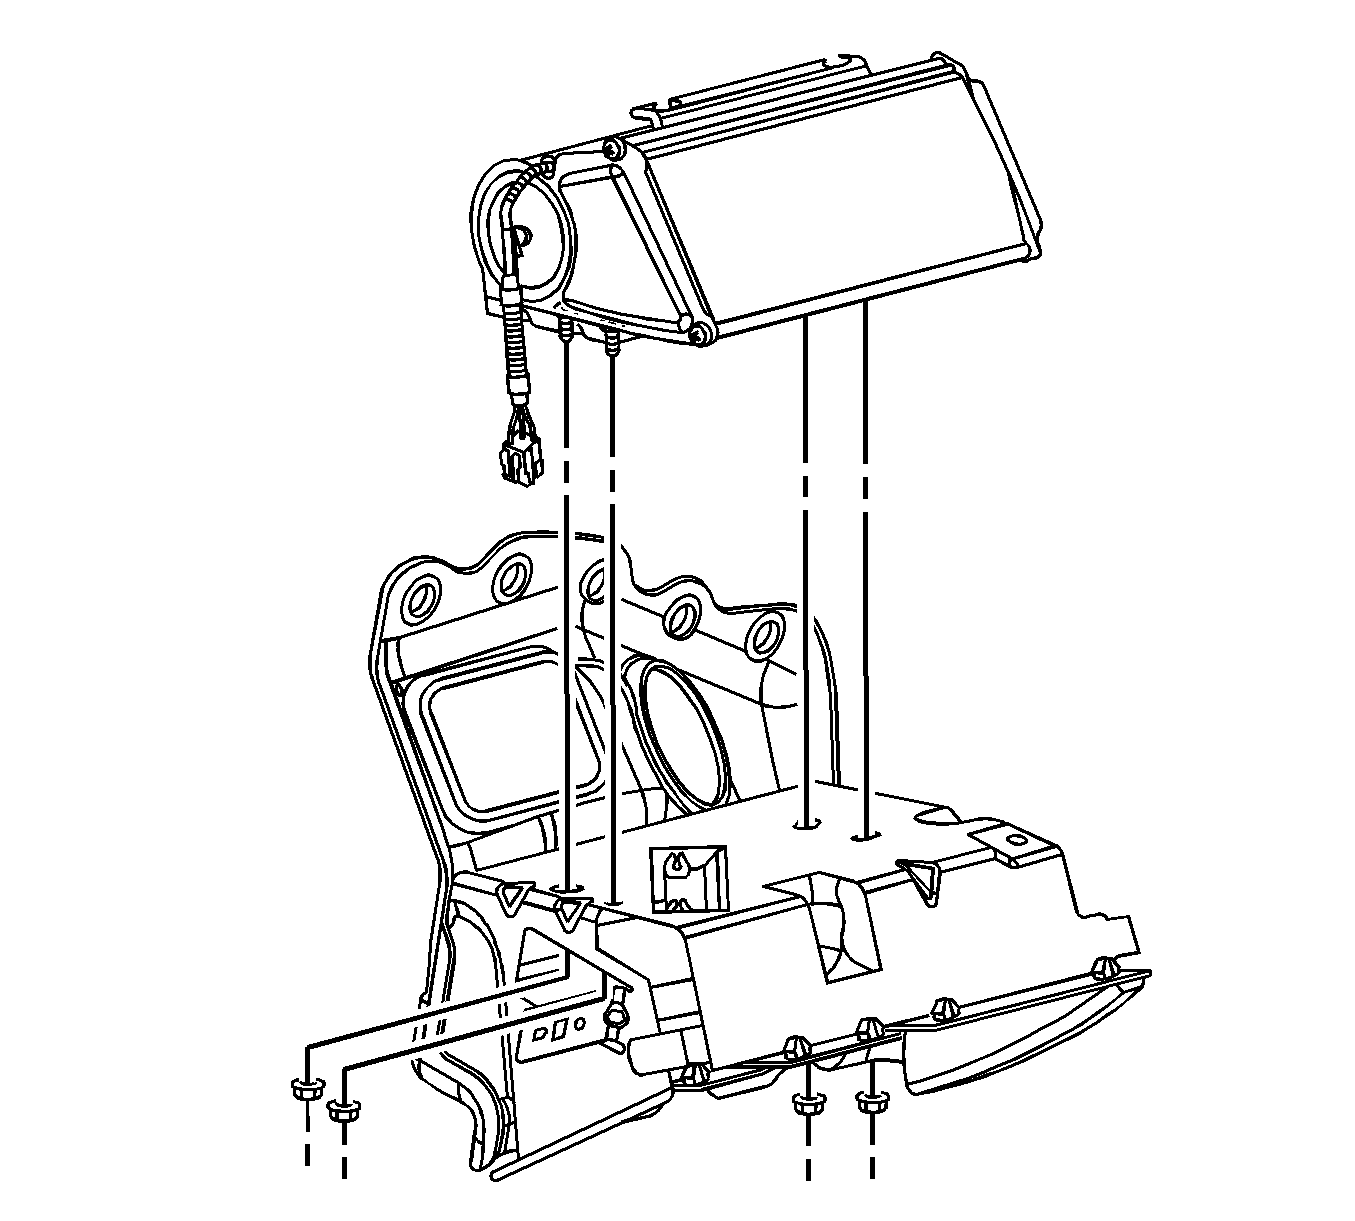
- Mark the location of the SIR module in the SIR bracket.
- Remove the SIR module retaining nuts (3).
- Remove the SIR module (1) from the SIR bracket (2).
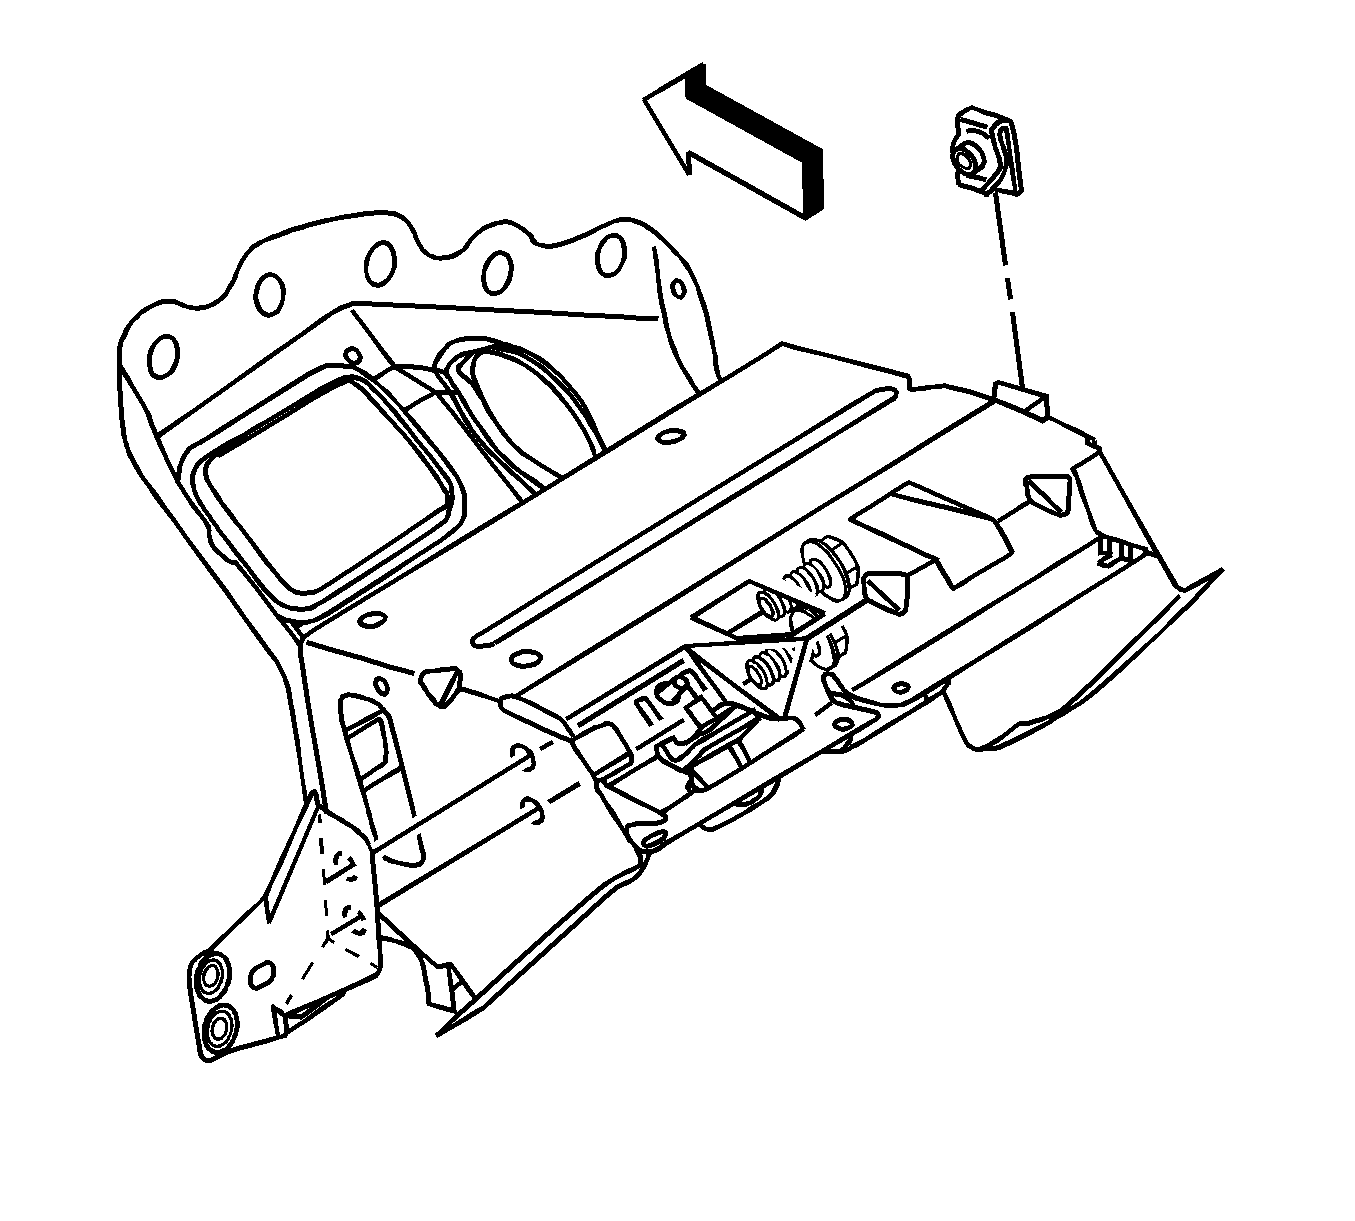
- Remove the mounting bolts from the knee bolster bracket.
- Remove the knee bolster bracket.
Caution: Refer to SIR Inflator Module Handling and Storage Caution in the Preface section.
Important: The following steps are important to assure proper trim fit during installation.
Installation Procedure
- Install the knee bolster bracket into position as marked prior to removal.
- Install the retaining bolts which secure the knee bolster bracket to the SIR bracket.
- Install the SIR module (1) to the SIR bracket (2) as marked prior to removal.
- Install the SIR module retaining nuts (3).
- Install the SIR bracket into position as marked prior to removal.
- Install the bolts (1, 2) which secure the SIR bracket to the I/P upper and lower support beams.
- Position the knee bolster bracket to the center support bracket as marked prior to removal.
- Install the bolts (3) which secure the knee bolster bracket to the center support bracket.
- Connect the SIR module electrical connector.
- Secure the electrical connector retainer to the SIR bracket.
- Install the CPA to the SIR module electrical connector.
- Secure the I/P harness retainer to the SIR bracket.
- Install the outlet duct to the right side window defogger.
- Install the I/P carrier. Refer to Instrument Panel Carrier Replacement .
- Install the console. Refer to Console Replacement .
- Enable the SIR system. Refer to the following procedures in SIR:
Notice: Refer to Fastener Notice in the Preface section.
Tighten
Tighten the bolts to 12 N·m (106 lb in).
Tighten
Tighten the nuts to 10 N·m (89 lb in).
Tighten
Tighten the bolts to 12 N·m (106 lb in).
Tighten
Tighten the bolts to 12 N·m (106 lb in).
